引言:
audio是微信小程序中的音频组件,可以轻松实现小程序中播放/停止音频等自定义动作。
附上微信小程序audio组件的相关属性说明:https://mp.weixin.qq.com/debug/wxadoc/dev/component/audio.html
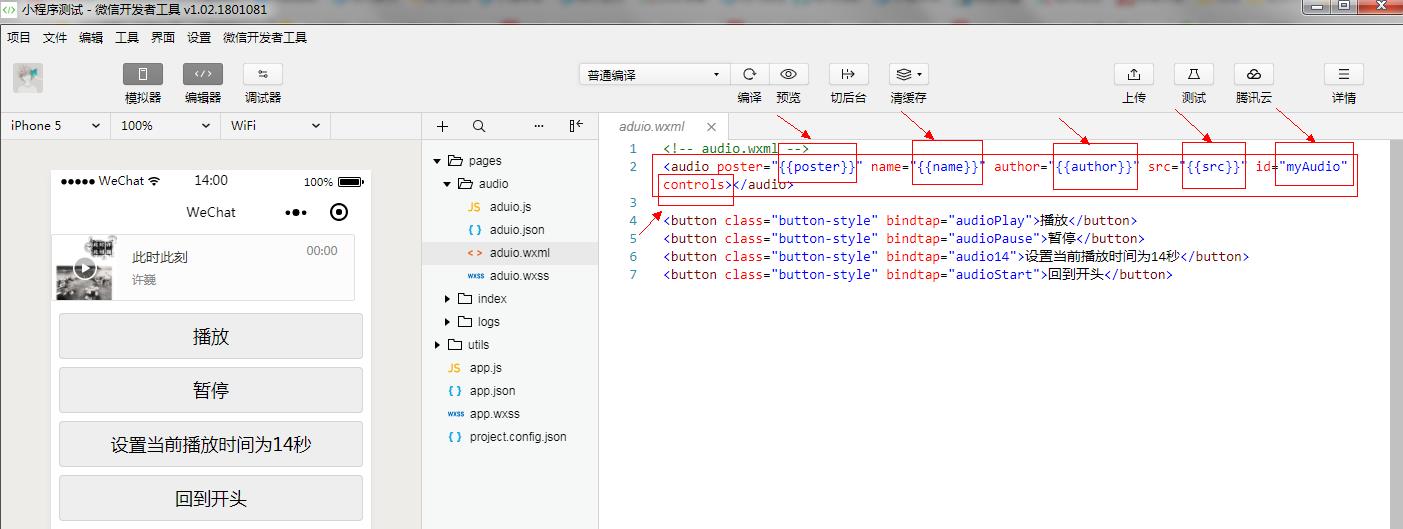
本次将通过小程序audio的 poster、name、author、src、id、controls 属性,以及 相关api:wx.createAudioContext 的使用,来制作一个简单的微信小程序音频播放控制页面

步骤一
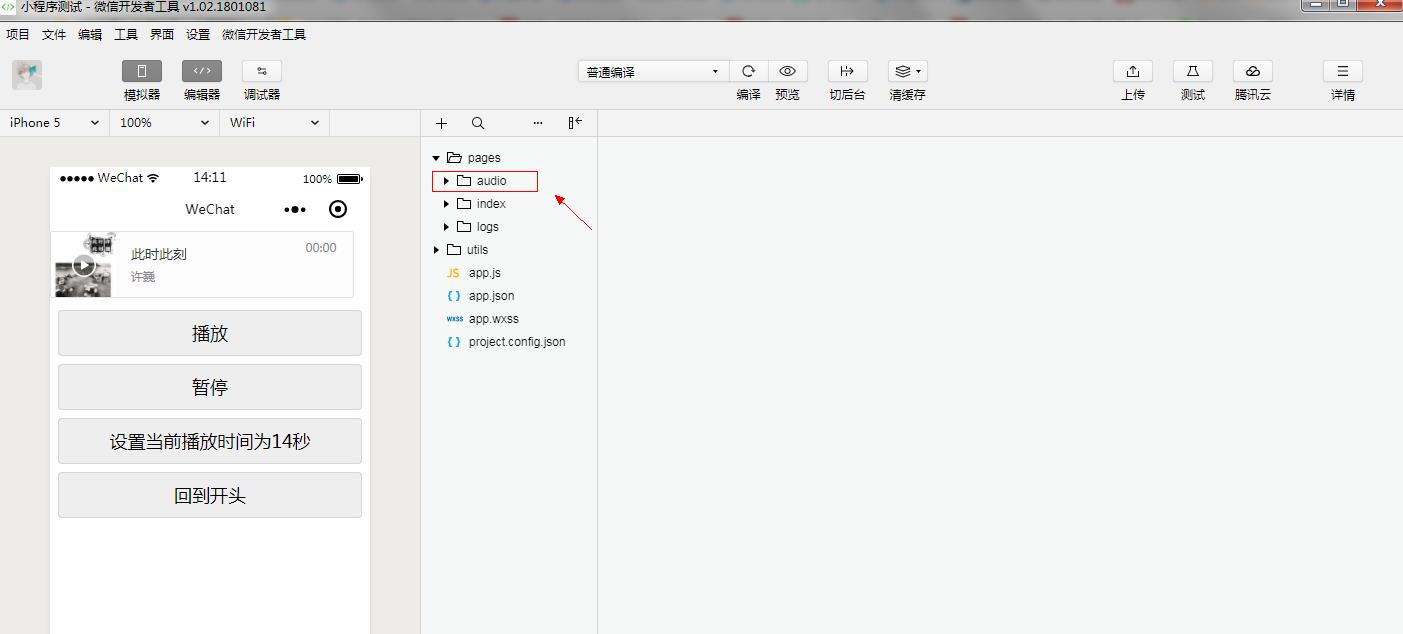
打开微信开发者工具,创建微信小程序项目,选择新建的空白文件夹即可,工具为自动为你生成微信小程序必要文件!接着在 pages 下创建一个文件夹命名 audio

步骤二
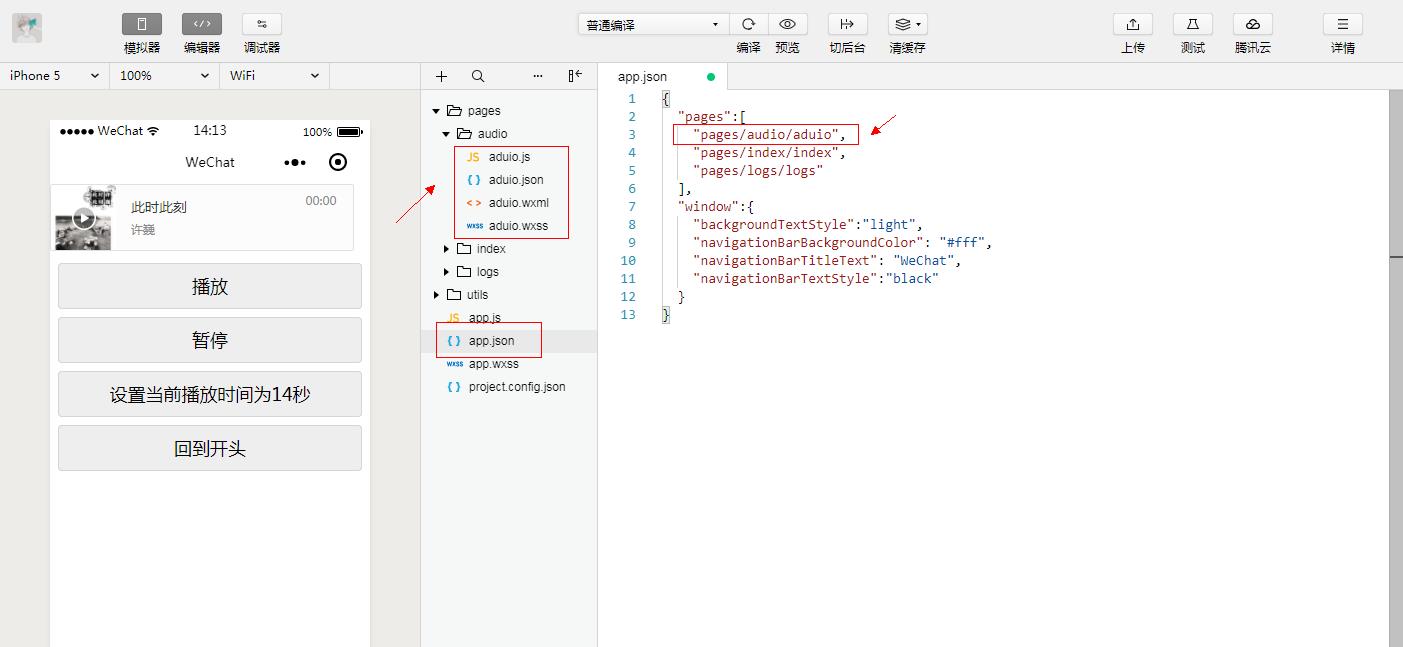
接着打开微信小程序的 app.json,如下图添加 "pages/audio/audio", 写入该页面路径,确保能够访问。写入之后,audio文件会生成js/json/wxml等空白配置文件。这是最基本的操作啦!

步骤三
直接贴出代码了,audio.json 默认即可
audio.js (audio脚本文件)
 // audio.js

Page({
  data: {
    poster: ‘http://y.gtimg.cn/music/photo_new/T002R300x300M000003rsKF44GyaSk.jpg?max_age=2592000‘,
    name: ‘此时此刻‘,
    author: ‘许巍‘,
    src: ‘http://ws.stream.qqmusic.qq.com/M500001VfvsJ21xFqb.mp3?guid=ffffffff82def4af4b12b3cd9337d5e7&uin=346897220&vkey=6292F51E1E384E06DCBDC9AB7C49FD713D632D313AC4858BACB8DDD29067D3C601481D36E62053BF8DFEAF74C0A5CCFADD6471160CAF3E6A&fromtag=46‘,
  },
  onReady: function (e) {
    // 使用 wx.createAudioContext 获取 audio 上下文 context
this.audioCtx = wx.createAudioContext(‘myAudio‘)
  },
  audioPlay: function () {
    this.audioCtx.play()
  },
  audioPause: function () {
    this.audioCtx.pause()
  },
  audio14: function () {
    this.audioCtx.seek(14)
  },
  audiostart: function () {
    this.audioCtx.seek(0)
  }
})
audio.wxml(audio页面结构文件)
-
<!-- audio.wxml -->
<audio poster="{{poster}}" name="{{name}}" author="{{author}}" src="{{src}}" id="myAudio" controls></audio>

<button class="button-style" bindtap="audioPlay">播放</button>
<button class="button-style" bindtap="audioPause">暂停</button>
<button class="button-style" bindtap="audio14">设置当前播放时间为14秒</button>
<button class="button-style" bindtap="audioStart">回到开头</button>
audio.wxss(audio页面样式文件)
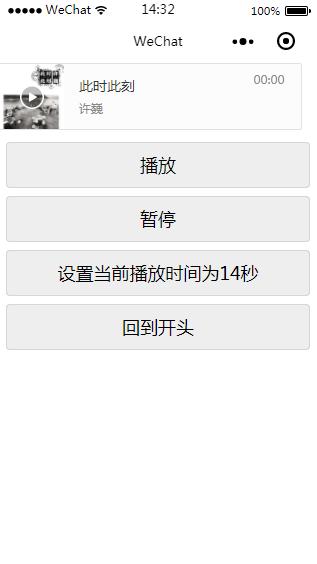
微信小程序audio音频播放的效果:

更多微信小程序开发可以关注我的博客:http://www.cnblogs.com/lanshu/