Nginx+Tomcat简单集群
Posted FangZheng
tags:
篇首语:本文由小常识网(cha138.com)小编为大家整理,主要介绍了Nginx+Tomcat简单集群相关的知识,希望对你有一定的参考价值。
下载Nginx和Tomcat
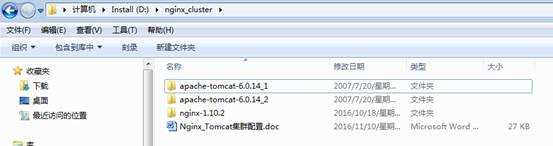
解压到一个目录
2.修改Tomcat的端口
Tomcat1:修改Server.xml
Tomcat2:修改Server.xml
3.测试Tomcat是否正常运行
分别访问两个Tomcat
4.配置Nginx
主要配置
5.测试集群访问
启动Nginx
访问测试
附录:
6.配置文件
Tomcat1 的Server.xml配置文件
Tomcat2 的Server.xml配置文件
Nginx配置文件
1.软件准备
下载nginx和Tomcat
Nginx:http://nginx.org/en/download.html 这里需要下载稳定版:Stable version
Tomcat:下载就不说了,这里使用apache-tomcat-6.0.14版本
解压到一个目录
2.修改Tomcat的端口
Tomcat1:修改Server.xml
D:\nginx_cluster\apache-tomcat-6.0.14_1\conf\server.xml
共修改3处内容:将以下端口都加1
<!--第1处--><Serverport="18005"shutdown="SHUTDOWN"><!--第2处--><Connectorport="18080"protocol="HTTP/1.1"connectionTimeout="20000"redirectPort="8443"/><!--第3处--><Connectorport="18009"protocol="AJP/1.3"redirectPort="8443"/>
Tomcat2:修改Server.xml
D:\nginx_cluster\apache-tomcat-6.0.14_2\conf\server.xml
共修改3处内容:将以下端口都加2
<!--第1处--><Serverport="28005"shutdown="SHUTDOWN"><!--第2处--><Connectorport="28080"protocol="HTTP/1.1"connectionTimeout="20000"redirectPort="8443"/><!--第3处--><Connectorport="28009"protocol="AJP/1.3"redirectPort="8443"/>
3.测试Tomcat是否正常运行
分别访问两个Tomcat
http://localhost:18080/
http://localhost:28080/
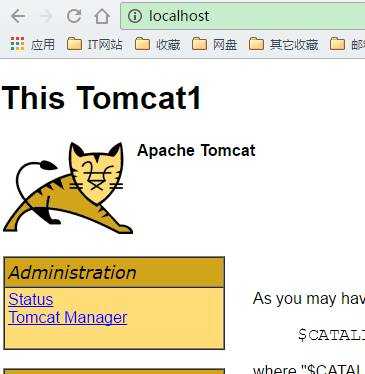
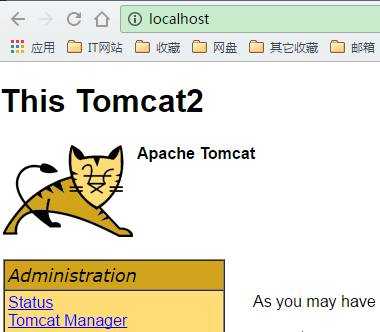
都出现猫的页面说明正常,为了区分不同的Tomcat,这里修改${Tmocat_home}\webapps\ROOT\ index.html文件内容,加入内容以便区分
<h1>This Tomcat1</h1>
之后再次访问两个Tomcat
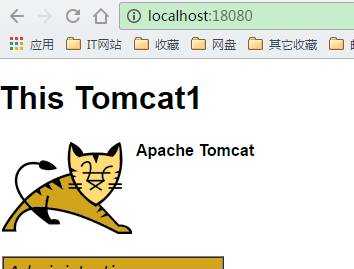
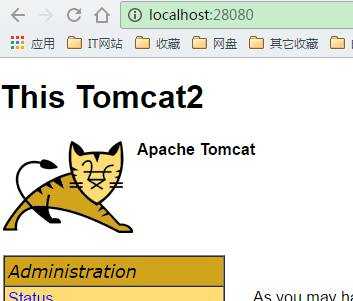
至此,两个Tomcat运行正常。
4.配置Nginx
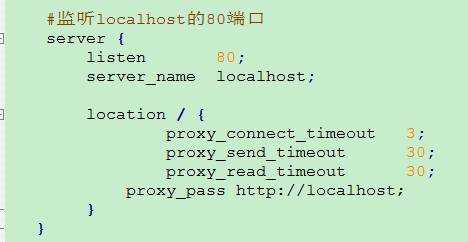
修改Nginx的主配置文件:
D:\nginx_cluster\nginx-1.10.2\conf\ nginx.conf
#user nobody;worker_processes 1;#error_log logs/error.log;#error_log logs/error.log notice;#error_log logs/error.log info;#pid logs/nginx.pid;events {worker_connections 1024;}http {include mime.types;default_type application/octet-stream;#log_format main ‘$remote_addr - $remote_user [$time_local] "$request" ‘# ‘$status $body_bytes_sent "$http_referer" ‘# ‘"$http_user_agent" "$http_x_forwarded_for"‘;#access_log logs/access.log main;sendfile on;#tcp_nopush on;#keepalive_timeout 0;keepalive_timeout 65;#gzip on;#监听localhost的80端口server {listen 80;server_name localhost;location /{proxy_connect_timeout 3;proxy_send_timeout 30;proxy_read_timeout 30;proxy_pass http://localhost;}}# another virtual host using mix of IP-, name-, and port-based configuration##server {# listen 8000;# listen somename:8080;# server_name somename alias another.alias;# location / {# root html;# index index.html index.htm;# }#}#集群配置:服务器列表upstream localhost {server localhost:18080 weight=2;#服务器配置 weight是权重的意思,权重越大,分配的概率越大。server localhost:28080 weight=1;}# HTTPS server##server {# listen 443 ssl;# server_name localhost;# ssl_certificate cert.pem;# ssl_certificate_key cert.key;# ssl_session_cache shared:SSL:1m;# ssl_session_timeout 5m;# ssl_ciphers HIGH:!aNULL:!MD5;# ssl_prefer_server_ciphers on;# location / {# root html;# index index.html index.htm;# }#}}
主要配置

至此,Nginx的简单配置就完成了。下面开始测试
5.测试集群访问
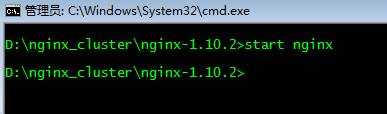
启动Nginx
进入到Nginx目录
启动命令为:start nginx
停止命令为:nginx –s stop
访问测试
访问:http://localhost/
Nginx内部配置了监听80端口,默认进行服务器的分发。
随便刷新测试了10次,共访问了Tomcat1共8次,Tomcat2共2次。可以看到权重越大,访问到的概率越大。
附录:
Nginx.conf配置
#Nginx所用用户和组#user niumd niumd;#工作的子进程数量(通常等于CPU数量或者2倍于CPU)worker_processes 2;#错误日志存放路径#error_log logs/error.log;#error_log logs/error.log notice;error_log logs/error.log info;#指定pid存放文件pid logs/nginx.pid;events {#使用网络IO模型linux建议epoll,FreeBSD建议采用kqueue#use epoll;#允许最大连接数worker_connections 2048;}http {include mime.types;default_type application/octet-stream;#定义日志格式#log_format main ‘$remote_addr - $remote_user [$time_local] $request ‘# ‘"$status" $body_bytes_sent "$http_referer" ‘# ‘"$http_user_agent" "$http_x_forwarded_for"‘;#access_log off;access_log logs/access.log;client_header_timeout 3m;client_body_timeout 3m;send_timeout 3m;client_header_buffer_size 1k;large_client_header_buffers 44k;sendfile on;tcp_nopush on;tcp_nodelay on;#keepalive_timeout 75 20;include gzip.conf;#集群配置:服务器列表upstream localhost {server localhost:18080 weight=2;#服务器配置 weight是权重的意思,权重越大,分配的概率越大。server localhost:28080 weight=1;}server {listen 80;server_name localhost;location /{proxy_connect_timeout 3;proxy_send_timeout 30;proxy_read_timeout 30;proxy_pass http://localhost;}}}
6.配置文件
Tomcat1 的Server.xml配置文件
<!-- Note: A "Server" is not itself a "Container", so you may notdefine subcomponents such as "Valves" at this level.Documentation at /docs/config/server.html--><Serverport="18005"shutdown="SHUTDOWN"><!--APR library loader. Documentation at /docs/apr.html --><ListenerclassName="org.apache.catalina.core.AprLifecycleListener"SSLEngine="on"/><!--Initialize Jasper prior to webapps are loaded. Documentation at /docs/jasper-howto.html --><ListenerclassName="org.apache.catalina.core.JasperListener"/><!-- JMX Support for the Tomcat server. Documentation at /docs/non-existent.html --><ListenerclassName="org.apache.catalina.mbeans.ServerLifecycleListener"/><ListenerclassName="org.apache.catalina.mbeans.GlobalResourcesLifecycleListener"/><!-- Global JNDI resourcesDocumentation at /docs/jndi-resources-howto.html--><GlobalNamingResources><!-- Editable user database that can also be used byUserDatabaseRealm to authenticate users--><Resourcename="UserDatabase"auth="Container"type="org.apache.catalina.UserDatabase"description="User database that can be updated and saved"factory="org.apache.catalina.users.MemoryUserDatabaseFactory"pathname="conf/tomcat-users.xml"/></GlobalNamingResources><!-- A "Service" is a collection of one or more "Connectors" that sharea single "Container" Note: A "Service" is not itself a "Container",so you may not define subcomponents such as "Valves" at this level.Documentation at /docs/config/service.html--><Servicename="Catalina"><!--The connectors can use a shared executor, you can define one or more named thread pools--><!--<Executor name="tomcatThreadPool" namePrefix="catalina-exec-"maxThreads="150" minSpareThreads="4"/>--><!-- A "Connector" represents an endpoint by which requests are receivedand responses are returned. Documentation at :Java HTTP Connector: /docs/config/http.html (blocking & non-blocking)Java AJP Connector: /docs/config/ajp.htmlAPR (HTTP/AJP) Connector: /docs/apr.htmlDefine a non-SSL HTTP/1.1 Connector on port 8080--><Connectorport="18080"protocol="HTTP/1.1"connectionTimeout="20000"redirectPort="8443"/><!-- A "Connector" using the shared thread pool--><!--<Connector executor="tomcatThreadPool"port="8080" protocol="HTTP/1.1"connectionTimeout="20000"redirectPort="8443" />--><!-- Define a SSL HTTP/1.1 Connector on port 8443This connector uses the JSSE configuration, when using APR, theconnector should be using the OpenSSL style configurationdescribed in the APR documentation --><!--<Connector port="8443" protocol="HTTP/1.1" SSLEnabled="true"maxThreads="150" scheme="https" secure="true"clientAuth="false" sslProtocol="TLS" />--><!-- Define an AJP 1.3 Connector on port 8009 --><Connectorport="18009"protocol="AJP/1.3"redirectPort="8443"/><!-- An Engine represents the entry point (within Catalina) that processesevery request. The Engine implementation for Tomcat stand aloneanalyzes the HTTP headers included with the request, and passes themon to the appropriate Host (virtual host).Documentation at /docs/config/engine.html --><!-- You should set jvmRoute to support load-balancing via AJP ie :<Engine name="Standalone" defaultHost="localhost" jvmRoute="jvm1">--><Enginename="Catalina"defaultHost="localhost"><!--For clustering, please take a look at documentation at:/docs/cluster-howto.html (simple how to)/docs/config/cluster.html (reference documentation) --><!--<Cluster className="org.apache.catalina.ha.tcp.SimpleTcpCluster"/>--><!-- The request dumper valve dumps useful debugging information aboutthe request and response data received and sent by Tomcat.Documentation at: /docs/config/valve.html --><!--<Valve className="org.apache.catalina.valves.RequestDumperValve"/>--><!-- This Realm uses the UserDatabase configured in the global JNDIresources under the key "UserDatabase". Any editsthat are performed against this UserDatabase are immediatelyavailable for use by the Realm. --><RealmclassName="org.apache.catalina.realm.UserDatabaseRealm"resourceName="UserDatabase"/><!-- Define the default virtual hostNote: XML Schema validation will not work with Xerces 2.2.--><Hostname="localhost"appBase="webapps"unpackWARs="true"autoDeploy="true"xmlValidation="false"xmlNamespaceAware="false"><!-- SingleSignOn valve, share authentication between web applicationsDocumentation at: /docs/config/valve.html --><!--<Valve className="org.apache.catalina.authenticator.SingleSignOn" />--><!-- Access log processes all example.Documentation at: /docs/config/valve.html --><!--<Valve className="org.apache.catalina.valves.AccessLogValve" directory="logs"prefix="localhost_access_log." suffix=".txt" pattern="common" resolveHosts="false"/>--></Host></Engine></Service></Server>
Tomcat2 的Server.xml配置文件
<!-- Note: A "Server" is not itself a "Container", so you may notdefine subcomponents such as "Valves" at this level.Documentation at /docs/config/server.html--><Serverport="28005"shutdown="SHUTDOWN"><!--APR library loader. Documentation at /docs/apr.html --><ListenerclassName="org.apache.catalina.core.AprLifecycleListener"SSLEngine="on"/><!--Initialize Jasper prior to webapps are loaded. Documentation at /docs/jasper-howto.html --><ListenerclassName="org.apache.catalina.core.JasperListener"/><!-- JMX Support for the Tomcat server. Documentation at /docs/non-existent.html --><ListenerclassName="org.apache.catalina.mbeans.ServerLifecycleListener"/><ListenerclassName="org.apache.catalina.mbeans.GlobalResourcesLifecycleListener"/><!-- Global JNDI resourcesDocumentation at /docs/jndi-resources-howto.html--><GlobalNamingResources><!-- Editable user database that can also be used byUserDatabaseRealm to authenticate users--><Resourcename="UserDatabase"auth="Container"type="org.apache.catalina.UserDatabase"description="User database that can be updated and saved"factory="org.apache.catalina.users.MemoryUserDatabaseFactory"pathname="conf/tomcat-users.xml"/></GlobalNamingResources><!-- A "Service" is a collection of one or more "Connectors" that sharea single "Container" Note: A "Service" is not itself a "Container",so you may not define subcomponents such as "Valves" at this level.Documentation at /docs/config/service.html--><Servicename="Catalina"><!--The connectors can use a shared executor, you can define one or more named thread pools--><!--<Executor name="tomcatThreadPool" namePrefix="catalina-exec-"maxThreads="150" minSpareThreads="4"/>--><!-- A "Connector" represents an endpoint by which requests are receivedand responses are returned. Documentation at :Java HTTP Connector: /docs/config/http.html (blocking & non-blocking)Java AJP Connector: /docs/config/ajp.htmlAPR (HTTP/AJP) Connector: /docs/apr.htmlDefine a non-SSL HTTP/1.1 Connector on port 8080--><Connectorport="28080"protocol="HTTP/1.1"connectionTimeout="20000"redirectPort="8443"/><!-- A "Connector" using the shared thread pool--><!--<Connector executor="tomcatThreadPool"port="8080" protocol="HTTP/1.1"connectionTimeout="20000"redirectPort="8443" />--><!-- Define a SSL HTTP/1.1 Connector on port 8443This connector uses the JSSE configuration, when using APR, theconnector should be using the OpenSSL style configurationdescribed in the APR documentation --><!--<Connector port="8443" protocol="HTTP/1.1" SSLEnabled="true"maxThreads="150" scheme="https" secure="true"clientAuth="false" sslProtocol="TLS" />--><!-- Define an AJP 1.3 Connector on port 8009 --><Connectorport="28009"protocol="AJP/1.3"redirectPort="8443"/><!-- An Engine represents the entry point (within Catalina) that processesevery request. The Engine implementation for Tomcat stand aloneanalyzes the HTTP headers included with the request, and passes themon to the appropriate Host (virtual host).Documentation at /docs/config/engine.html --><!-- You should set jvmRoute to support load-balancing via AJP ie :<Engine name="Standalone" defaultHost="localhost" jvmRoute="jvm1">--><Enginename="Catalina"defaultHost="localhost"><!--For clustering, please take a look at documentation at:/docs/cluster-howto.html (simple how to)/docs/config/cluster.html (reference documentation) --><!--<Cluster className="org.apache.catalina.ha.tcp.SimpleTcpCluster"/>--><!-- The request dumper valve dumps useful debugging information aboutthe request and response data received and sent by Tomcat.Documentation at: /docs/config/valve.html --><!--<Valve className="org.apache.catalina.valves.RequestDumperValve"/>--><!-- This Realm uses the UserDatabase configured in the global JNDIresources under the key "UserDatabase". Any editsthat are performed against this UserDatabase are immediatelyavailable for use by the Realm. --><RealmclassName="org.apache.catalina.realm.UserDatabaseRealm"resourceName="UserDatabase"/><!-- Define the default virtual hostNote: XML Schema validation will not work with Xerces 2.2.--><Hostname="localhost"appBase="webapps"unpackWARs="true"autoDeploy="true"xmlValidation="false"xmlNamespaceAware="false"><!-- SingleSignOn valve, share authentication between web applicationsDocumentation at: /docs/config/valve.html --><!--<Valve className="org.apache.catalina.authenticator.SingleSignOn" />--><!-- Access log processes all example.Documentation at: /docs/config/valve.html --><!--<Valve className="org.apache.catalina.valves.AccessLogValve" directory="logs"prefix="localhost_access_log." suffix=".txt" pattern="common" resolveHosts="false"/>--></Host></Engine></Service></Server>
Nginx配置文件
#user nobody;worker_processes 1;#error_log logs/error.log;#error_log logs/error.log notice;#error_log logs/error.log info;#pid logs/nginx.pid;events {worker_connections 1024;}http {include mime.types;default_type application/octet-stream;#log_format main ‘$remote_addr - $remote_user [$time_local] "$request" ‘# ‘$status $body_bytes_sent "$http_referer" ‘# ‘"$http_user_agent" "$http_x_forwarded_for"‘;#access_log logs/access.log main;sendfile on;#tcp_nopush on;#keepalive_timeout 0;keepalive_timeout 65;#gzip on;#监听localhost的80端口server {listen 80;server_name localhost;location / {proxy_connect_timeout 3;proxy_send_timeout 30;proxy_read_timeout 30;proxy_pass http://localhost;}}# another virtual host using mix of IP-, name-, and port-based configuration##server {# listen 8000;# listen somename:8080;# server_name somename alias another.alias;# location / {# root html;# index index.html index.htm;# }#}#集群配置:服务器列表upstream localhost {server localhost:18080 weight=2;#服务器配置 weight是权重的意思,权重越大,分配的概率越大。server localhost:28080 weight=1;}# HTTPS server##server {# listen 443 ssl;# server_name localhost;# ssl_certificate cert.pem;# ssl_certificate_key cert.key;# ssl_session_cache shared:SSL:1m;# ssl_session_timeout 5m;# ssl_ciphers HIGH:!aNULL:!MD5;# ssl_prefer_server_ciphers on;# location / {# root html;# index index.html index.htm;# }#}}
以上是关于Nginx+Tomcat简单集群的主要内容,如果未能解决你的问题,请参考以下文章