windows系统下Disconf web安装-分布式配置管理平台
Posted 帅S俊
tags:
篇首语:本文由小常识网(cha138.com)小编为大家整理,主要介绍了windows系统下Disconf web安装-分布式配置管理平台相关的知识,希望对你有一定的参考价值。
文章参考自
http://blog.csdn.net/syc001/article/details/78128117
https://www.cnblogs.com/mrluo735/p/6322719.html
http://disconf.readthedocs.io/zh_CN/latest/tutorial-client/src/Tutorial9.html (官方文档)
一.环境准备
1.下载disconf源码https://github.com/knightliao/disconf
2.下载nginx1.10.2(windows版) http://nginx.org/download/nginx-1.10.2.zip
3.安装tomcat https://tomcat.apache.org/download-70.cgi
4.安装redis https://www.cnblogs.com/M-LittleBird/p/5902850.html(windows安装指导) https://github.com/MicrosoftArchive/redis/tags(安装包)
5.安装好zookeeper http://blog.csdn.net/tlk20071/article/details/52028945(windows安装指导)
二、组件配置
1、tomcat配置
idea的tomcat配置
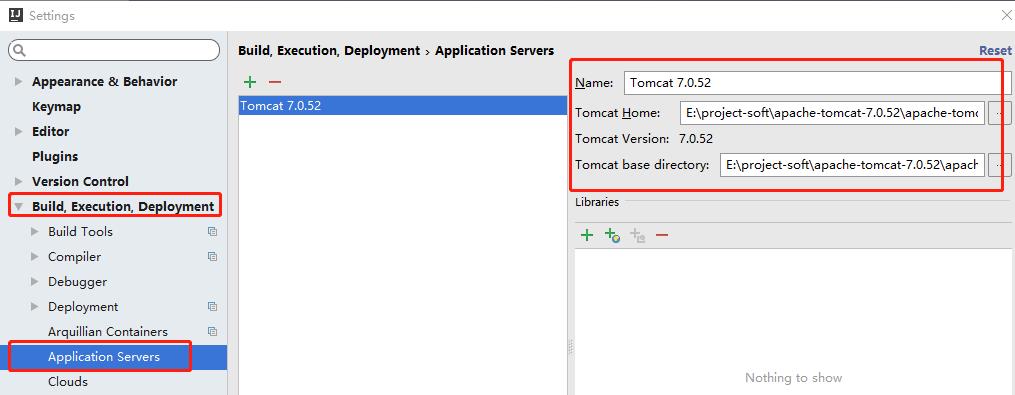
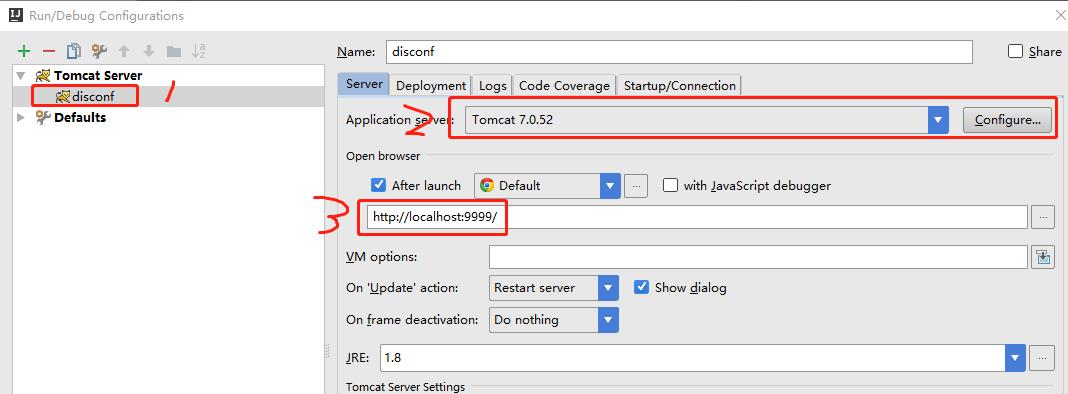
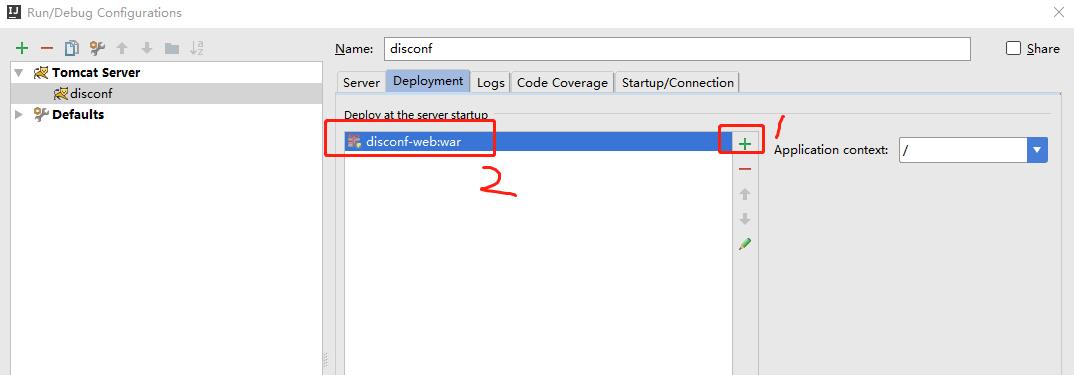
2、nginx配置(nginx-1.12.2\\conf\\nginx.conf)看好插入的层级管理,不要插入错了
upstream disconf {
    server 127.0.0.1:9999;      #代理tomcat,动态请求转发至后端tomcat程序,这里和tomcat的端口号配置相同
   }
   server {
       listen       8089;  #这里是nginx的监听端口
        server_name  localhost;

    location / {
        root E:\\project\\disconf\\disconf\\disconf-web\\html;   #这里指向项目中disconf-web子模块中html位置
        if ($query_string) {
            expires max;
        }
    }

    location ~ ^/(api|export) {
        proxy_pass_header Server;
        proxy_set_header Host $http_host;
        proxy_redirect off;
        proxy_set_header X-Real-IP $remote_addr;
        proxy_set_header X-Scheme $scheme;
        proxy_pass http://127.0.0.1:9999;      #tomcat端口
    }

    location = /favicon.ico {
        log_not_found off;
        access_log off;
    }
}
3、Redis配置(redis-3.2.100\\redis.windows.conf)
设置密码
# requirepass foobared 在配置文件中找到这项,然后解开注释即可,这个会在后面配置文件中配置
#设置Redis密码

requirepass foobared
这里启动可以参考上面文章,很有帮助
4、zookeeper配置
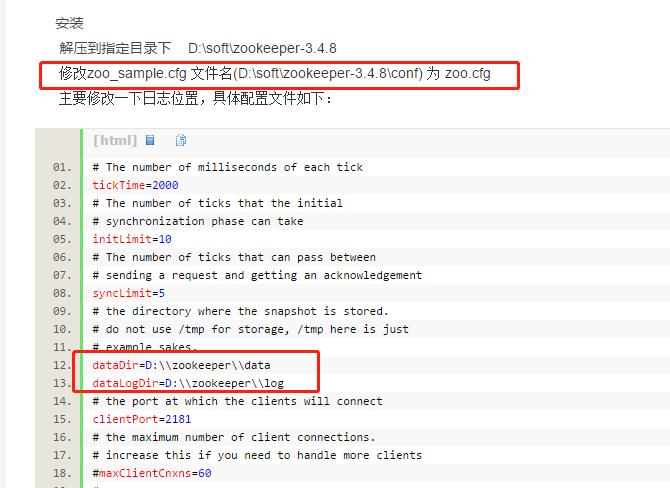
5、数据库配置
创建一个数据库,我这里创建的是disconf数据库,然后按顺序执行下面的脚本
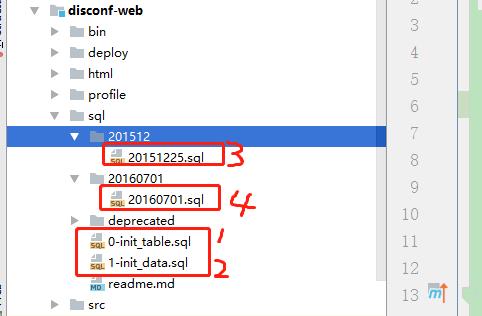
6、disconf配置
将disconf-web添加到父模块中
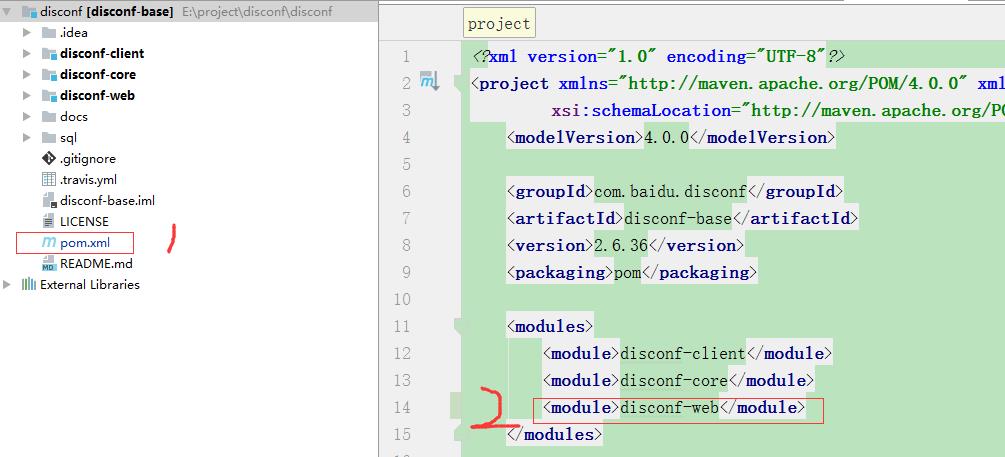
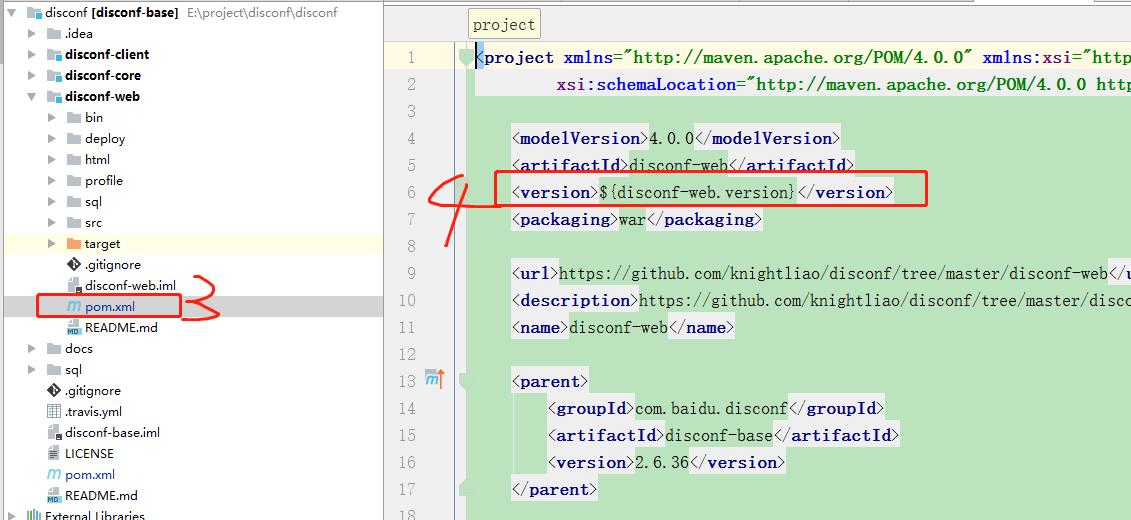
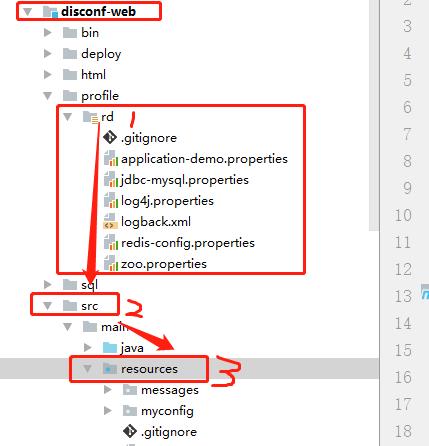
项目配置文件配置----将rd中的配置文件修改----然后复制到src/resourse中
1).jdbc-mysql.properties 修改数据库连接
2).redis-config.properties 修改redis连接
3).zoo.properties 修改zookeeper连接
4).将application-demo.properties 改名为 application.properties
三、项目启动
1、先启动中间件(nginx、zookeeper、Redis)
2、然后用idea启动项目
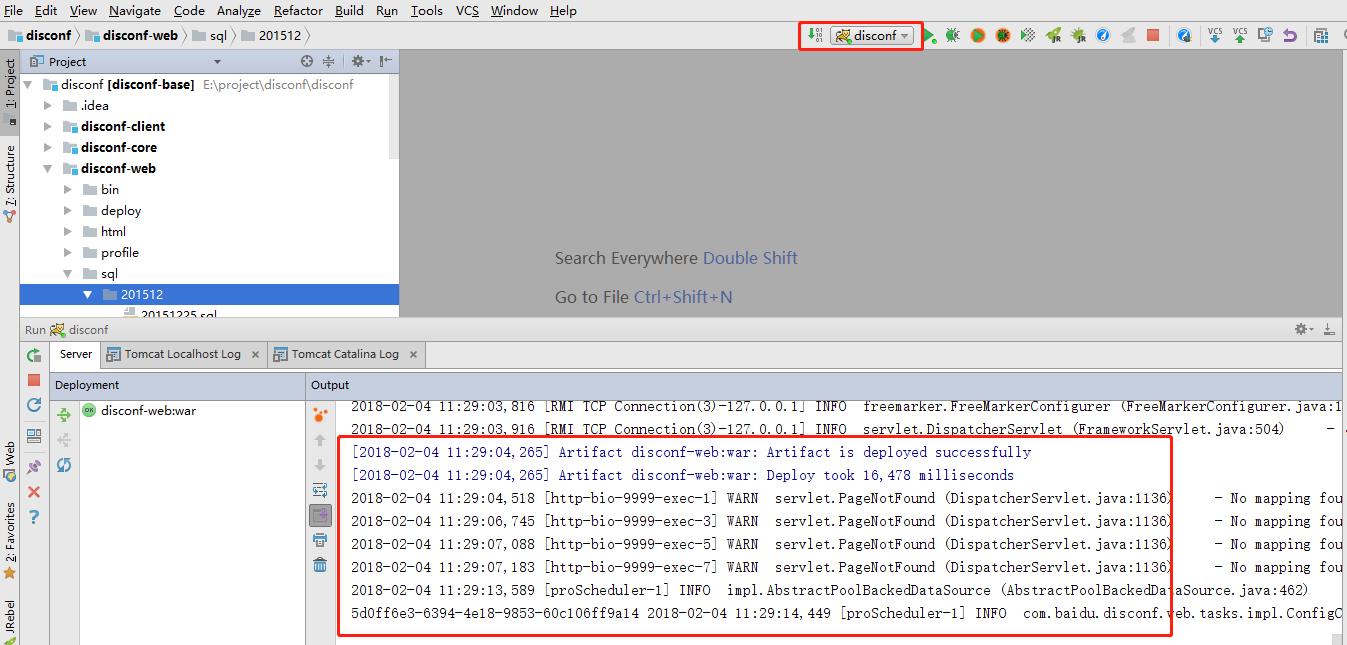
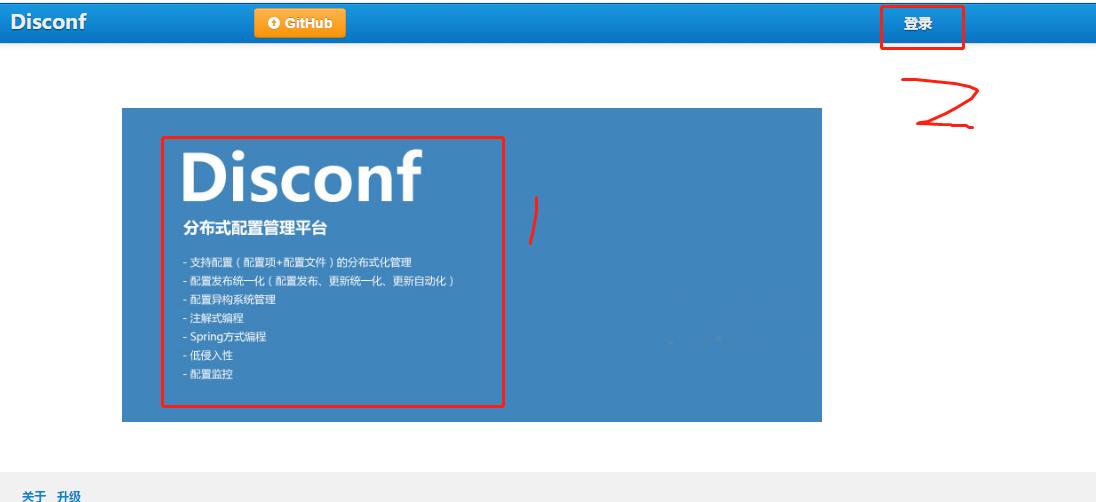
3、输入网址http://localhost:8089/main.html
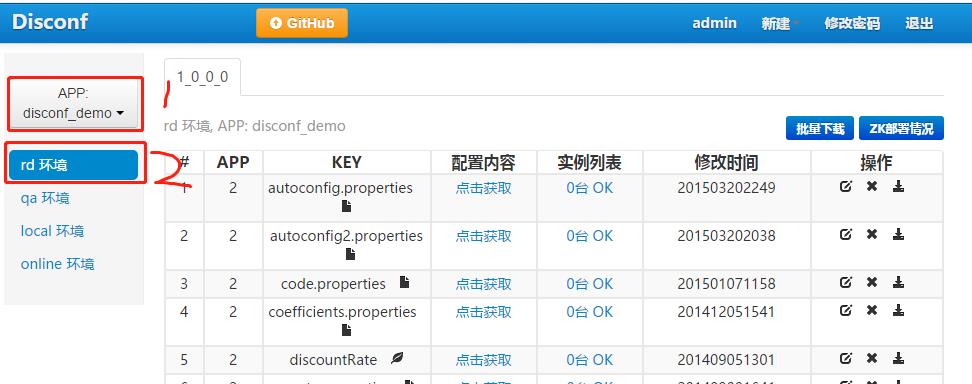
可以看到以下,表示启动成功,然后登陆吧(账号admin-密码admin)
以上是关于windows系统下Disconf web安装-分布式配置管理平台的主要内容,如果未能解决你的问题,请参考以下文章