CXF框架实现webservice实例
Posted
tags:
篇首语:本文由小常识网(cha138.com)小编为大家整理,主要介绍了CXF框架实现webservice实例相关的知识,希望对你有一定的参考价值。
服务器端:
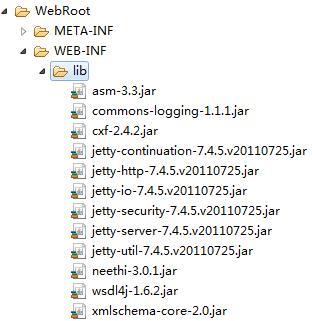
1.新建Web项目,例如CXF_Server,导入cxf-2.4.2的相关jar包,如下图所示:
2.新建一个webservice服务接口MyService,该接口通过注解来暴露服务:
package com.founder.service;

import javax.jws.WebService;

@WebService(serviceName="MyServiceManage")
public interface MyService {
	/**
	 * add():定义add方法
	 * @param a
	 * @param b
	 * @return
	 */
	public int add(int a,int b);

}3.写出该接口的实现类MyServiceImpl:
package com.founder.service;

public class MyServiceImpl implements MyService {

	@Override
	 public int add(int a, int b) {
		System.out.println(a + "+" + b + "=" + (a + b));
		return a+b;
   }

}4.配置spring,把webservice类托管给spring,然后在src下新建spring的配置文件applicationContext.xml:
<?xml version="1.0" encoding="UTF-8"?>
<beans
	xmlns="http://www.springframework.org/schema/beans"
	xmlns:xsi="http://www.w3.org/2001/XMLSchema-instance"
	xmlns:p="http://www.springframework.org/schema/p"
	xmlns:jaxws="http://cxf.apache.org/jaxws"
	xsi:schemaLocation="http://www.springframework.org/schema/beans http://www.springframework.org/schema/beans/spring-beans-3.1.xsd
	 http://cxf.apache.org/jaxws http://cxf.apache.org/schemas/jaxws.xsd">

	 <bean id="myServiceImpl" class="com.founder.service.MyServiceImpl"></bean>

 <!-- 配置cxf
     地址:      http://localhost:8080/CXF_Server/ws/employeeManager
     组成 :  http://localhost:8080 +CXF_Server( 项目名)+ws(过滤的路径)+/myService(自定义部分)
     服务类 :
     服务的实现类:
     拦截器
      -->
  <jaxws:server address="/myService" serviceClass="com.founder.service.MyService">
   <jaxws:serviceBean>
    <ref bean="myServiceImpl"/>
   </jaxws:serviceBean>
  </jaxws:server>
</beans>
5.配置web.xml:
<?xml version="1.0" encoding="UTF-8"?>
<web-app xmlns:xsi="http://www.w3.org/2001/XMLSchema-instance" xmlns="http://java.sun.com/xml/ns/javaee" xmlns:web="http://java.sun.com/xml/ns/javaee/web-app_2_5.xsd" xsi:schemaLocation="http://java.sun.com/xml/ns/javaee http://java.sun.com/xml/ns/javaee/web-app_3_0.xsd" version="3.0">
  <display-name>CXF__Server</display-name>

  <!-- 添加  CXF 的Servlet ,处理 webservice的请求 -->
  <servlet>
  	<servlet-name>cxfServlet</servlet-name>
  	<servlet-class>org.apache.cxf.transport.servlet.CXFServlet</servlet-class>
  	<load-on-startup>0</load-on-startup>
  </servlet>
  <servlet-mapping>
   	<servlet-name>cxfServlet</servlet-name>
   	<url-pattern>/ws/*</url-pattern>
  </servlet-mapping>

  <listener>
    <listener-class>org.springframework.web.context.ContextLoaderListener</listener-class>
  </listener>
  <context-param>
    <param-name>contextConfigLocation</param-name>
    <param-value>classpath:applicationContext.xml</param-value>
  </context-param>
</web-app>
至此服务器端基本上告一段落,可以将应用部署到tomcat,启动并访问http://localhost:8080/CXF_Server/ws/myService?wsdl,如果能正确显示xml文件则说明部署成功。
客户端测试:
1.通过myeclipse自带的soap浏览器完成测试,就不用在客户端写java代码了:
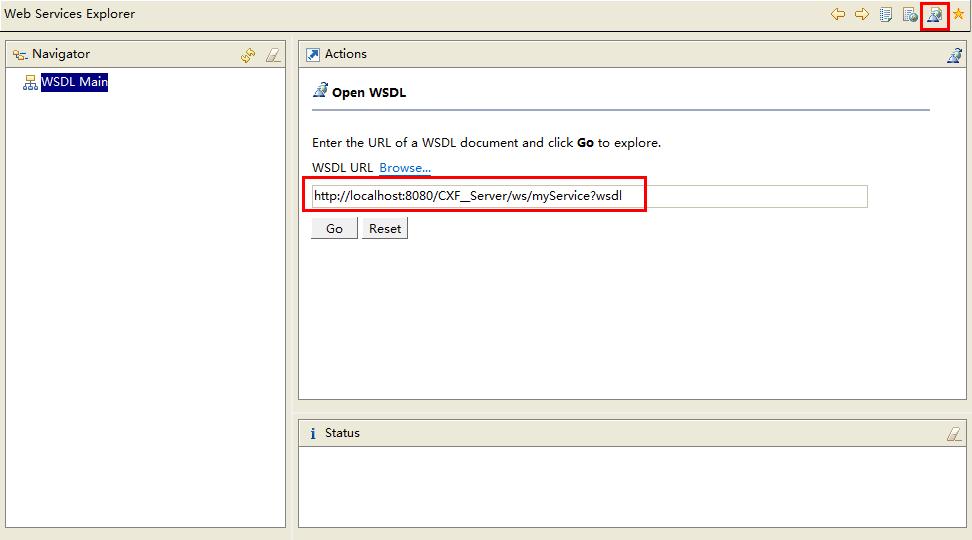
点击图标所示按钮,即可启动soap浏览器。
2.点击右侧图标所示的按钮wsdl page,在输入框中输入wsdl地址:
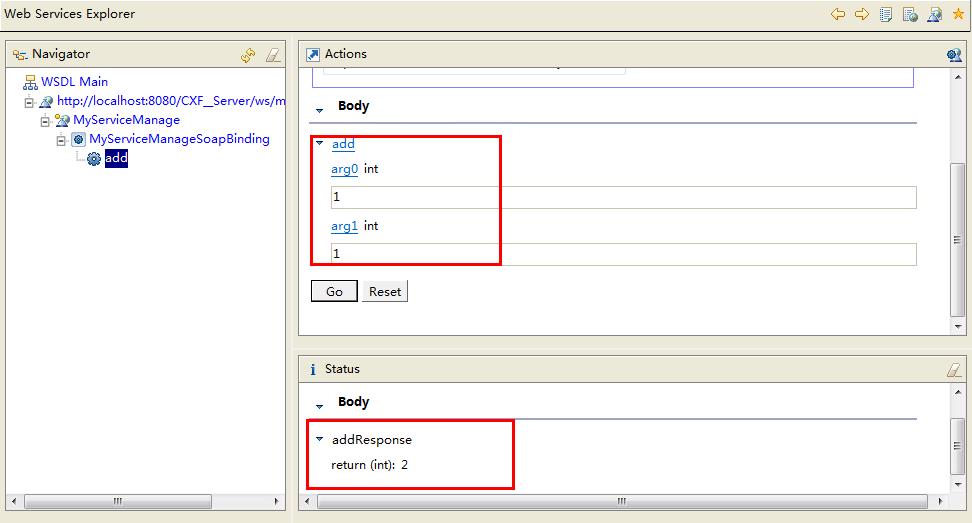
3.点击里面的add()方法,输入参数,点击go,即可显示调用结果:
OK,实例完成!
本文出自 “Founder_ZL” 博客,转载请与作者联系!
以上是关于CXF框架实现webservice实例的主要内容,如果未能解决你的问题,请参考以下文章


