linux任务计划cron
Posted jack的网络日志
tags:
篇首语:本文由小常识网(cha138.com)小编为大家整理,主要介绍了linux任务计划cron相关的知识,希望对你有一定的参考价值。
linux任务计划cron

1.crontab命令任务计划配置文件
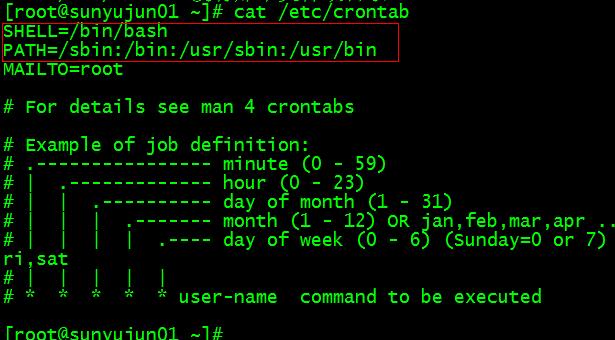
[root@bogon ~]# cat /etc/crontab
SHELL=/bin/bash
PATH=/sbin:/bin:/usr/sbin:/usr/bin
MAILTO=root

# For details see man 4 crontabs

# Example of job definition:
# .---------------- minute (0 - 59)
# |  .------------- hour (0 - 23)
# |  |  .---------- day of month (1 - 31)
# |  |  |  .------- month (1 - 12) OR jan,feb,mar,apr ...
# |  |  |  |  .---- day of week (0 - 6) (Sunday=0 or 7) OR sun,mon,tue,wed,thu,fri,sat
# |  |  |  |  |
# *  *  *  *  * user-name  command to be executed

[root@bogon ~]#
2.编辑计划任务crontab -e
[root@bogon ~]# crontab -e
3. 每天三点执行并把正确的和错误的输出到123.log文件中 0 3 * * * /bin/bash /usr/loacl/sbin/123.sh >/tmp/123.log 2>/tmp/123.log,如果是追加将>改成>>会将每天的输出以追加的方式写入文件
4.一号到十号的三点执行0 3 1-10 * * /bin/bash /usr/loacl/sbin/123.sh >/tmp/123.log 2>/tmp/123.log
5.一号到十号的每两个月(能被2整除的月份)三点执行0 3 1-10 */2 * /bin/bash /usr/loacl/sbin/123.sh >/tmp/123.log 2>/tmp/123.log
6.一号到十号的每两个月(能被2整除的月份)的周二和周五三点执行0 3 1-10 */2 2,5 /bin/bash /usr/loacl/sbin/123.sh >/tmp/123.log 2>/tmp/123.log
7.启动并查看crond服务
[root@sunyujun01 ~]# systemctl start crond
[root@sunyujun01 ~]# ps aux|grep crond
root       1393  0.0  0.0 124144   508 ?        Ss   09:44   0:00 /usr/sbin/crond -n
root      16427  0.0  0.0 112672   972 pts/2    R+   11:55   0:00 grep --color=auto crond
[root@sunyujun01 ~]#
8.也可以用systemctl status crond命令查看crond启动状态
[root@sunyujun01 ~]# systemctl status crond
● crond.service - Command Scheduler
   Loaded: loaded (/usr/lib/systemd/system/crond.service; enabled; vendor preset: enabled)
   Active: active (running) since 三 2018-01-24 09:44:22 CST; 3h 26min ago
 Main PID: 1393 (crond)
   CGroup: /system.slice/crond.service
           └─1393 /usr/sbin/crond -n

1月 24 09:44:22 localhost.localdomain systemd[1]: Started Command Scheduler.
1月 24 09:44:22 localhost.localdomain systemd[1]: Starting Command Scheduler...
1月 24 09:44:23 localhost.localdomain crond[1393]: (CRON) INFO (Syslog will ...
1月 24 09:44:23 localhost.localdomain crond[1393]: (CRON) INFO (RANDOM_DELAY...
1月 24 09:44:23 localhost.localdomain crond[1393]: (CRON) INFO (running with...
Hint: Some lines were ellipsized, use -l to show in full.
[root@sunyujun01 ~]#
9.停掉crond
[root@sunyujun01 ~]# systemctl stop crond
10.如果脚步中的命令没有执行,可能是命令没有加入到crond变量里面,也可以直接写绝对路径
11.这个文件的内容是crontab -l列出来的计划任务列表,如果备份的话直接拷贝这个文件就行
[root@sunyujun01 ~]# cat /var/spool/cron/root
12.crontab -r 删除
chkconfig工具
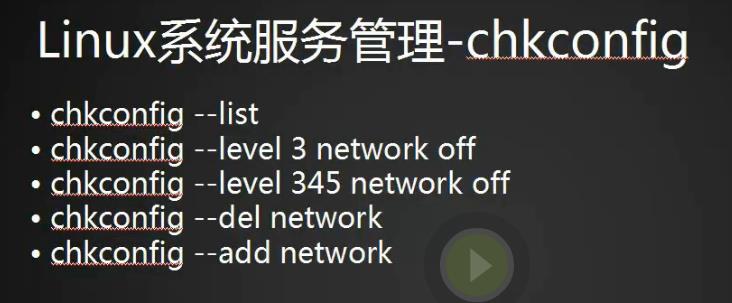
1.chkconfig --list查看使用chkconfig工具的服务
[root@sunyujun01 ~]# chkconfig --list

注意:该输出结果只显示 SysV 服务,并不包含原生 systemd 服务。SysV 配置数据可能被原生 systemd 配置覆盖。
      如果您想列出 systemd 服务,请执行 \'systemctl list-unit-files\'。
      欲查看对特定 target 启用的服务请执行
      \'systemctl list-dependencies [target]\'。

mysql           0:关    1:关    2:开    3:开    4:开    5:开    6:关
netconsole      0:关    1:关    2:关    3:关    4:关    5:关    6:关
network         0:关    1:关    2:开    3:开    4:开    5:开    6:关
nginx           0:关    1:关    2:开    3:开    4:开    5:开    6:关
php-fpm         0:关    1:关    2:开    3:开    4:开    5:开    6:关
[root@sunyujun01 ~]#
2.对应的服务都在/etc/init.d/目录下
[root@sunyujun01 ~]# ls /etc/init.d/
functions  mysql  netconsole  network  nginx  php-fpm  README
[root@sunyujun01 ~]#
3.关闭network服务 chkconfig network off
[root@sunyujun01 ~]# chkconfig network off
[root@sunyujun01 ~]# chkconfig --list

注意:该输出结果只显示 SysV 服务,并不包含原生 systemd 服务。SysV 配置数据可能被原生 systemd 配置覆盖。
      如果您想列出 systemd 服务,请执行 \'systemctl list-unit-files\'。
      欲查看对特定 target 启用的服务请执行
      \'systemctl list-dependencies [target]\'。

mysql           0:关    1:关    2:开    3:开    4:开    5:开    6:关
netconsole      0:关    1:关    2:关    3:关    4:关    5:关    6:关
network         0:关    1:关    2:关    3:关    4:关    5:关    6:关
nginx           0:关    1:关    2:开    3:开    4:开    5:开    6:关
php-fpm         0:关    1:关    2:开    3:开    4:开    5:开    6:关
[root@sunyujun01 ~]#
4.network的6个级别都变成关闭状态了
5.重新启动network
0 停机
1 单用户模式
2 多用户,没有 NFS
3 完全多用户模式
4 没有用到
5 图形界面
6 重新启动
S s Single user mode
[root@sunyujun01 ~]# chkconfig network on
[root@sunyujun01 ~]# chkconfig --list

注意:该输出结果只显示 SysV 服务,并不包含原生 systemd 服务。SysV 配置数据可能被原生 systemd 配置覆盖。
      如果您想列出 systemd 服务,请执行 \'systemctl list-unit-files\'。
      欲查看对特定 target 启用的服务请执行
      \'systemctl list-dependencies [target]\'。

mysql           0:关    1:关    2:开    3:开    4:开    5:开    6:关
netconsole      0:关    1:关    2:关    3:关    4:关    5:关    6:关
network         0:关    1:关    2:开    3:开    4:开    5:开    6:关
nginx           0:关    1:关    2:开    3:开    4:开    5:开    6:关
php-fpm         0:关    1:关    2:开    3:开    4:开    5:开    6:关
[root@sunyujun01 ~]#
6.在centos7之前的版本可以通过编辑文件定义系统级别
[root@sunyujun01 ~]# vim /etc/inittab
7. 设定某个运行级别开关
[root@sunyujun01 ~]# chkconfig --level 3 network off
8.也可以写多个345
[root@sunyujun01 ~]# chkconfig --level 345 network off
9.将123服务添加到服务中
[root@sunyujun01 init.d]# cp network 123^C
[root@sunyujun01 init.d]# ls -l
总用量 60
-rwxr-xr-x  1 root root  6630 1月  24 14:17 123
-rw-r--r--. 1 root root 13948 9月  16 2015 functions
-rwxr-xr-x. 1 root root 10880 2月  10 2017 mysql
-rwxr-xr-x. 1 root root  2989 9月  16 2015 netconsole
-rwxr-xr-x. 1 root root  6630 9月  16 2015 network
-rwxr-xr-x. 1 root root  2652 2月  10 2017 nginx
-rwxr-xr-x. 1 root root  2401 2月  10 2017 php-fpm
-rw-r--r--. 1 root root  1160 11月 22 2016 README
[root@sunyujun01 init.d]# chkconfig --list

注意:该输出结果只显示 SysV 服务,并不包含原生 systemd 服务。SysV 配置数据可能被原生 systemd 配置覆盖。
      如果您想列出 systemd 服务,请执行 \'systemctl list-unit-files\'。
      欲查看对特定 target 启用的服务请执行
      \'systemctl list-dependencies [target]\'。

mysql           0:关    1:关    2:开    3:开    4:开    5:开    6:关
netconsole      0:关    1:关    2:关    3:关    4:关    5:关    6:关
network         0:关    1:关    2:开    3:开    4:开    5:开    6:关
nginx           0:关    1:关    2:开    3:开    4:开    5:开    6:关
php-fpm         0:关    1:关    2:开    3:开    4:开    5:开    6:关
[root@sunyujun01 init.d]# chkconfig --add 123
[root@sunyujun01 init.d]# chkconfig --list

注意:该输出结果只显示 SysV 服务,并不包含原生 systemd 服务。SysV 配置数据可能被原生 systemd 配置覆盖。
      如果您想列出 systemd 服务,请执行 \'systemctl list-unit-files\'。
      欲查看对特定 target 启用的服务请执行
      \'systemctl list-dependencies [target]\'。

123             0:关    1:关    2:开    3:开    4:开    5:开    6:关
mysql           0:关    1:关    2:开    3:开    4:开    5:开    6:关
netconsole      0:关    1:关    2:关    3:关    4:关    5:关    6:关
network         0:关    1:关    2:开    3:开    4:开    5:开    6:关
nginx           0:关    1:关    2:开    3:开    4:开    5:开    6:关
php-fpm         0:关    1:关    2:开    3:开    4:开    5:开    6:关
[root@sunyujun01 init.d]#
10.删除一个服务
[root@sunyujun01 init.d]# chkconfig --del 123
[root@sunyujun01 init.d]#
systemd管理服务
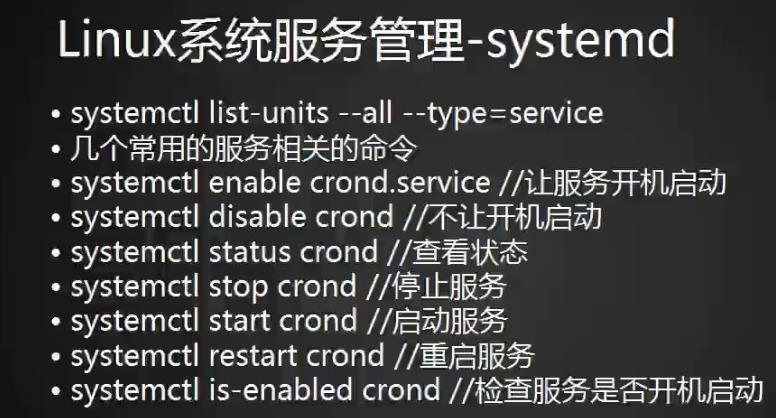
1.列出所有service服务,如果想列出所有用systemctl list-unit-files
[root@sunyujun01 init.d]# systemctl list-units -all --type=service
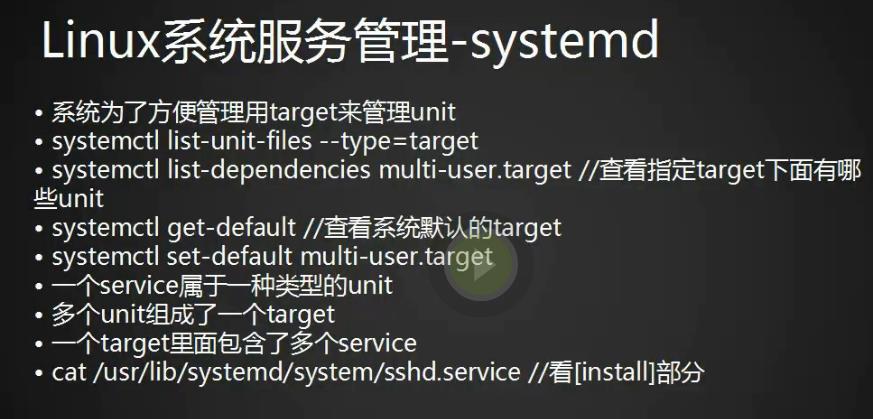
unit介绍
1.7个运行级别一一对应的软连接
[root@sunyujun01 system]# ls -l runlevel*
lrwxrwxrwx. 1 root root 15 2月  10 2017 runlevel0.target -> poweroff.target
lrwxrwxrwx. 1 root root 13 2月  10 2017 runlevel1.target -> rescue.target
lrwxrwxrwx. 1 root root 17 2月  10 2017 runlevel2.target -> multi-user.target
lrwxrwxrwx. 1 root root 17 2月  10 2017 runlevel3.target -> multi-user.target
lrwxrwxrwx. 1 root root 17 2月  10 2017 runlevel4.target -> multi-user.target
lrwxrwxrwx. 1 root root 16 2月  10 2017 runlevel5.target -> graphical.target
lrwxrwxrwx. 1 root root 13 2月  10 2017 runlevel6.target -> reboot.target
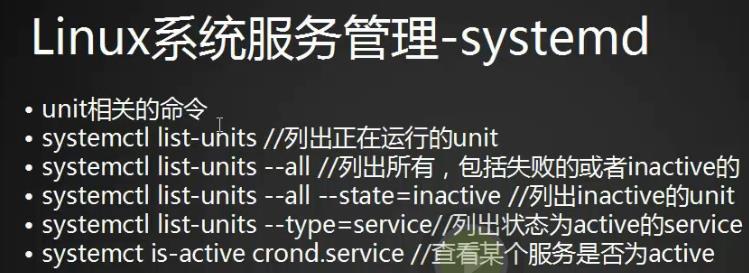
target介绍(一个target是多个unit的组合)
以上是关于linux任务计划cron的主要内容,如果未能解决你的问题,请参考以下文章
