Github Copilot的申请及在Pycharm的配置和使用
Posted 梦无矶
tags:
篇首语:本文由小常识网(cha138.com)小编为大家整理,主要介绍了Github Copilot的申请及在Pycharm的配置和使用相关的知识,希望对你有一定的参考价值。
文章目录
目录
Github Copilot的申请及在Pycharm的配置和使用
目前Github Copilot不是完全公开的,需要自己进入copilot官方网站进行申请,我申请下来是花了两天左右的时间。
2022/06/29更新
放在最前面说,很多人留言说这个登录不进去,申请不了什么的,不用看之前的什么更新插件啥的问题了,因为他要收费了!
100美元一年,告辞了!

1.简介
微软与OpenAI共同推出了一款AI编程工具GitHub Copilot。
GitHub Copilot基于 GitHub 及其他网站的源代码,可根据上文提示为程序员自动编写下文代码。
我使用下来它最实用的功能并不是说它的智能输入代码,而是它能够结合你实际业务代码的上下文进行预测你下一步的代码,会根据你的代码格式代码规范进行编写。
从个人的角度来讲,它带给我们的是更加便捷轻巧,当然,不能完全把它当作一个偷懒的工具,在一些灵活性逻辑比较复杂的一些功能上还需要我们自己验证,否则之后编译出错,你自己都找不到在哪里出问题。
2.copilot首页
https://copilot.github.com/
点击sign up 使用自己的github账户

3.copilot的申请


4.GitHub Copilot 官方使用文档
https://github.com/github/copilot-docs
5.PyChram下载地址
为什么会有这一步?
官方文档给出的说明:
- We have tested with the following JetBrains IDEs: IntelliJ and PyCharm versions 2021.2 and above.
意思是 经过他们的测试, JetBrains系列的 IntelliJ 和 PyCharm 这两款编译器需要使用2021.2及以上的版本
https://www.jetbrains.com/pycharm/download/other.html

6.Pychram下载 GitHub Copilot
在pycharm中的Plugins中搜索GitHub Copilot点击Install进行下载(下载完别忘记了点击Apply哦)

7.jetbrains系列官方教程
https://github.com/github/copilot-docs/blob/main/docs/jetbrains/gettingstarted.md#getting-started-with-github-copilot-in-jetbrains
8.申请通过之后的操作
等了两天,发邮件通知我通过了

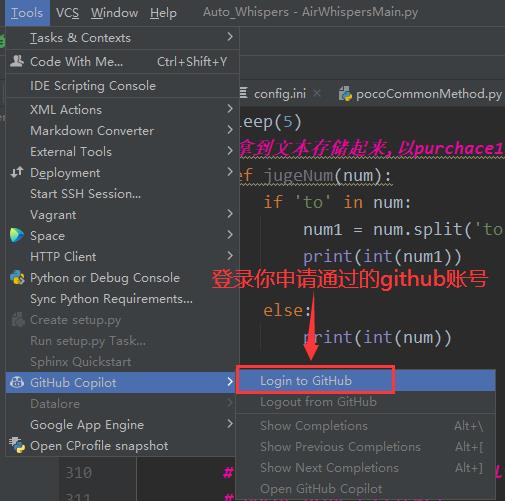
既然通过了,我们可以在Tools – > GitHub Copilot中进行登录自己的Github账号进行验证


点击Join the Waitlist


9.使用过程
如下为我的使用过程
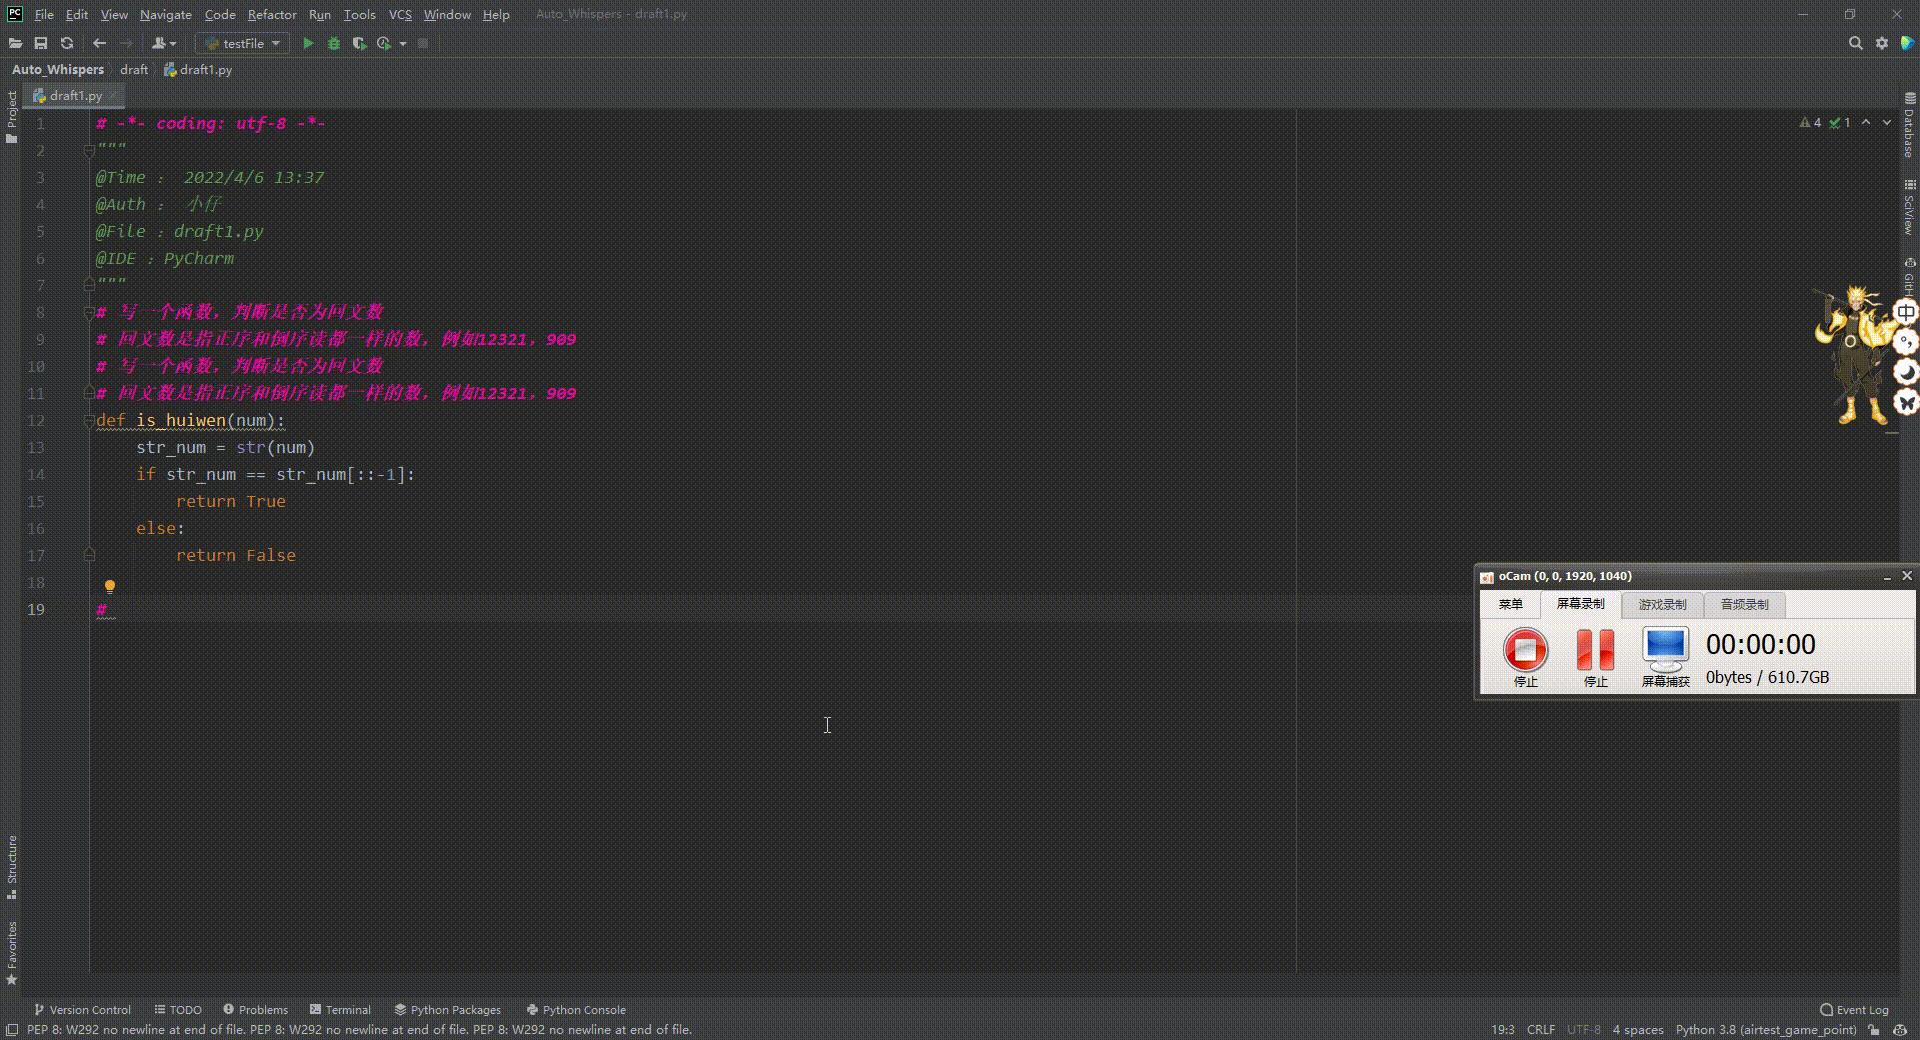
写注释,然后回车就会发现它会给门智能建议代码,我们只需要按下Tab键,就会选择这个建议,然后会有新的建议代码出现,符合你的需求就继续按Tab键,比如我们按下四次Tab键后得到如下结果


 除了以上的这些功能,你还可以在自己的业务代码里面尝试写一个新的方法,它会很智能的给出相关建议(需要自己确认一遍是否有误)
Github Copilot自动生成的代码
# 写一个函数,判断是否为回文数
# 回文数是指正序和倒序读都一样的数,例如12321,909
# 写一个函数,判断是否为回文数
# 回文数是指正序和倒序读都一样的数,例如12321,909
def is_huiwen(num):
    str_num = str(num)
    if str_num == str_num[::-1]:
        return True
    else:
        return False

# 冒泡排序
def maopao(list_num):
    for i in range(len(list_num)):
        for j in range(len(list_num)-i-1):
            if list_num[j] > list_num[j+1]:
                list_num[j],list_num[j+1] = list_num[j+1],list_num[j]
    return list_num

# 快速排序
def quick_sort(list_num):
    if len(list_num) <= 1:
        return list_num
    else:
        base = list_num[0]
        left = [x for x in list_num[1:] if x < base]
        right = [x for x in list_num[1:] if x >= base]
        return quick_sort(left) + [base] + quick_sort(right)
10.相关功能键:
Tab选择提供的建议Esc拒绝提供的建议Alt+]查看下一个建议;Alt+[查看上一个建议。(macos把Alt键换成option键即可)Alt + \\把提供的建议注释掉。(macos把Alt键换成option键即可)Alt+Enter显示当前所有的建议。(macos把Alt键换成option键即可)
11.退出Github Copilot
Tools – > GitHub Copilot – > Logout
用AI写代码 -- Github Copilot测试

截图为copilot官网
要使用copilot,首先要安装vscode。下载copilot插件。下载完了以后,并不能马上使用。还需要申请内测账号,前几天,我终于收到内测账号通过的邮件。趁着今天在家,连忙打开vscode测试一下。
爬图片
我们的第一个实验是爬csdn的logo。
于是,我新建了一个文件,我开始写注释。当我写道retri的时候,copilot已经知道我要说什么了,直接把一句话补全了。牛!

我于是打了一下tab,这句话就补全了。
接着,我打了import,copilot已经开始建议我导入urllib了。牛!

打完def三个字,整个函数的建议都有了。牛!

接着,打if:

于是,满怀期待的,运行了程序,结果,悲剧了:
AttributeError: module ‘urllib’ has no attribute ‘urlopen’
我还是比较熟悉requests模块,于是,我把第一句代码改成了import requests,重新生成代码。如下:
# find logo in csdn.net
# retrieve the logo and save it in the same directory

import requests
from bs4 import BeautifulSoup
import os

def get_logo(url):
    r = requests.get(url)
    soup = BeautifulSoup(r.text, 'html.parser')
    logo = soup.find('link', rel='shortcut icon')
    if logo:
        logo_url = logo['href']
        r = requests.get(logo_url)
        if r.status_code == 200:
            with open(os.path.basename(logo_url), 'wb') as f:
                f.write(r.content)
                print('logo saved')
        else:
            print('logo not found')
    else:
        print('logo not found')


if __name__ == "__main__":
    get_logo('http://www.csdn.net')
运行完了,发现不是logo,是favicon。😦
算了,算了,Copilot找不到logo,还是我自己找吧。
于是,我把注释改成了
# download and save https://img-home.csdnimg.cn/images/20201124032511.png
# to the same folder
生成的代码如下:
# download and save https://img-home.csdnimg.cn/images/20201124032511.png
# to the same folder

import requests
from bs4 import BeautifulSoup
import os

def download():
    url = 'https://img-home.csdnimg.cn/images/20201124032511.png'
    root = './img'
    path = root + url.split('/')[-1]
    try:
        if not os.path.exists(root):
            os.mkdir(root)
        if not os.path.exists(path):
            r = requests.get(url)
            with open(path, 'wb') as f:
                f.write(r.content)
                f.close()
                print('文件保存成功')
        else:
            print('文件已存在')
    except:
        print('爬取失败')


if __name__ == '__main__':
    download()
这次终于成功的下载了csdn的logo。
我想,这可能是因为csdn使用了反爬技术(logo图片名字不叫logo),所以找不到,于是,我想到了,可以去爬小米的200万logo。
给了注释以后,生成代码如下:
# find logo from https://www.mi.com/index.html
# and download it to local

import os
import requests
from bs4 import BeautifulSoup

def download():
    url = 'https://www.mi.com/index.html'
    r = requests.get(url)
    r.raise_for_status()
    soup = BeautifulSoup(r.text, 'html.parser')
    img = soup.find('img', class_='logo')
    print(img)
    img_url = img['src']
    img_name = img['alt']
    img_path = os.path.join('.', img_name)
    if not os.path.exists(img_path):
        with open(img_path, 'wb') as f:
            f.write(requests.get(img_url).content)
            print('Downloading %s' % img_name)
    else:
        print('%s already exists' % img_name)


if __name__ == '__main__':
    download()
运行结果,找不到logo。我打开小米官网,看了半天,我都没看出来logo的地址在哪里。怪不得copilot也找不到。看来,200万的logo,不容屌丝随便盗取呀!
Pandas过滤
第二个例子,我打算写一个过滤程序,导入两个csv,用第一个减去第二个。得到第三个并保存。
生成代码如下
# read two csv files using pandas,
# subtract the data in the second file from the first file,
# and write the result to a new csv file.

import pandas as pd
import csv
import sys

def subtract():
    # read the two csv files
    df1 = pd.read_csv(sys.argv[1])
    df2 = pd.read_csv(sys.argv[2])
    # subtract the second file from the first file
    df3 = df1 - df2
    # write the result to a new csv file
    df3.to_csv(sys.argv[3], index=False)

if __name__ == '__main__':
    subtract()
结果,运行出错:
TypeError: unsupported operand type(s) for -: ‘str’ and ‘str’
于是,我修改了注释,再次生成。
# read two csv files, a.csv and b.csv
# remove every row in a.csv that appears in b.csv
# write the result to a new csv file.

import os
import csv
import pandas as pd

def main():
    # get the current working directory
    cwd = os.getcwd()
    # get the path to the files
    a_path = os.path.join(cwd, "a.csv")
    b_path = os.path.join(cwd, "b.csv")
    # read the files into pandas dataframes
    a_df = pd.read_csv(a_path)
    b_df = pd.read_csv(b_path)
    # remove rows from a_df that appear in b_df
    a_df = a_df[~a_df.index.isin(b_df.index)]
    # write the result to a new csv file
    a_df.to_csv("a_minus_b.csv", index=False)

if __name__ == "__main__":
    main()
这次居然用了index过滤,但是并不是我想要的。算了,我还是去StackOverflow找吧。
Leetcode测试
我用leetcode第14题,测试,结果如下:
# 14. Longest Common Prefix
# Easy

# 4845

# 2366

# Add to List

# Share
# Write a function to find the longest common prefix string amongst an array of strings.

# If there is no common prefix, return an empty string "".


# Example 1:

# Input: strs = ["flower","flow","flight"]
# Output: "fl"
# Example 2:

# Input: strs = ["dog","racecar","car"]
# Output: ""
# Explanation: There is no common prefix among the input strings.


# Constraints:

# 1 <= strs.length <= 200
# 0 <= strs[i].length <= 200
# strs[i] consists of only lower-case English letters.

class Solution(object):
    def longestCommonPrefix(self, strs):
        """
        :type strs: List[str]
        :rtype: str
        """
        # 以上是我复制粘贴自
		# https://leetcode.com/problems/longest-common-prefix/
        # 以下为copilot生成
        if not strs:
            return ""
        if len(strs) == 1:
            return strs[0]
        min_len = min([len(s) for s in strs])
        for i in range(min_len):
            for j in range(len(strs)):
                if strs[j][i] != strs[0][i]:
                    return strs[0][:i]
        return strs[0][:min_len]

if __name__ == "__main__":
    a = Solution()
    print(a.longestCommonPrefix(["flower","flow","flight"]))
    print(a.longestCommonPrefix(["dog","racecar","car"]))
    print(a.longestCommonPrefix(["a","b","c"]))
    print(a.longestCommonPrefix(["a"]))
    print(a.longestCommonPrefix([""]))
    print(a.longestCommonPrefix([]))
打印结果
fl
a
看起来好像很厉害,都能做leetcode的题目了。但是,我大胆怀疑,copilot应该用了leetcode训练模型,所以能做出leetcode并不奇怪。
机器学习代码
同理,我给出注释,然后copilot给出代码,如下:
# read iris datasets from sklearn.datasets
# predict the class of the samples in the test set
# return the predicted classes
# print accuracy, f1 score, recall, precision


from sklearn.datasets import load_iris
from sklearn.model_selection import train_test_split
from sklearn.neighbors import KNeighborsClassifier
from sklearn.metrics import accuracy_score, f1_score, recall_score, precision_score

def predict(X_train, y_train, X_test, y_test, k):
    knn = KNeighborsClassifier(n_neighbors=k)
    knn.fit(X_train, y_train)
    y_pred = knn.predict(X_test)
    print("Accuracy: :.2f".format(accuracy_score(y_test, y_pred)))
    print("F1 score: :.2f".format(f1_score(y_test, y_pred)))
    print("Recall: :.2f".format(recall_score(y_test, y_pred)))
    print("Precision: :.2f".format(precision_score(y_test, y_pred)))

def main():
    iris = load_iris()
    X = iris.data
    y = iris.target
    X_train, X_test, y_train, y_test = train_test_split(X, y, test_size=0.3)
    predict(X_train, y_train, X_test, y_test, 5)


if __name__ == "__main__":
    main()
又报错了:
ValueError: Target is multiclass but average=‘binary’. Please choose another average setting, one of [None, ‘micro’, ‘macro’, ‘weighted’].
修改predict函数如下
def predict(X_train, y_train, X_test, y_test, k):
    knn = KNeighborsClassifier(n_neighbors=k)
    knn.fit(X_train, y_train)
    y_pred = knn.predict(X_test)
    print("Accuracy: :.2f".format(accuracy_score(y_test, y_pred)))
    print("F1 score: :.2f".format(f1_score(y_test, y_pred, average='macro')))
    print("Recall: :.2f".format(recall_score(y_test, y_pred, average='macro')))
    print("Precision: :.2f".format(precision_score(y_test, y_pred, average='macro')))
再测试,通过了。
虽然有错误,但是我觉得也挺好,我可以少打不少字了。少数几个错误改一下即可。
总结
要用好copilot,还是需要给他非常明确的指示。比如下载图片,要告诉他图片的URL。很多时候,你忙了半天,或许还不如自己去网上找代码。常见问题能解决,非常见问题,就未必了。不过,这还仅仅是开始,相信未来copilot会越来越准。那时候,善于使用copitlot的程序员,就不用加班了。不用copilot,就要天天加班了。
即使有了copilot,你还是需要自己理解代码。比如上面的pandas过滤程序,代码其实错了,但是正好通过了测试。如果你不知起所以然,直接上生产,后果可想而知。
测试过程中发现,他的速度非常不稳定。经常是半天没反应,不知道是不是网络原因。希望未来copilot能在中国放服务器,这样速度就有保证了。
以上是关于Github Copilot的申请及在Pycharm的配置和使用的主要内容,如果未能解决你的问题,请参考以下文章
Github Copilot 值得购买吗?使用GitHub Copilot进行快速EDA的示例