redux模块化封装2
Posted 不想写,还得写,写就写,慢慢写
tags:
篇首语:本文由小常识网(cha138.com)小编为大家整理,主要介绍了redux模块化封装2相关的知识,希望对你有一定的参考价值。
redux封装
物业系统的模块
1.用户模块
1.token 2.用户个人信息 3.用户权限 premission 4.动态权限菜单
2.历史访问记录模块
管理状态
3.动画效果状态需要管理
创建新的目录结构—按照模块化划分
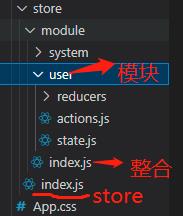
store文件需要使用reducer
//store核心
import  legacy_createStore  from "redux";

const store = legacy_createStore();//————————
export default store;
需要使用redux的api combineReducers将多个reducer合并为一个reducers
//将多个模块下的reducer整合
import  combineReducers  from "redux";
//引入reducer
import userReducer from "./user/reducers/index";
import sysReducer from "./system/reducers/index";
//参数为 引入的单个reducer 已key:value 格式进行合并
export default combineReducers(
user: userReducer,
system: sysReducer,
);
合并完成之后在store文件中引入使用
//store核心
import  legacy_createStore  from "redux";
//引入合并之后的reducers
import reducers from "./module/index";
const store = legacy_createStore(reducers);
export default store;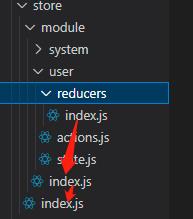
store中state状态值输出:
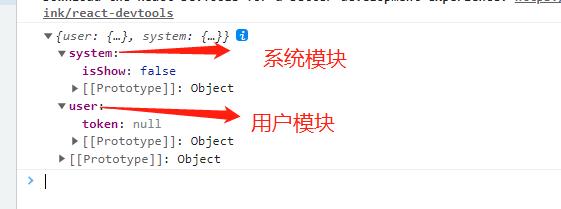
在一个模块下管理多个状态
//如果是一个rducer操作多个状态 业务代码混乱
//引入user state
import userState from "../state";
export default (state = userState, action) =>
//操作token
//操作userInfo信息
return state;
;
拆分为多个reducer 进行使用(业务代码分离)
//引入user state
import userState from "../state";
import  combineReducers  from "redux";
//token相关业务
function Token(state = userState.token, action)
return state;

//用户信息相关业务
function UserInfo(state = userState.userInfo, action)
return state;


export default combineReducers(
Token,
UserInfo,
);
实现redux跟踪
浏览器插件

解压之后拖到谷歌的扩展程序(开发者打开)安装
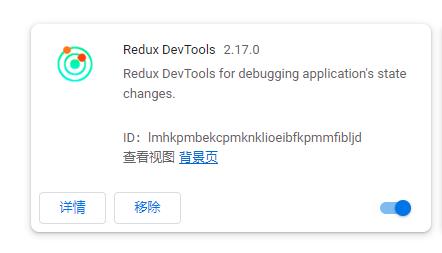
浏览器调试器中redux调试工具

找到插件:
https://github.com/zalmoxisus/redux-devtools-extension项目中安装插件redux-devtools-extension
"redux-devtools-extension": "^2.13.9",配置redux
//store核心
import  legacy_createStore  from "redux";
//配置devtools工具
import  composeWithDevTools  from "redux-devtools-extension";
//引入合并之后的reducers
import reducers from "./module/index";
//store使用跟踪插件
const store = legacy_createStore(reducers, composeWithDevTools());
export default store;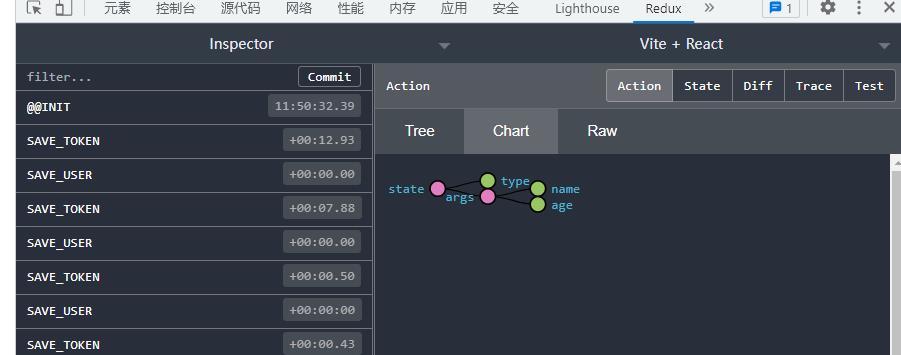
redux中如何异步
默认action为同步代码
//存储token
export const SAVE_TOKEN = (token) =>
//写入缓存
localStorage.setItem("_token", token);
return  type: "SAVE_TOKEN", args: token ;
;

//修改action为异步代码
//存储token
export const SAVE_TOKEN = (token) =>
setTimeout(() =>
//写入缓存
localStorage.setItem("_token", token);
return  type: "SAVE_TOKEN", args: token ;
, 1000);
;
//浏览器端报错
redux提示使用middleware 来增强redux。
redux本身不支持异步action操作。使用中间件来增强redux,让其支持异步的action。
异步数据流
默认情况下,createStore() 所创建的 Redux store 没有使用 middleware所以只支持 同步数据流。
你可以使用 applyMiddleware() 来增强 createStore()
官方提供插件像 redux-thunk 或 redux-promise 这样支持异步。
1.引入增强api
import  legacy_createStore, applyMiddleware  from "redux";
//applyMiddleware 增加redux支持异步action

2.安装redux-thunk
cnpm i --save-dev redux-thunk
"redux-thunk": "^2.4.2",

3.使用插件redux-thunk 来增强store
//store核心
import  legacy_createStore, applyMiddleware  from "redux";
//applyMiddleware 增加redux支持异步action
//引入redux-thunk 中间件
import thunk from "redux-thunk";
//配置devtools工具
import  composeWithDevTools  from "redux-devtools-extension";
//引入合并之后的reducers
import reducers from "./module/index";
const store = legacy_createStore(reducers, applyMiddleware(thunk));
export default store;


4.异步的action按照thunk的处理方案来写代码
//存储token
export const SAVE_TOKEN = (token) =>
//使用thunk处理之后 action中执行返回一个匿名函数回调
return () =>
//写入缓存
localStorage.setItem("_token", token);
return  type: "SAVE_TOKEN", args: token ;
;
;

使用thunk之后action异步返回匿名函数回调参数
1.dispatch 2.getState
//存储token
export const SAVE_TOKEN = (token) =>
//使用thunk处理之后 action中执行返回一个匿名函数回调
//传递的参数1.dispatch 方法 getState 获取原始状态值
return (dispatch, getState) =>
//写入缓存
setTimeout(() =>
localStorage.setItem("_token", token);
dispatch( type: "SAVE_TOKEN", args: token );
, 500);
;
;
//在thunk的函数中异步完成之后在使用dispatch 触发action

//将redux-devtools 添加跟踪
const store = legacy_createStore(
reducers,
composeWithDevTools(applyMiddleware(thunk))
);

//存储token
export const SAVE_TOKEN = (token) =>
//使用thunk处理之后 action中执行返回一个匿名函数回调
//传递的参数1.dispatch 方法 getState 获取原始状态值
return async (dispatch, getState) =>
//编写异步编程
let res=await 1;
//res token 用户信息
//写入缓存
localStorage.setItem("_token", token);
dispatch( type: "SAVE_TOKEN", args: token );
;
;

React----redux学习总结
redux:
redux是flux的进阶版,相较与flux 更加方便,其内部封装了flux的一些方法,使可以快速的完成数据的交互
1、使用场景
大型项目
多模块,多数据
2、安装 cnpm install redux --save-dev
3、工作流程:
当组件需要改变store数据的时候,需要先创建一个action,通过dispatch将action传给Store,store会将action转发给reducer,在reducer内部进行数据的结合(previousState和state),然后生成一个新的 数据结构传递给store,发生改变,view也随之改变
4、代码操作流程
1、创建Store
打印一下Store
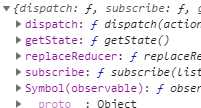
可以看到Store中包含有
2、创建reducers
          const defaultState = {
                    inputVal:‘‘,
                    list:‘‘
                }
                export default (state=defaultState,action)=>{
           /*
           */
                    switch (action.type) {
                        case ‘CHANGE_ITEM‘:
                            const changState = JSON.parse(JSON.stringify(state))
                            changState.inoutVal=action.val
                            return changState
                            break;

                        default:
                            return state
                    }
                }
3、创建action
cosnt action = {
      type:‘CHANGE_ITEM‘,
      value:‘’
}
通过Store.dispatch(action) 将action传递给reducers reducers进行数据的更新
4、组件中进行数据更新
Store.subscribe(this.hangdleChangeUpadata.bind(this))


hangdleChangeUpadata(){
      this.setState(Store.getState)
}
以上是关于redux模块化封装2的主要内容,如果未能解决你的问题,请参考以下文章