WebVirtMgr 基于Centos7.3的KVM虚拟化管理平台安装
Posted
tags:
篇首语:本文由小常识网(cha138.com)小编为大家整理,主要介绍了WebVirtMgr 基于Centos7.3的KVM虚拟化管理平台安装相关的知识,希望对你有一定的参考价值。
KVM是centos下面的虚拟机,是一个比较好用的一种虚拟化技术,但是通常来说服务器跑Centos很少会安装图形界面,使用命令来管理虚拟机也是比较麻烦的,所以有一种web的虚拟化管理平台就很方便了。
安装环境,Centos7.3,硬件Dell R710,3块1TB硬盘做阵列5
安装KVM部分
1、首先,对服务器Bios开启虚拟化支持,
然后,查看服务器CPU是否支持虚拟化,一般服务器都会支持,可以看到是支持的
[[email protected] ~]# egrep ‘(svm|vmx)‘ /proc/cpuinfo
2、关闭Selinux,设置selinux=disabled
[[email protected] ~]# vim /etc/selinux/config
# This file controls the state of SELinux on the system.
# SELINUX= can take one of these three values:
#     enforcing - SELinux security policy is enforced.
#     permissive - SELinux prints warnings instead of enforcing.
#     disabled - No SELinux policy is loaded.
SELINUX=disabled
# SELINUXTYPE= can take one of three two values:
#     targeted - Targeted processes are protected,
#     minimum - Modification of targeted policy. Only selected processes are protected.
#     mls - Multi Level Security protection.
SELINUXTYPE=targeted
3、最后安装kvm
[[email protected] ~]# yum install qemu-kvm libvirt virt-install bridge-utils -y
设置开机启动
[[email protected] ~]# systemctl enable libvirtd.service
[[email protected] ~]# systemctl start libvirtd.service
4、配置网卡桥接,这样kvm虚拟机就可以使用物理机网段了
编辑物理网卡
[[email protected] network-scripts]# vim ifcfg-em1
BRIDGE=br0        #增加这段br0是桥接网卡名字
BOOTPROTO=none
DEFROUTE=yes
PEERDNS=yes
PEERROUTES=yes
IPV4_FAILURE_FATAL=no
IPV6INIT=yes
IPV6_AUTOCONF=yes
IPV6_DEFROUTE=yes
IPV6_PEERDNS=yes
IPV6_PEERROUTES=yes
IPV6_FAILURE_FATAL=no
IPV6_ADDR_GEN_MODE=stable-privacy
NAME=em1
UUID=db488d6c-f2bd-4162-91b0-b093da627043
DEVICE=em1
ONBOOT=yes            #设置网卡启用
拷贝一份em1配置文件改名成br0
[[email protected] network-scripts]# cp ifcfg-em1 ifcfg-br0
TYPE=Bridge        #增加这段
BOOTPROTO=none
DEFROUTE=yes
PEERDNS=yes
PEERROUTES=yes
IPV4_FAILURE_FATAL=no
IPV6INIT=yes
IPV6_AUTOCONF=yes
IPV6_DEFROUTE=yes
IPV6_PEERDNS=yes
IPV6_PEERROUTES=yes
IPV6_FAILURE_FATAL=no
IPV6_ADDR_GEN_MODE=stable-privacy
NAME=br0            #名字改成br0
DEVICE=br0            #名字改成br0
ONBOOT=yes            #设置网卡启用
IPADDR=192.168.30.4    #设置IP,这是物理机IP
NETMASK=255.255.255.0
GATEWAY=192.168.30.1
DNS1=8.8.8.8
配置完成重启网卡,配置成功
[[email protected] network-scripts]# ifconfig
br0: flags=4163<UP,BROADCAST,RUNNING,MULTICAST>  mtu 1500
        inet 192.168.30.4  netmask 255.255.255.0  broadcast 192.168.30.255
        inet6 fe80::97ef:e8ee:ec13:7b67  prefixlen 64  scopeid 0x20<link>
        ether 00:24:e8:79:5f:9a  txqueuelen 1000  (Ethernet)
        RX packets 94700  bytes 38161377 (36.3 MiB)
        RX errors 0  dropped 0  overruns 0  frame 0
        TX packets 52912  bytes 24224444 (23.1 MiB)
        TX errors 0  dropped 0 overruns 0  carrier 0  collisions 0

em1: flags=4163<UP,BROADCAST,RUNNING,MULTICAST>  mtu 1500
        ether 00:24:e8:79:5f:9a  txqueuelen 1000  (Ethernet)
        RX packets 115799  bytes 70980112 (67.6 MiB)
        RX errors 0  dropped 6  overruns 0  frame 0
        TX packets 74826  bytes 26101223 (24.8 MiB)
        TX errors 0  dropped 0 overruns 0  carrier 0  collisions 0
KVM部分到此基本完成了
WebVirtMgr安装部分
1、安装依赖包
yum -y install git python-pip libvirt-python libxml2-python python-websockify python-devel
pip install numpy
2、下载程序代码webvirtmgr
[[email protected]]# git clone git://github.com/retspen/webvirtmgr.git        #clone代码
[[email protected]]# mv webvirtmgr/ /var/www/                                #移动到/var/www目录
[[email protected] ~]# cd /var/www/webvirtmgr/
[[email protected] webvirtmgr]# pip install -r requirements.txt                #安装依赖
初始化数据库,配置管理用户
[[email protected] webvirtmgr]# ./manage.py syncdb
WARNING:root:No local_settings file found.
Creating tables ...
Creating table auth_permission
Creating table auth_group_permissions
Creating table auth_group
Creating table auth_user_groups
Creating table auth_user_user_permissions
Creating table auth_user
Creating table django_content_type
Creating table django_session
Creating table django_site
Creating table servers_compute
Creating table instance_instance
Creating table create_flavor

You just installed Django‘s auth system, which means you don‘t have any superusers defined.
Would you like to create one now? (yes/no): yes
Username (leave blank to use ‘root‘): root        #管理账号
Email address:
Password:                                         #管理密码
Password (again):
Superuser created successfully.
Installing custom SQL ...
Installing indexes ...
Installed 6 object(s) from 1 fixture(s)
下一步,选yes
[[email protected] webvirtmgr]# ./manage.py collectstatic
WARNING:root:No local_settings file found.

You have requested to collect static files at the destination
location as specified in your settings.

This will overwrite existing files!
Are you sure you want to do this?

Type ‘yes‘ to continue, or ‘no‘ to cancel: yes
Copying ‘/var/www/webvirtmgr/webvirtmgr/static/css/bootstrap-multiselect.css‘
Copying ‘/var/www/webvirtmgr/webvirtmgr/static/css/bootstrap.min.css‘
Copying ‘/var/www/webvirtmgr/webvirtmgr/static/css/signin.css‘
Copying ‘/var/www/webvirtmgr/webvirtmgr/static/css/table-sort.css‘
Copying ‘/var/www/webvirtmgr/webvirtmgr/static/css/webvirtmgr.css‘
Copying ‘/var/www/webvirtmgr/webvirtmgr/static/fonts/glyphicons-halflings-regular.eot‘
Copying ‘/var/www/webvirtmgr/webvirtmgr/static/fonts/glyphicons-halflings-regular.svg‘
Copying ‘/var/www/webvirtmgr/webvirtmgr/static/fonts/glyphicons-halflings-regular.ttf‘
Copying ‘/var/www/webvirtmgr/webvirtmgr/static/fonts/glyphicons-halflings-regular.woff‘
Copying ‘/var/www/webvirtmgr/webvirtmgr/static/img/asc.gif‘
添加额外管理用户,选做
[[email protected] webvirtmgr]# ./manage.py createsuperuser
3、配置nginx,安装nginx过程略
配置虚拟主机站点,配置如下
server {
    listen 80 default_server;

    server_name $hostname;
    access_log /var/log/nginx/webvirtmgr_access_log;

    location /static/ {
        root /var/www/webvirtmgr/webvirtmgr;
        expires max;
    }

    location / {
        proxy_pass http://127.0.0.1:8000;
        proxy_set_header X-Real-IP $remote_addr;
        proxy_set_header X-Forwarded-for $proxy_add_x_forwarded_for;
        proxy_set_header Host $host:$server_port;
        proxy_set_header X-Forwarded-Proto $scheme;
        proxy_connect_timeout 600;
        proxy_read_timeout 600;
        proxy_send_timeout 600;
        client_max_body_size 1024M;
    }
}
然后启动nginx
4、启动webvirtmgr程序和webvirtmgr-console
   nohup /usr/bin/python /var/www/webvirtmgr/manage.py run_gunicorn 127.0.0.1:8000 &
   nohup /usr/bin/python /var/www/webvirtmgr/console/webvirtmgr-console &
防火墙部分
    firewall-cmd --permanent --add-port=80/tcp
    firewall-cmd --permanent --add-port=6080/tcp
    firewall-cmd  --permanent  --add-port=5900/tcp
    firewall-cmd  --permanent  --add-port=5901/tcp        #控制台端口,可以多
                                                          #开放几个5900起
    firewall-cmd --reload
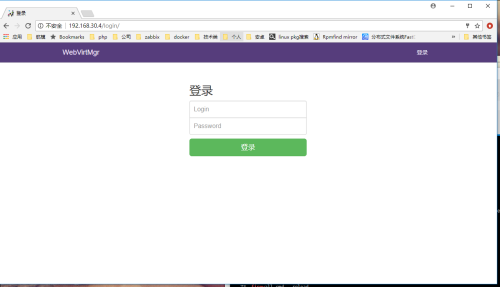
打开管理界面,
webvirtmgr管理部分
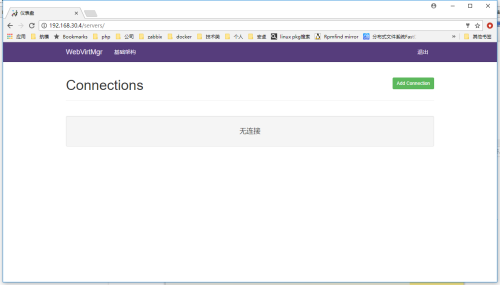
1、登陆上去,需要添加被管理主机,这里是空的,我们要添加被管理的KVM主机是本机,只要做ssh免密码登陆即可
[[email protected] ~]# ssh-keygen -t rsa
[[email protected] ~]# ssh-copy-id 192.168.30.4
登陆默认是空的
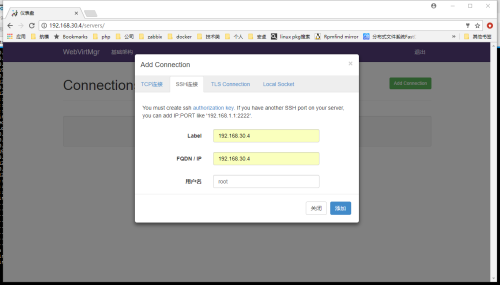
添加连接,选ssh连接
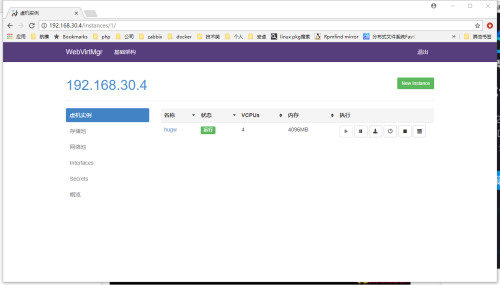
添加成功后就到这里了,这里我创建过一台虚拟机
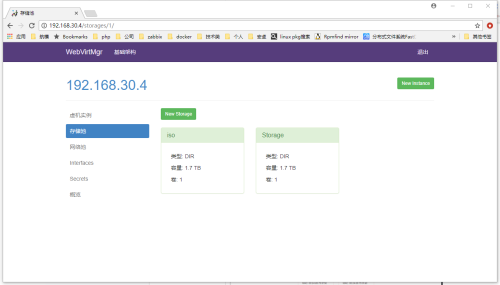
创建虚拟机前我们需要创建一个存储池,也就是虚拟机磁盘存放位置
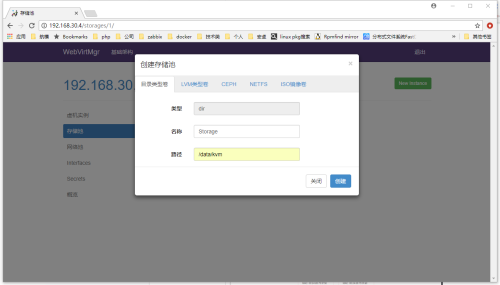
创建目录类型卷
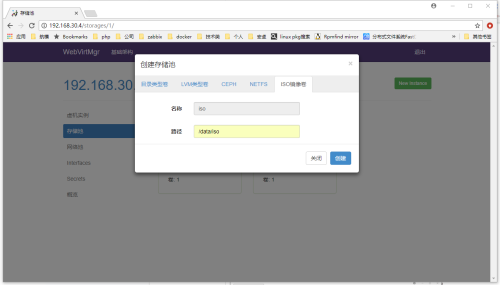
再添加一个ISO镜像卷,安装磁盘镜像就放这里
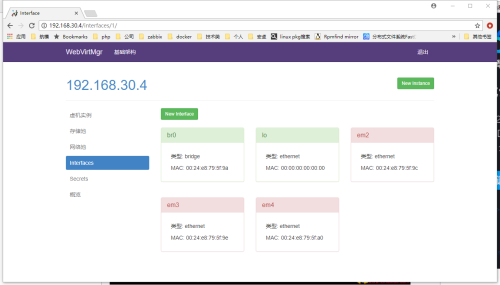
这是网络接口部分,我之前创建的桥接端口br0就显示在这里了
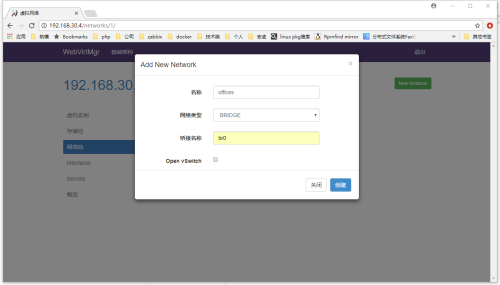
再来创建一个叫offices的网络池
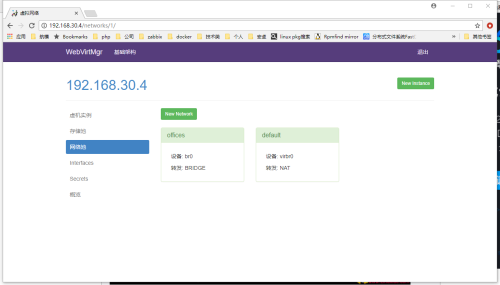
创建完成了
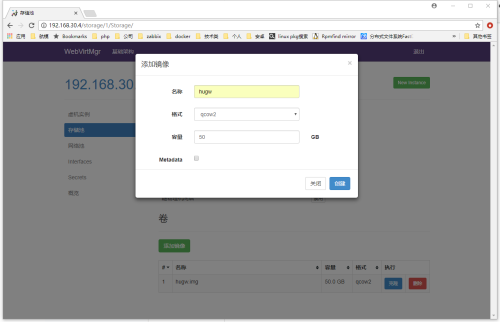
我们再到存储池里面给我们要创建的虚拟机划一个50G的磁盘
点击storage池进去添加镜像, 注意,勾选Metadata就会真的创建一个50G的文件
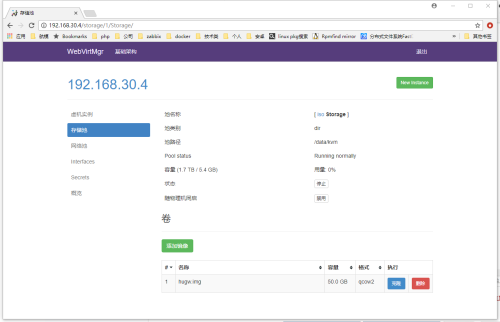
创建完成
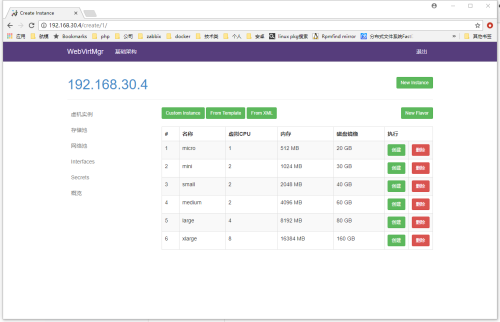
接下来可以创建虚拟机了,选择newinstance
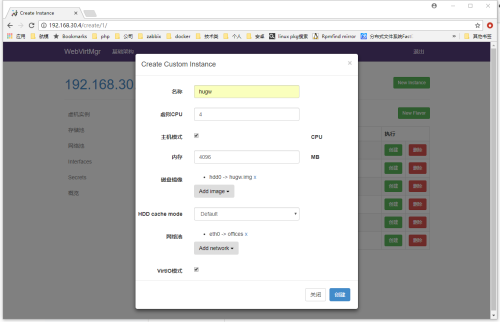
注意,这里的temple是没用的 ,点击custom instance
主要设置名字,cpu、内存,还有刚才创建的磁盘镜像hugw.img和网络池offices桥接
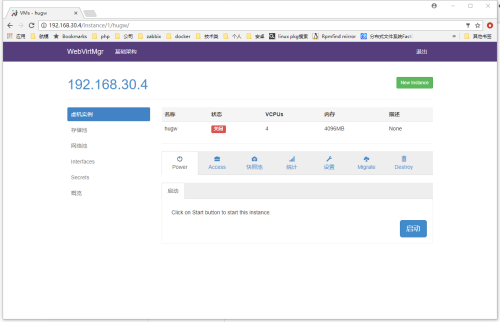
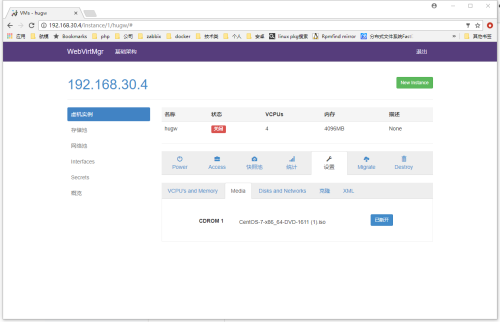
创建完成之后点击虚拟机名字可以进入管理
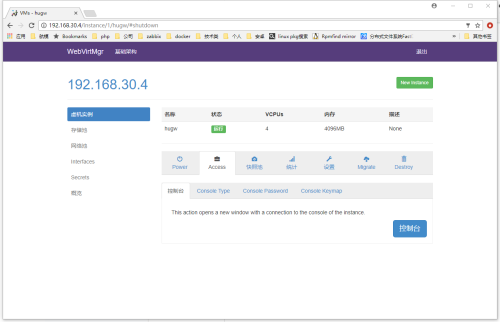
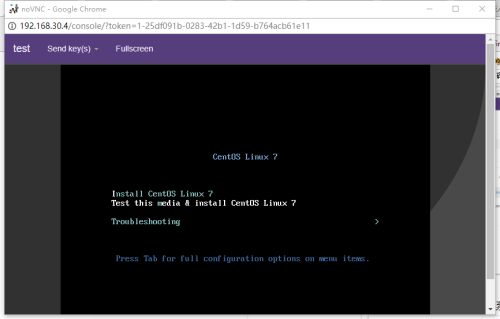
这里是连接控制台
在这里选择安装磁盘ISO,装系统的时候如果提示找不到安装介质在这里点连接就行了
开机启动,点击重制台连接安装系统,就可以正常管理虚拟机了
到此结束
本文出自 “飞一般的爱情故事” 博客,请务必保留此出处http://niubdada.blog.51cto.com/3511133/1981760
以上是关于WebVirtMgr 基于Centos7.3的KVM虚拟化管理平台安装的主要内容,如果未能解决你的问题,请参考以下文章

