在kaggle上用Yolov5训练口罩模型并部署到android端
Posted Yellow Small Tiger
tags:
篇首语:本文由小常识网(cha138.com)小编为大家整理,主要介绍了在kaggle上用Yolov5训练口罩模型并部署到android端相关的知识,希望对你有一定的参考价值。
文章目录
利用Kaggle平台提供免费的GPU采用Yolov5算法进行口罩模型数据的训练
前言
利用Kaggle平台提供免费的GPU采用Yolov5算法进行口罩模型数据的训练
一、使用步骤
(一)下载Yolov5源码
YOLOv5 开源代码项目下载地址:https://github.com/ultralytics/yolov5
(二)配置Yolov5所需的库
在下载源码的路径中输入cmd,输入如下命令:
pip install —r requirements.txt
我的路径如下:

(三)修改源码
1.修改输出文件的保存路径
在train.py中修改为:
#采用kaggele训练模型一定要修改文件的保存路径
    parser.add_argument('--project', default= '/kaggle/working/runs/train', help='save to project/name')
2.添加mask.yaml
在data文件夹中增加mask.yaml:
# Custom data for safety helmet


# train and val data as 1) directory: path/images/, 2) file: path/images.txt, or 3) list: [path1/images/, path2/images/]
train: data/mask/images/train #口罩训练集的路径
val: data/mask/images/val #口罩验证集的路径

# number of classes
nc: 2

# class names
#names: ['mask', 'face']
names: ['face', 'mask']
3.修改models
在models文件夹下的yolov5s.yaml文件:
# YOLOv5 🚀 by Ultralytics, GPL-3.0 license

# Parameters
#nc: 80  # number of classes
nc: 2  # number of classes #佩戴口罩和未佩戴口罩两个类别
depth_multiple: 0.33  # model depth multiple
width_multiple: 0.50  # layer channel multiple
anchors:
  - [10,13, 16,30, 33,23]  # P3/8
  - [30,61, 62,45, 59,119]  # P4/16
  - [116,90, 156,198, 373,326]  # P5/32

# YOLOv5 v6.0 backbone
backbone:
  # [from, number, module, args]
  [[-1, 1, Conv, [64, 6, 2, 2]],  # 0-P1/2
   [-1, 1, Conv, [128, 3, 2]],  # 1-P2/4
   [-1, 3, C3, [128]],
   [-1, 1, Conv, [256, 3, 2]],  # 3-P3/8
   [-1, 6, C3, [256]],
   [-1, 1, Conv, [512, 3, 2]],  # 5-P4/16
   [-1, 9, C3, [512]],
   [-1, 1, Conv, [1024, 3, 2]],  # 7-P5/32
   [-1, 3, C3, [1024]],
   [-1, 1, SPPF, [1024, 5]],  # 9
  ]

# YOLOv5 v6.0 head
head:
  [[-1, 1, Conv, [512, 1, 1]],
   [-1, 1, nn.Upsample, [None, 2, 'nearest']],
   [[-1, 6], 1, Concat, [1]],  # cat backbone P4
   [-1, 3, C3, [512, False]],  # 13

   [-1, 1, Conv, [256, 1, 1]],
   [-1, 1, nn.Upsample, [None, 2, 'nearest']],
   [[-1, 4], 1, Concat, [1]],  # cat backbone P3
   [-1, 3, C3, [256, False]],  # 17 (P3/8-small)

   [-1, 1, Conv, [256, 3, 2]],
   [[-1, 14], 1, Concat, [1]],  # cat head P4
   [-1, 3, C3, [512, False]],  # 20 (P4/16-medium)

   [-1, 1, Conv, [512, 3, 2]],
   [[-1, 10], 1, Concat, [1]],  # cat head P5
   [-1, 3, C3, [1024, False]],  # 23 (P5/32-large)

   [[17, 20, 23], 1, Detect, [nc, anchors]],  # Detect(P3, P4, P5)
  ]
4.配置train.py
修改train.py中的源码:
...............
def parse_opt(known=False):
    parser = argparse.ArgumentParser()
    parser.add_argument('--weights', type=str, default=ROOT / 'yolov5s.pt', help='initial weights path')
    parser.add_argument('--cfg', type=str, default='', help='model.yaml path')
    #data为自己新增的mask.yaml文件
    parser.add_argument('--data', type=str, default=ROOT / 'data/mask.yaml', help='dataset.yaml path')
    parser.add_argument('--hyp', type=str, default=ROOT / 'data/hyps/hyp.scratch-low.yaml', help='hyperparameters path')
    #训练的轮数
    parser.add_argument('--epochs', type=int, default=100)
    parser.add_argument('--batch-size', type=int, default=16, help='total batch size for all GPUs, -1 for autobatch')
    parser.add_argument('--imgsz', '--img', '--img-size', type=int, default=640, help='train, val image size (pixels)')
    parser.add_argument('--rect', action='store_true', help='rectangular training')
    parser.add_argument('--resume', nargs='?', const=True, default=False, help='resume most recent training')
    parser.add_argument('--nosave', action='store_true', help='only save final checkpoint')
    parser.add_argument('--noval', action='store_true', help='only validate final epoch')
    parser.add_argument('--noautoanchor', action='store_true', help='disable AutoAnchor')
    parser.add_argument('--noplots', action='store_true', help='save no plot files')
    parser.add_argument('--evolve', type=int, nargs='?', const=300, help='evolve hyperparameters for x generations')
    parser.add_argument('--bucket', type=str, default='', help='gsutil bucket')
    parser.add_argument('--cache', type=str, nargs='?', const='ram', help='--cache images in "ram" (default) or "disk"')
    parser.add_argument('--image-weights', action='store_true', help='use weighted image selection for training')
    parser.add_argument('--device', default='', help='cuda device, i.e. 0 or 0,1,2,3 or cpu')
    parser.add_argument('--multi-scale', action='store_true', help='vary img-size +/- 50%%')
    parser.add_argument('--single-cls', action='store_true', help='train multi-class data as single-class')
    parser.add_argument('--optimizer', type=str, choices=['SGD', 'Adam', 'AdamW'], default='SGD', help='optimizer')
    parser.add_argument('--sync-bn', action='store_true', help='use SyncBatchNorm, only available in DDP mode')
    parser.add_argument('--workers', type=int, default=8, help='max dataloader workers (per RANK in DDP mode)')
    # parser.add_argument('--project', default=ROOT / 'runs/train', help='save to project/name')
    #采用kaggele训练模型一定要修改文件的保存路径(非常重要)
    parser.add_argument('--project', default= '/kaggle/working/runs/train', help='save to project/name')
    parser.add_argument('--name', default='exp', help='save to project/name')
    parser.add_argument('--exist-ok', action='store_true', help='existing project/name ok, do not increment')
    parser.add_argument('--quad', action='store_true', help='quad dataloader')
    parser.add_argument('--cos-lr', action='store_true', help='cosine LR scheduler')
    parser.add_argument('--label-smoothing', type=float, default=0.0, help='Label smoothing epsilon')
    parser.add_argument('--patience', type=int, default=100, help='EarlyStopping patience (epochs without improvement)')
    parser.add_argument('--freeze', nargs='+', type=int, default=[0], help='Freeze layers: backbone=10, first3=0 1 2')
    parser.add_argument('--save-period', type=int, default=-1, help='Save checkpoint every x epochs (disabled if < 1)')
    parser.add_argument('--seed', type=int, default=0, help='Global training seed')
    parser.add_argument('--local_rank', type=int, default=-1, help='Automatic DDP Multi-GPU argument, do not modify')

    # Weights & Biases arguments
    parser.add_argument('--entity', default=None, help='W&B: Entity')
    parser.add_argument('--upload_dataset', nargs='?', const=True, default=False, help='W&B: Upload data, "val" option')
    parser.add_argument('--bbox_interval', type=int, default=-1, help='W&B: Set bounding-box image logging interval')
    parser.add_argument('--artifact_alias', type=str, default='latest', help='W&B: Version of dataset artifact to use')

    return parser.parse_known_args()[0] if known else parser.parse_args()
    ............
(四)在Kaggle上部署项目
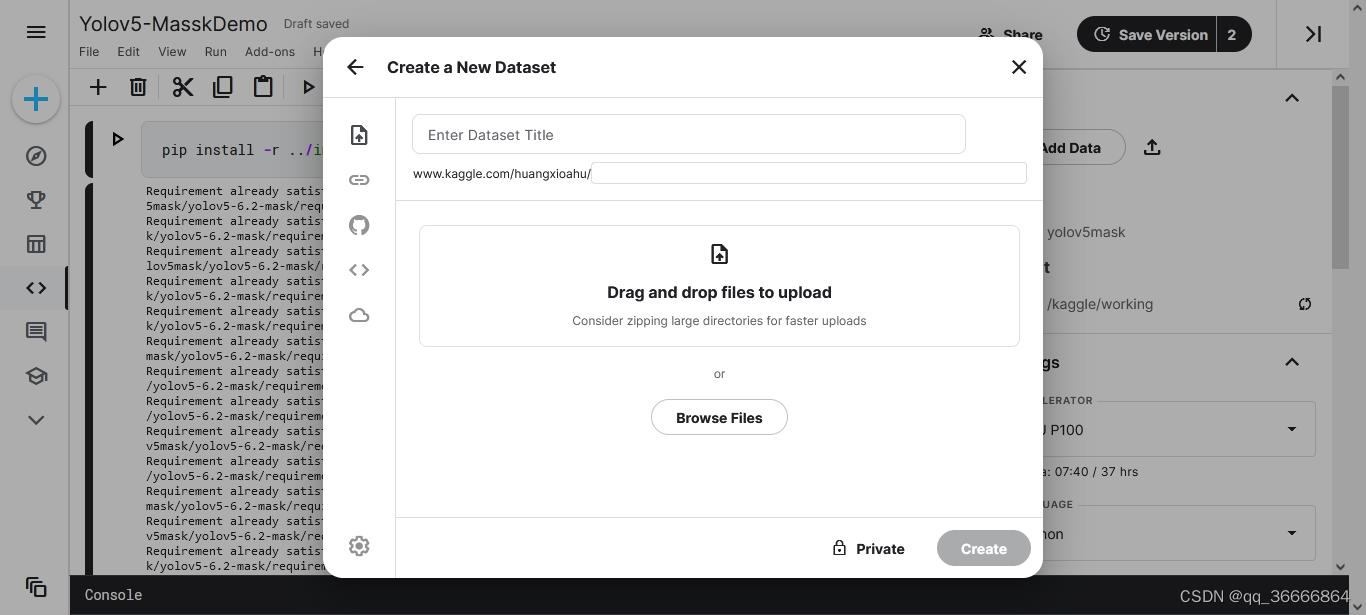
1.把源码本地打包成.zip格式上传到Kaggle的Data上:

2.在代码框中输入如下命令并运行:
pip install -r ../input/yolov5mask/yolov5-6.2-mask/requirements.txt
3.运行train.py:
!python ../input/yolov5mask/yolov5-6.2-mask/train.py
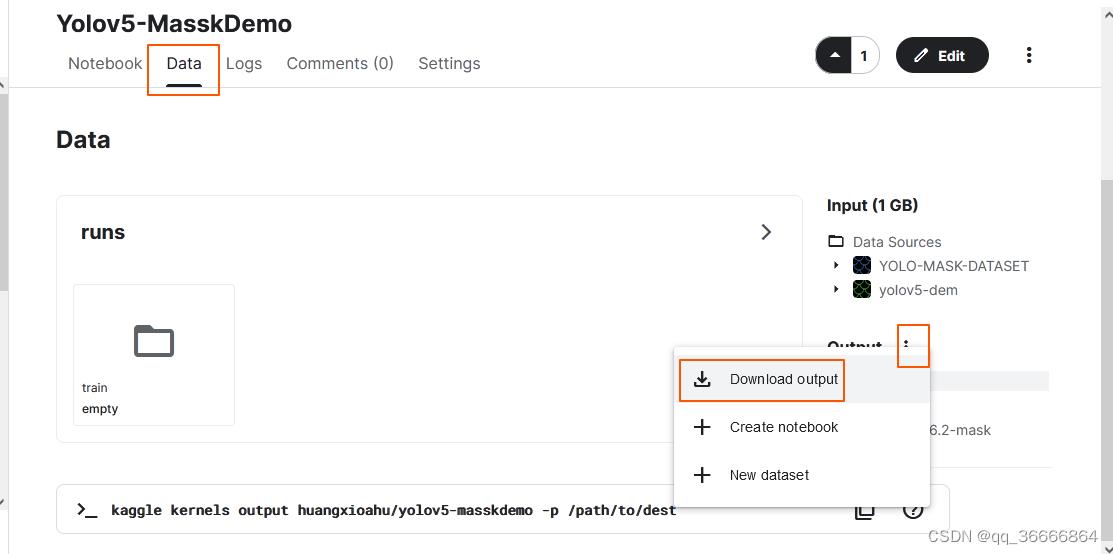
4.下载run中训练好的模型:

5.本机上测试训练好的模型:
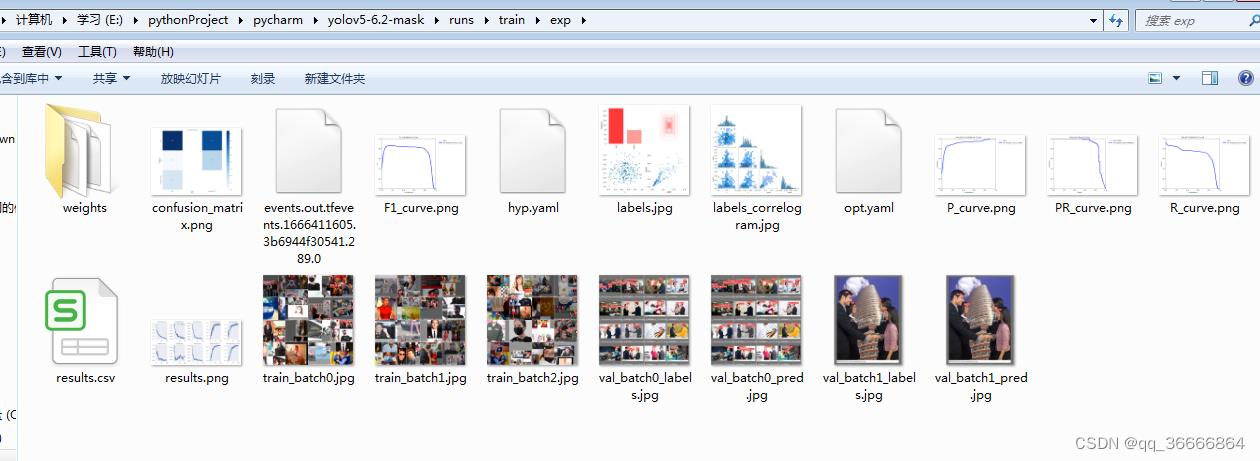
将训练好的模型数据放在本地项目的runs\\train\\exp中:
E:\\pythonProject\\pycharm\\yolov5-6.2-mask\\runs\\train\\exp
我的:
修改detect.py中的代码:
def parse_opt():
    parser = argparse.ArgumentParser()
    # parser.add_argument('--weights', nargs='+', type=str, default=ROOT / 'yolov5s.pt', help='model path(s)')
    #下载训练好的口罩模型
    parser.add_argument('--weights', nargs='+', type=str, default='./runs/train/exp/weights/best.pt', help='model path(s)')
    parser.add_argument('--source', type=str, default=ROOT / 'data/images', help='file/dir/URL/glob, 0 for webcam')
    #网络摄像头
    # parser.add_argument('--source', type=str, default=1, help='file/dir/URL/glob, 0 for webcam')
    # parser.add_argument('--data', type=str, default=ROOT / 'data/coco128.yaml', help='(optional) dataset.yaml path')
    #自己的口罩数据
    parser.add_argument('--data', type=str, default=ROOT / 'data/mask.yaml', help='(optional) dataset.yaml path')
    parser.add_argument('--imgsz', '--img', '--img-size', nargs='+', type=int, default=[640], help='inference size h,w')
    #置信度
    parser.add_argument('--conf-thres', type=float, default=0.5, help='confidence threshold')
    parser.add_argument('--iou-thres', type=float, default=0.45, help='NMS IoU threshold')
    parser.add_argument('--max-det', type=int, default=1000, help='maximum detections per image')
    parser.add_argument('--device', default='', help='cuda device, i.e. 0 or 0,1,2,3 or cpu')
    parser.add_argument('--view-img', action='store_true', help='show results')
    parser.add_argument('--save-txt', action='store_true', help='save results to *.txt')
    parser.add_argument('--save-conf', action='store_true', help='save confidences in --save-txt labels')
    parser.add_argument('--save-crop', action='store_true', help='save cropped prediction boxes')
    parser.add_argument('--nosave', action='store_true', help='do not save images/videos')
    parser.add_argument('--classes', nargs='+', type=int, help='filter by class: --classes 0, or --classes 0 2 3')
    parser.add_argument('--agnostic-nms', action='store_true', help='class-agnostic NMS')
    parser.add_argument('--augment', action='store_true', help='augmented inference')
    parser.add_argument('--visualize', action='store_true', help='visualize features')
    parser.add_argument('--update', action='store_true'以上是关于在kaggle上用Yolov5训练口罩模型并部署到android端的主要内容,如果未能解决你的问题,请参考以下文章