Nginx基础到进阶
Posted
tags:
篇首语:本文由小常识网(cha138.com)小编为大家整理,主要介绍了Nginx基础到进阶相关的知识,希望对你有一定的参考价值。
nginx相关配置
===============================================================================
概述:
本篇我们将继续上一篇的话题,来介绍Nginx的相关配置
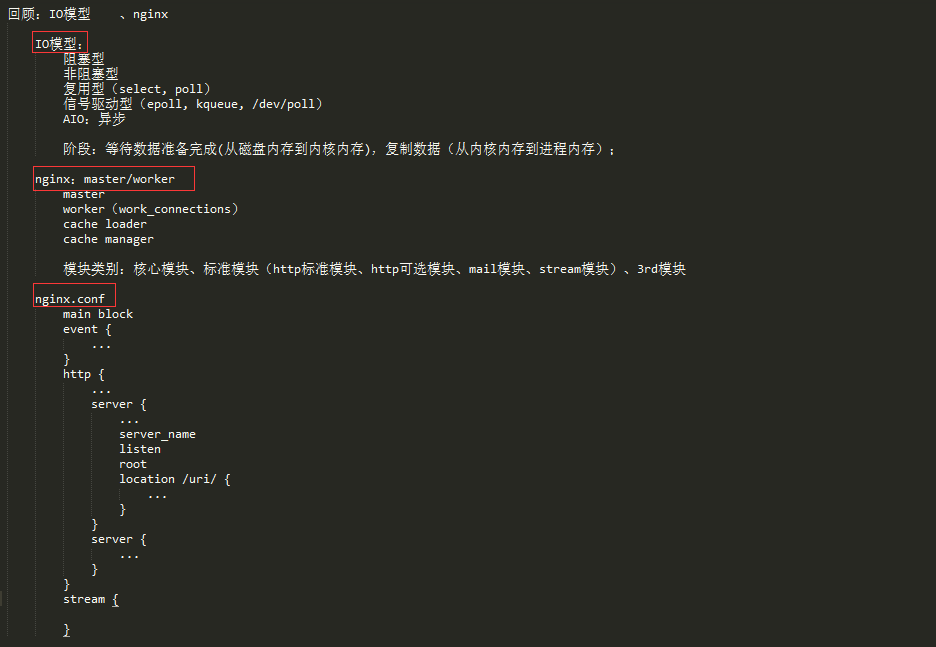
回顾:
Nginx安装之rpm包
过程如下:
1.在Nginx官方网点下载适合的nginx rpm包到本地,这里是我下载的rpm包:
nginx-1.10.0-1.el7.ngx.x86_64.rpm
2.在当前nginx包的所在目录中执行yum install 即可
[[email protected] ~]# ls
nginx-1.10.0  nginx-1.10.0-1.el7.ngx.x86_64.rpm  nginx-1.10.0.tar.gz
[[email protected] ~]# yum install ./nginx-1.10.0-1.el7.ngx.x86_64.rpm -y
3.安装完成之后查看文件及程序所在位置
[[email protected] nginx]# rpm -ql nginx
/etc/logrotate.d/nginx
/etc/nginx                      # 配置文件所在位置
/etc/nginx/conf.d
/etc/nginx/conf.d/default.conf  # 配置文件片段
/etc/nginx/fastcgi_params
/etc/nginx/koi-utf
/etc/nginx/koi-win
/etc/nginx/mime.types
/etc/nginx/modules
/etc/nginx/nginx.conf           # nginx主配置文件
/etc/nginx/scgi_params
/etc/nginx/uwsgi_params
/etc/nginx/win-utf
/etc/sysconfig/nginx
/etc/sysconfig/nginx-debug
/usr/lib/systemd/system/nginx-debug.service
/usr/lib/systemd/system/nginx.service     # unit file 文件,使用nginx.service启动即可
/usr/lib64/nginx
/usr/lib64/nginx/modules
/usr/libexec/initscripts/legacy-actions/nginx
/usr/libexec/initscripts/legacy-actions/nginx/upgrade
/usr/sbin/nginx                  # 主程序文件
/usr/sbin/nginx-debug
/usr/share/doc/nginx-1.10.0
/usr/share/doc/nginx-1.10.0/COPYRIGHT
/usr/share/nginx                 # 默认root的指向位置
/usr/share/nginx/html
/usr/share/nginx/html/50x.html
/usr/share/nginx/html/index.html   # 默认提供的网页文件
/var/cache/nginx
/var/log/nginx
我们用rpm包安装的nginx的主配置文件和编译安装的主配置文件中的定义使用写区别的,如下:
[[email protected] nginx]# pwd
/etc/nginx
[[email protected] nginx]# ls
conf.d  fastcgi_params  koi-utf  koi-win  mime.types  modules  nginx.conf   scgi_params  uwsgi_params  win-utf
[[email protected] nginx]# mv nginx.conf{,.bak} # 同样先对主配置文件做备份

# 查看主配置文件,如下:
[[email protected] nginx]# cat  nginx.conf

user  nginx;
worker_processes  1;

error_log  /var/log/nginx/error.log warn;     # 主配置段
pid        /var/run/nginx.pid;


events {
    worker_connections  1024;
}
                                              # 如下为http配置段

http {
    include       /etc/nginx/mime.types;
    default_type  application/octet-stream;

    log_format  main  ‘$remote_addr - $remote_user [$time_local] "$request" ‘
                      ‘$status $body_bytes_sent "$http_referer" ‘
                      ‘"$http_user_agent" "$http_x_forwarded_for"‘;

    access_log  /var/log/nginx/access.log  main;

    sendfile        on;
    #tcp_nopush     on;

    keepalive_timeout  65;

    #gzip  on;

    include /etc/nginx/conf.d/*.conf;
}

# 由上可见这里只是定义了一些server的公共配置,没有定义server虚拟主机,而是定义在了/etc/nginx/conf.d/*.conf下
Nginx中http协议的相关配置
2.定义路径相关的配置:
★root path;
设置web资源路径映射;用于指明用户请求的url所对应的本地文件系统上的文档所在目录路径;
用的位置:http, server, location, if in location;
★location [ = | ~ | ~* | ^~ ] uri { ... }
location @name { ... }
在一个server中location配置段可存在多个,用于实现从uri到文件系统的路径映射;ngnix会根据用户请求的URI来检查定义的所有location,并找出一个最佳匹配,而后应用其配置;
定义的路径映射
匹配的定义和优先级
★alias path;
定义路径别名,文档映射的另一种机制;仅能用于location上下文;
注意:
location中使用root指令和alias指令的意义不同;
(a)root,给定的路径对应于location中的/uri/左侧的/;
(b)alias,给定的路径对应于location中的/uri/右侧的/;
★index file ...;
定义默认资源;
定义的位置:http, server, location;
★error_page code ... [=[response]] uri;
Defines the URI that will be shown for the specified errors. A
urivalue can contain variables.(Defines URI,它将显示指定的错误。一个uri的值可以包含变量。)可以自定义响应码
示例:
由上面客可知,我们在http的配置段中要想编辑定义虚拟主机server,要在/etc/nginx/conf.d中定义,如下:
[[email protected] nginx]# cd conf.d/
[[email protected] conf.d]# ls
default.conf
[[email protected] conf.d]# cp default.conf{,.bak} # 做备份
[[email protected] conf.d]# vim default.conf # 编辑配置文件如下:
  1 server {                    # 可见http的虚拟主机server都定义在此文件下
  2     listen       80;
  3     server_name  localhost;
  4
  5     #charset koi8-r;
  6     #access_log  /var/log/nginx/log/host.access.log  main;
  7
  8     location / {      # 这里没有把root定义在server中,而是把根 / 映射到 location中的/usr/share/nginx/html下
  9         root   /usr/share/nginx/html;
 10         index  index.html index.htm;
 11     }
 12
 13     #error_page  404              /404.html;
 14
 15     # redirect server error pages to the static page /50x.html
 16     #
 17     error_page   500 502 503 504  /50x.html;
 18     location = /50x.html {
 19         root   /usr/share/nginx/html;
 20     }    # 表示做精确匹配
 21
 22     # proxy the php scripts to Apache listening on 127.0.0.1:80
 23     #
 24     #location ~ \.php$ {
 25     #    proxy_pass   http://127.0.0.1;
 26     #}   # 表示做正则表达式模式匹配
 27
 28     # pass the PHP scripts to FastCGI server listening on 127.0.0.1:9000
 29     #
 30     #location ~ \.php$ {
 31     #    root           html;
 32     #    fastcgi_pass   127.0.0.1:9000;
 33     #    fastcgi_index  index.php;
 34     #    fastcgi_param  SCRIPT_FILENAME  /scripts$fastcgi_script_name;
 35     #    include        fastcgi_params;
 36     #}
 37
 38     # deny access to .htaccess files, if Apache‘s document root
 39     # concurs with nginx‘s one
 40     #
 41     #location ~ /\.ht {
 42     #    deny  all;
 43     #}
 44 }
1.由上面的配置文件中可知,用rpm包安装的nginx中,http配置段中虚拟主机server的根并没有直接定义在server的公共配置段中,而是定义在了location的上下文中,表示把根映射到/usr/share/nginx/html/下;
所以如果我们要在浏览器中访问 http://10.1.252.161/admin 则对应的文件系统映射路径为 /usr/share/nginx/html/admin,试验如下:
# 在映射的根目录下创建目录admin,并提供默认页面
[[email protected] conf.d]# mkdir /usr/share/nginx/html/admin
[[email protected] conf.d]# echo "taotaoxiuxiu" > /usr/share/nginx/html/admin/index.html
[[email protected] conf.d]# cat /usr/share/nginx/html/admin/index.html
taotaoxiuxiu
浏览器访问如下:
2.假如我们要单独对admin目录做访问控制,也可以重新定义admin的目录映射关系,例如,这里我们把admin目录映射到/vnhosts/www1/data下
保存退出后,检测语法重载nginx再次访问发现找不到该资源,如下:
如上,可见我们单独对admin做路径定义后,原来admin的路径就不对了,所以,我们要在新定义的路径下再次创建admin目录才可以,如下:
[[email protected] conf.d]# mkdir -pv /vnhosts/www1/data/admin
mkdir: created directory ‘/vnhosts/www1’
mkdir: created directory ‘/vnhosts/www1/data’
mkdir: created directory ‘/vnhosts/www1/data/admin’
[[email protected] conf.d]# cp /usr/share/nginx/html/admin/index.html /vnhosts/www1/data/admin
再次刷新网页,可以正常访问,如下:
3.如果我们把admin在location中新定义的路径 root /vnhosts/www1/data 改为 alias /vnhosts/www1/data 会是怎样的效果呢,如下:
# 为了对比效果,我们在/vnhosts/www1/data目录下再创建一个默认页面,内容不同admin中的默认页面
[[email protected] data]# pwd
/vnhosts/www1/data
[[email protected] data]# echo "/vnhost/www1/data" > index.html
[[email protected] data]# ls
admin  index.html
再次访问如下:
总结:
在location上下文中
1.定义 alia /vnhosts/www1/data/ 为目录admin的路径别名,映射的是/admin/最右侧的/;
即: http://10.1.252.161/admin ---> /vnhosts/www1/data
2.定义 root /vnhosts/www1/data/ 是/vnhosts/www1/data/最右侧根与/admin 最左侧根的映射,表示在data目录下还有一个目录为admin,而且必须要有,才能在浏览器中访问到admin。
即: http://10.1.252.161/admin ---> /vnhosts/www1/data/admin
一定要注意映射关系,不要搞混了!!!
示例:
自定义错误页面:
首先编辑配置文件,自己定义一个404的错误页面,并定义文件映射的位置
创建此文件,并编辑错误页面信息
[[email protected] ~]# ls /usr/share/nginx/html/
50x.html  admin  index.html
[[email protected] ~]# mkdir /usr/share/nginx/html/error_pages
[[email protected] ~]# vim /usr/share/nginx/html/error_pages/404.html
  1 <h1>-----------------------------Not Found----------------------------------</h1>
  2 Power By taotao
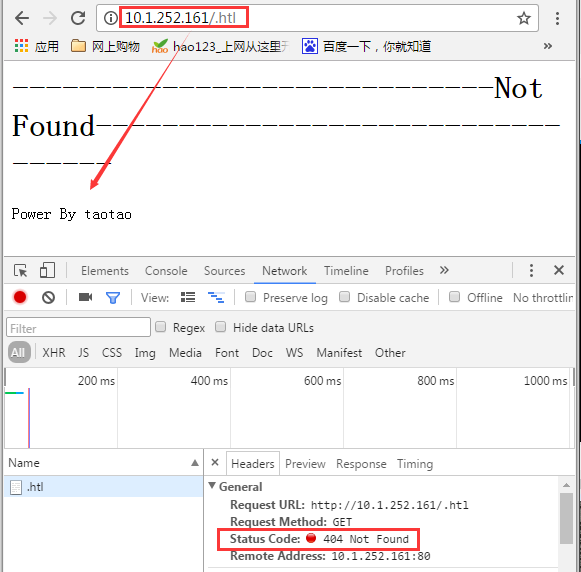
检查语法错误,重载后访问页面如下:
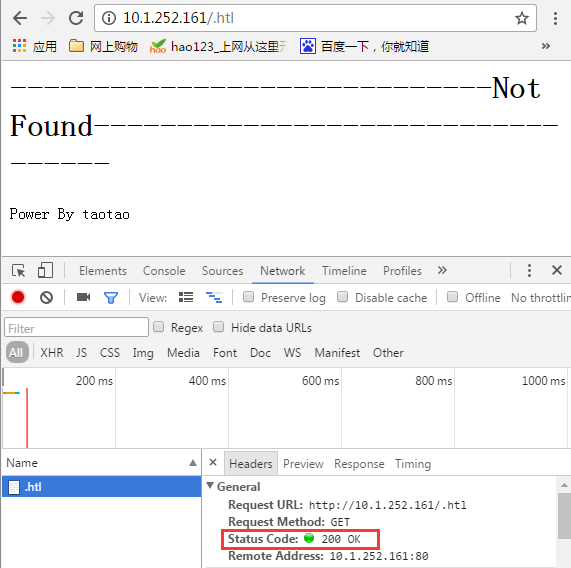
如上,调试页面显示为404错误,我们也可以改变状态码,让客户端以位访问的就是正确的资源
保存,重载后再次刷新页面如下:
2.定义客户端请求的相关的配置:
★keepalive_timeout timeout [header_timeout];
设定保持连接的超时时长,0表示禁止长连接;默认为75s;
★keepalive_requests number;
在一次长连接上所允许请求的资源的最大数量,默认为100;
★keepalive_disable none | browser ...;
对哪种浏览器禁用长连接;
★send_timeout time;
向客户端发送响应报文的超时时长,此处,是指两次写操作之间的间隔时长;
★client_body_buffer_size size;
用于接收客户端请求报文的body部分的缓冲区大小;默认为16k;超出此大小时,其将被暂存到磁盘上的由client_body_temp_path指令所定义的位置;
★client_body_temp_path path [level1 [level2 [level3]]];
设定用于存储客户端请求报文的body部分的临时存储路径及子目录结构和数量;
level为16进制的数字;
举例:client_body_temp_path path /var/tmp/client_body 1 2 2 表示:有16个一级子目录,一级子目录下有256(16*16)个二级子目录;每个二级子目录下又有256个三级子目录
以上是关于Nginx基础到进阶的主要内容,如果未能解决你的问题,请参考以下文章


