微信小程序|基于小程序实现发送语音消息及转文字
Posted 摔跤猫子
tags:
篇首语:本文由小常识网(cha138.com)小编为大家整理,主要介绍了微信小程序|基于小程序实现发送语音消息及转文字相关的知识,希望对你有一定的参考价值。
此文主要在小程序内聊天的基础上实现语音发送及文字转换。
小程序
账号创建及工具准备
- 访问微信公众平台,点击账号注册。
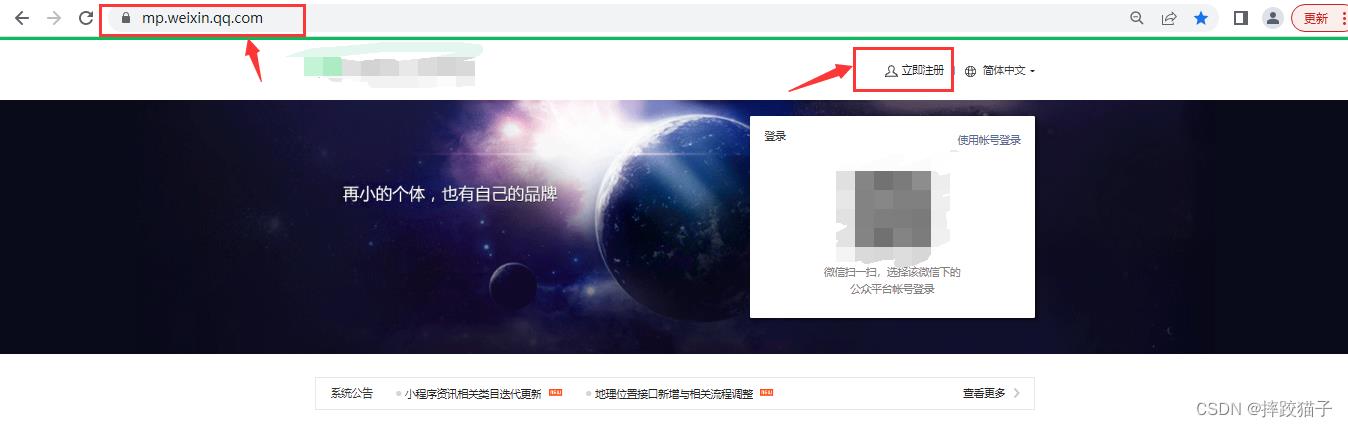
- 选择小程序,并在表单填写所需的各项信息进行注册。


- 在开发管理选择开发设置,将AppID及AppSecret复制出来进行存储。

- 下载安装微信web开发者工具并创建一个新的项目,填入上图所复制的AppId。


页面大体设计
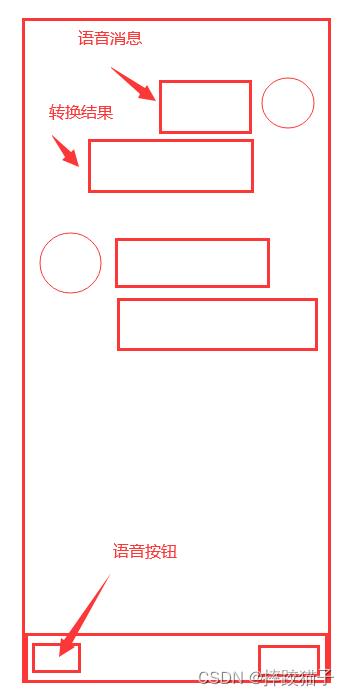
- 页面上主要元素应该有语音发送按钮、语音展示区域、语音转换结果区域等,大致设计如下。
实现录音功能
- 在小程序中获取全局唯一的录音管理器:RecorderManager wx.getRecorderManager()。
const recorderManager = wx.getRecorderManager()

- 先在页面定义几个按钮,测试录音管理器是否有效。

<button bindtap="start" class='btn'>开始录音</button>
<button bindtap="pause" class='btn'>暂停录音</button>
<button bindtap="resume" class='btn'>继续录音</button>
<button bindtap="stop" class='btn'>停止录音</button>
<button bindtap="play" class='btn'>播放录音</button>
- 在JS文件中实现开始录音按钮对应的事件,因为需要用到手机麦克风权限,所以需要先向用户进行申请。

- 拼接插件API所需的各项参数。

const options =
      duration: 10000,//指定录音的时长,单位 ms
      sampleRate: 16000,//采样率
      numberOfChannels: 1,//录音通道数
      encodeBitRate: 96000,//编码码率
      format: 'mp3',//音频格式,有效值 aac/mp3
      frameSize: 50,//指定帧大小,单位 KB
- 将录音start的方法嵌入授权的方法中,并在错误回调进行提示。
    //开始录音
    wx.authorize(
      scope: 'scope.record',
      success()
        console.log("录音授权成功");
        //第一次成功授权后 状态切换为2
        that.setData(
          status: 2,
        )
        recorderManager.start(options);
        recorderManager.onStart(() =>
          console.log('recorder start')
        );
        //错误回调
        recorderManager.onError((res) =>
          console.log(res);
        )
      ,
      fail()
        console.log("第一次录音授权失败");
        wx.showModal(
          title: '提示',
          content: '您未授权录音,功能将无法使用',
          showCancel: true,
          confirmText: "授权",
          confirmColor: "#52a2d8",
          success: function (res)
            if (res.confirm)
              //确认则打开设置页面(重点)
              wx.openSetting(
                success: (res) =>
                  console.log(res.authSetting);
                  if (!res.authSetting['scope.record'])
                    //未设置录音授权
                    console.log("未设置录音授权");
                    wx.showModal(
                      title: '提示',
                      content: '您未授权录音,功能将无法使用',
                      showCancel: false,
                      success: function (res)

                      ,
                    )
                   else
                    //第二次才成功授权
                    console.log("设置录音授权成功");
                    that.setData(
                      status: 2,
                    )

                    recorderManager.start(options);
                    recorderManager.onStart(() =>
                      console.log('recorder start')
                    );
                    //错误回调
                    recorderManager.onError((res) =>
                      console.log(res);
                    )

                ,
                fail: function ()
                  console.log("授权设置录音失败");

              )
             else if (res.cancel)
              console.log("cancel");

          ,
          fail: function ()
            console.log("openfail");

        )

    )
- 点击开始录音,如果上述操作能够正常完成,那么在小程序的顶部会有音量的标识闪烁同时控制台也会有对应的结果输出。

- 能够正常的开始录音功能后,继续实现暂停录音以及停止录音功能,相比于获取权限以及开始录音相对简单,只要针对全局录音管理器做对应的操作即可。

  //暂停录音
  pause: function ()
    recorderManager.pause();
    recorderManager.onPause((res) =>
      console.log('暂停录音')
    )
  ,
  //继续录音
  resume: function ()
    recorderManager.resume();
    recorderManager.onStart(() =>
      console.log('重新开始录音')
    );
    //错误回调
    recorderManager.onError((res) =>
      console.log(res);
    )
  ,
  //停止录音
  stop: function ()
    recorderManager.stop();
    recorderManager.onStop((res) =>
      this.tempFilePath = res.tempFilePath;
      console.log('停止录音', res.tempFilePath)
      const  tempFilePath  = res
    )
  ,
- 当点击停止录音时,将结果进行输出并存储,以便我们用来播放以及文字转换;下图中后缀为.mp3的就是我们所需要的录音文件了。

- 实现播放音乐时需要创建另外一个对象:createInnerAudioContext。在JS定义之后,再实现界面上按钮的事件,就能够听到自己美妙的声音啦。

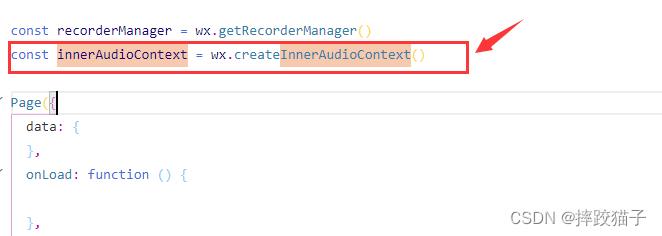

const innerAudioContext = wx.createInnerAudioContext()
  //播放声音
 play: function ()
   innerAudioContext.autoplay = true
   innerAudioContext.src = this.tempFilePath,
     innerAudioContext.onPlay(() =>
       console.log('开始播放')
     )
   innerAudioContext.onError((res) =>
     console.log(res.errMsg)
     console.log(res.errCode)
   )
 ,
实现对话界面
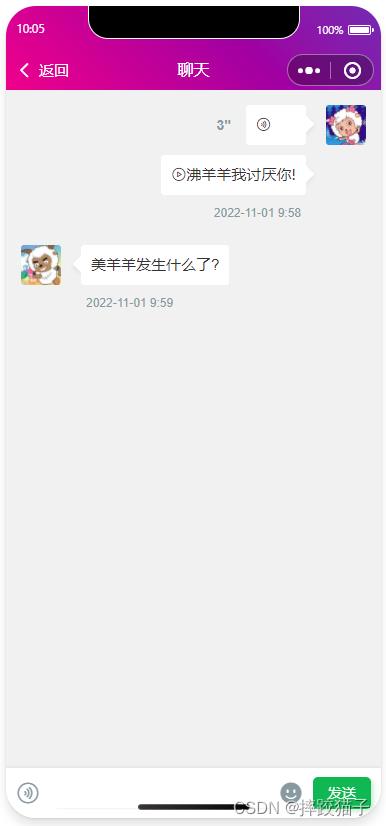
- 根据上篇聊天文章界面进行调整,增加语音样式及语音转换后的界面展示。
微信小程序|基于小程序+C#实现聊天功能
<view class="cu-chat">
  <view class="cu-item self" >
    <view class="main">
      <view class="action text-bold text-grey">
        3"
      </view>
      <view class="content shadow">
        <text class="cuIcon-sound text-xxl padding-right-xl"> </text>
      </view>
    </view>
    <view class="cu-avatar radius" style="background-image:url(userHead.jpg);"></view>
  </view>
  <view class="cu-item self" style="margin-top:-80rpx;">
    <view class="main" >
      <view class="content shadow" style="">
        <text class="cuIcon-video text-xxl ">这里是语音转换文字后的区域。</text>
      </view>
    </view>
    <view class="date "> 2022-11-01 9:58</view>
    <view class="cu-avatar radius" style="background-color: #F1F1F1;"></view>
  </view>
- 在界面底部将录音按钮样式进行调整,加上语音图标,并增加对应的事件。

<view class="cu-bar foot input InputBottom!=0?'cur':''" style="bottom:InputBottompx">
  <view class="action">
    <text class="cuIcon-sound text-grey"></text>
  </view>
  <input class="solid-bottom" value="content" bindinput="formMsg" bindfocus="InputFocus" bindblur="InputBlur" adjust-position="false" focus="false" maxlength="300" cursor-spacing="10"></input>
  <view class="action">
    <text class="cuIcon-emojifill text-grey"></text>
  </view>
  <button class="cu-btn bg-green shadow" bindtap="sendMsg">发送</button>
</view>
.scrollPage
  height: 100vh;


.nav-list
  display: flex;
  flex-wrap: wrap;
  padding: 0px 40rpx 0px;
  justify-content: space-between;


.nav-li
  padding: 30rpx;
  border-radius: 12rpx;
  width: 45%;
  margin: 0 2.5% 40rpx;
  background-image: url(https://image.weilanwl.com/color2.0/cardBg.png);
  background-size: cover;
  background-position: center;
  position: relative;
  z-index: 1;


.nav-li::after
  content: "";
  position: absolute;
  z-index: -1;
  background-color: inherit;
  width: 100%;
  height: 100%;
  left: 0;
  bottom: -10%;
  border-radius: 10rpx;
  opacity: 0.2;
  transform: scale(0.9, 0.9);


.nav-li.cur
  color: #fff;
  background: rgb(94, 185, 94);
  box-shadow: 4rpx 4rpx 6rpx rgba(94, 185, 94, 0.4);


.nav-title
  font-size: 32rpx;
  font-weight: 300;


.nav-title::first-letter
  font-size: 40rpx;
  margin-right: 4rpx;


.nav-name
  font-size: 28rpx;
  text-transform: Capitalize;
  margin-top: 20rpx;
  position: relative;


.nav-name::before
  content: "";
  position: absolute;
  display: block;
  width: 40rpx;
  height: 6rpx;
  background: #fff;
  bottom: 0;
  right: 0;
  opacity: 0.5;


.nav-name::after
  content: "";
  position: absolute;
  display: block;
  width: 100rpx;
  height: 1px;
  background: #fff;
  bottom: 0;
  right: 40rpx;
  opacity: 0.3;


.nav-name::first-letter
  font-weight: bold;
  font-size: 36rpx;
  margin-right: 1px;


.nav-li text
  position: absolute;
  right: 30rpx;
  top: 30rpx;
  font-size: 52rpx;
  width: 60rpx;
  height: 60rpx;
  text-align: center;
  line-height: 60rpx;


.text-light
  font-weight: 300;
- 可以增加一些细节处理,在录音的时候增加计时,在结束的时候停止,将时长在界面上进行显示。

语音转换文字
账号创建及应用申请
界面及录音发送功能实现后,接下来需要申请语音转换文字的API。以前公众平台是有一个插件可以进行转换的,现在不知道什么原因下架了,所以只能使用替代方案。
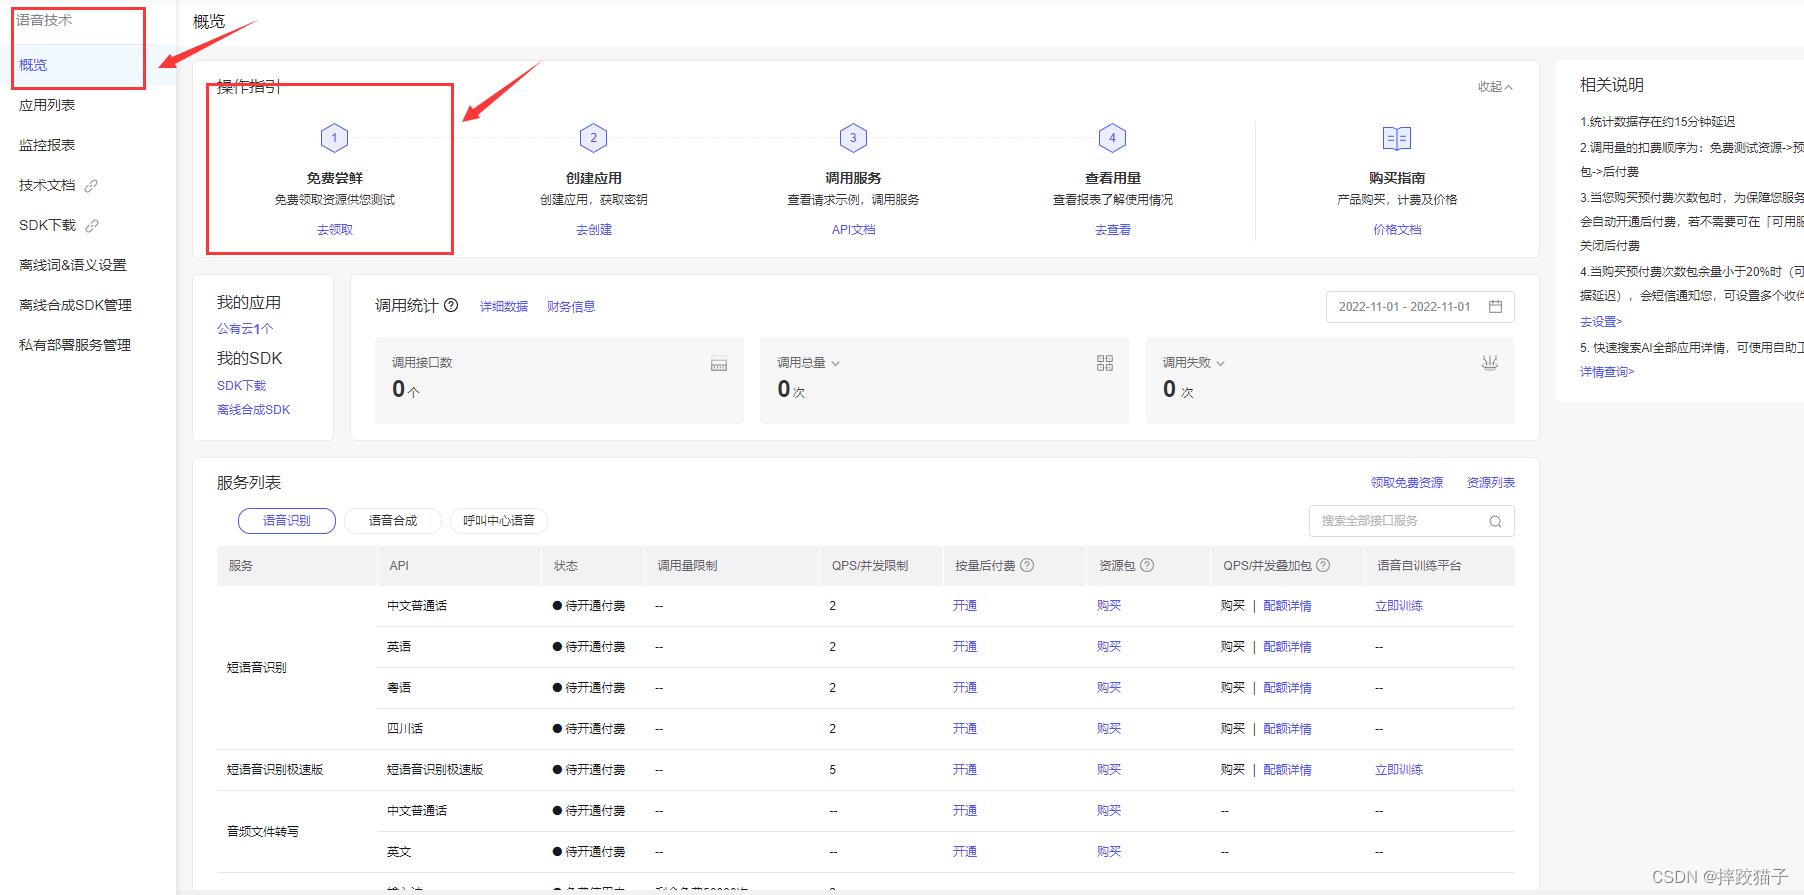
- 访问百度开放平台选择语音识别并领取免费资源

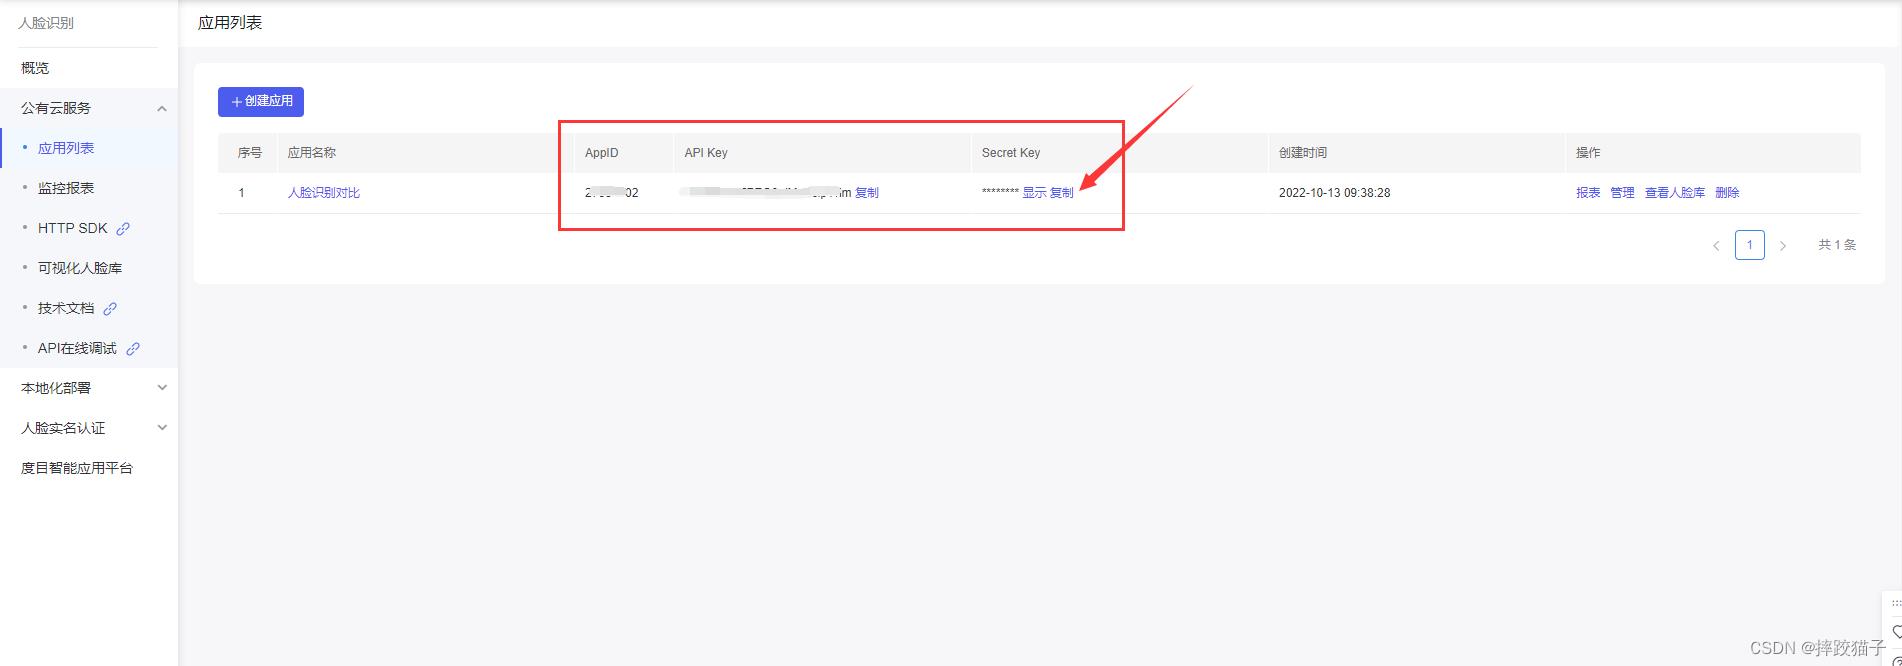
- 填写表单所需的各项信息创建应用。

- 创建完毕后回到应用列表,将API Key 以及Serect Key复制出来,后面我们需要通过这些凭证来获取Token。

实现语音转文字
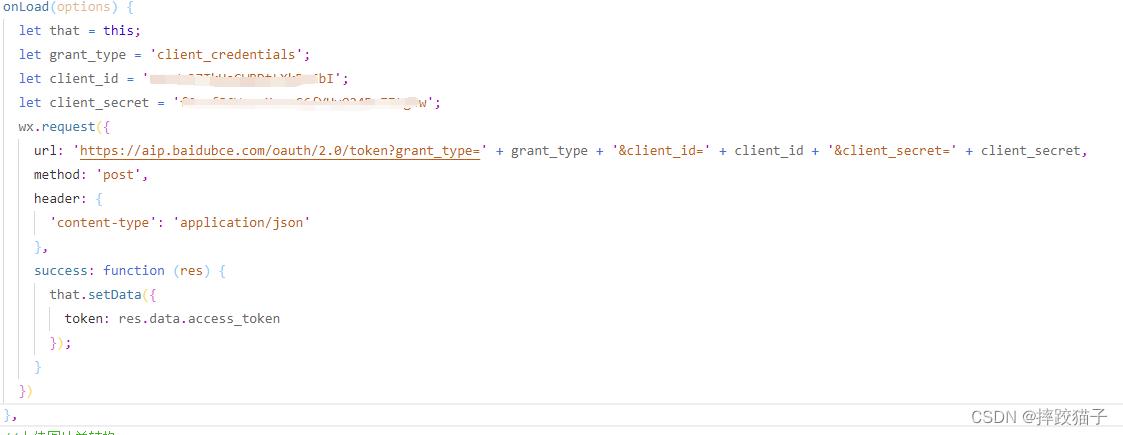
- 回到小程序,在JS文件中的onLoad函数中请求获取Token的接口,这时候就需要用到我们刚才所申请的ApiKey等信息了。
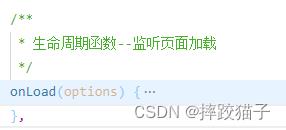
/**
 * 生命周期函数--监听页面加载
   */
  onLoad(options)
    let that = this;
    let ApiKey='这里填你所申请的ApiKey';
    let SecretKey='这里填你所申请的SecretKey';
    wx.request(
      url: 'https://aip.baidubce.com/oauth/2.0/token?grant_type=client_credentials&client_id=' + ApiKey+'&client_secret='+SecretKey,
      method: 'POST',
      success: function (res)
        that.setData(
          AccessToken:res.data.access_token
        );

    );
  ,
- 编译程序,检查接口是否有正常返回,下图所标记的字段就是我们所需要的token了,它的有效期为30天,记得要定期且及时更新。

- 拼接参数并调用接口,我们这里先使用JSON的方式上传,因为小程序内转换raw有些麻烦;如果请求失败,可以先看一下本地设置中是否开启不校验合法域名。


let data =
    "format":"pcm",
    "rate":16000,
    "dev_pid":1537,
    "channel":1,
    "token":xxx,
    "cuid":"baidu_workshop",
    "len":4096,
    "speech":'这里放你存放的mp3文件且转换为base格式', // xxx为 base64(FILE_CONTENT)
;
      wx.request(
        url: 'http://vop.baidu.com/server_api',
        method: 'post',
        Content-Type:'application/json',
        success: function (res)
         	console.log(res);

      );

- 将接口返回的数据进行打印输出,result字段就是语音转换后的结果了。
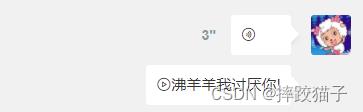
"corpus_no":"6433214037620997779","err_msg":"success.","err_no":0,"result":["沸羊羊我讨厌你,"],"sn":"371191073711497849365"
- 在wxml界面语音框增加事件,绑定上述语音转文字的方法,将转换结果进行显示;最终结果如下图,大家测试的时候尽量用普通话,这样结果会相对来说准确一些。
以上是关于微信小程序|基于小程序实现发送语音消息及转文字的主要内容,如果未能解决你的问题,请参考以下文章