TensorFlow-windowskeras接口——ImageDataGenerator裁剪
Posted 风翼冰舟
tags:
篇首语:本文由小常识网(cha138.com)小编为大家整理,主要介绍了TensorFlow-windowskeras接口——ImageDataGenerator裁剪相关的知识,希望对你有一定的参考价值。
前言
Keras中有一个图像数据处理器ImageDataGenerator,能够很方便地进行数据增强,并且从文件中批量加载图片,避免数据集过大时,一下子加载进内存会崩掉。但是从官方文档发现,并没有一个比较重要的图像增强方式:随机裁剪,本博客就是记录一下如何在对ImageDataGenerator中生成的batch做图像裁剪
国际惯例,参考博客:
Keras 在fit_generator训练方式中加入图像random_crop
Extending Keras’ ImageDataGenerator to Support Random Cropping
how to use fit_generator with multiple image inputs
第二个博客比较全,第三个博客只介绍了分类数据的增强,如果是图像分割或者超分辨率,输出仍是一张图像,所以涉及到对image和mask进行同步增强
代码
先介绍一下数据集目录结构:
在test文件夹下,分别有GT和NGT两个文件夹,每个文件夹存储的都是bmp图像文件
其次需要注意,从ImageDataGenerator中取数据用的是next(generator)函数
-
载入相关包
from keras_preprocessing.image import ImageDataGenerator import matplotlib.pyplot as plt import numpy as np -
先使用自带的
ImageDataGenerator配合flow_from_director读取数据
创建生成器train_img_datagen=ImageDataGenerator()#各种预处理 train_mask_datagen=ImageDataGenerator()#各种预处理读取文件
seed=2 #图像会随机打乱即shuffle,但是输入和输出的打乱顺序必须一样
batch_size=2
target_size=(1080,1920)
train_img_gen=train_img_datagen.flow_from_directory('./test',classes=['NGT'],
                                                    class_mode=None,
                                                    batch_size=batch_size,
                                                    target_size=target_size,
                                                    shuffle=True,
                                                    seed=seed,
                                                    interpolation='bicubic')
train_mask_gen=train_img_datagen.flow_from_directory('./test',
                                                     classes=['GT'],
                                                     class_mode=None,
                                                     batch_size=batch_size,
                                                     target_size=target_size,
                                                     shuffle=True,
                                                     seed=seed,
                                                     interpolation='bicubic')
封装打包
train_generator=zip(train_img_gen,train_mask_gen) -
定义裁剪器,裁剪图像和对应的mask:
def crop_generator(batch_gen,crop_size=(270,480)): while True: batch_x,batch_y=next(batch_gen) crops_img=np.zeros((batch_x.shape[0],crop_size[0],crop_size[1],3)) crops_mask=np.zeros((batch_y.shape[0],crop_size[0],crop_size[1],3)) height,width=batch_x.shape[1],batch_x.shape[2] for i in range(batch_x.shape[0]): #裁剪图像 x=np.random.randint(0,height-crop_size[0]+1) y=np.random.randint(0,width-crop_size[1]+1) crops_img[i]=batch_x[i,x:x+crop_size[0],y:y+crop_size[1]] crops_mask[i]=batch_y[i,x:x+crop_size[0],y:y+crop_size[1]] yield (crops_img,crops_mask) -
使用裁剪器对
Generator进行裁剪train_crops=crop_generator(train_generator)
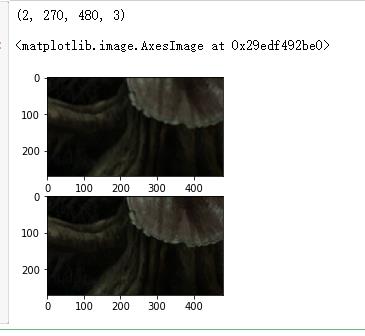
可视化:
img,mask=next(train_crops)
print(img.shape)
plt.subplot(2,1,1)
plt.imshow(img[0]/255)
plt.subplot(2,1,2)
plt.imshow(mask[0]/255)

后记
记住要用while(True)死循环,并且yield在while循环内部,和for循环外部,代表每个批次
代码:
链接:https://pan.baidu.com/s/1UNZLke5kygBFHJ8iR8wV2A
提取码:e51e
以上是关于TensorFlow-windowskeras接口——ImageDataGenerator裁剪的主要内容,如果未能解决你的问题,请参考以下文章