Android--View自定义-折叠
Posted time_iter
tags:
篇首语:本文由小常识网(cha138.com)小编为大家整理,主要介绍了Android--View自定义-折叠相关的知识,希望对你有一定的参考价值。
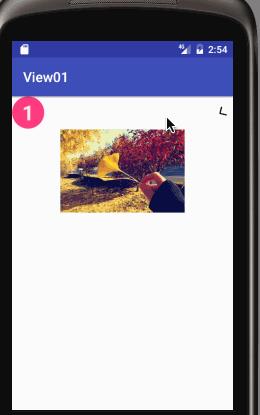
一:效果描述:
1-:点击title部分,展开布局;
2-:点击title部分,隐藏布局;
3-:布局的隐藏与展示都是一个渐变,title右边的图片切换方向;

二:需求分析:
1-:控制由左边的数字,左边的文字,右边的图片以及隐藏布局中的组件组成;
2-:点击标题,控制布局,进一步隐藏布局里面的控件显示或者隐藏;
3-:布局的显示隐藏伴随右边图片箭头方向
三:功能实现思路:
1-:提供六个控件:左边的数字,左边的文字,右边的图案,title总布局,隐藏的布局;
2-:提供设置隐藏布局的方法, 并对布局宽高进行设置,需要测量;
3-:布局隐藏显示动画应与右边图片箭头方向保持一致<时间一致>;
四:自定义view的布局:
1-:main_view.xml:
<?xml version="1.0" encoding="utf-8"?>
<LinearLayout xmlns:android="http://schemas.android.com/apk/res/android"
    android:layout_width="match_parent"
    android:layout_height="wrap_content"
    android:background="#ffffff"
    android:orientation="vertical">


    <RelativeLayout
        android:id="@+id/title_layout"
        android:layout_width="match_parent"
        android:layout_height="wrap_content">

        <TextView
            android:id="@+id/layout_number"
            android:layout_width="70px"
            android:layout_height="70px"
            android:gravity="center"
            android:layout_centerVertical="true"
            android:background="@drawable/tv_color"
            android:clickable="false"
            android:text="1"
            android:textStyle="bold"
            android:textColor="#EBEFEC"
            android:textSize="35px" />

        <TextView
            android:id="@+id/layout_title"
            android:layout_width="match_parent"
            android:layout_height="wrap_content"
            android:layout_centerVertical="true"
            android:layout_toRightOf="@id/layout_number"
            android:layout_marginLeft="30px"
            android:clickable="false"
            android:textColor="#1d953f"
            android:textSize="46px" />


        <ImageView
            android:src="@mipmap/arrow_up"
            android:id="@+id/layout_image"
            android:layout_width="48px"
            android:layout_height="27px"
            android:layout_alignParentRight="true"
            android:layout_centerVertical="true"
            android:clickable="false"
            android:scaleType="fitCenter" />
    </RelativeLayout>

    <View
        android:layout_width="match_parent"
        android:layout_height="2px"
        android:layout_below="@id/title_layout"
        android:background="#E7E7EF"
        android:clickable="false"
        />

    <RelativeLayout
        android:id="@+id/content_layout"
        android:visibility="gone"
        android:layout_width="wrap_content"
        android:layout_height="wrap_content">
    </RelativeLayout>

</LinearLayout>
五:自定义View,获取属性,自定义一些方法:
1-:布局的显示与隐藏是通过控制Visibility,右上角角图片,是通过控制动画进行旋转实现:
2-:代码具体实现:
public class CollapseView extends LinearLayout
     Context mcontext;
     TextView  numberTv,titleTv;
     ImageView titleImg;
     Drawable titleBmp;

     RelativeLayout titleLayout,contentLayout;

    long duration=300l;

    int parentWidthMeasureSpec;
    int parentHeightMeasureSpec;
    float titlenumberSize,titlenameSize;

    public CollapseView(Context context)
        super(context);


    public CollapseView(Context context, AttributeSet attrs)
        super(context, attrs);
        mcontext=context;
        LayoutInflater.from(mcontext).inflate(R.layout.view_layout,this);
        initType(mcontext,attrs);
        initView();


    public void initType(Context context, AttributeSet attrs)
        TypedArray typedArray=context.obtainStyledAttributes(attrs,R.styleable.CollapseView,0,0);
        titleBmp=typedArray.getDrawable(R.styleable.CollapseView_titleimg);
        titlenumberSize=typedArray.getDimensionPixelSize(R.styleable.CollapseView_titlenumberSize, (int) TypedValue.applyDimension(TypedValue.COMPLEX_UNIT_SP,16,getResources().getDisplayMetrics()));
        titlenameSize=typedArray.getDimensionPixelSize(R.styleable.CollapseView_titlenameSize, (int) TypedValue.applyDimension(TypedValue.COMPLEX_UNIT_SP,16,getResources().getDisplayMetrics()));
        typedArray.recycle();


    public void initView()
        numberTv=(TextView) findViewById(R.id.layout_number);
        titleTv=(TextView) findViewById(R.id.layout_title);
        titleImg=(ImageView) findViewById(R.id.layout_image);
        titleLayout=(RelativeLayout) findViewById(R.id.title_layout);
        contentLayout=(RelativeLayout) findViewById(R.id.content_layout);
        if (titlenameSize!=0)
            titleTv.setTextSize(titlenumberSize);


        if (titlenumberSize!=0)
            numberTv.setTextSize(titlenumberSize);


        if (titleBmp!=null)
            titleImg.setImageDrawable(titleBmp);


        titleLayout.setOnClickListener(new OnClickListener()
            @Override
            public void onClick(View v)
                rotateArrow();

        );

        collapse(contentLayout);


    /**
     * 设置数字
     *
     */
    public void setNumber(String number)
        if(!TextUtils.isEmpty(number))
            titleTv.setText(number);


    /**
     * 设置标题
     *
     */
    public void setTitle(String title)
        if(!TextUtils.isEmpty(title))
            titleTv.setText(title);


    /**
     * 实际上在使用因此布局的时候仅需要传入布局的ID
     */
    public void setContent(int resID)
        View view=LayoutInflater.from(mcontext).inflate(resID,null);
        RelativeLayout.LayoutParams layoutParams=
                new RelativeLayout.LayoutParams(LayoutParams.MATCH_PARENT, LinearLayout.LayoutParams.WRAP_CONTENT);
        view.setLayoutParams(layoutParams);
        contentLayout.addView(view);


    @Override
    protected void onMeasure(int widthMeasureSpec, int heightMeasureSpec)
        super.onMeasure(widthMeasureSpec, heightMeasureSpec);
        parentWidthMeasureSpec=widthMeasureSpec;
        parentHeightMeasureSpec=heightMeasureSpec;


     //右上角图标旋转
    public void rotateArrow()
        int degree=0;
        if (titleImg.getTag()==null||titleImg.getTag().equals(true))
            titleImg.setTag(false);
            degree=-180;
            expand(contentLayout);
        else
            degree=0;
            titleImg.setTag(true);
            collapse(contentLayout);

        titleImg.animate().setDuration(duration).rotation(degree).start();


    //展开
    private void expand(final View view)
        WindowManager  wm=(WindowManager)mcontext.getSystemService(Context.WINDOW_SERVICE);
        DisplayMetrics displayMetrics=new DisplayMetrics();
        wm.getDefaultDisplay().getMetrics(displayMetrics);
        view.measure(parentWidthMeasureSpec,parentHeightMeasureSpec);
        final int measuredHeight = view.getMeasuredHeight();
        view.setVisibility(View.VISIBLE);

        Animation animation=new Animation()
            @Override
            protected void applyTransformation(float interpolatedTime, Transformation t)
                if (interpolatedTime==1)
                    view.getLayoutParams().height=measuredHeight;
                else
                    view.getLayoutParams().height=(int) (measuredHeight*interpolatedTime);

                view.requestLayout();


            @Override
            public boolean willChangeBounds()
                return true;

        ;
        animation.setDuration(duration);
        startAnimation(animation);


   //折叠
    public void collapse(final View view)
       final   int measuredHeight=view.getMeasuredHeight();

        Animation animation=new Animation()
            @Override
            protected void applyTransformation(float interpolatedTime, Transformation t)

                if (interpolatedTime==1)
                    view.setVisibility(View.GONE);
                else
                    view.getLayoutParams().height = measuredHeight - (int) (measuredHeight * interpolatedTime);
                    view.requestLayout();


        ;
        animation.setDuration(duration);
        startAnimation(animation);
3-:部门代码解析:
-1:initType()获取自定义的属性,进行初始化,可以对自定义View的组件属性进行控制;
-2:initView()获取自定义View使用到组件,进行初始化;
-3:setNumber()可以对左边的TextView数字进行,默认为1;
-4: setTitle()可以对中间的TextView设置文字;
-5: setContent()设置显示隐藏的布局,只关注布局id,不关注布局包含哪些组件;
-6: expand()实现隐藏布局的展示,其中,需要知道,当一个view的Visibility状态为GONE时,系统在measure阶段不会去进行测量,所以,当显示布局的时候无法得知到布局的宽和高,但是,可以得知,在view的measure阶段,系统会测量宽高,而此时,可以通过getMeasuredWidth()getMeasuredHeight()
就可以获取到测量的宽高。
-7:通过传入隐藏布局的id,把布局转化为view,使用addview()可以把布局添加到其他组件上。
-8:可以通过手动测绘的方式对布局设置宽高:
则:
WindowManager  wm=(WindowManager)mcontext.getSystemService(Context.WINDOW_SERVICE);
DisplayMetrics displayMetrics=new DisplayMetrics();
wm.getDefaultDisplay().getMetrics(displayMetrics);
view.measure(parentWidthMeasureSpec,parentHeightMeasureSpec);
-9:布局展开,借助动画实现:
applyTransformation(float interpolatedTime, Transformation t)animation的interpolatedTime值在一定的时间内可以从0变化到1,所以,可以使用它进行布局高度的渐次展开扩大:
view.getLayoutParams().height=(int) (measuredHeight*interpolatedTime);measuredHeight * interpolatedTime表示了content的高从0到measuredHeight的逐次变化,在这个变化的过程中不断调用
view.requestLayout();不断刷新页面,就可以达到效果;
-10:
requestLayout View重新调用一次layout过程;
总结:技术关键点:手动测量view 的方式来获取view的宽高。
另附:
左上角TextView的背景色的xml:
1-:tv_color:
<?xml version="1.0" encoding="utf-8"?>
<shape xmlns:android="http://schemas.android.com/apk/res/android"
    android:shape="oval"
    android:useLevel="false">

    <solid android:color="@color/colorAccent"/>
    <padding
        android:left="2dp"
        android:top="1dp"
        android:right="2dp"
        android:bottom="1dp"
        />

    <solid android:color="@color/colorAccent"/>
    <stroke android:width="1dp" android:color="@color/colorAccent"/>
    <size android:width="15dp"
        android:height="15dp"/>

</shape>
2-:自定义属性xml:
<resources>
    <declare-styleable name="CollapseView">

        <attr name="titlenumberSize" format="dimension"/>
        <attr name="titlenameSize" format="dimension"/>
        <attr name="titleimg"  format="reference"/>
    </declare-styleable>
</resources>
3-:使用:
<?xml version="1.0" encoding="utf-8"?>
<LinearLayout xmlns:android="http://schemas.android.com/apk/res/android"
    xmlns:tools="http://schemas.android.com/tools"
    android:layout_width="match_parent"
    android:layout_height="match_parent"
    android:orientation="vertical"
    xmlns:app="http://schemas.android.com/apk/res-auto"
    tools:context="com.example.erhu.view01.MainActivity">

    <com.example.erhu.view01.CollapseView
    android:id="@+id/mian"
        app:titlenameSize="20sp"
        app:titlenumberSize="20sp"
    android:orientation="vertical"
    android:layout_width="wrap_content"
    android:layout_height="wrap_content">

</com.example.erhu.view01.CollapseView>

</LinearLayout>
4-:使用时,需要使用setcontent设置content布局id:
collapseView=(CollapseView)findViewById(R.id.mian);
collapseView.setContent(R.layout.mian_view);
以上是关于Android--View自定义-折叠的主要内容,如果未能解决你的问题,请参考以下文章