基于 Amazon Amplify 构建自己的首个 iOS 应用程序
Posted Data-Mining
tags:
篇首语:本文由小常识网(cha138.com)小编为大家整理,主要介绍了基于 Amazon Amplify 构建自己的首个 iOS 应用程序相关的知识,希望对你有一定的参考价值。
目录
摘要
Amazon Amplify 是一组位于云端的工具和无服务器服务。本文的主要是介绍如何基于 Amazon Amplify 构建自己的首个 ios 应用程序。首先,我们将构建一个简单的 iOS 应用程序。然后,使用 Amplify 命令行接口 (Amplify CLI) 初始化一个本地应用程序,同时添加用户身份验证、添加GraphQL API 和数据库以存储我们的数据,最后,更新我们的应用程序来存储图像文件。
正文
Amazon Amplify 是一组专门构建的工具和功能,使前端 Web 和移动开发人员可以快速、轻松地在 Amazon 上构建全堆栈应用程序,随着使用案例的发展,可以灵活地利用广泛的 Amazon 服务。借助 Amplify,您可以在几分钟内配置 web 或移动应用程序后端并连接应用程序,可视化地构建 web 前端 UI,并在 Amazon 控制台外轻松管理应用程序内容。无需云专业知识,就可更快发布和扩展。
现在很多技术方案都在上云,仿佛一切都可以云原生化。那么 iOS 应用程序开发是不是也可以在云端开发呢?今天就有机会体验了一把使用亚马逊的 Amazon Amplify 创建了一个 iOS 应用程序,实现了添加用户身份验证、添加 GraphQL API 和操作数据库等功能。接下来,我们就详细了解一下整个构建过程。
一、创建 iOS 应用程序
Amazon Amplify 提供基于 Git 的工作流,用于创建、管理、集成和部署 Web 和移动应用程序的无服务器后端。Amplify CLI 提供了一个简单的基于文本的用户界面,用于预置和管理后端服务,比如用于应用程序的用户身份验证或 REST 或 GraphQL API。使用 Amplify 库可以轻松地将这些后端服务与应用程序中的几行代码集成。
首先,我们创建一个新的 iOS 应用程序来记录旅行备注。其中,备注由标题、描述和图片组成。
1.1 创建 iOS 应用程序
启动 Xcode 并选择创建新的 Xcode 项目,具体操作如下图所示:

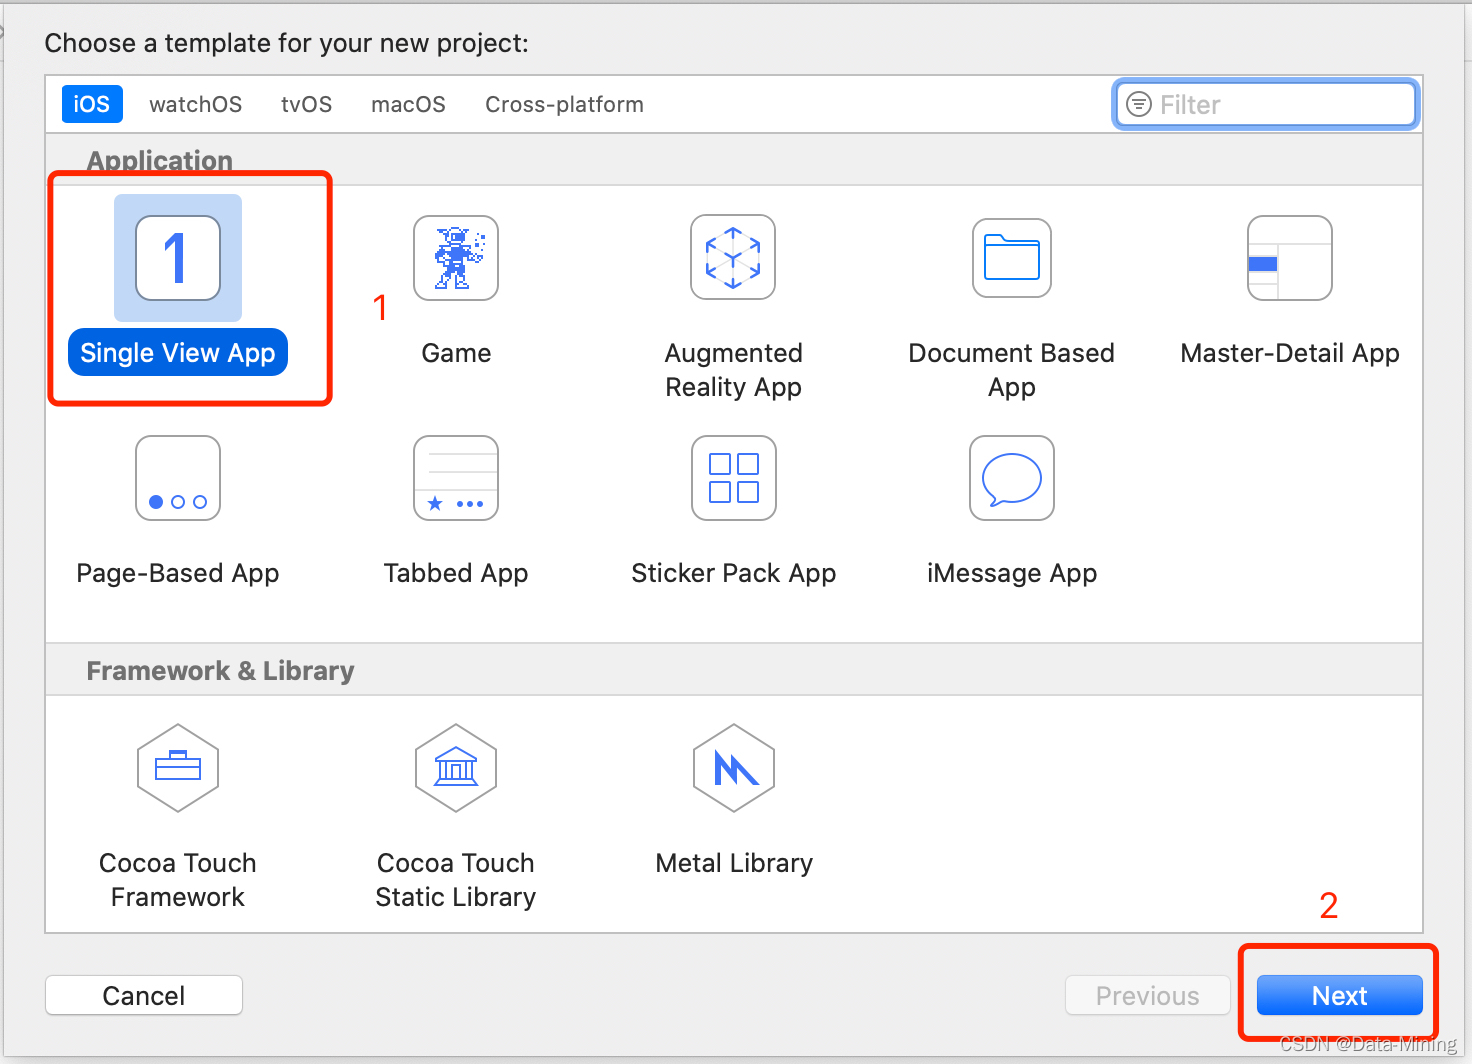
在 iOS 应用程序下,选择“单一视图应用程序”,然后单击“下一步”,具体操作如下图所示:
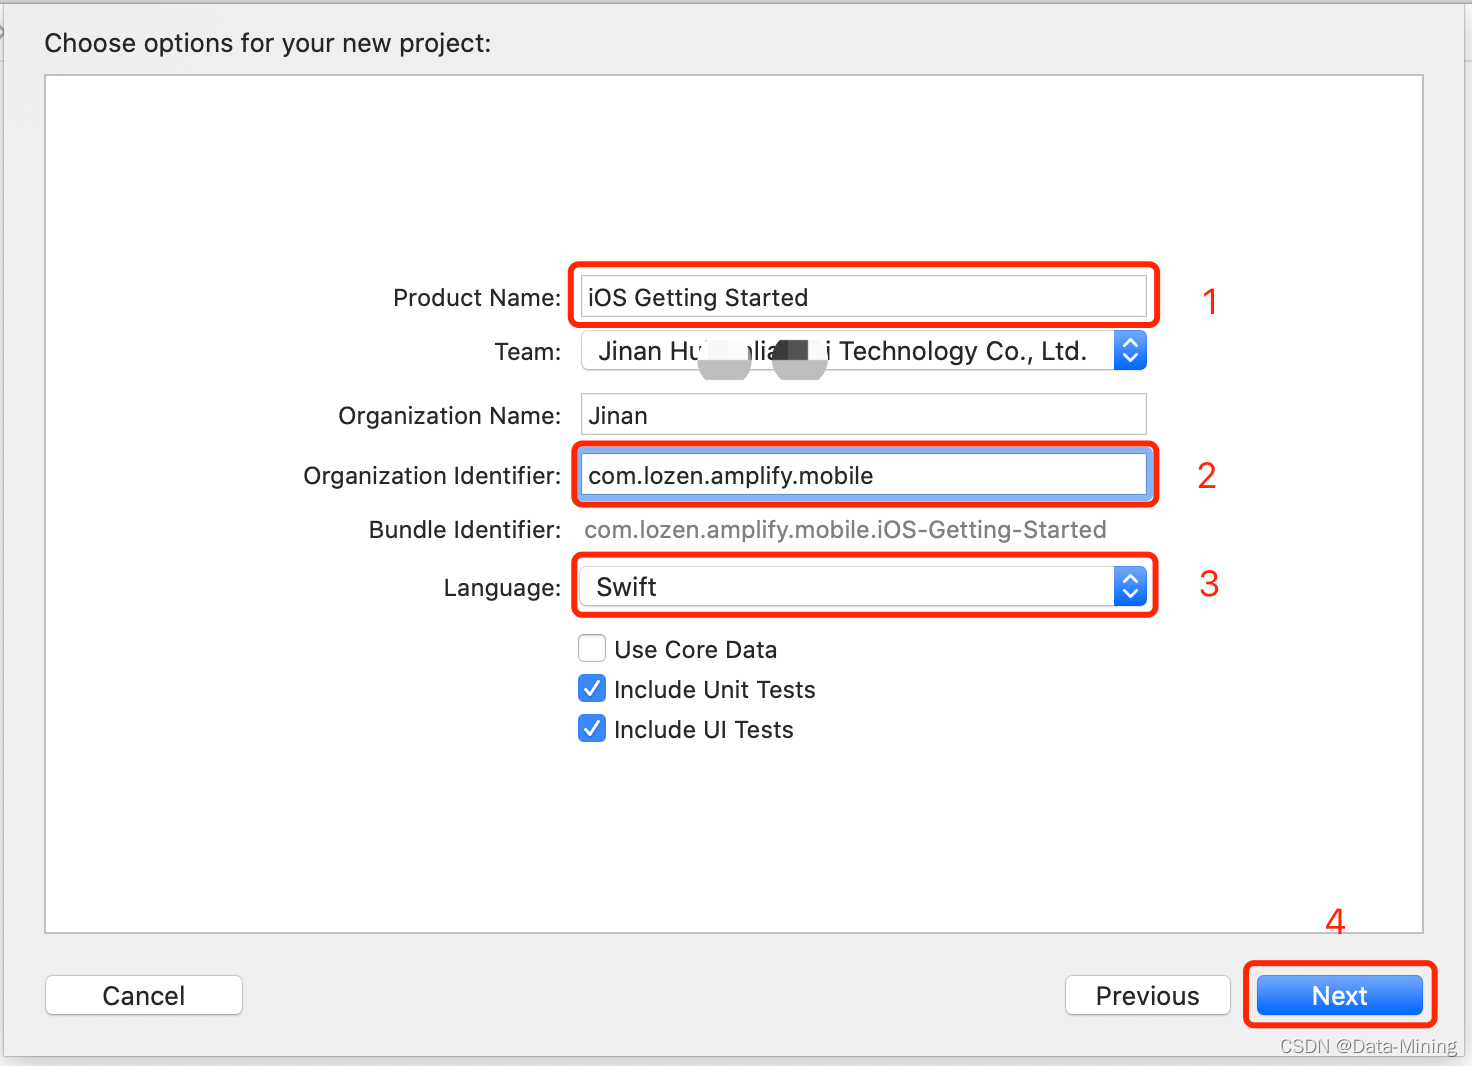
键入项目的名称,例如 iOS Getting Started。确保将语言设置为“Swift”,如果可以设置用户界面的话,那就使用“SwiftUI”。其实,SwiftUI 是一种通过 Swift 编程语言在所有 Apple 平台上构建用户界面的简单方法。但是,本文使用的 XCode 版本没有该设置项,因此可以跳过,单击“下一步”,具体如下图所示:
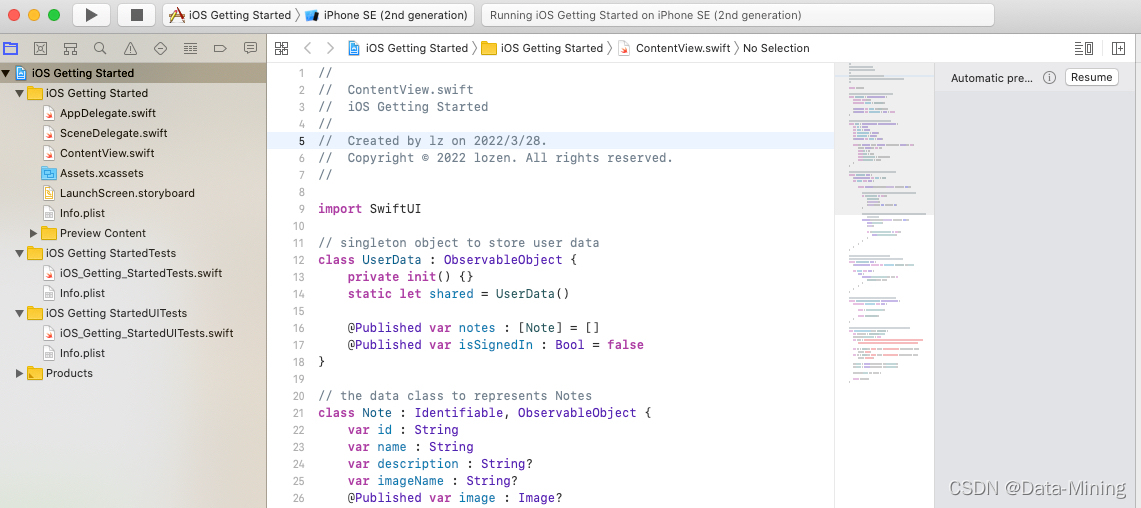
最后,选择一个保存目录,然后单击“创建”,以创建项目,呈现效果如下图所示:

1.2 更新主视图
从 Xcode 左侧的文件列表中,打开 ContentView.swift,然后将代码替换为以下内容:
//
// ContentView.swift
// iOS Getting Started
//
// Created by lz on 2022/3/28.
// Copyright © 2022 lozen. All rights reserved.
//

import SwiftUI

// singleton object to store user data
class UserData : ObservableObject
  private init()
  static let shared = UserData()

  @Published var notes : [Note] = []
  @Published var isSignedIn : Bool = false


// the data class to represents Notes
class Note : Identifiable, ObservableObject
  var id : String
  var name : String
  var description : String?
  var imageName : String?
  @Published var image : Image?

  init(id: String, name: String, description: String? = nil, image: String? = nil )
    self.id = id
    self.name = name
    self.description = description
    self.imageName = image


// a view to represent a single list item
struct ListRow: View
  @ObservedObject var note : Note
  var body: some View

    return HStack(alignment: .center, spacing: 5.0)

      // if there is an image, display it on the left
      if (note.image != nil)
        note.image!
        .resizable()
        .frame(width: 50, height: 50)


      // the right part is a vertical stack with the title and description
      VStack(alignment: .leading, spacing: 5.0)
        Text(note.name)
        .bold()

        if ((note.description) != nil)
          Text(note.description!)


// this is the main view of our app,
// it is made of a Table with one line per Note
struct ContentView: View
  @ObservedObject private var userData: UserData = .shared

  var body: some View
    List
      ForEach(userData.notes)  note in
        ListRow(note: note)


// this is use to preview the UI in Xcode
struct ContentView_Previews: PreviewProvider
  static var previews: some View

    let _ = prepareTestData()

    return ContentView()


// this is a test data set to preview the UI in Xcode
func prepareTestData() -> UserData
  let userData = UserData.shared
  userData.isSignedIn = true
  let desc = "this is a very long description that should fit on multiiple lines.\\nit even has a line break\\nor two."

  let n1 = Note(id: "01", name: "Hello world", description: desc, image: "mic")
  let n2 = Note(id: "02", name: "A new note", description: desc, image: "phone")

  n1.image = Image(systemName: n1.imageName!)
  n2.image = Image(systemName: n2.imageName!)

  userData.notes = [ n1, n2 ]

  return userData
上述代码都完成了如下工作:
- 创建了一个备注类来存储备注的数据。针对 ImageName 和 Image 使用了两个不同的属性。稍后,我们将在“添加存储”部分中处理图像。
- 创建了一个 UserData 类来保存特定用户的数据,在此阶段,只保存一个备注对象列表。
- 主视图 ContentView 包含 ListRow 的列表
- 每行都由 ListRow 呈现:包含图像和文本的水平堆栈。文本垂直堆栈备注名称和备注说明,以粗体显示。
- 最后,调整了 ContentView_Previews 并添加了 prepareTestData() 以允许在画布中进行预览渲染。
1.3 构建和测试
检查画布以验证布局是否满足需要。如果看不到画布,可以使用编辑器菜单启用画布,然后单击画布。您可能还需要单击画布中的恢复按钮以生成布局预览。
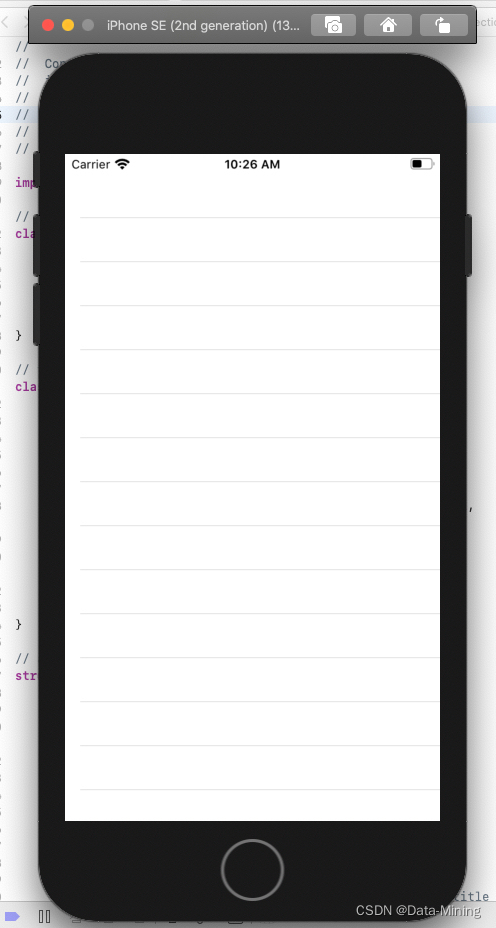
请注意,预览数据是在代码中生成的,数据不会在运行时显示。如果一切正常,请在模拟器中构建并启动应用程序。单击产品菜单,然后选择运行或键入 。或者,您也可以单击工具栏中的播放 ▶️ 按钮。
一段时间后,应用程序会在 iOS 模拟器中启动,初始屏幕为空。 预览数据不会在运行时呈现,它们仅用于 Xcode 内的预览,具体效果如下图所示:
但是,这个过程中有个小插曲,由于我本机的XCode版本过低,导致代码编译不同,后来自己升级到11.5才解决。

二、初始化 Amplify
上一步,我们已创建一个 iOS 应用程序,接下来继续开发并添加新功能。在应用程序中使用 Amazon Amplify,必须安装 Amplify 命令行,初始化 Amplify 项目目录,将项目配置为使用 Amplify 库,并在运行时初始化 Amplify 库。
在正式开始前,我们先介绍两个概念。Amplify CLI – Amplify CLI 可使您直接从您的终端创建、管理和删除 Amazon 服务。Amplify 库 – 您可以使用 Amplify 库通过 Web 应用程序或移动应用程序使用 Amazon 服务。
2.1 安装 Amplify CLI
Amazon Amplify CLI 取决于 Node.js,要安装 Amazon Amplify CLI,请打开一个终端,然后输入以下命令:
## Install Amplify CLI
npm install -g @aws-amplify/cli
## Verify installation and version
amplify --version
##Scanning for plugins...
##Plugin scan successful
##4.27.2
2.2 初始化 Amplify 后端
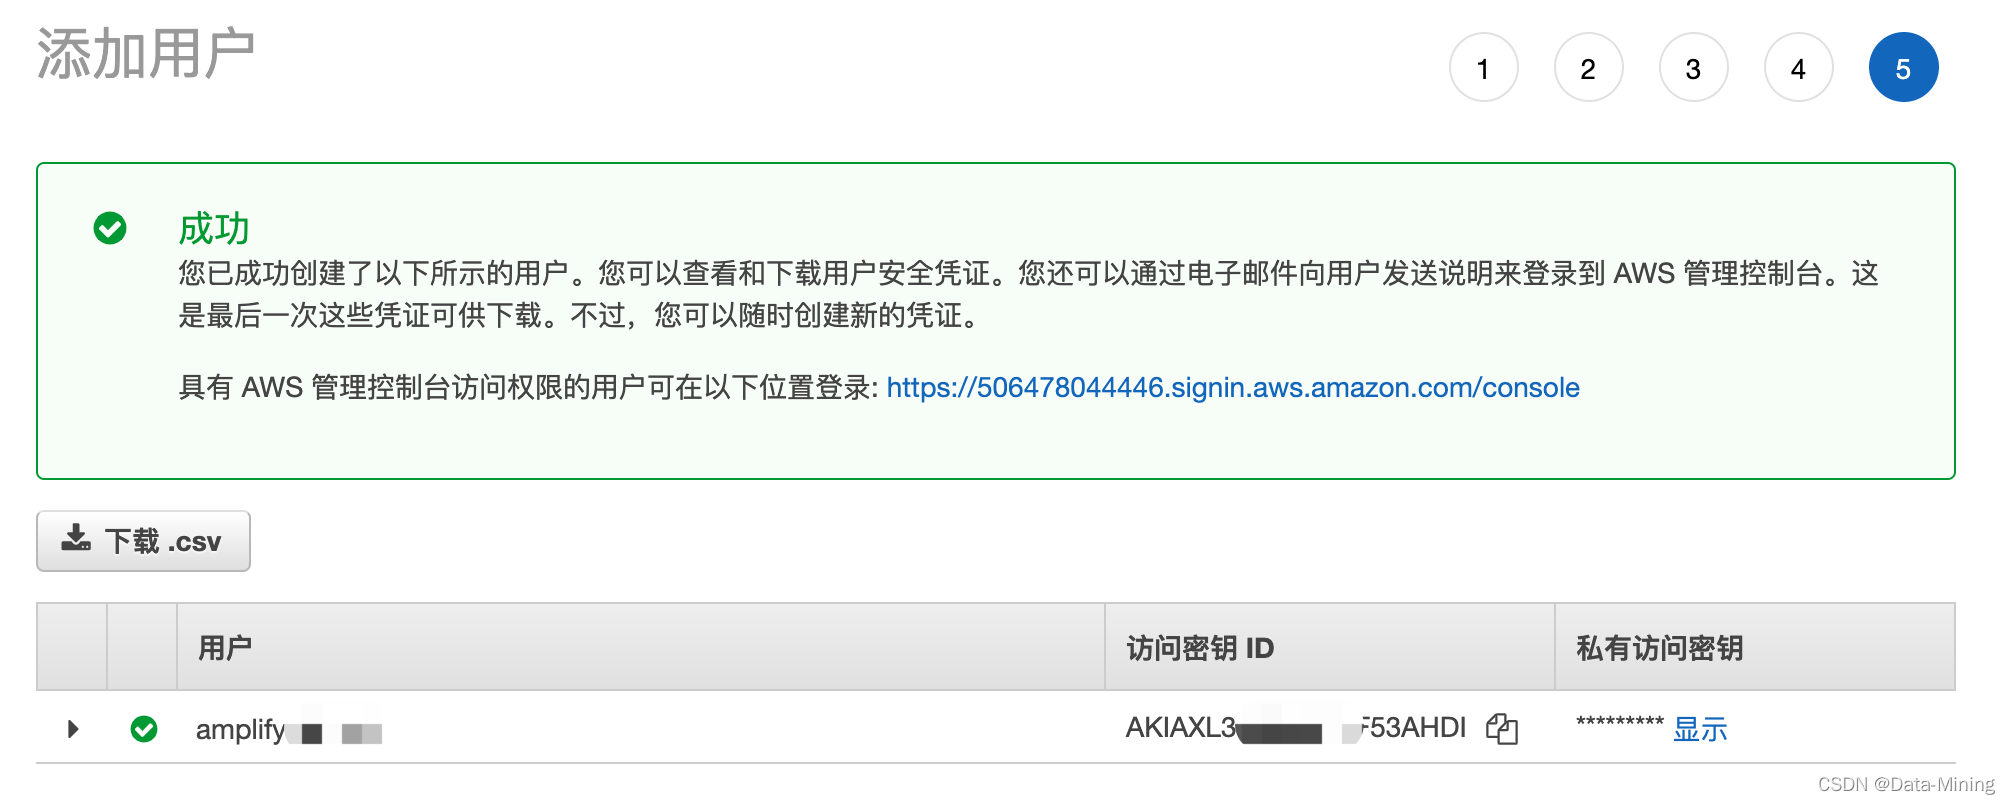
在初始化 Amplify 后端模块之前,我们需要先创建对应的用户信息,在亚马逊服务管理后台添加对应的用户,并添加权限类型,具体如下图所示:

用户名一般会默认生成,也可以自己修改并指定。另外,还要选择访问凭证类型,一种是访问密钥,为 API、CLI、SDK 和其他开发工具启用访问密钥 ID 和私有访问密钥;另一种是密码,启用密码,使得用户可以登录到亚马逊服务管理控制台。
创建好用户后,点击“下一步”,选择“直接附加现有策略”,一直“下一步”,最后会提示创建用户成功。
在执行过程中,可能会遇到如下报错:
⠦ Initializing project in the cloud...An error occurred when creating the CloudFormation stack
✖ Root stack creation failed
init failed
OptInRequired: The AWS Access Key Id needs a subscription for the service
at Request.extractError (/usr/local/lib/node_modules/@aws-amplify/cli/node_modules/aws-sdk/lib/protocol/query.js:50:29)
at Request.callListeners (/usr/local/lib/node_modules/@aws-amplify/cli/node_modules/aws-sdk/lib/sequential_executor.js:106:20)
at Request.emit (/usr/local/lib/node_modules/@aws-amplify/cli/node_modules/aws-sdk/lib/sequential_executor.js:78:10)
at Request.emit (/usr/local/lib/node_modules/@aws-amplify/cli/node_modules/aws-sdk/lib/request.js:686:14)
at Request.transition (/usr/local/lib/node_modules/@aws-amplify/cli/node_modules/aws-sdk/lib/request.js:22:10)
at AcceptorStateMachine.runTo (/usr/local/lib/node_modules/@aws-amplify/cli/node_modules/aws-sdk/lib/state_machine.js:14:12)
at /usr/local/lib/node_modules/@aws-amplify/cli/node_modules/aws-sdk/lib/state_machine.js:26:10
at Request.<anonymous> (/usr/local/lib/node_modules/@aws-amplify/cli/node_modules/aws-sdk/lib/request.js:38:9)
at Request.<anonymous> (/usr/local/lib/node_modules/@aws-amplify/cli/node_modules/aws-sdk/lib/request.js:688:12)
at Request.callListeners (/usr/local/lib/node_modules/@aws-amplify/cli/node_modules/aws-sdk/lib/sequential_executor.js:116:18)
code: 'OptInRequired',
time: 2022-03-28T16:20:47.649Z,
requestId: '39858f24-3c22-4eaa-9a0e-398095a8ebc9',
statusCode: 403,
retryable: false,
retryDelay: 93.04199180846567
很可能的原因就是信用卡信息错误,最常见的就是信用卡有效期填写有误,而我就是这个问题。
接下来,我们开始正式创建后端基本结构,首先需要初始化 Amplify 项目目录并创建云后端。打开一个终端并将目录更改为第一步中的 iOS 项目。例如,如果您在文件夹 ~/job/ios/ 中创建项目,则可以输入:
cd ~/job/ios/iOS Getting Started
验证一下是否在正确的目录中,它应该如下所示:
liuzhen-40:iOS Getting Started lz$ ls -al
total 16
drwxr-xr-x 7 lz staff 224 Mar 28 11:06 .
drwxr-xr-x 7 lz staff 224 Mar 28 10:05 ..
-rw-r--r--@ 1 lz staff 6148 Mar 28 22:09 .DS_Store
drwxr-xr-x 9 lz staff 288 Mar 28 10:06 iOS Getting Started
drwxr-xr-x@ 5 lz staff 160 Mar 28 10:05 iOS Getting Started.xcodeproj
drwxr-xr-x 4 lz staff 128 Mar 28 10:05 iOS Getting StartedTests
drwxr-xr-x 4 lz staff 128 Mar 28 10:05 iOS Getting StartedUITests
初始化 Amplify 项目结构和配置文件,运行以下命令:
liuzhen-40:iOS Getting Started lz$ amplify init
Note: It is recommended to run this command from the root of your app directory
? Enter a name for the project iOSGettingStarted
? Enter a name for the environment dev
? Choose your default editor: Visual Studio Code
? Choose the type of app that you're building ios
Using default provider awscloudformation
For more information on AWS Profiles, see:
https://docs.aws.amazon.com/cli/latest/userguide/cli-multiple-profiles.html
? Do you want to use an AWS profile? Yes
? Please choose the profile you want to use default
Adding backend environment dev to AWS Amplify Console app: dj56g6ku6ef6p
2.3 将 Amplify 库添加到项目中
在开始此步骤之前,请确保关闭 Xcode。然后命令行进入工程目录,使用 CocoaPods 软件包管理器初始化项目,请执行以下命令:
## Initialize the Amplify Project
pod init
完成此操作后,您应该看到一个名为 Podfile 的新建文件,此文件用于描述我们的项目所依赖的软件包。然后,更新 Podfile 以包含以下 Pod 并更新平台:
# you need at least version 13.0 for this tutorial, more recent versions are valid too
platform :ios,'13.0'
target 'iOS Getting Started' do
# Comment the next line if you don't want to use dynamic frameworks
use_frameworks!
# Pods for getting started
pod 'Amplify', '~> 1.0' # required amplify dependency
pod 'Amplify/Tools', '~> 1.0' # allows to call amplify CLI from within Xcode
end
将 Amplify 库下载并安装到您的项目中,执行如下命令:
pod install --repo-update
完成此操作后,我们会发现生成了一个名为 iOS Getting Started.xcworkspace 的文件。之后,我们就需要使用这个文件,而不是 iOS Getting Started.xcodeproj 文件了。然后,在 Xcode 中打开工作区,并执行如下命令:
xed .
2.4 在运行时初始化 Amplify
在运行时,Amplify 库需要由 CLI 生成的 Amplify 配置文件。将 Amplify 配置文件添加到项目中,使用 Finder 在项目目录的根目录下找到 awsconfiguration.json 和 amplifyconfiguration.json,并将其拖放到 Xcode 项目中。
接下来,新建一个 swift 文本文件 Backend.swift,将其添加到我们的 Xcode 项目 (CTRL-N) 并添加以下代码:
import UIKit
import Amplify

class Backend
    static let shared = Backend()
    static func initialize() -> Backend
        return .shared

    private init()
      // initialize amplify
      do
        try Amplify.configure()
        print("Initialized Amplify");
       catch
        print("Could not initialize Amplify: \\(error)")
应用程序启动后,初始化单例 Backend 对象。打开 AppDelegate.swift 文件并在 application(:didFinishLaunchingWithOptions:) 方法中添加 Backend.initialize();,如下所示:
// inside the AppDelegate.swift file
func application(_ application: UIApplication, didFinishLaunchingWithOptions launchOptions: [UIApplication.LaunchOptionsKey: Any]?) -> Bool

    // initialize Amplify
    let _ = Backend.initialize()

    return true
2.5 验证设置
要验证一切是否都按预期运行,构建项目,单击 Product 菜单,然后选择 Build,或按 ⌘B。不出现错误即可。
《基于 Amazon Amplify 构建自己的首个 iOS 应用程序(二)》
作者简介:😄大家好,我是 Data-Mining(liuzhen007),是一位典型的音视频技术爱好者,前后就职于传统广电巨头和音视频互联网公司,具有丰富的音视频直播和点播相关经验,对 WebRTC、FFmpeg 和 Electron 有非常深入的了解,😄公众号:玩转音视频。同时也是 CSDN 博客专家、华为云享专家(共创编辑)、InfoQ 签约作者,欢迎关注我分享更多干货!😄
以上是关于基于 Amazon Amplify 构建自己的首个 iOS 应用程序的主要内容,如果未能解决你的问题,请参考以下文章