01 DAPP简单Demo
Posted 杰西啊杰西
tags:
篇首语:本文由小常识网(cha138.com)小编为大家整理,主要介绍了01 DAPP简单Demo相关的知识,希望对你有一定的参考价值。
参考:
https://www.jianshu.com/p/683ea7d62a39
令狐一冲: https://www.bilibili.com/video/BV14z4y1Z7Jd?
文章目录
一、公共环境搭建
1.1 Ubuntu20.04 虚拟机环境
https://zhuanlan.zhihu.com/p/141033713
1.2 Git安装
sudo add-apt-repository ppa:git-core/ppa
sudo apt-get update
sudo apt install git
git --version
二、开发方法一:geth+js
2.1 Geth安装
sudo apt-get install software-properties-common
sudo add-apt-repository -y ppa:ethereum/ethereum
sudo add-apt-repository -y ppa:ethereum/ethereum-dev
sudo apt-get update
sudo apt-get install ethereum
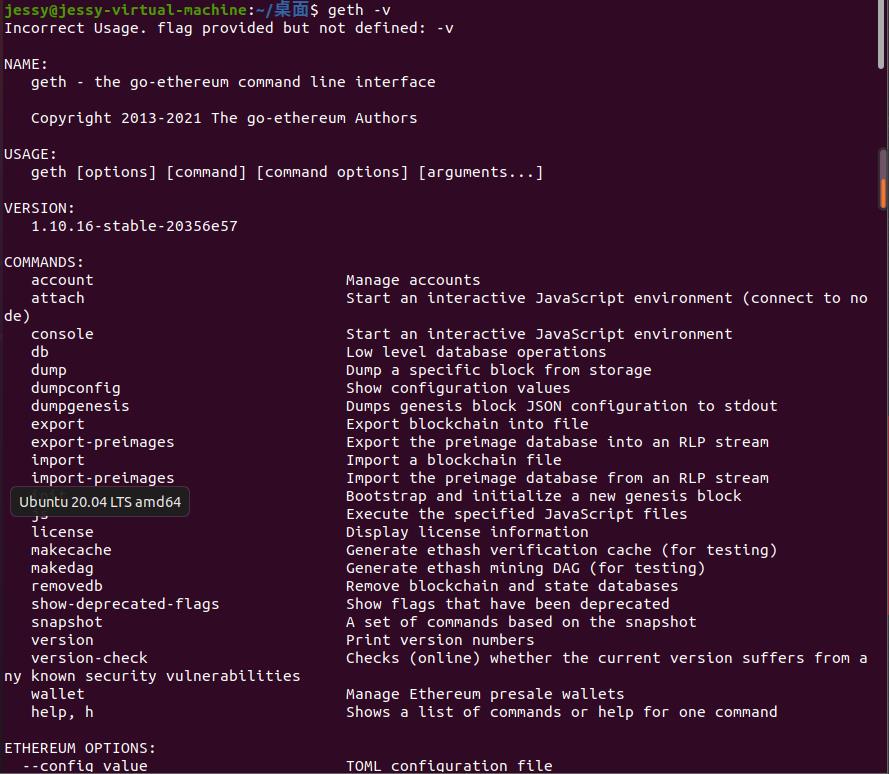
geth help		//查看是否安装成功
2.2 创始区块json
cd ~/private_geth
vim genesis.json
    "nonce": "0x0000000000000042",
    "difficulty": "0x200",
    "mixhash": "0x0000000000000000000000000000000000000000000000000000000000000000",
    "coinbase":"0x0000000000000000000000000000000000000000",
    "timestamp": "0x0",
    "parentHash": "0x0000000000000000000000000000000000000000000000000000000000000000",
    "extraData":"0x",
    "gasLimit": "0x8000000",
    "alloc": ,
    "config":
        "chainId": 6500,
        "homesteadBlock": 0,
| 字段 | 含义 |
|---|---|
| alloc | 可以预置账号以及账号的以太币数量 |
| coinbase | 区块受益者地址,可以设置为已经存在的账户,后面挖出的区块的受益者监视挖出那个区块的账户(矿工) |
| difficulty | 代表当前区块难度等级,这里定义创始区块的难度等级,难度等级越高,挖矿越难,后面生成的区块难度等级根据前一个区块的难度等级和时间戳计算得到 |
| extraData | 一个包含这个区块相关数据的字节数组,任意填写,必须在32位以内 |
| gasLimit | 执行这个事务应该被使用gas的最大值,这个在任何计算被做之前是预付的,并且在这个之后不会增加 |
| nonce | 代表从这个地址发送的事务的数目,或者在关联代码的账户下,则代表这个账户创造的合约数目 |
| mixhash | 由nonce合并,怎么在这个区块上已经执行足够量的计算 |
| parentHash | 上一个区块的header的keccak256算法hash |
| timestamp | 这个区块开始的Unix time()和合理输出 |
2.3 初始化geth
指定生成在chain目录下
geth --datadir "chain" init genesis.json

2.4 启动geth节点
geth --identity "myetherum" --datadir "chain" --http --http.api db,eth,net,web3,personal,miner --networkid 6500 console 2>>chain/geth.log
注意这里的networkid就是genesis.json中的chainId

tips:关于–rpc启动失效:https://blog.csdn.net/claysystem/article/details/121133081
2.5 创建账户
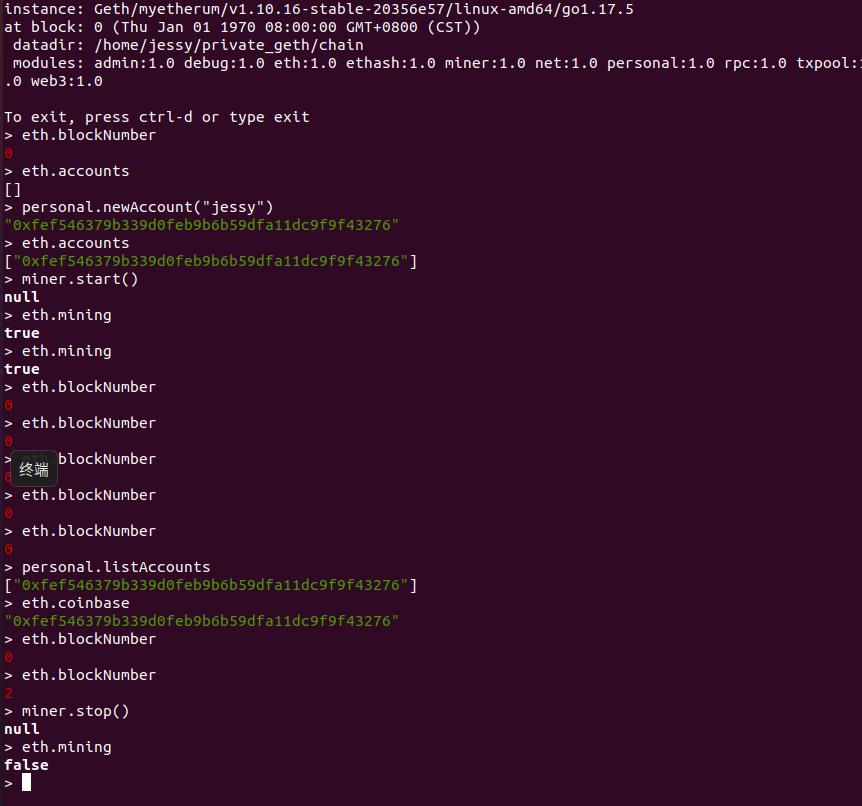
personal.newAccount("jessy")
查看账户
eth.accounts
2.6 挖矿,需要耐心等待一会
开始挖矿
miner.start()
查看挖矿状态
eth.mining
关闭挖矿
miner.stop()
三、开发方法二:Ganache+js
由开发方法一中可以看到挖矿速度实在感人,所以可以使用ganache在内存中模拟区块链,注意在开发时,geth+js(搭建一个私链)和ganache+js(模拟区块链)两个方法选一个就行
ganache是truffle框架中的一个组件,个人区块链2333,ganache也就是之前的testrpc
ganache 要求npm>=v8

3.1 安装Node
https://blog.csdn.net/huiskai/article/details/116109255
wget https://npmmirror.com/mirrors/node/v16.14.2/node-v16.14.2-linux-x64.tar.xz
tar -xvf node-v16.14.2-linux-x64.tar.xz
mv node-v16.14.2-linux-x64 /usr/local/node
建立软链接
//切换目录
cd /usr/bin
//创建node软链接
sudo ln -s /usr/local/node/bin/node node
//创建npm软链接
sudo ln -s /usr/local/node/bin/npm npm
查看是否安装成功

3.2 安装genache-cli
npm install -g ganache-cli
然后设置全局变量
vim ~/.bashrc
在最末尾添加存放node的路径
export PATH="/usr/local/node/bin/:$PATH"
然后使其生效
source ~/.bashrc
即可查看是否安装成功
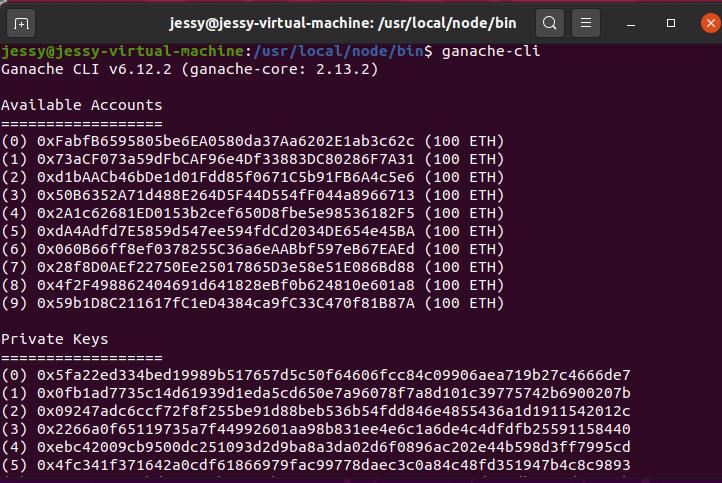
ganache-cli
可以看到自己生成了10个账户,每个账户中有100ETH
ctrl+C关闭ganache
3.3 安装Web3.js与以太坊交互
新建一个文件夹安装web3
cd ~
mkdir GanacheLearn
cd GanacheLearn
sudo npm install web3 -save
写一个测试文件测试
vim test.js
var Web3 = require('web3');
var web3 = new Web3(new Web3.providers.HttpProvider('http://localhost:8545'));
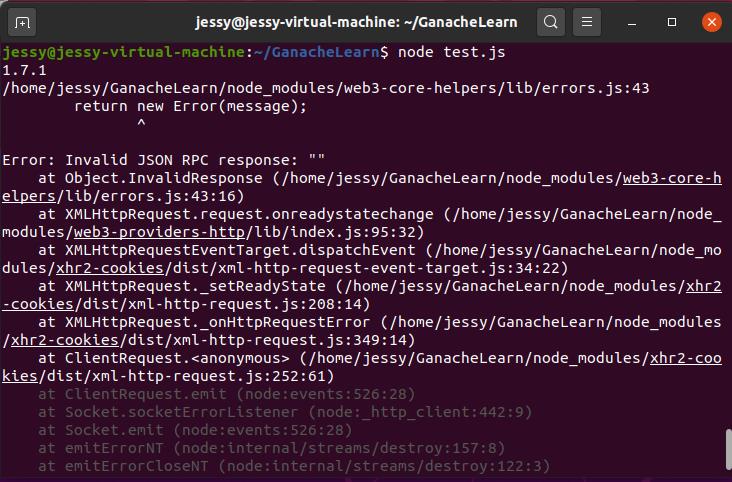
console.log(web3.version);	//版本号无论是否运行Ganache都可以访问
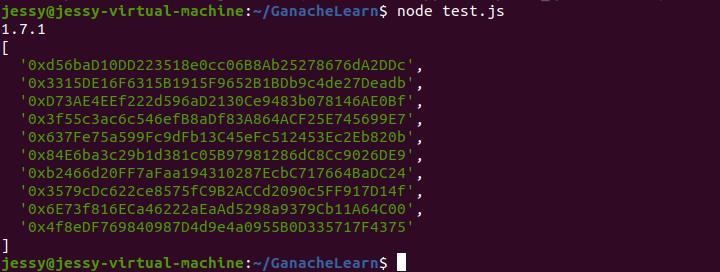
web3.eth.getAccounts().then(console.log);       //打印账户
在不允许ganache的时候是不能获取到账户的
另起终端运行ganache
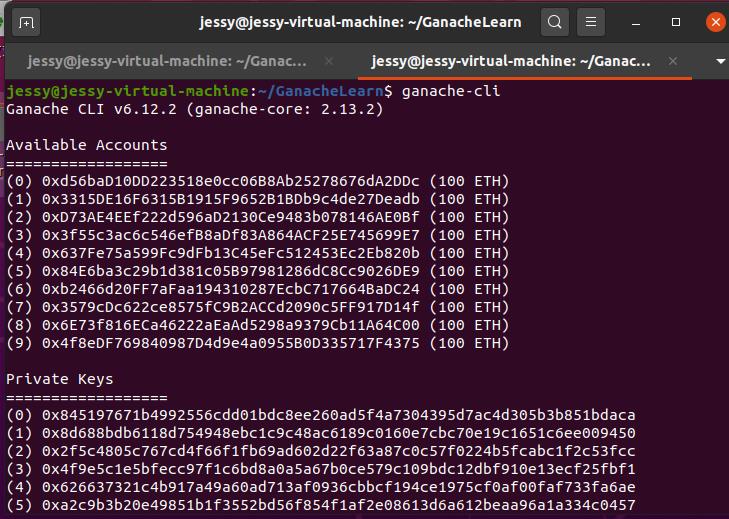
然后再运行test.js,发现可以获取到信息了,这就是web3.js和以太坊网络进行交互
四、简单的Dapp开发Demo
tips:
- 要使用官方文档时注意查对应的版本号
- geth和ganache的端口都一样8545
1、新建工程目录
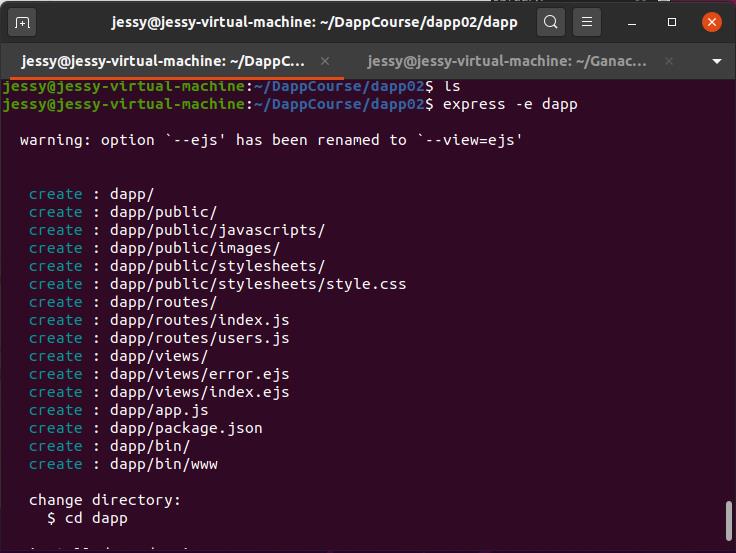
2、新建express项目
express -e dapp
3、安装
npm install

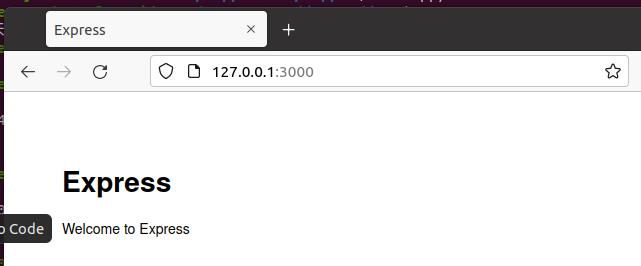
4、启动测试

4、本项目安装web3
npm install web3 -save
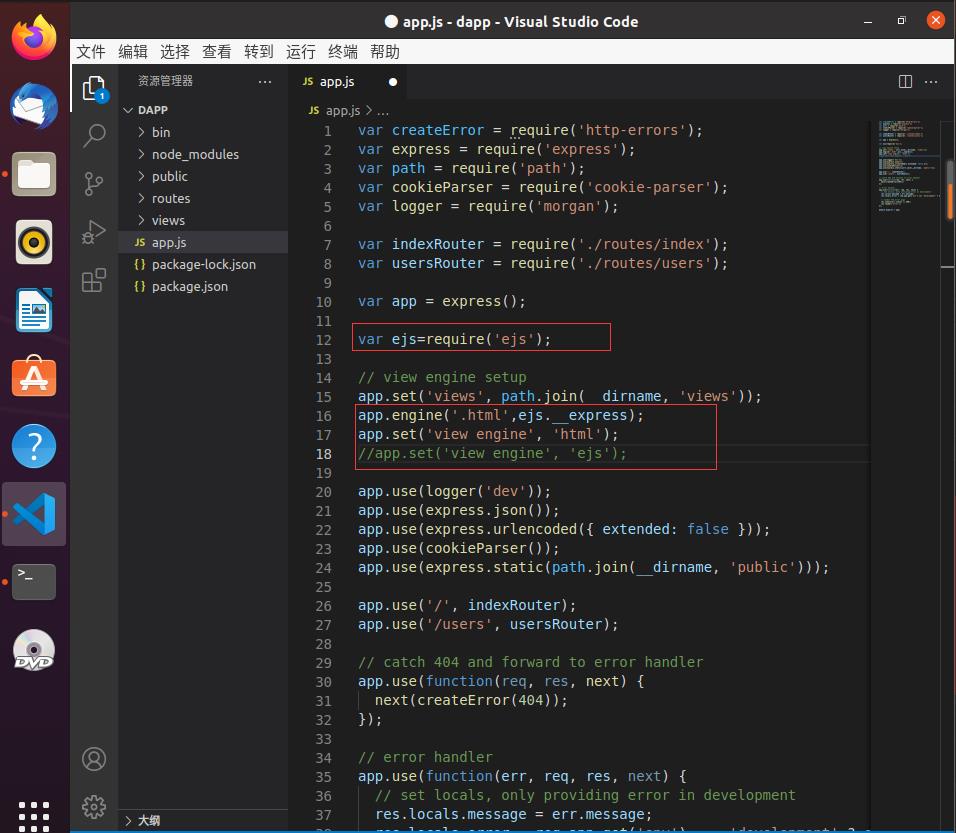
5、修改express项目中的app.js
var ejs=require('ejs');

app.engine('.html',ejs.__express);
app.set('view engine', 'html');
//app.set('view engine', 'ejs');
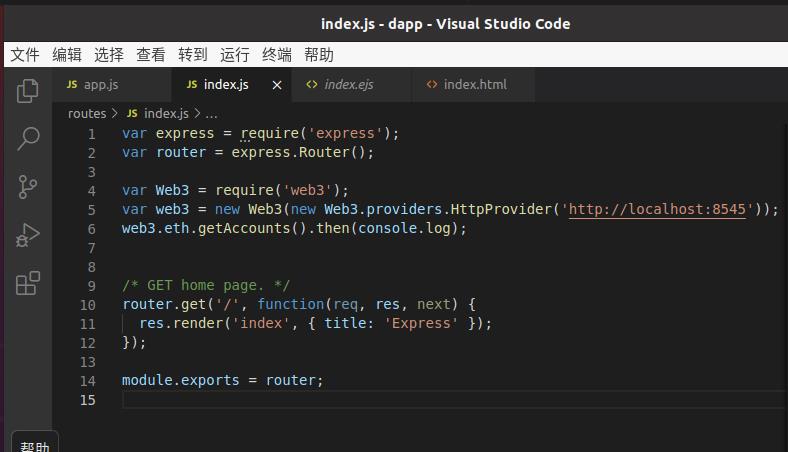
5、修改router目录下的index.js
var Web3 = require('web3');
var web3 = new Web3(new Web3.providers.HttpProvider('http://localhost:8545'));
web3.eth.getAccounts().then(console.log);
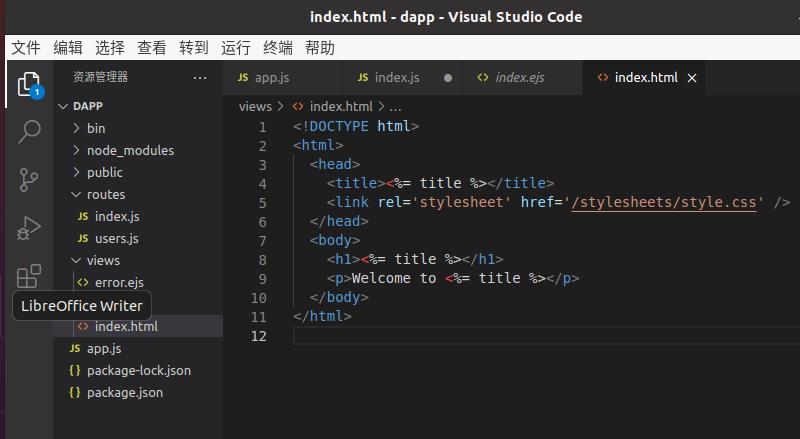
6、将views目录下的index.ejs内容拷贝到index.html(自己新建)
7、部署一个简单合约到ganache中
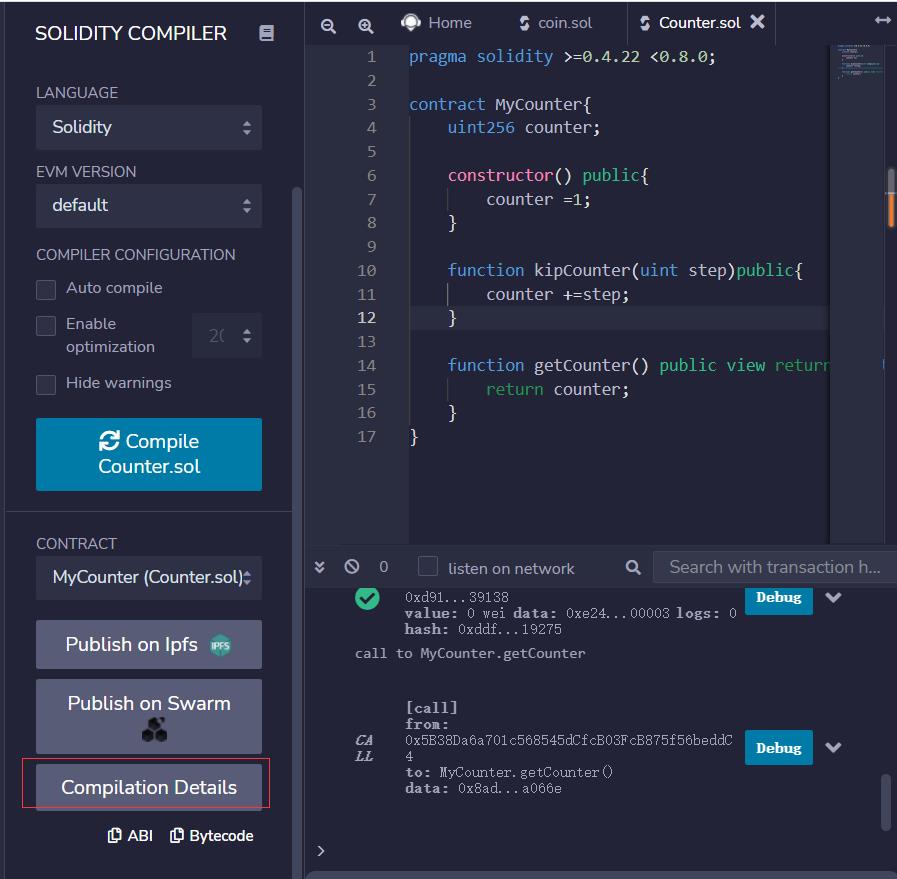
remix中编写一个简单的计数器counter合约
https://remix.ethereum.org
pragma solidity >=0.4.22 <0.8.0;

contract MyCounter
    uint256 counter;

    constructor() public
        counter =1;


    function kipCounter(uint step)public
        counter +=step;


    function getCounter() public view returns(uint256)
        return counter;
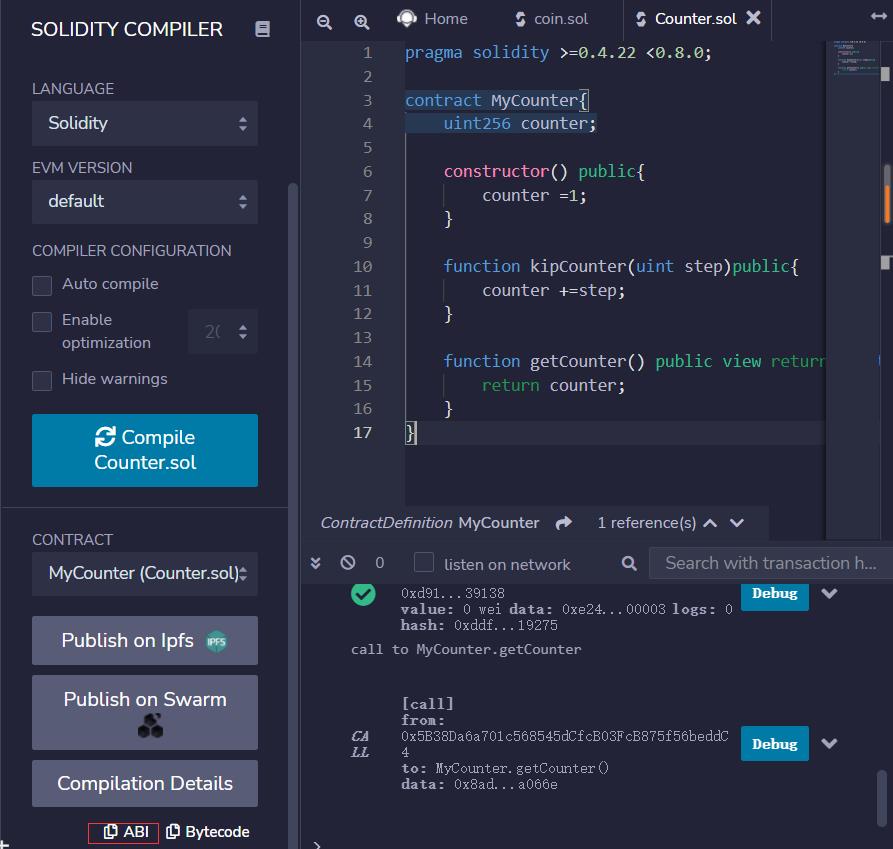
然后编译之后,查看字节码
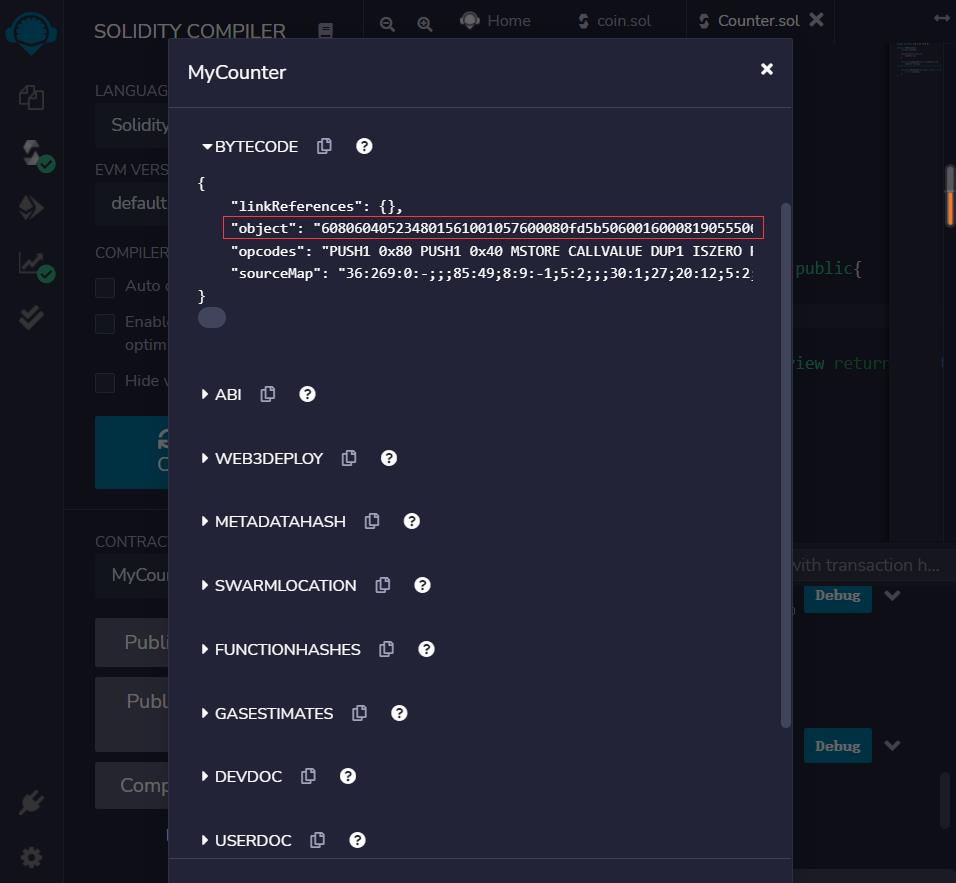
在项目中新建一个文件夹deploy,在下面写一个deploy.js用于部署合约:
- 首先编写建立连接的代码
var Web3 = require('web3');
var web3 = new Web3(new Web3.providers.HttpProvider('http://localhost:8545'));

//web3.eth.getAccounts().then(console.log);
-
然后拷贝remix中自动生成的代码
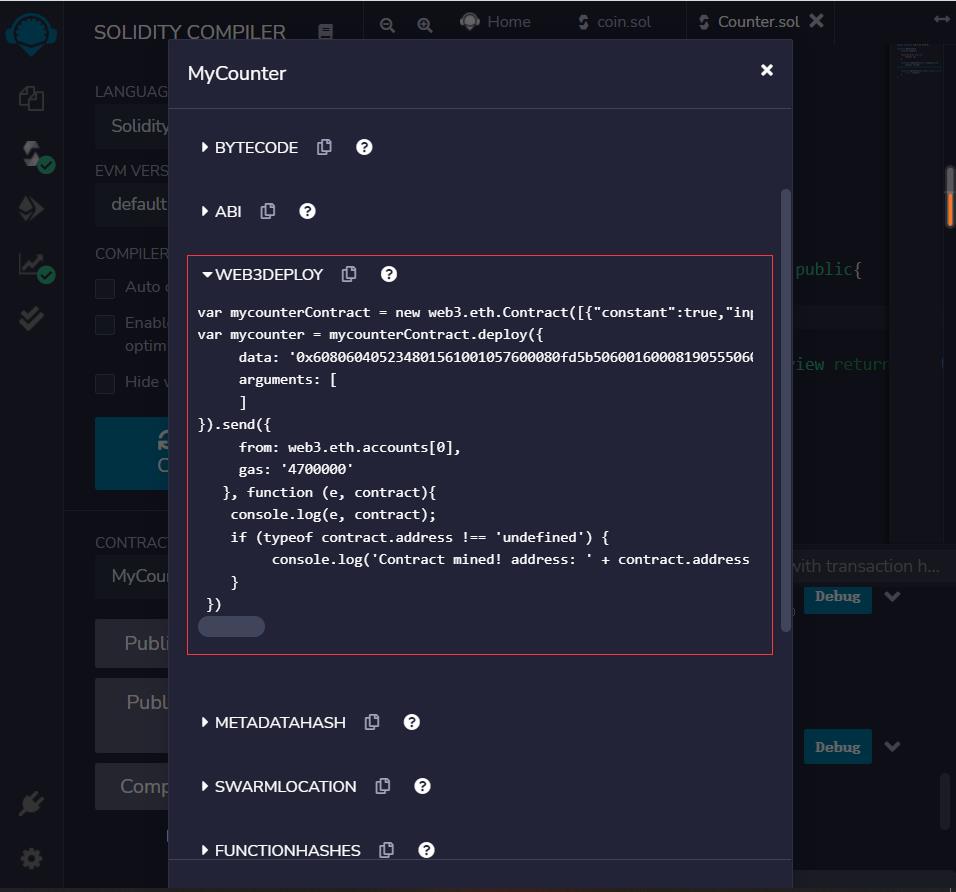
-
再添加字节码和修改账户(使用ganache-cli生成账户的第一个账户)
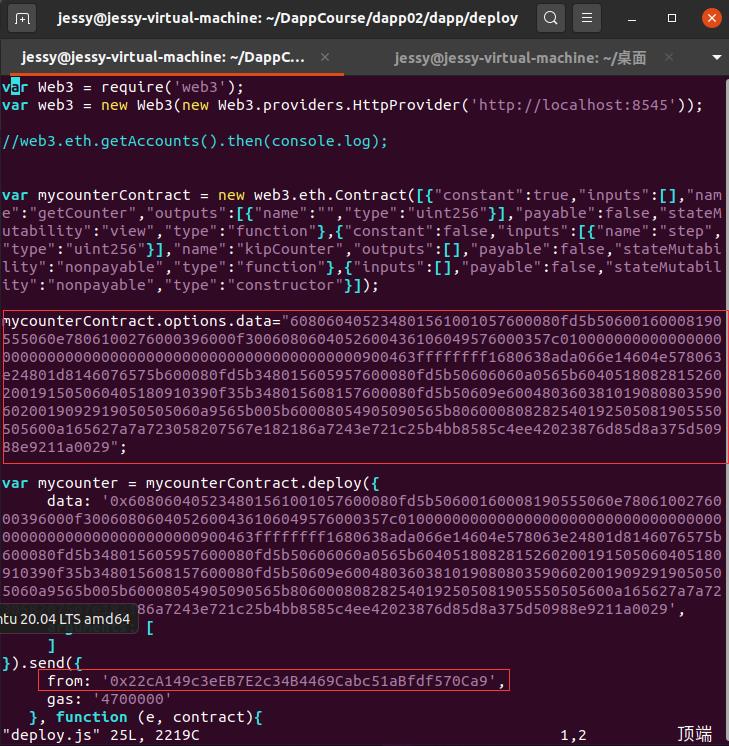
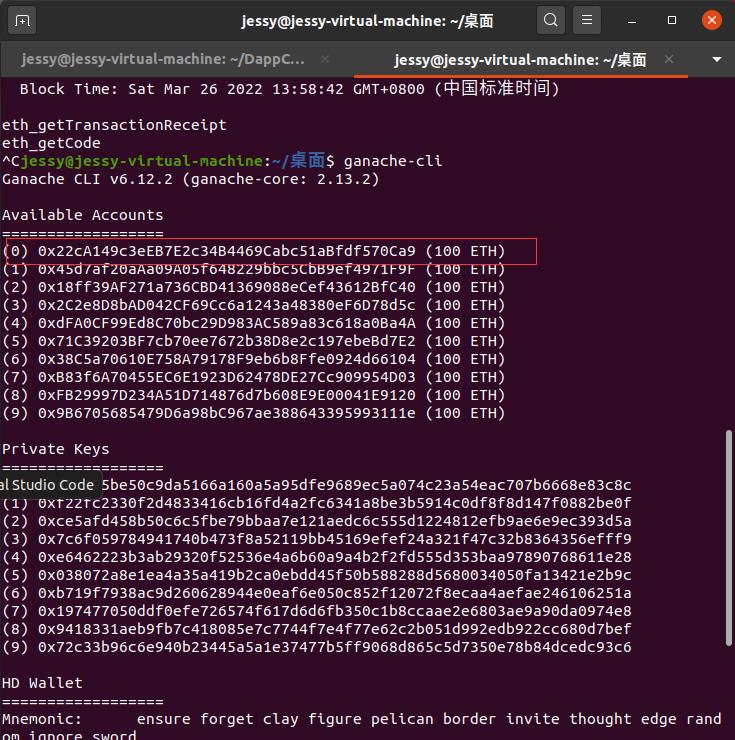
-
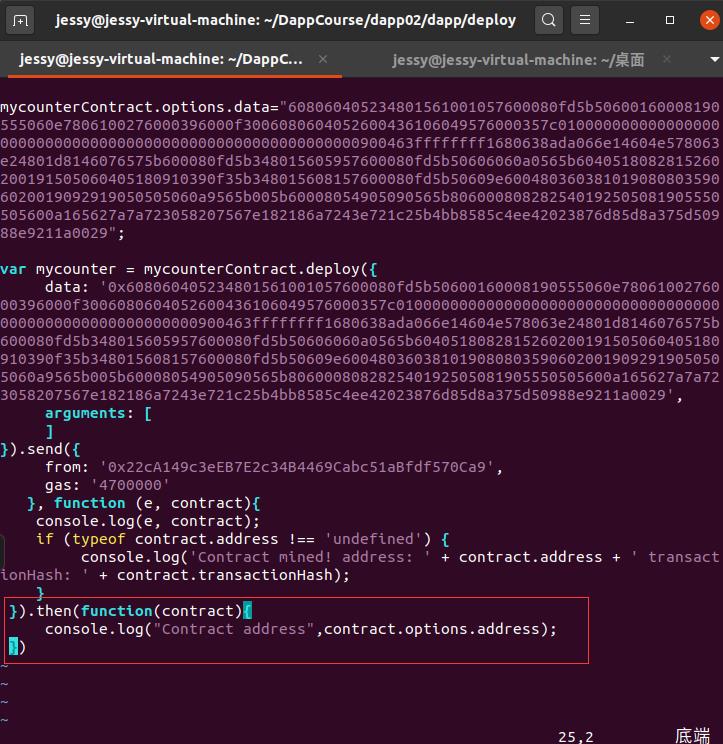
最后添加回调,查看合约部署的地址
运行
node deploy.js

8、dapp调用合约函数
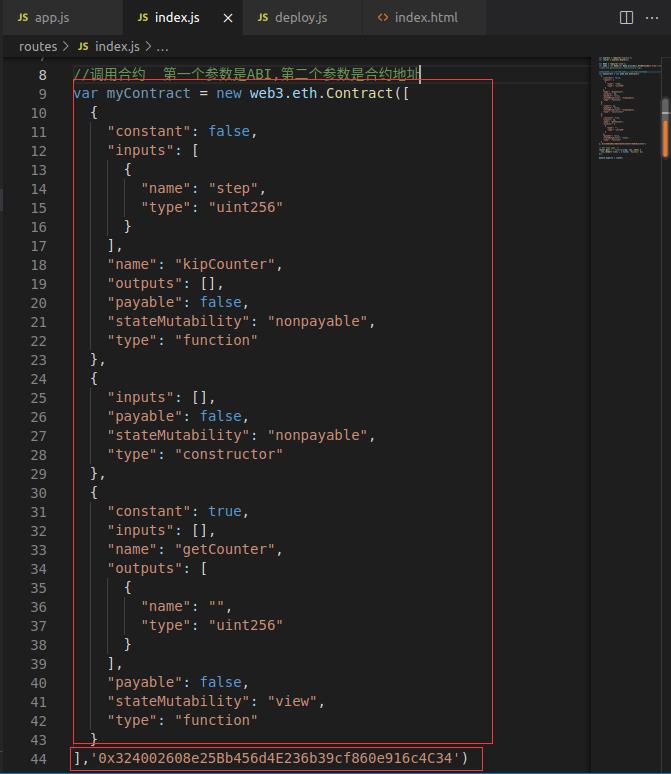
(1)在index.js中,创建合约对象,第一个参数是编译后产生的ABI,第二个参数是合约地址
(2)调用合约函数
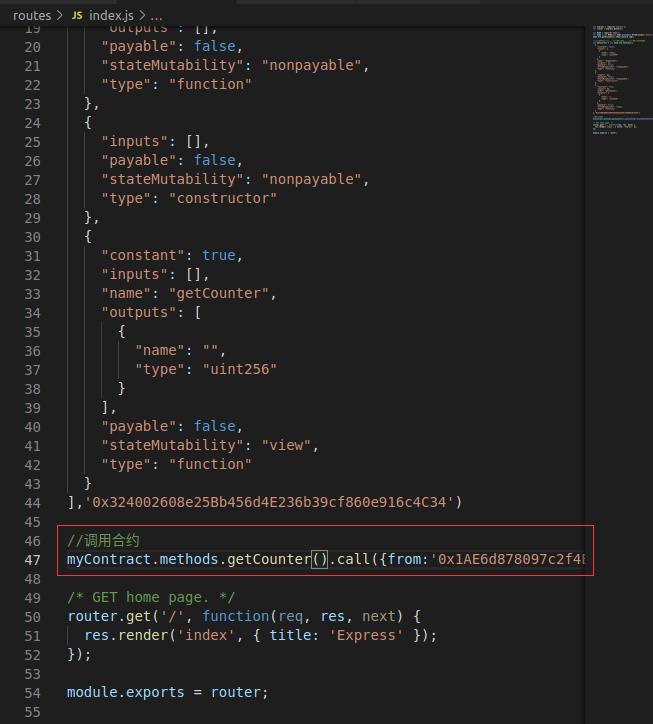
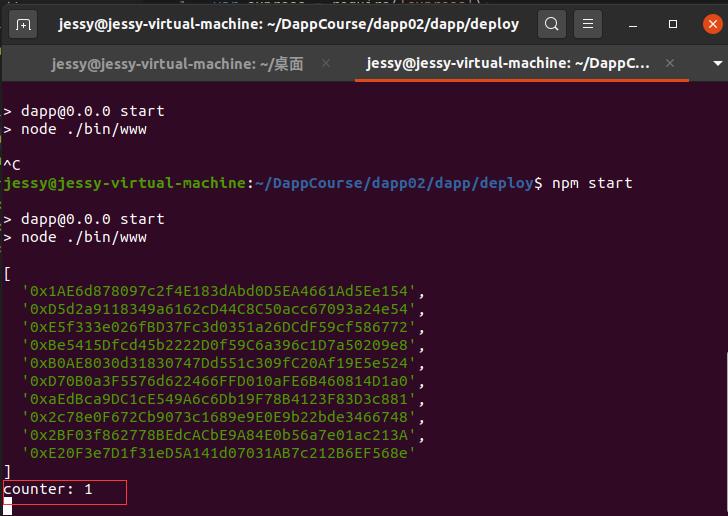
调用不需要修改合约的方式用call
//需要传部署合约的地址
myContract.methods.getCounter().call(from:'0x1AE6d878097c2f4E183dAbd0D5EA4661Ad5Ee154',function(error,result)console.log("counter:",result););

//不需要传部署合约的地址
myContract.methods.getCounter().call().then(function(counter)
  console.log('init counter:',counter);
  init_counter=counter;
);
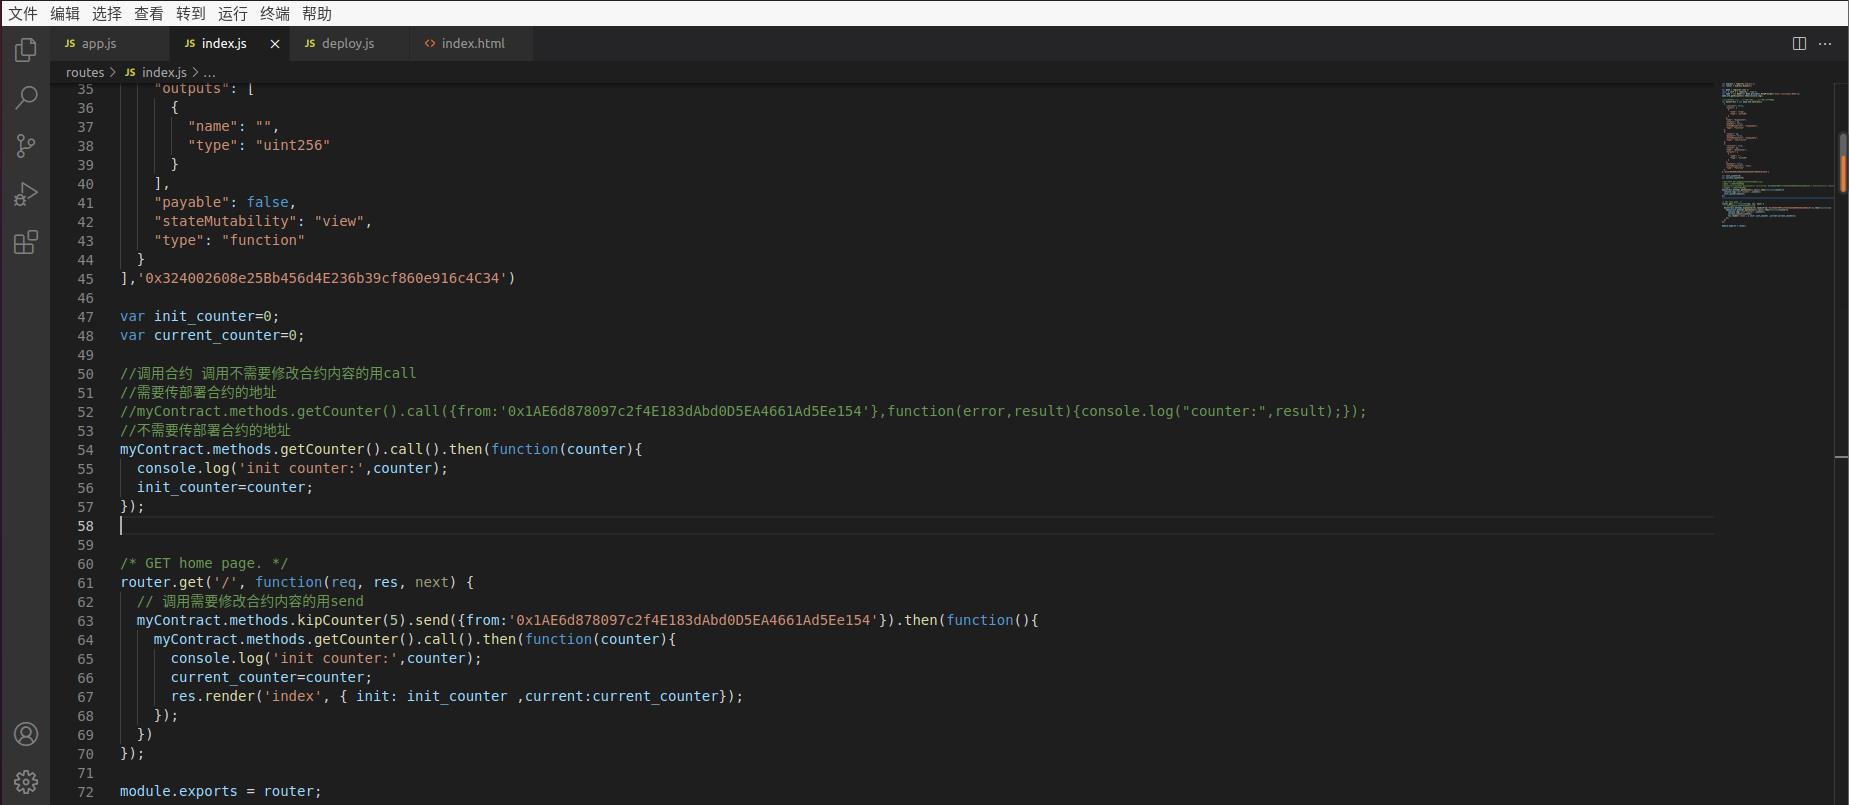
(3)调用需要修改合约的函数
myContract.methods.kipCounter(5).send(from:'0x1AE6d878097c2f4E183dAbd0D5EA4661Ad5Ee154').then(function()
    myContract.methods.getCounter().call().then(function(counter)
      console.log('init counter:',counter);
      current_counter=counter;
      res.render('index',  init: init_counter ,current:current_counter);
    );
  )
(4)修改index.html
<!DOCTYPE html>
<html>
  <head>
    <title>调用智能合约</title>
    <link rel='stylesheet' href='/stylesheets/style.css' />
  </head>
  <body>
    <h1>init: <%= init %></h1>
    <p>current: <%= current %></p>
  </body>
</html>
运行结果:

以上是关于01 DAPP简单Demo的主要内容,如果未能解决你的问题,请参考以下文章