前端-自动化测试react项目-TDD
Posted lin-fighting
tags:
篇首语:本文由小常识网(cha138.com)小编为大家整理,主要介绍了前端-自动化测试react项目-TDD相关的知识,希望对你有一定的参考价值。
TDD
何为tdd (测试驱动的开发)
- 流程: 1 编写测试用例 2 运行测试,测试用力无法通过测试 3 编写代码,使测试用例通过测试 4 优化代码,完成开发。 5 新增功能,重复以上步骤。
- 以测试为驱动流程的开发
- 好处: 1 长期减少回归bug 2 代码指令更好(组织,可维护性) 3 测试覆盖率高 4 错误测试代码不高
基本环境配置
脚手架create-react-app已经内置了jest。自己搭配的项目需要安装,
yarn add jest ts-jest babel-jest @types/jest -D
初始化git,使用git管理项目。
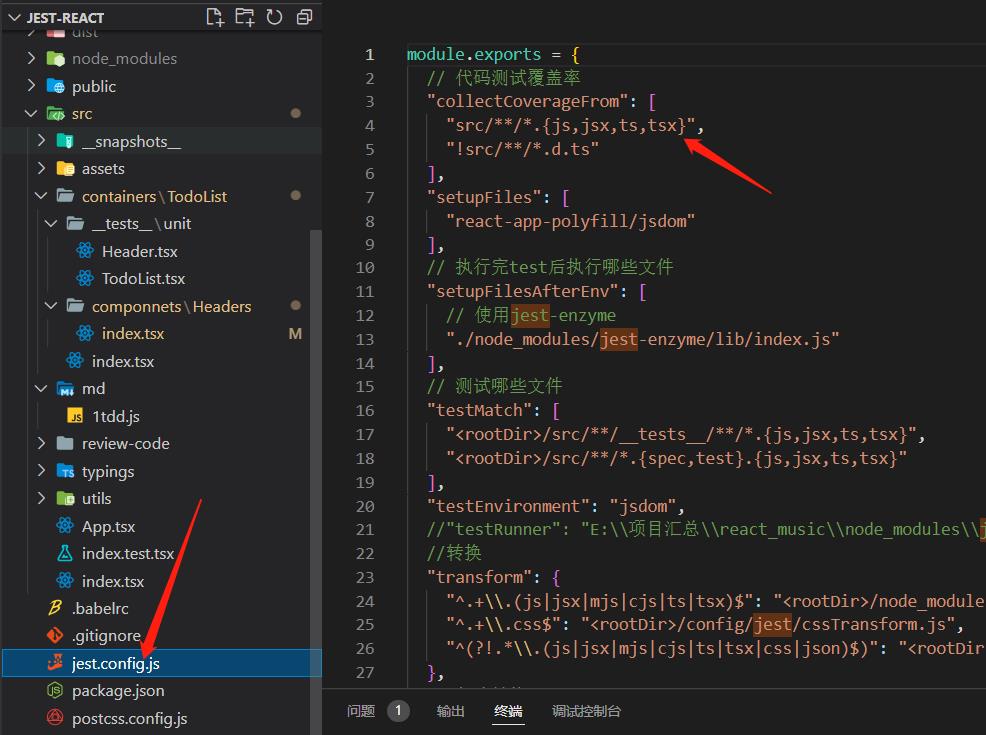
然后在项目下面配置jest.config.js文件,


执行yarn test的时候,jest就会通过文件的配置进行测试。
因为我们是react项目,所以需要使用Enzyme。
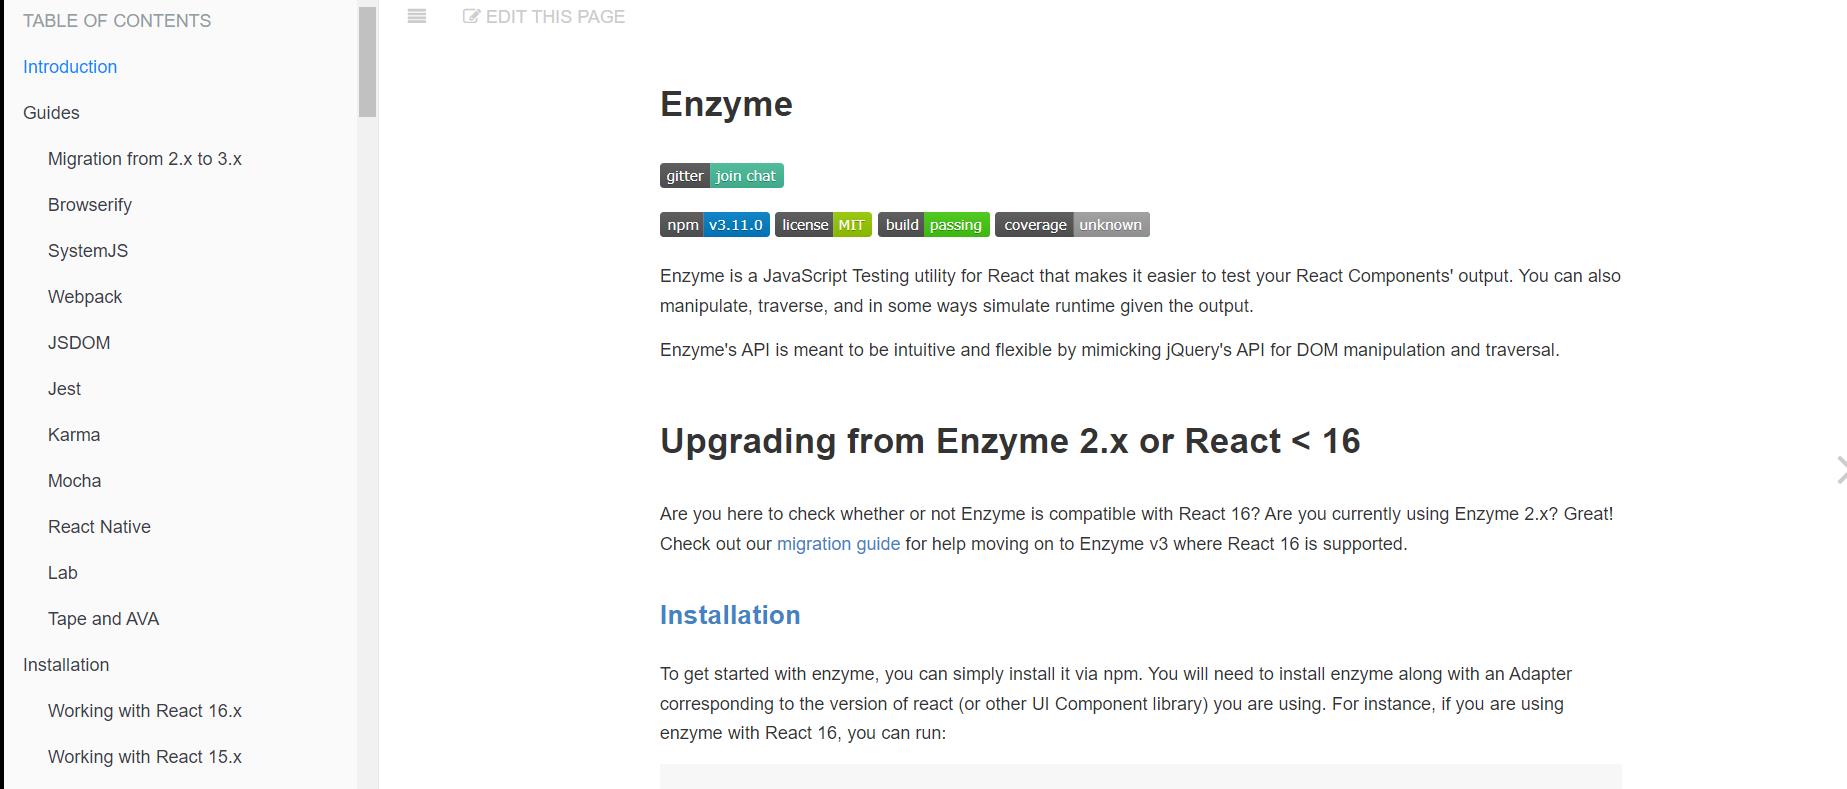
Enzyme 加强jest测试React组件的功能
enzyme 官网https://enzymejs.github.io/enzyme/
- 编写最基本的测试用例
test("renders without crashing", () =>
  const div = document.createElement("div");
  // 测试App的挂载
  ReactDOM.render(<App />, div);
  const container = div.getElementsByClassName('app')
  console.log('container', container.length);
  expect(container.lenght).toBe(2)
);
如上,通过ReactDOM挂载App后,可以判断app是否被挂载上去。
- 像这种简单的测试组件的挂载,比较简单,但是单元测试的时候,希望可以测试组件里的状态等等,那么就比较麻烦了,Enzyme提供了这些功能。

// 安装依赖
yarn add enzyme enzyme-adapter-react-16 jest-enzyme @types/enzyme  @types/enzyme-adapter-react-16 -D
// 测试组件的状态等,就得使用enzyme来测试
import   shallow from 'enzyme
test("renders without crashing", () =>
  // 对App做一层浅渲染,shallow只对一个组件做测试的时候使用,并不关心他的子组件。
  // 还可以使用mount,mount会把子组件也渲染出来,做集成测试的时候适合。
  const wrapper = shallow(<App />); //浅渲染App渲染到wrapper
  const continer = wrapper.find('[data-test="app"]');
  // wrapper.find(selector) 当前包装器的渲染树中查找与提供的选择器匹配的每个节点,如类选择器,id选择器等等。
  // 用了enzymen后可以安装jest-enzyme使用其他的匹配器。
  (expect(continer) as any).toExist();
  (expect(continer) as any).toHaveProp("title", "haha,test");
);
如上,shallow只会对App测试的时候使用,他不关心他的子组件。
也可以使用mount,moUnt会将子组件也渲染出来,做集成测试的时候适合。
通过shallwo渲染的组件wrapper用法很像jq,如上就是判断App组件是否存在,并且存在特定的属性。
可以看到wrapper长这样
<div className="app1" title="haha,test" data-test="app">
        <TodoList />
      </div>
还可以使用mount结合快照的形式,
//使用Mount结合快照
test.only("mounter snapshot", () =>
  const wrapper = mount(<App />); //浅渲染App渲染到wrapper
  console.log("wrapper", wrapper.debug());
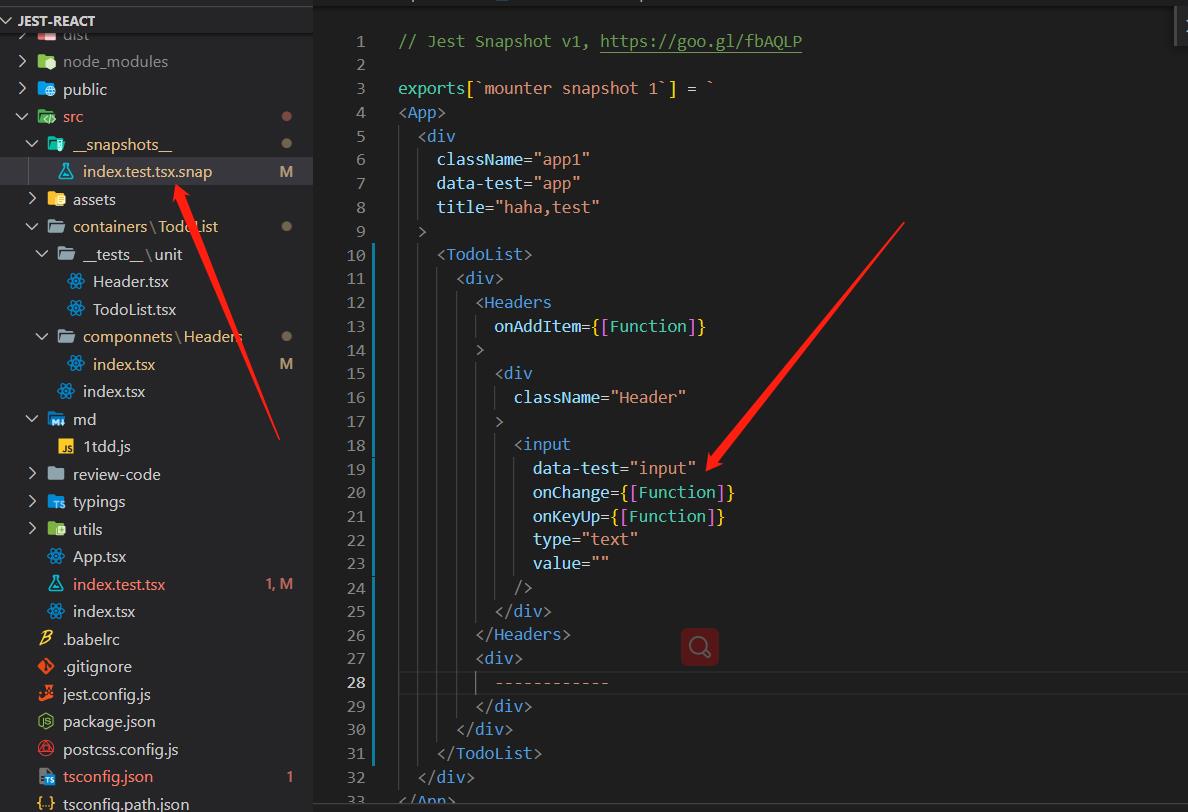
  expect(wrapper).toMatchSnapshot(); //第一次会生成快照,第二次会比对,适合一些Ui不能随便改动的场景、
);
如上,会生成快照,如果第二次App的ui改动了,就会报错,看mount帮我们渲染出来的wrapper
<App>
        <div className="app1" title="haha,test" data-test="app">
          <TodoList>
            <div>
              <Headers onAddItem=[Function (anonymous)]>
                <div className="Header">
                  <input type="text" data-test="input" value="" onChange=[Function: onChange] onKeyUp=[Function: onKeyUp] />
                </div>
              </Headers>
              <div>
                ------------
              </div>
            </div>
          </TodoList>
        </div>
      </App>
可以看到,把子组件也渲染出来了。
ui快照保存

这就是enzyme的基本用法了。
TDD开发todoList
效果就是输入框输入东西,在List中显示。
准备一个Header组件,用来输入内容。然后显示到List组件去。
那么测试用例应该如下:
test("header 组件包含一个input框", () =>
// 单独测试一个组件,所以使用shallow
  const wrapper = shallow(<Headers/>)
  const inputElem = wrapper.find("[data-test='input']")
  expect(inputElem.length).toBe(1)
);

it("header组件 input框初始化应该是''", () =>
  const wrapper = shallow(<Headers/>)
  const inputElem = wrapper.find("[data-test='input']")
  expect(inputElem.prop('value')).toEqual('')
)


it("header组件 input框内容,当用户输入时,会跟随变化''", () =>
  const wrapper = shallow(<Headers/>)
  const inputElem = wrapper.find("[data-test='input']") //找到输入框
  const userInput = '学习jest'
  // simulate触发事件
  inputElem.simulate('change',
    target:
      value: userInput

  )
  // 数据改变
  const newInputElm =  wrapper.find("[data-test='input']")
  expect(newInputElm.prop('value')).toBe(userInput)
)


// 改变内容并且输入回车
test("header组件 input框输入回车的时候,如果input无内容,无操作", () =>
  const fn = jest.fn()
  const wrapper = shallow(<Headers onAddItem=fn/>) // 传入回调函数
  const inputElem = wrapper.find("[data-test='input']")
  const userInput = '学习jest'
  // simulate触发事件
  inputElem.simulate('change',
    target:
      value: userInput

  )
  inputElem.simulate('keyUp',
   keyCode: 13 //回车事件
  )
  // 按下回车键,fn被调用,并且value被置为''
  expect(fn).toHaveBeenCalled()
  const newInputElm =  wrapper.find("[data-test='input']")
  expect(newInputElm.prop('value')).toBe('')
)
通过上面的测试用来来写组件,应该是这样的。
import React from "react";

interface Props
  onAddItem?: (v: string) => void;


function Headers( onAddItem : Props)
  const [value, setValue] = React.useState("");

  return (
    <div className="Header">
      <input
        type="text"
        data-test="input"
        value=value
        onChange=(e) =>
          setValue(e.target.value);

        onKeyUp=(e) =>
          if (e.keyCode === 13)
            onAddItem && onAddItem(value);
            setValue("");


      />
    </div>
  );


export  Headers ;
接着编写List组件内容。
先编写测试用例
import React from "react";
//import ReactDOM from "react-dom";

import Enzyme,  shallow, mount  from "enzyme";
import Adapter from "enzyme-adapter-react-16";
import TodoList from '../../index'
Enzyme.configure(adapter: new Adapter())
初始化列表应该为空
test("toDoList 组件初始化列表为空", () =>
  const wrapper = shallow(<TodoList/>)
  const todoListItems = wrapper.find("[data-test='list-item']")
  expect(todoListItems.length).toBe(0)
);
lists组件应该给Header传递一个onAddItem方法
test("toDoList 组件应该给Headers传递一个onADdItem方法", () =>
    const wrapper = shallow(<TodoList/>)
    const Headers = wrapper.find('Headers')
    expect(Headers.length).toBe(1)
    // headers组件应该有一个Props为onAddItem
    expect(Headers.prop('onAddItem')).toHaveLength(1)
  );
当input回车键按下的时候,list组件应该新增内容
test.only("当Headers回车的时候, todoListItem应该新增内容", () =>
    const wrapper = shallow(<TodoList/>)
    const Headers = wrapper.find('Headers')
    const addFunc = Headers.prop('onAddItem')
    typeof addFunc === 'function' && addFunc('哈哈哈哈') //调用headers组建的addFunc
    const todoListItems = wrapper.find("[data-test='list-item']")
    expect(todoListItems.length).toBe(1)
    console.log('todoListItems', JSON.stringify(todoListItems));

  );
先这三个逻辑,然后根据测试用例开发组件
import React,  useState, useCallback  from "react";

import  Headers  from "./componnets/Headers";

function TodoList()
  const [item, setItems] = useState<string[]>([]);

  const onAddItem = useCallback((e) =>
    setItems((pre) =>
      return [...pre].concat(e);
    );
  , []);

  return (
    <div>
      <Headers onAddItem=onAddItem />
      <div>------------</div>
      item.map((ctem) =>
       return  <div data-test="list-item" key=ctem>ctem</div>;
      )
    </div>
  );


export default TodoList;
测试代码覆盖率
jest提供了测试代码覆盖率的问题:在package.json添加这句。
"covery": "jest --coverage --watchAll=false",
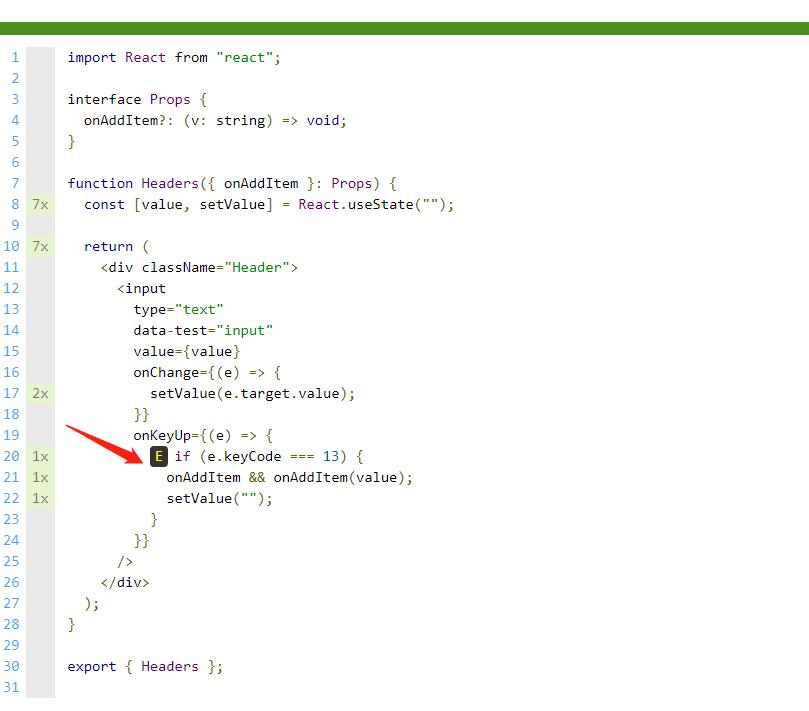
执行过后会成成这样一份文件供你分析,可以看到两个主要的组件的覆盖率是100%,但是

Header组建的分支是75%,也就是说有if else没被俘获的判断,如
可以直接点进去打开查看是什么原因;
这里少了个else的判断,所以需要添加多一个测试用例
test("header组件 input框按键不是回车的时候", () =>
  const fn = jest.fn();
  const wrapper = shallow(<Headers onAddItem=fn />);
  const inputElem = wrapper.find("[data-test='input']");
  const userInput = "学习jest";
  // simulate触发事件
  inputElem.simulate("change",
    target:
      value: userInput,
    ,
  );
  inputElem.simulate("keyUp",  keyCode: 0 );
  const newInputElm = wrapper.find("[data-test='input']");
  expect(newInputElm.prop("value")).toBe(userInput);
  expect(fn).toHaveBeenCalledTimes(0);
);
测试组件按键不是回车事件的时候,然后在执行npm run covery。

这次可以看到百分之一百了。
总结
通过一个小的dmoe了解了tdd的流程,以测试用例驱动的开发,就是先写测试用例,再写组件内容。
好处:
- 代码质量提升,开发之前已经想好怎么入手,根据测试用例一步一步开发。
单元测试的优劣:
- 测试覆盖率高
- 但是业务耦合度高 (依赖数据)
- 代码量大 (高覆盖率往往伴随高代码量)
- 过于独立 (无法保证跟其他组件结合不出错)
- 适用于开发一些单独的函数库。保证入参出参等。不用关心其他函数。
以上是关于前端-自动化测试react项目-TDD的主要内容,如果未能解决你的问题,请参考以下文章