OAuth2.0 - 使用数据库存储客户端信息 及 授权码
Posted 小毕超
tags:
篇首语:本文由小常识网(cha138.com)小编为大家整理,主要介绍了OAuth2.0 - 使用数据库存储客户端信息 及 授权码相关的知识,希望对你有一定的参考价值。
一、OAuth2.0
上篇文章我们介绍了使用JWT替换Token使得认证服务的压力减小,但是向客户端信息,和授权码都是存储在了内存中,一旦认证服务宕机,那客户端的认证信息也随之消失,而且客户端信息是在程序中写死的,维护起来及不方便,每次修改都需要重启服务,如果向上述信息都存于数据库中便可以解决上面的问题,其中数据我们可以自定义存到noSql或其他数据库中,SpringOauth2也为我们提供了数据库的解决方案。
下面是上篇文章的地址:
二、数据库库存储模式
数据库我们选择mysql存储我们的数据,首先在数据库中新建存储客户端信息,及授权码的表:
CREATE TABLE `oauth_client_details` (
  `client_id` varchar(255) NOT NULL COMMENT '客户端标识',
  `resource_ids` varchar(255) DEFAULT NULL COMMENT '接入资源列表',
  `client_secret` varchar(255) DEFAULT NULL COMMENT '客户端秘钥',
  `scope` varchar(255) DEFAULT NULL COMMENT '授权范围',
  `authorized_grant_types` varchar(255) DEFAULT NULL COMMENT '允许授权类型',
  `web_server_redirect_uri` varchar(255) DEFAULT NULL COMMENT '客户端的重定向URI',
  `authorities` varchar(255) DEFAULT NULL COMMENT '客户端所拥有的权限值',
  `access_token_validity` int(11) DEFAULT NULL COMMENT '设定客户端的access_token的有效时间值(单位:秒)',
  `refresh_token_validity` int(11) DEFAULT NULL COMMENT '设定客户端的refresh_token的有效时间值(单位:秒',
  `additional_information` text COMMENT '这是一个预留的字段,在Oauth的流程中没有实际的使用,可选,但若设置值,必须是JSON格式的数据,',
  `create_time` timestamp NULL DEFAULT NULL,
  `archived` tinyint(1) DEFAULT NULL COMMENT '用于标识客户端是否已存档(即实现逻辑删除),默认值为’0’(即未存档)',
  `trusted` tinyint(1) DEFAULT NULL COMMENT '设置客户端是否为受信任的,默认为’0’(即不受信任的,1为受信任的)',
  `autoapprove` varchar(255) DEFAULT NULL COMMENT '设置用户是否自动Approval操作, 默认值为 ‘false’, 可选值包括 ‘true’,‘false’, ‘read’,‘write’. ',
  PRIMARY KEY (`client_id`) USING BTREE
) ENGINE=InnoDB DEFAULT CHARSET=utf8 ROW_FORMAT=DYNAMIC;
向该表中添加两条客户端信息:
INSERT INTO `testdb`.`oauth_client_details` (`client_id`, `resource_ids`, `client_secret`, `scope`, `authorized_grant_types`, `web_server_redirect_uri`, `authorities`, `access_token_validity`, `refresh_token_validity`, `additional_information`, `create_time`, `archived`, `trusted`, `autoapprove`) VALUES ('c1', 'res1', '$2a$10$UmGvnYkVcMwvv.Tki2hd2.1TwSbB3FmQuJDduq0cnIVoCYkvAh5Ey', 'all', 'client_credentials,password,authorization_code,implicit,refresh_token,sms_code', 'http://www.baidu.com', NULL, '259200', '31536000', NULL, '2020-07-12 21:55:48', '0', '0', 'false');
INSERT INTO `testdb`.`oauth_client_details` (`client_id`, `resource_ids`, `client_secret`, `scope`, `authorized_grant_types`, `web_server_redirect_uri`, `authorities`, `access_token_validity`, `refresh_token_validity`, `additional_information`, `create_time`, `archived`, `trusted`, `autoapprove`) VALUES ('c2', 'res2', '$2a$10$UmGvnYkVcMwvv.Tki2hd2.1TwSbB3FmQuJDduq0cnIVoCYkvAh5Ey', 'ROLE_API', 'client_credentials,password,authorization_code,implicit,refresh_token', 'http://www.baidu.com', NULL, '259200', '31536000', NULL, '2020-07-12 21:55:48', '0', '0', 'false');
下面在创建存储授权码的表:
CREATE TABLE `oauth_code` (
  `create_time` timestamp NULL DEFAULT CURRENT_TIMESTAMP COMMENT '数据的创建时间',
  `code` varchar(255) DEFAULT NULL COMMENT '存储服务端系统生成的code的值(未加密)',
  `authentication` blob COMMENT '存储将AuthorizationRequestHolder.java对象序列化后的二进制数据.',
  KEY `code_index` (`code`) USING BTREE
) ENGINE=InnoDB DEFAULT CHARSET=utf8 ROW_FORMAT=DYNAMIC;
授权码由每次客户申请授权时生成,我们无需添加什么数据。
认证服务修改
下面在认证服务添加mysql及mybatis-plus的依赖:
<dependency>
    <groupId>com.baomidou</groupId>
    <artifactId>mybatis-plus-boot-starter</artifactId>
    <version>3.3.2</version>
</dependency>

<dependency>
    <groupId>mysql</groupId>
    <artifactId>mysql-connector-java</artifactId>
</dependency>

<dependency>
    <groupId>com.alibaba</groupId>
    <artifactId>druid</artifactId>
    <version>1.1.6</version>
</dependency>
在配制文件中,添加链接数据库的信息:
server:
  port: 8020

spring:
  datasource:
    url: jdbc:mysql://192.168.40.1:3307/testdb?useUnicode=true&characterEncoding=utf8
    username: root
    password: root123
    type: com.alibaba.druid.pool.DruidDataSource
mybatis-plus:
  mapper-locations: classpath:mapper/*.xml
  type-aliases-package: com.bxc.auth.entity
  configuration:
    log-impl: org.apache.ibatis.logging.stdout.StdOutImpl
    map-underscore-to-camel-case: true
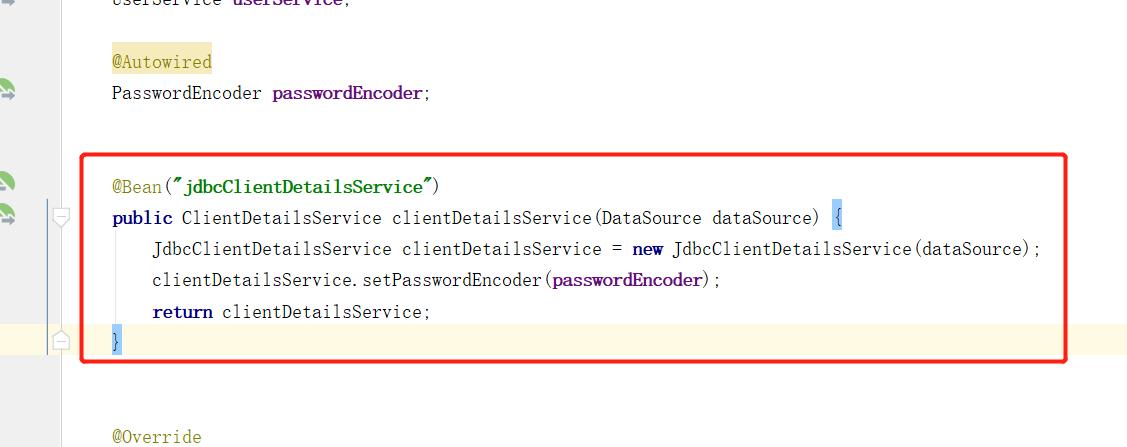
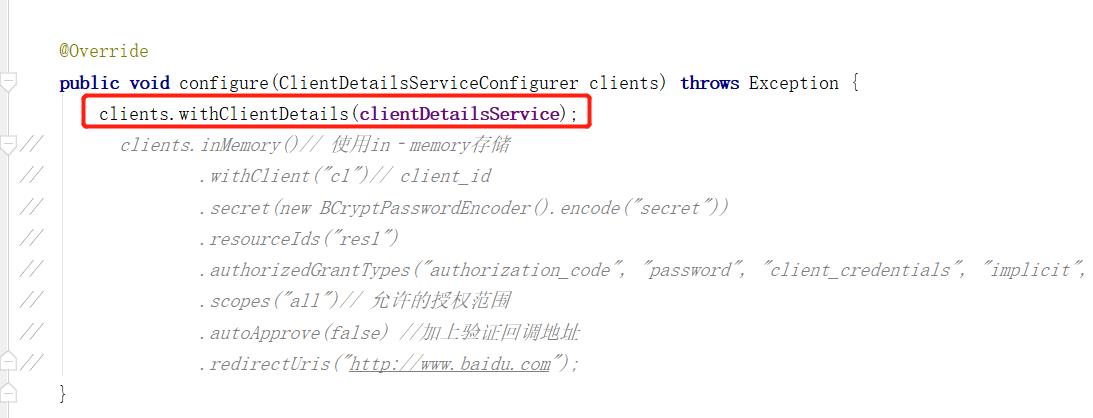
下面我们主要在AuthorizationServer配制类中,添加一个ClientDetailsService的返回方法,其中使用SpringOauth2帮我们封装好的JdbcClientDetailsService对象构建一个ClientDetailsService替换原来默认的ClientDetailsService。
授权码我们同样使用JdbcAuthorizationCodeServices替换原先的InMemoryAuthorizationCodeServices。
下面是修改过的配制类:
@Configuration
@EnableAuthorizationServer
public class AuthorizationServer extends AuthorizationServerConfigurerAdapter

    @Autowired
    private TokenStore tokenStore;

    @Autowired
    @Qualifier("jdbcClientDetailsService")
    private ClientDetailsService clientDetailsService;

    @Autowired
    private AuthenticationManager authenticationManager;

    @Autowired
    private AuthorizationCodeServices authorizationCodeServices;

    @Autowired
    private JwtAccessTokenConverter accessTokenConverter;

    @Autowired
    UserService userService;

    @Autowired
    PasswordEncoder passwordEncoder;


    @Bean("jdbcClientDetailsService")
    public ClientDetailsService clientDetailsService(DataSource dataSource)
        JdbcClientDetailsService clientDetailsService = new JdbcClientDetailsService(dataSource);
        clientDetailsService.setPasswordEncoder(passwordEncoder);
        return clientDetailsService;


    @Override
    public void configure(ClientDetailsServiceConfigurer clients) throws Exception
        clients.withClientDetails(clientDetailsService);


    @Bean
    public AuthorizationCodeServices authorizationCodeServices(DataSource dataSource)
        return new JdbcAuthorizationCodeServices(dataSource);//设置授权码模式的授权码如何存取


    @Bean
    public AuthorizationServerTokenServices tokenService()
        DefaultTokenServices service = new DefaultTokenServices();
        service.setClientDetailsService(clientDetailsService);
        service.setSupportRefreshToken(true);
        service.setTokenStore(tokenStore);
        //令牌增强
        TokenEnhancerChain tokenEnhancerChain = new TokenEnhancerChain();
        List<TokenEnhancer> tokenEnhancers = new ArrayList<>();
        //内容增强
        tokenEnhancers.add(tokenEnhancer());
        tokenEnhancers.add(accessTokenConverter);
        tokenEnhancerChain.setTokenEnhancers(tokenEnhancers);
        service.setTokenEnhancer(tokenEnhancerChain);

        service.setAccessTokenValiditySeconds(7200); // 令牌默认有效期2小时
        service.setRefreshTokenValiditySeconds(259200); // 刷新令牌默认有效期3天
        return service;


    @Override
    public void configure(AuthorizationServerEndpointsConfigurer endpoints)
        endpoints
                .authenticationManager(authenticationManager)//认证管理器
                .authorizationCodeServices(authorizationCodeServices)//授权码服务
                .tokenServices(tokenService())//令牌管理服务
                .allowedTokenEndpointRequestMethods(HttpMethod.POST);


    @Override
    public void configure(AuthorizationServerSecurityConfigurer security) throws Exception
        security
                .tokenKeyAccess("permitAll()")                    //oauth/token_key是公开
                .checkTokenAccess("permitAll()")                  //oauth/check_token公开
                .allowFormAuthenticationForClients();                //表单认证(申请令牌)


    /**
     * JWT内容增强
     */
    @Bean
    public TokenEnhancer tokenEnhancer()
        return (accessToken, authentication) ->
            Map<String, Object> additionalInfo = new HashMap<>();
            additionalInfo.put("userid", -1);
            Authentication auth = authentication.getUserAuthentication();
            if (auth != null)
                UserEntity user = (UserEntity) auth.getPrincipal();
                additionalInfo.put("userid", user.getId());
            else
                String clientId = authentication.getOAuth2Request().getClientId();
                String grantType = authentication.getOAuth2Request().getRequestParameters().get("grant_type");
                if (Objects.equals(clientId, "c1") && Objects.equals(grantType, "client_credentials"))
                    additionalInfo.put("userid", "root");


            ((DefaultOAuth2AccessToken) accessToken).setAdditionalInformation(additionalInfo);
            return accessToken;
        ;
下面是主要修改的点:


三、授权码测试
首先我们使用c1客户端申请授权码:
http://localhost:8020/oauth/authorize?client_id=c1&response_type=code&scope=all&redirect_uri=http://www.baidu.com
需要认真登录:

授权:

在地址栏就可以看到返回的授权码了:

下面可以看下数据库的存储:

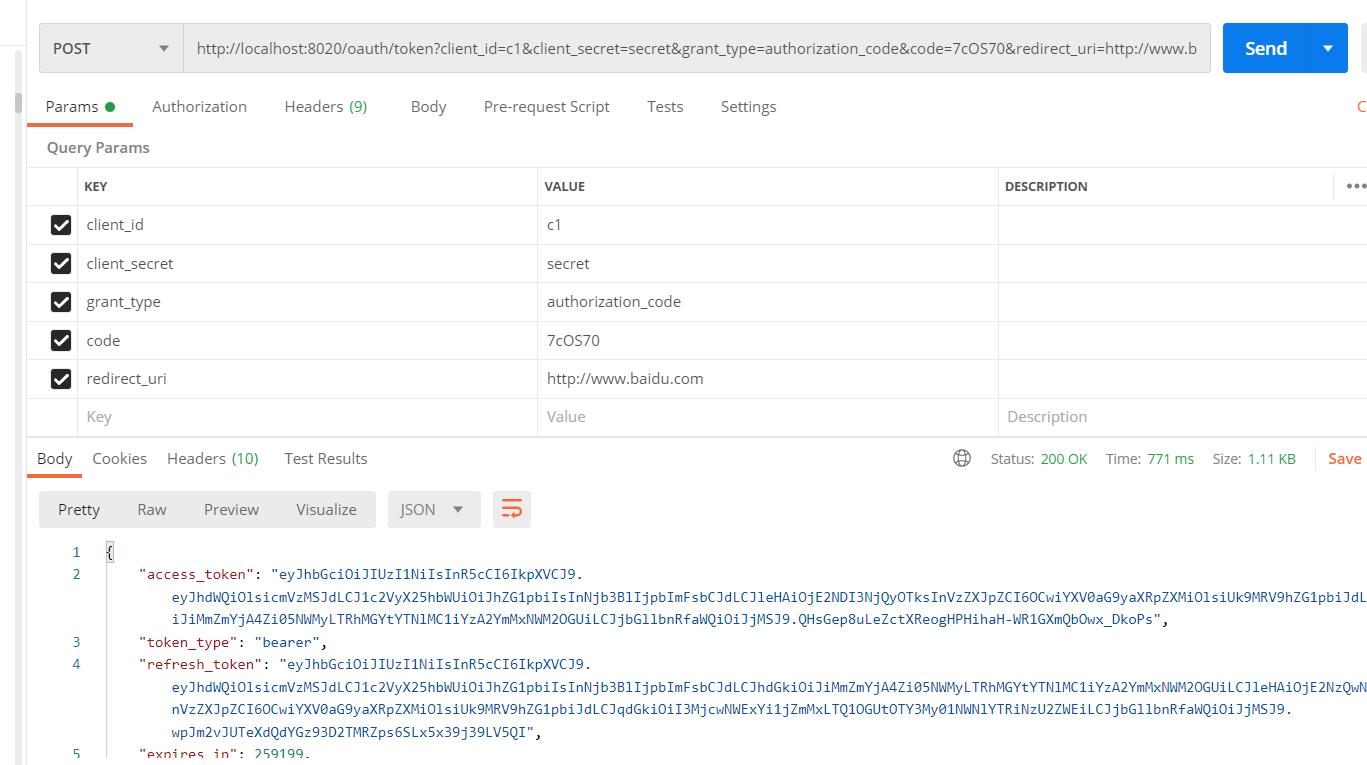
下面使用该认证码申请令牌:

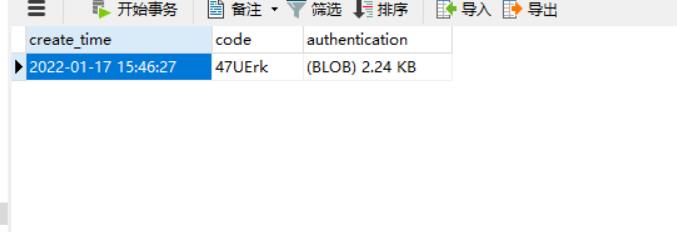
再查看数据库中数据:

从上面的演示可以看到,客户端和授权码两个都已经起作用了。

喜欢的小伙伴可以关注我的个人微信公众号,获取更多学习资料!
以上是关于OAuth2.0 - 使用数据库存储客户端信息 及 授权码的主要内容,如果未能解决你的问题,请参考以下文章
OAuth2.0 - 使用 SpringGateWay 网关实现统一鉴权