STC单片机VSCode PlatformIO开发环境详细配置过程
Posted perseverance52
tags:
篇首语:本文由小常识网(cha138.com)小编为大家整理,主要介绍了STC单片机VSCode PlatformIO开发环境详细配置过程相关的知识,希望对你有一定的参考价值。
【STC单片机】VSCode PlatformIO开发环境详细配置过程
- 关于 VSCode安装以及插件PlatformIO安装就不介绍了。
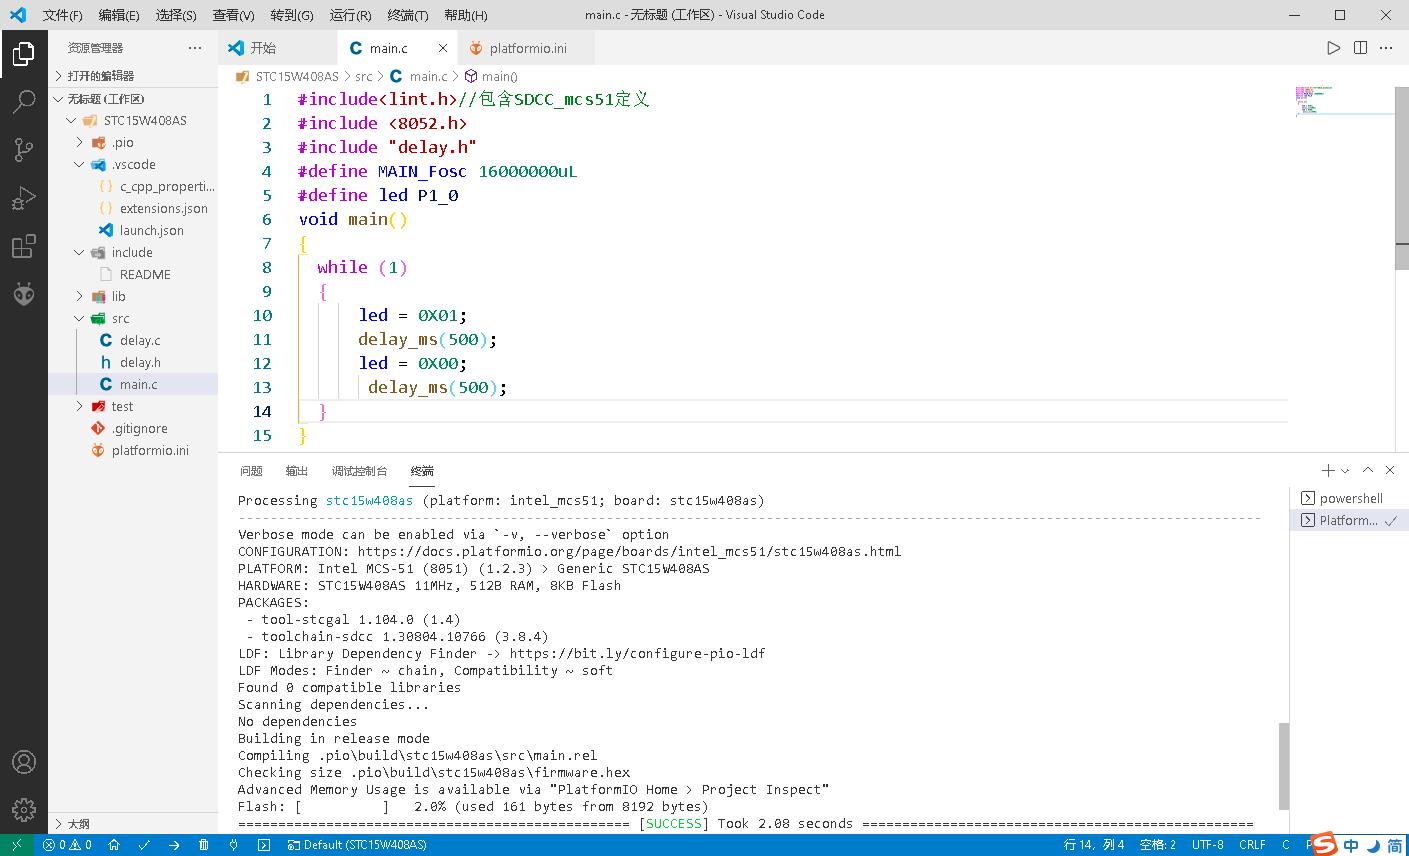
- 带新手入门,实现一个无错误,无警告的完整工程,包含编译上传过程。
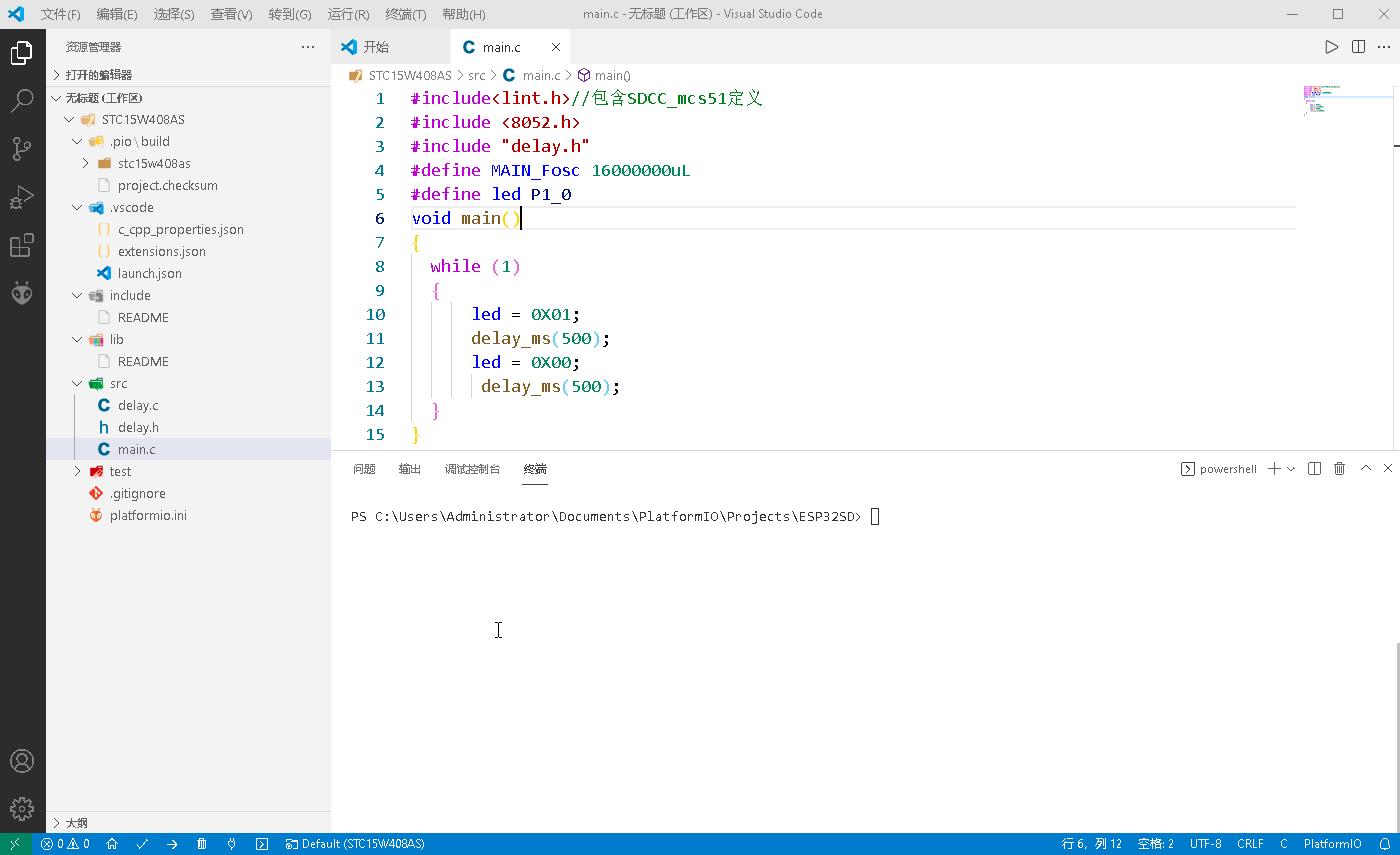
- 采用的是自制开发板
- 我的开发板已经开源《【开源分享】自制STC15W408AS开发板》
- 也可以使用自动下载连接自己的STC开发板,我制作的STC自动下载也已经开源,《【开源】STC单片机免冷启动自动下载器》
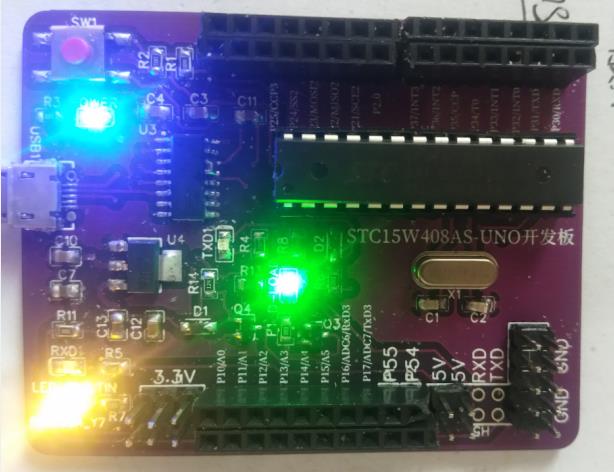
- 自动下载器

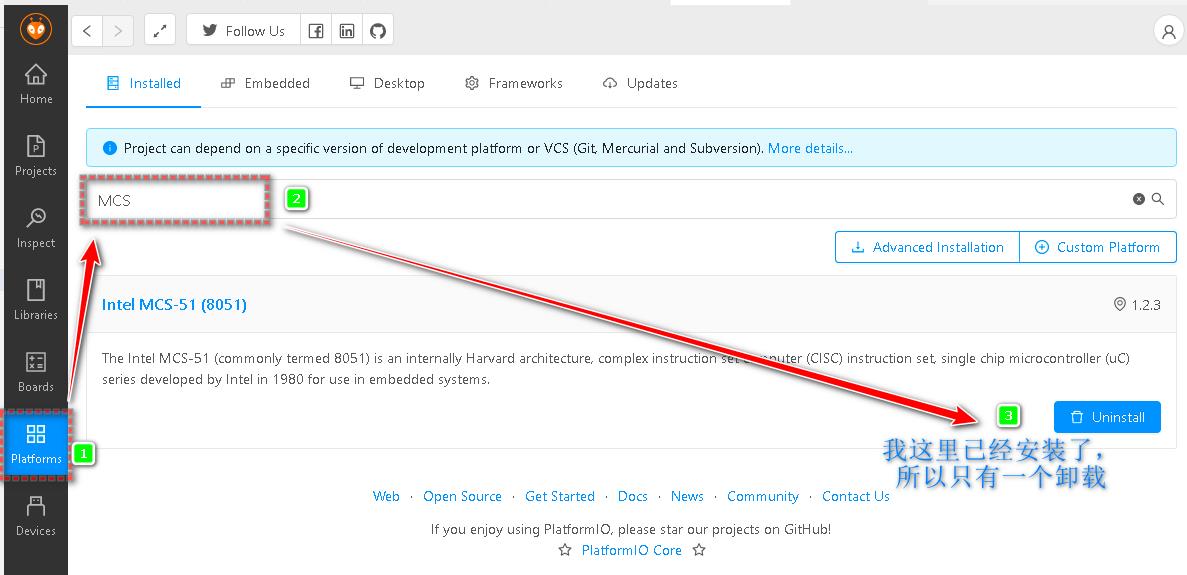
第一步:PlatformIO 8051单片机环境搭建
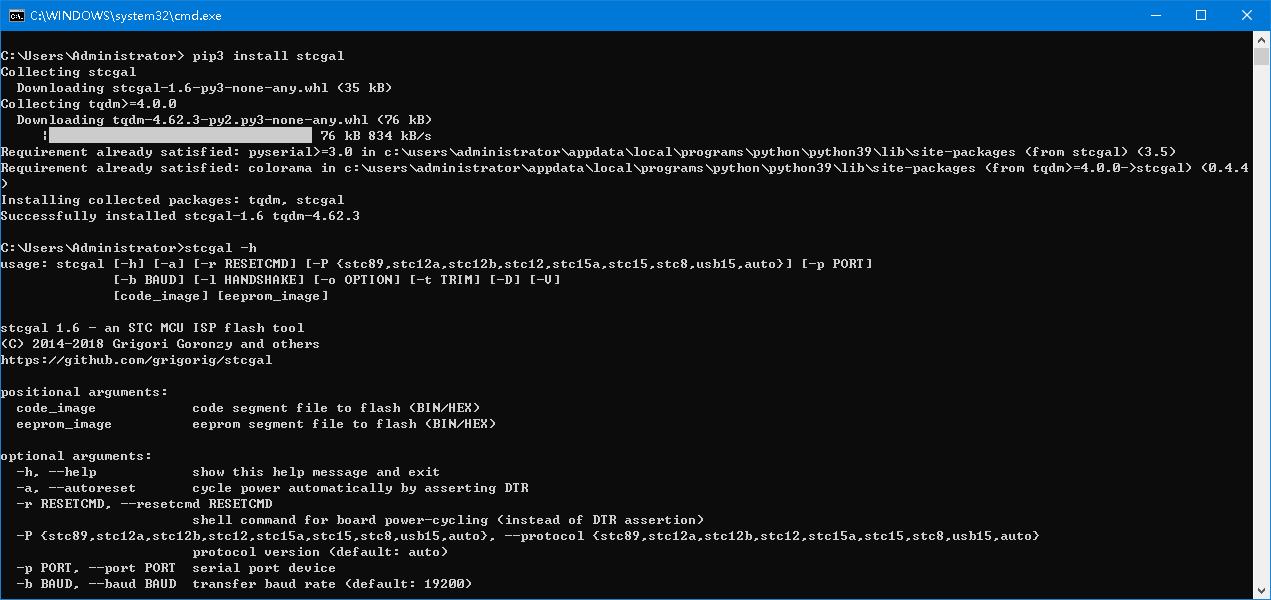
第二步: 安装python插件stcgal,用于上传hex文件到STC芯片上的。
- 在CMD命令提示符窗口内,输入命令:
pip3 install stcgal,进行安装。 - github地址:https://github.com/grigorig/stcgal
stcgal - STC MCU ISP flash tool,就不做介绍使用了。
第三步: 新建工程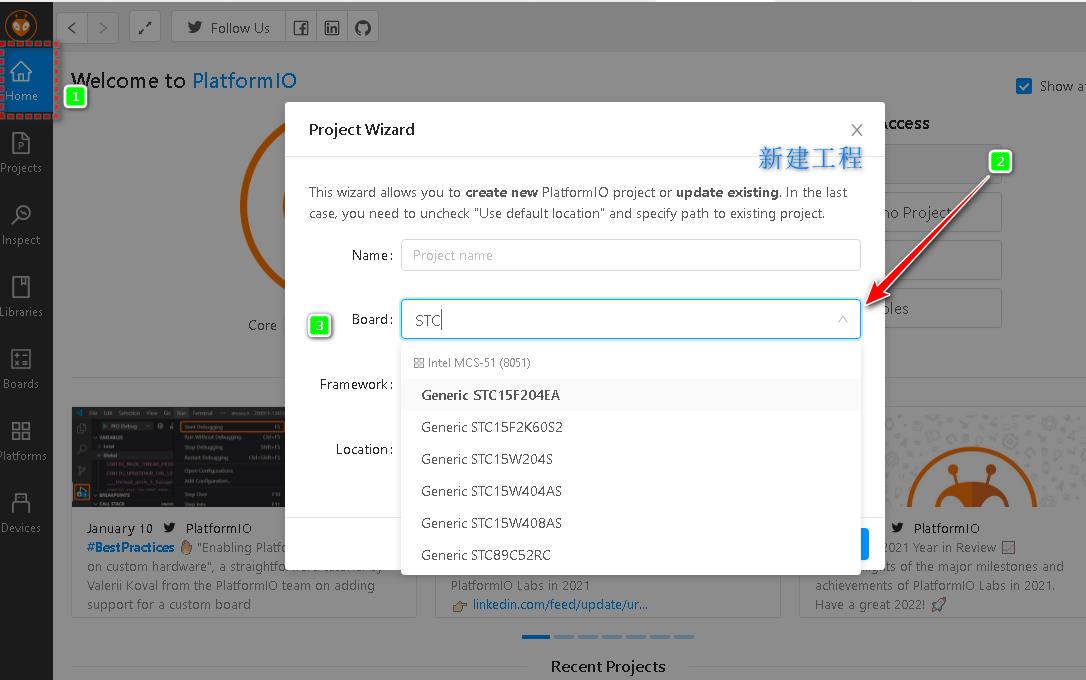
-
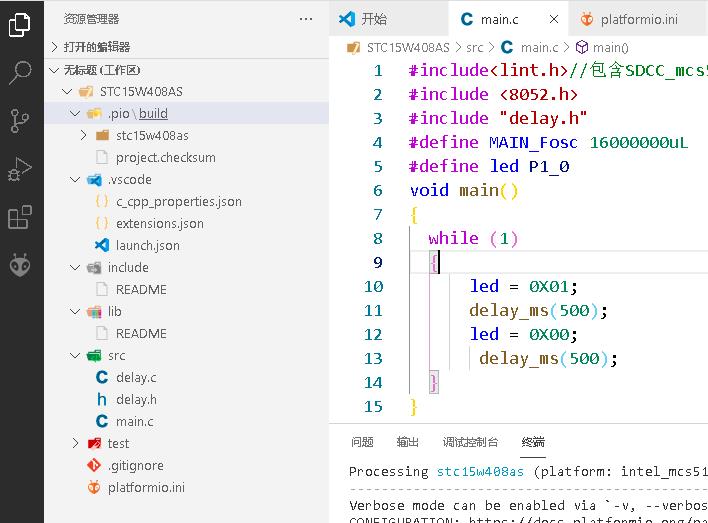
工程目录文件架构
-
工程源文件和头文件放置在
src目录下面。
main.c
#include<lint.h>//包含SDCC_mcs51定义,使编辑器支持 __sfr
#include <8052.h>//这个51的头文件
#include "delay.h"
#define MAIN_Fosc 16000000uL
#define led P1_0
void main()

  while (1)

      led = 0X01;
      delay_ms(500);
      led = 0X00;
       delay_ms(500);
delay.c文件代码
#include <delay.h>

void delay_ms(unsigned int ms)

    unsigned int i;
    do

        i = MAIN_Fosc / 13000;
        while (--i)
            ;
     while (--ms);
delay.h文件代码
#ifndef	__DELAY_H
#define	__DELAY_H

#define MAIN_Fosc 16000000uL //晶振频率
void delay_ms(unsigned int ms);
#endif
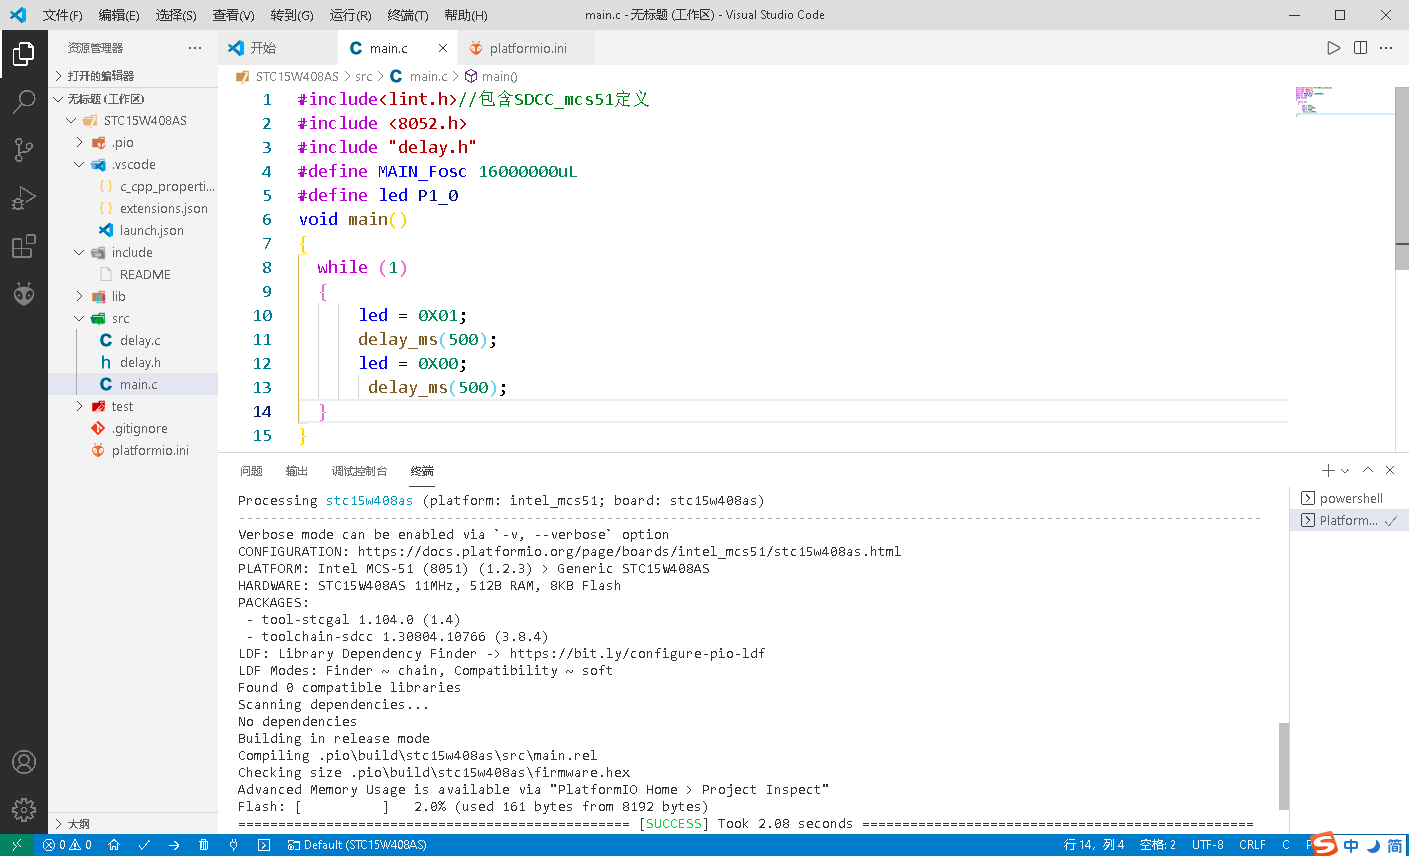
配置头文件路径
- 我的SDCC头文件目录:
C:\\Users\\Administrator\\.platformio\\packages\\toolchain-sdcc\\include\\mcs51
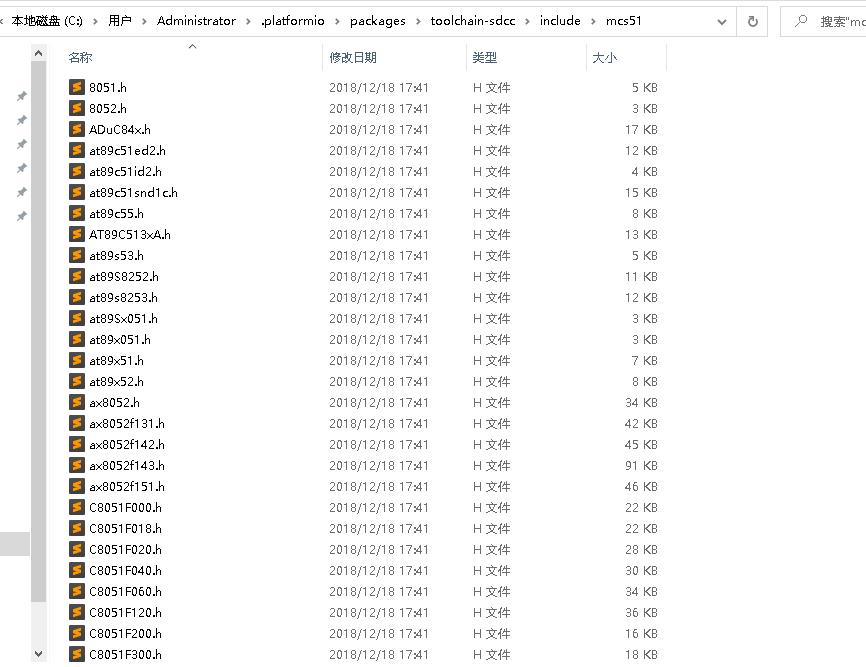
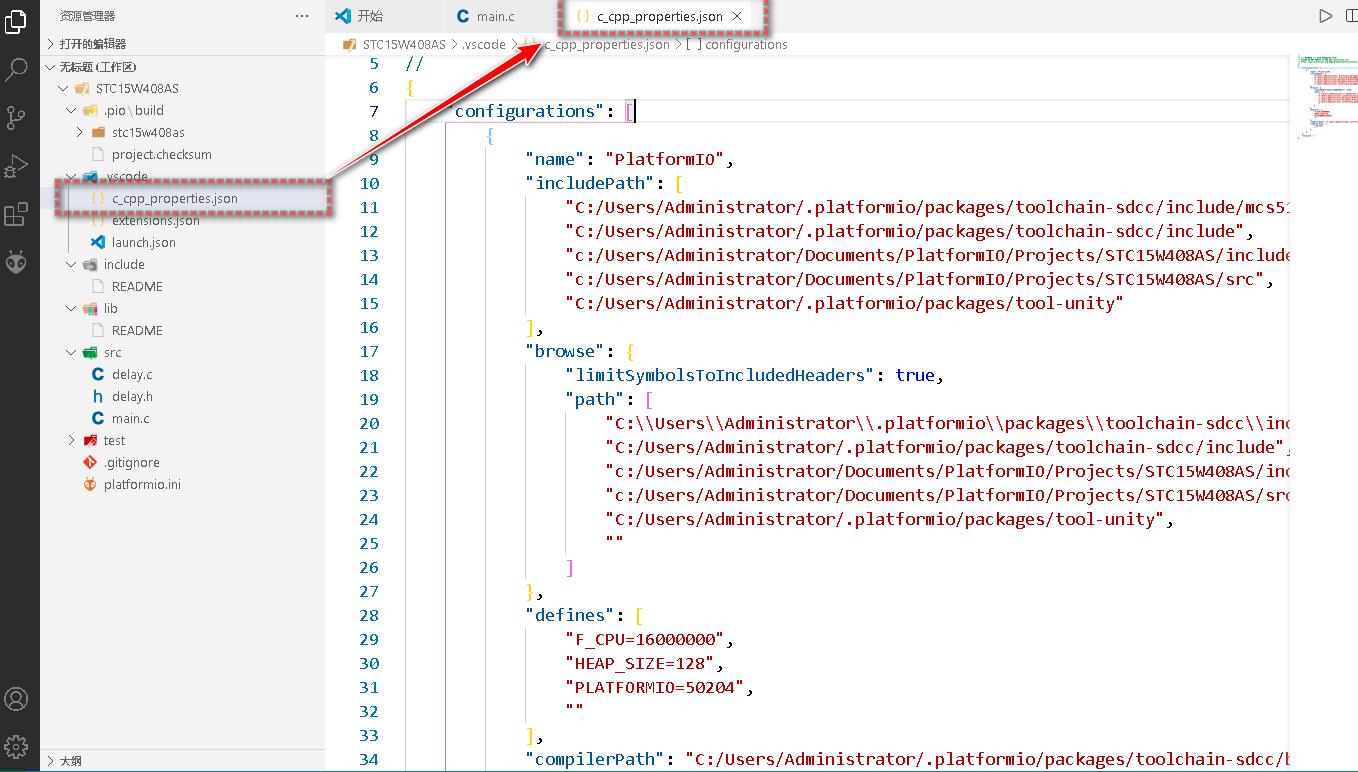
根据上面的头文件位置,来设定下面的配置文件路径。
c_cpp_properties.json//文件内容
//
// !!! WARNING !!! AUTO-GENERATED FILE!
// PLEASE DO NOT MODIFY IT AND USE "platformio.ini":
// https://docs.platformio.org/page/projectconf/section_env_build.html#build-flags
//

    "configurations": [

            "name": "PlatformIO",
            "includePath": [
                "C:/Users/Administrator/.platformio/packages/toolchain-sdcc/include/mcs51",
                "C:/Users/Administrator/.platformio/packages/toolchain-sdcc/include",
                "c:/Users/Administrator/Documents/PlatformIO/Projects/STC15W408AS/include",
                "c:/Users/Administrator/Documents/PlatformIO/Projects/STC15W408AS/src",
                "C:/Users/Administrator/.platformio/packages/tool-unity"
            ],
            "browse":
                "limitSymbolsToIncludedHeaders": true,
                "path": [
                    "C:\\\\Users\\\\Administrator\\\\.platformio\\\\packages\\\\toolchain-sdcc\\\\include\\\\mcs51",
                    "C:/Users/Administrator/.platformio/packages/toolchain-sdcc/include",
                    "c:/Users/Administrator/Documents/PlatformIO/Projects/STC15W408AS/include",
                    "c:/Users/Administrator/Documents/PlatformIO/Projects/STC15W408AS/src",
                    "C:/Users/Administrator/.platformio/packages/tool-unity",
                    ""
                ]
            ,
            "defines": [
                "F_CPU=16000000",
                "HEAP_SIZE=128",
                "PLATFORMIO=50204",
                ""
            ],
            "compilerPath": "C:/Users/Administrator/.platformio/packages/toolchain-sdcc/bin/sdcc.exe",
            "compilerArgs": [
                "-mmcs51",
                ""
            ]

    ],
    "version": 4
- 8051头文件路径需要自己添加,如果没有添加,会显示波浪线,虽然不影响编译,但是感觉看的很不舒服。
- 这个文件文章需要根据个人电脑安装路径来定,并不一定和我的一样。
                "C:/Users/Administrator/.platformio/packages/toolchain-sdcc/include/mcs51",
                "C:/Users/Administrator/.platformio/packages/toolchain-sdcc/include",
编译和上传代码
- 编译的话,只要包含了所需头文件路径没有问题,还有工程代码没有问题,编译就没什么问题。
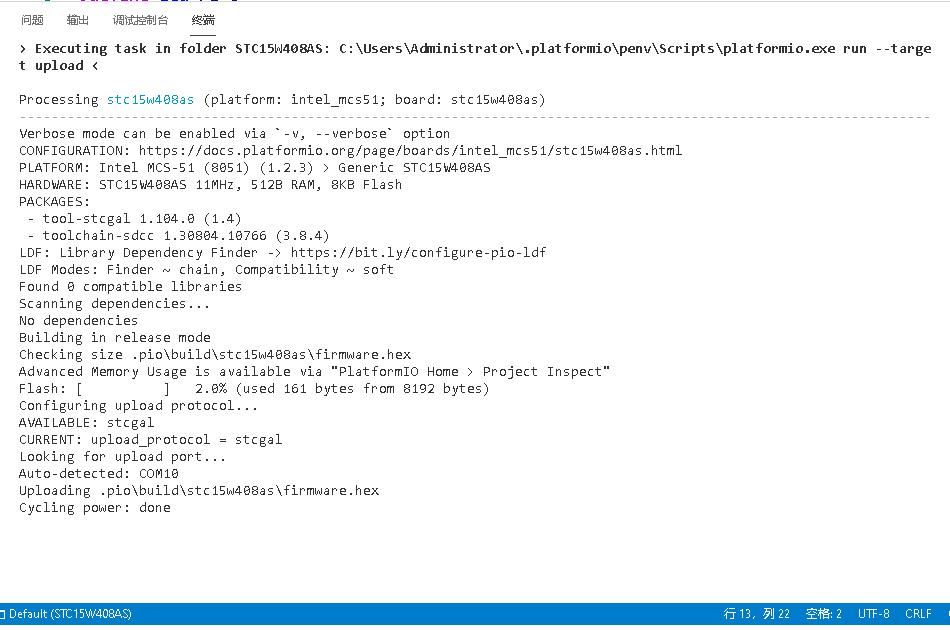
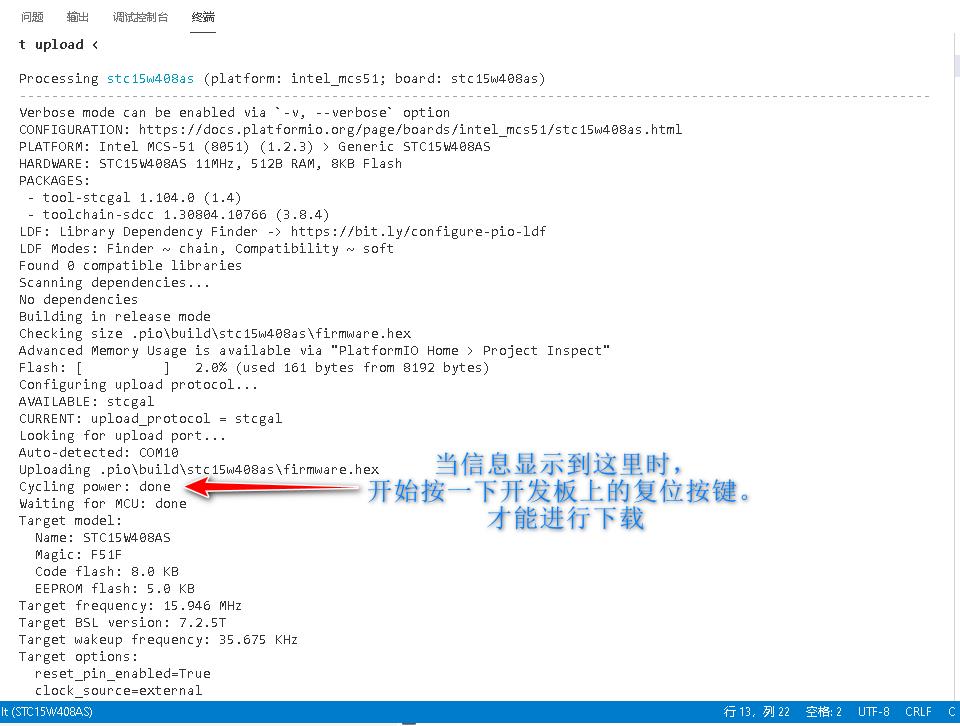
- Platform IO默认是需要手动按一下板子上的复位按键才能把程序下载到芯片里面的。我是受到《单片机—Mac下的开发环境【3】(STC单片机 + PlatformIO IDE)》启发,该烧写的命令。
- 烧写命令修改地方:
C:\\Users\\Administrator\\.platformio\\platforms\\intel_mcs51\\builder中的main.py文件,第145行:

- 原信息
if upload_protocol == "stcgal":
    f_cpu_khz = int(board_config.get("build.f_cpu")) / 1000
    stcgal_protocol = board_config.get("upload.stcgal_protocol")
    stcgal = join(env.PioPlatform().get_package_dir("tool-stcgal") or "", "stcgal.py")
    env.Replace(
        UPLOADERFLAGS=[
            "-P", stcgal_protocol,
            "-p", "$UPLOAD_PORT",
            "-t", int(f_cpu_khz),
            "-a"
        ],
默认在点击烧写时,会卡在下面这个地方。需要手动去按一下板子上的复位按键,才能下载到板子上。
-
按下开发板上的复位按键后,开始下载到开发板的芯片当中了
-
参考
stcgal帮助信息
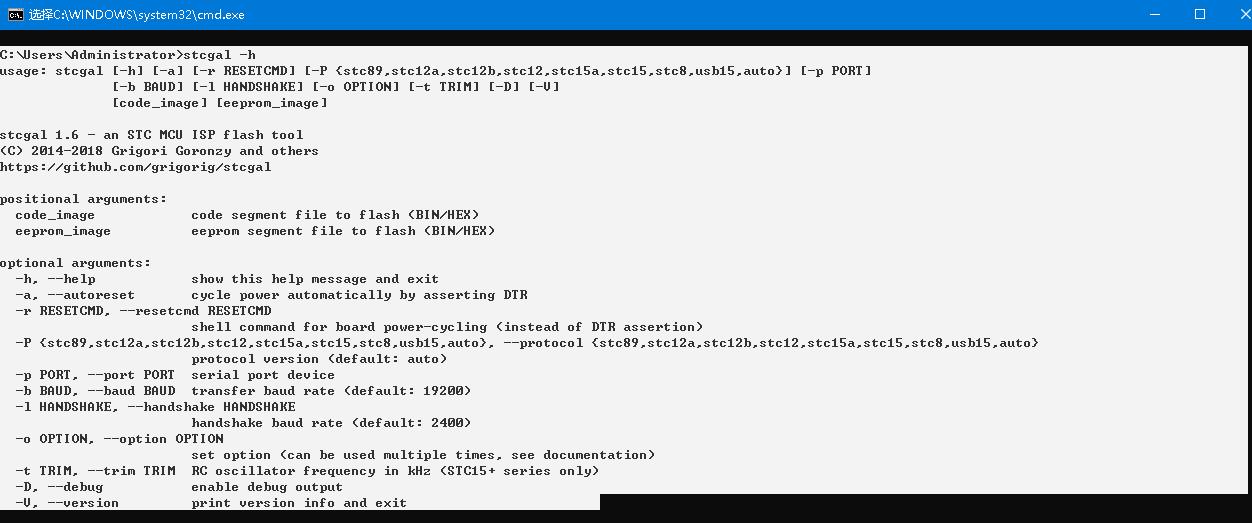
将烧录协议中的最后一个参数
-a去掉。因为我自制的开发板使用的是CH340C,使用了RTS引脚作为下载时的联络信号,来给芯片断电复位的电路。换句话说,我的板子支持自动下载功能。
-a, --autoreset cycle power automatically by asserting DTR
if upload_protocol == "stcgal":
    f_cpu_khz = int(board_config.get("build.f_cpu")) / 1000
    stcgal_protocol = board_config.get("upload.stcgal_protocol")
    stcgal = join(env.PioPlatform().get_package_dir("tool-stcgal") or "", "stcgal.py")
    env.Replace(
        UPLOADERFLAGS=[
            "-P", stcgal_protocol,
            "-p", "$UPLOAD_PORT",
            "-t", int(f_cpu_khz),

                   ],
- 去掉
-a参数后,整个下载过程信息
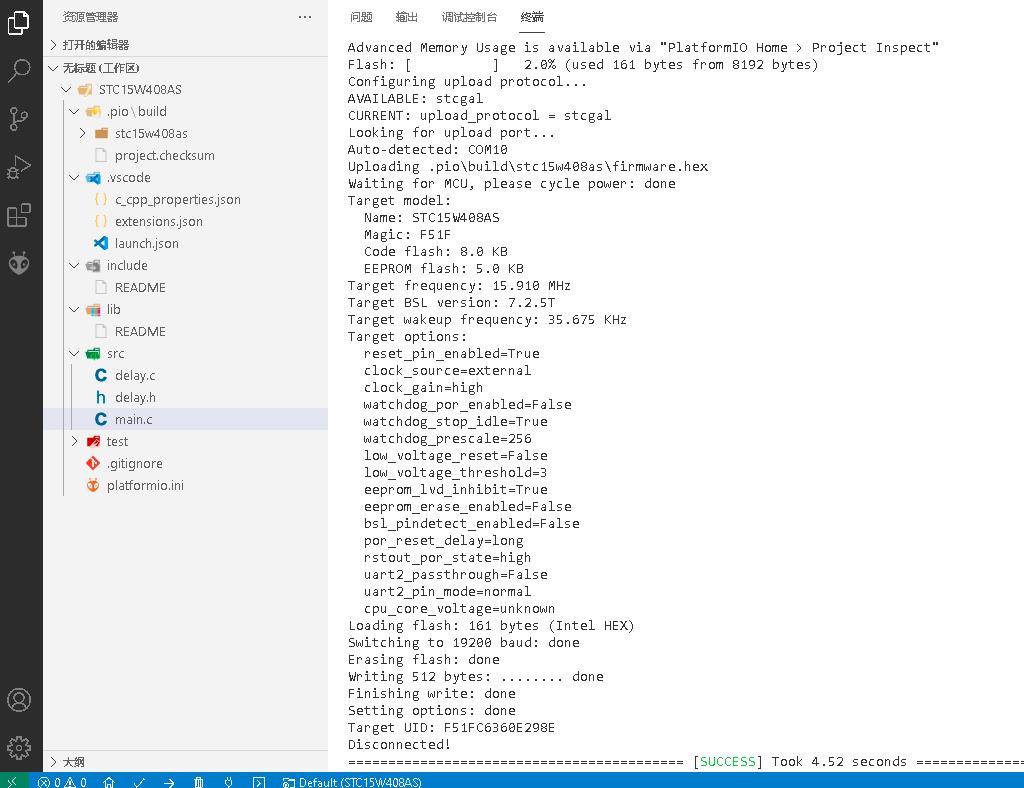
> Executing task in folder STC15W408AS: C:\\Users\\Administrator\\.platformio\\penv\\Scripts\\platformio.exe run --target upload <

Processing stc15w408as (platform: intel_mcs51; board: stc15w408as)
------------------------------------------------------------------------------------------------------------------Verbose mode can be enabled via `-v, --verbose` option
CONFIGURATION: https://docs.platformio.org/page/boards/intel_mcs51/stc15w408as.html
PLATFORM: Intel MCS-51 (8051) (1.2.3) > Generic STC15W408AS
HARDWARE: STC15W408AS 11MHz, 512B RAM, 8KB Flash
PACKAGES:
 - tool-stcgal 1.104.0 (1.4)
 - toolchain-sdcc 1.30804.10766 (3.8.4)
LDF: Library Dependency Finder -> https://bit.ly/configure-pio-ldf
LDF Modes: Finder ~ chain, Compatibility ~ soft
Found 0 compatible libraries
Scanning dependencies...
No dependencies
Building in release mode
Checking size .pio\\build\\stc15w408as\\firmware.hex
Advanced Memory Usage is available via "PlatformIO Home > Project Inspect"
Flash: [          ]   2.0% (used 161 bytes from 8192 bytes)
Configuring upload protocol...
AVAILABLE: stcgal
CURRENT: upload_protocol = stcgal
Looking for upload port...
Auto-detected: COM10
Uploading .pio\\build\\stc15w408as\\firmware.hex
Waiting for MCU, please cycle power: done
Target model:
  Name: STC15W408AS
  Magic: F51F
  Code flash: 8.0 KB
  EEPROM flash: 5.0 KB
Target frequency: 15.910 MHz
Target BSL version: 7.2.5T
Target wakeup frequency: 35.675 KHz
Target options:
  reset_pin_enabled=True
  clock_source=external
  clock_gain=high
  watchdog_por_enabled=False
  watchdog_stop_idle=True
  watchdog_prescale=256
  low_voltage_reset=False
  low_voltage_threshold=3
  eeprom_lvd_inhibit=True
  eeprom_erase_enabled=False
  bsl_pindetect_enabled=False
  por_reset_delay=long
  rstout_por_state=high
  uart2_passthrough=False
  uart2_pin_mode=normal
  cpu_core_voltage=unknown
Loading flash: 161 bytes (Intel HEX)
Switching to 19200 baud: done
Erasing flash: done
Writing 512 bytes: ........ done
Finishing write: done
Setting options: done
Target UID: F51FC6360E298E
Disconnected!
========================================== [SUCCESS] Took 4.52 seconds ==========================================

终端将被任务重用,按任意键关闭。
以上是关于STC单片机VSCode PlatformIO开发环境详细配置过程的主要内容,如果未能解决你的问题,请参考以下文章