Android MVVM框架搭建TabLayoutViewPager城市地图天气切换
Posted 初学者-Study
tags:
篇首语:本文由小常识网(cha138.com)小编为大家整理,主要介绍了Android MVVM框架搭建TabLayoutViewPager城市地图天气切换相关的知识,希望对你有一定的参考价值。
android MVVM框架搭建(九)TabLayout、ViewPager、城市地图切换
前言
在上一篇文章中完成了高德地图的使用及地图天气的显示,现在地图上可以查看当前的所在地天气,本文中将对国内其他城市进行切换,地图进行移动,天气查询。同时完成Fragment中再加载Fragment,通过TabLayout和ViewPager进行切换。
正文
从易到难,先完成Fragment中加载Fragment,现在HomeActivity中加载了三个Fragment,其中NewsFragment和VideoFragment的性质有一些相近,因此我们可以把这两个Fragment放到一个Fragment中去加载显示,这样做可以节省HomeActivity中空间。
一、父Fragment加载子Fragment
很简单,我们先在fragment包下创建一个InfoFragment,对应的布局info_fragment.xml,代码如下:
<?xml version="1.0" encoding="utf-8"?>
<layout xmlns:android="http://schemas.android.com/apk/res/android"
    xmlns:app="http://schemas.android.com/apk/res-auto"
    xmlns:tools="http://schemas.android.com/tools">

    <RelativeLayout
        android:layout_width="match_parent"
        android:layout_height="match_parent"
        tools:context=".ui.fragment.InfoFragment">

        <com.google.android.material.tabs.TabLayout
            android:id="@+id/tab"
            android:layout_width="match_parent"
            android:layout_height="wrap_content"
            app:tabIndicatorColor="@color/purple_500"
            app:tabTextColor="@color/purple_500" />

        <androidx.viewpager.widget.ViewPager
            android:id="@+id/vp"
            android:layout_width="match_parent"
            android:layout_height="match_parent"
            android:layout_below="@+id/tab" />

    </RelativeLayout>
</layout>
① Fragment适配器
然后我们创建一个Fragment适配器,在adapter包创建InfoFragmentAdapter类,代码如下:
public class InfoFragmentAdapter extends FragmentPagerAdapter

    String titleArr[];
    List<Fragment> mFragmentList;

    public InfoFragmentAdapter(FragmentManager fm, List<Fragment> list, String[] titleArr)
        super(fm);
        mFragmentList = list;
        this.titleArr = titleArr;


    @Override
    public Fragment getItem(int i)
        return mFragmentList.get(i);


    @Override
    public int getCount()
        return mFragmentList != null ? mFragmentList.size() : 0;


    @Nullable
    @Override
    public CharSequence getPageTitle(int position)
        return titleArr[position];


    @Override
    public void destroyItem(@NonNull ViewGroup container, int position, @NonNull Object object)
//        super.destroyItem(container, position, object);
② TabLayout组合ViewPager
下面在InfoFragment中进行两个控件的组合,InfoFragment中代码如下:
public class InfoFragment extends BaseFragment


    public static InfoFragment newInstance()
        return new InfoFragment();


    private InfoFragmentBinding binding;

    /**
     * 标题数组
     */
    private final String[] titles = "新闻","视频";
    private final List<Fragment> fragmentList = new ArrayList<>();

    @Override
    public View onCreateView(@NonNull LayoutInflater inflater, @Nullable ViewGroup container,
                             @Nullable Bundle savedInstanceState)
        binding = DataBindingUtil.inflate(inflater,R.layout.info_fragment,container,false);
        return binding.getRoot();


    @Override
    public void onActivityCreated(@Nullable Bundle savedInstanceState)
        super.onActivityCreated(savedInstanceState);

        fragmentList.add(new NewsFragment());
        fragmentList.add(new VideoFragment());
        binding.vp.setAdapter(new InfoFragmentAdapter(getChildFragmentManager(), fragmentList, titles));
        binding.tab.setupWithViewPager(binding.vp);
现在这个InfoFragment就写好了,下面就是去移除掉nav_graph.xml中的NewsFragment和VideoFragment,移除后如下图所示

然后就是底部的菜单移除,navigation_menu.xml中移除新闻和视频,移除后如下图:
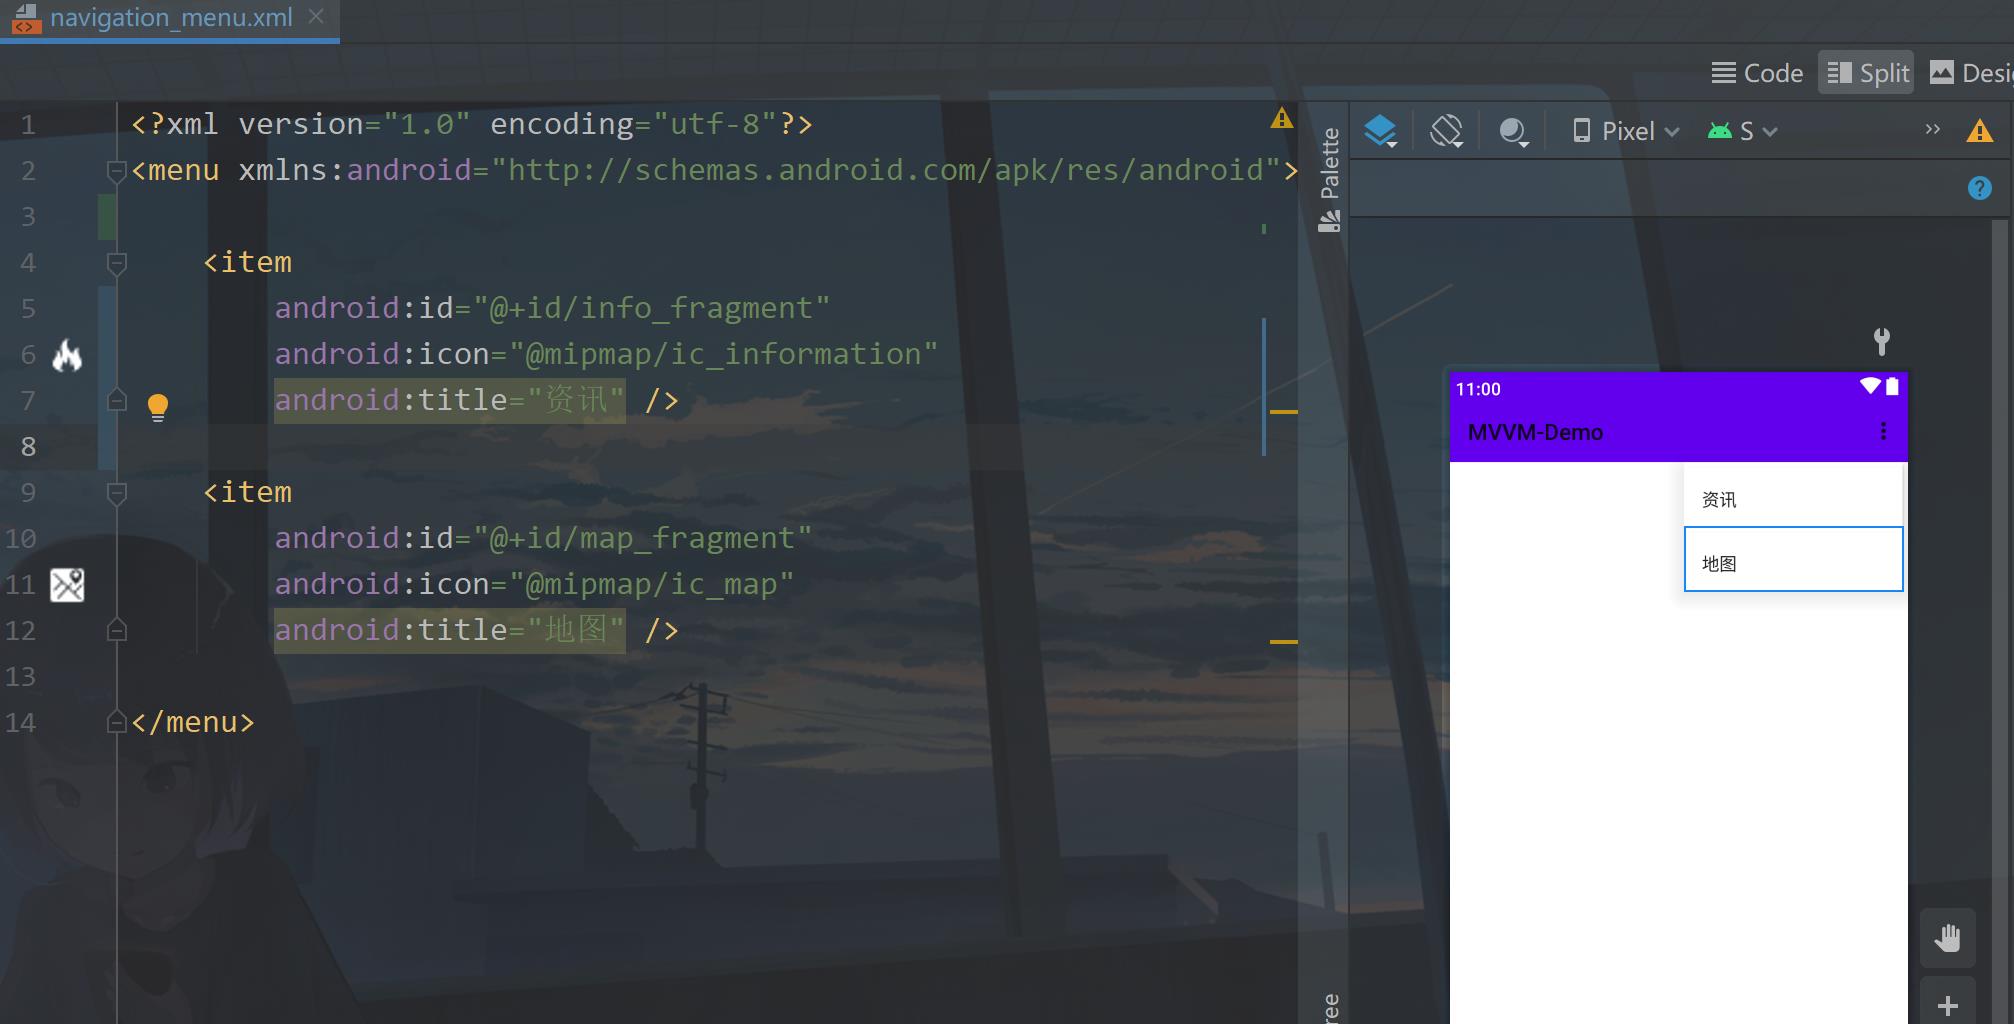
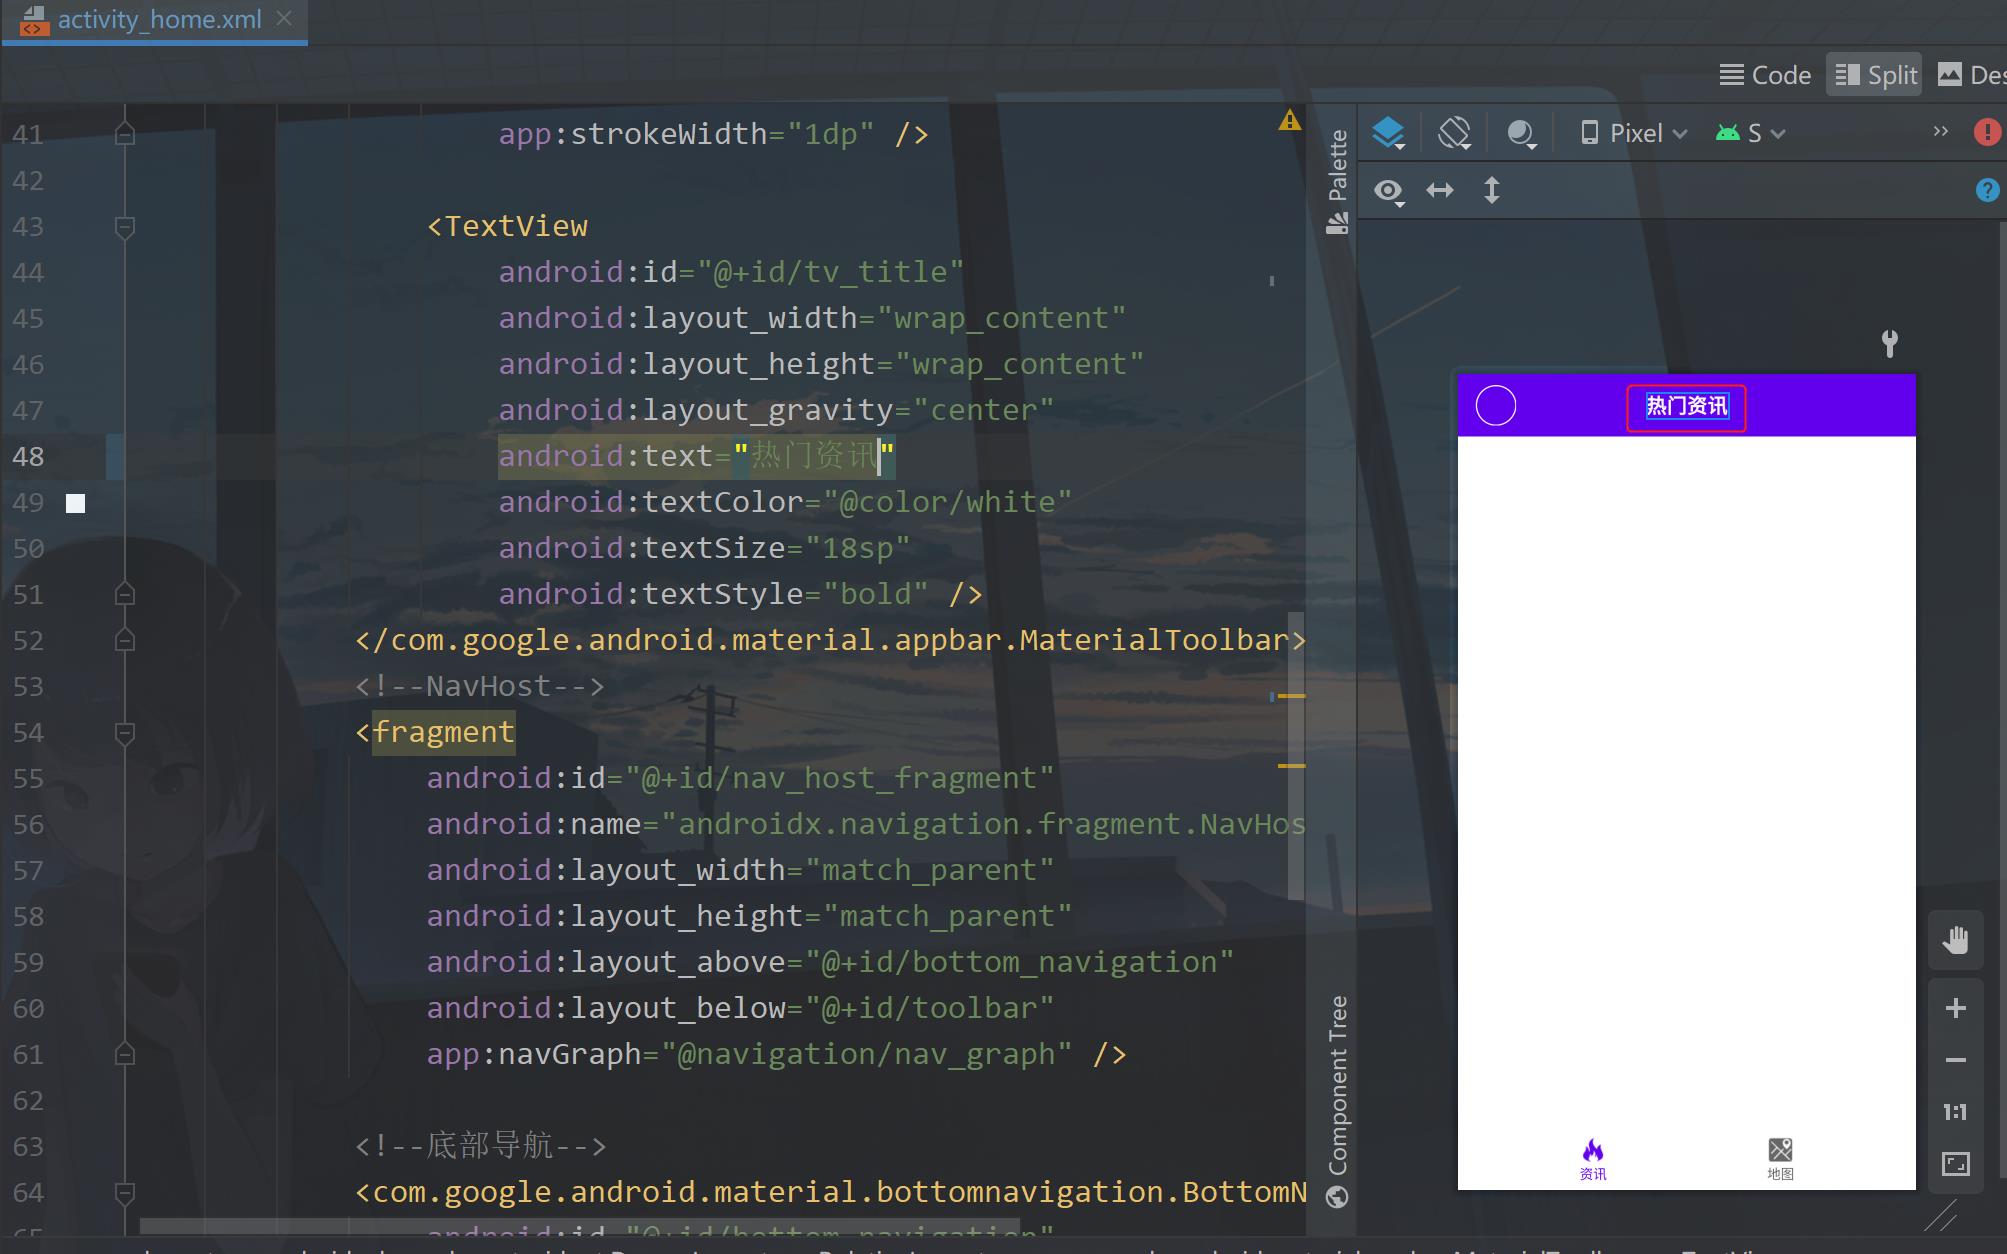
好了,最后再检查一下activity_home.xml。修改一下标题
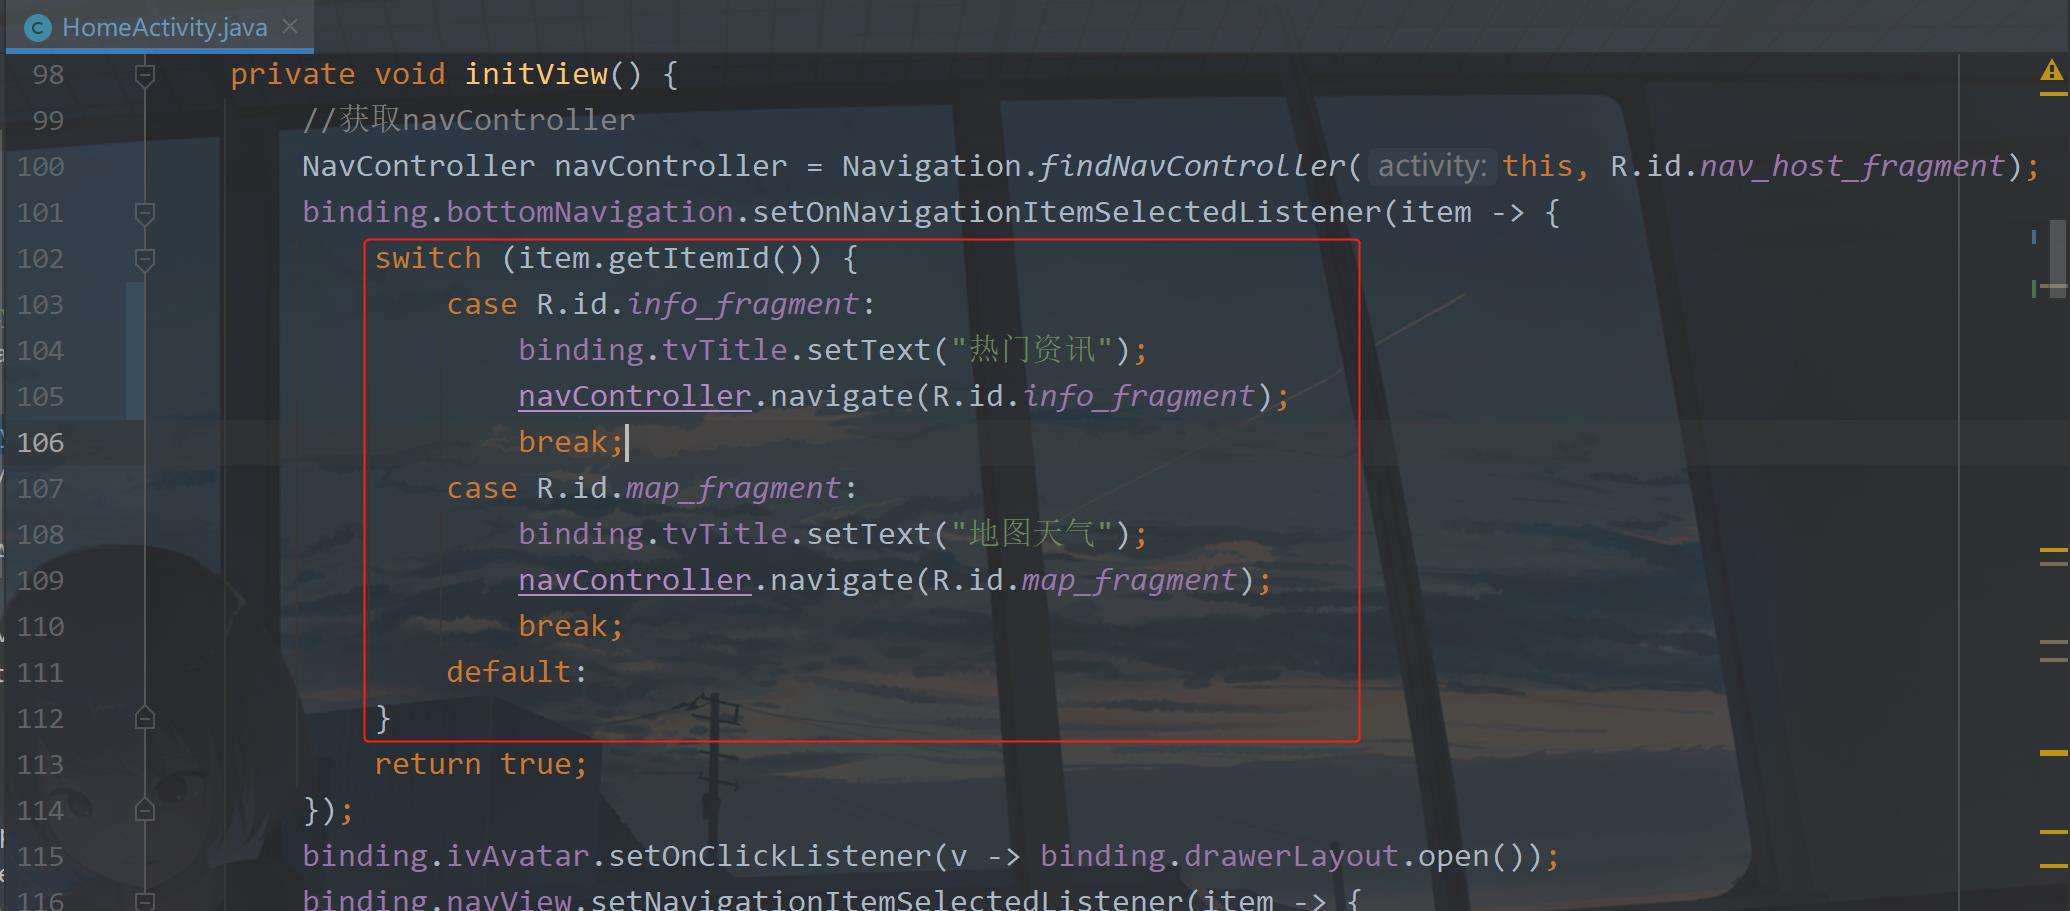
然后就是修改HomeActivity中的initView方法中的代码,如下图所示:
下面运行一下:

二、抽屉菜单
之前在主页面的HomeActivity中使用过抽屉菜单,现在需要在MapFragment中使用,目的是为了加载城市信息,例如全国的省、市、区/县、镇。
首先修改map_fragment的页面布局,代码如下:
<?xml version="1.0" encoding="utf-8"?>
<layout xmlns:android="http://schemas.android.com/apk/res/android"
    xmlns:app="http://schemas.android.com/apk/res-auto"
    xmlns:tools="http://schemas.android.com/tools">

    <androidx.drawerlayout.widget.DrawerLayout
        android:id="@+id/drawer_layout"
        android:layout_width="match_parent"
        android:layout_height="match_parent">
        <!-- 主页面 -->
        <RelativeLayout
            android:layout_width="match_parent"
            android:layout_height="match_parent"
            tools:context=".ui.fragment.MapFragment">

            <com.amap.api.maps.MapView
                android:id="@+id/map_view"
                android:layout_width="match_parent"
                android:layout_height="match_parent" />

            <LinearLayout
                android:layout_width="wrap_content"
                android:layout_height="wrap_content"
                android:layout_alignParentEnd="true"
                android:layout_alignParentBottom="true"
                android:layout_marginEnd="20dp"
                android:orientation="vertical">

                <com.google.android.material.floatingactionbutton.FloatingActionButton
                    android:id="@+id/fab_weather"
                    android:layout_width="wrap_content"
                    android:layout_height="wrap_content"
                    android:layout_marginBottom="20dp"
                    android:contentDescription="天气"
                    android:src="@mipmap/ic_weather"
                    android:visibility="gone"
                    app:backgroundTint="@color/white"
                    app:fabSize="auto"
                    tools:ignore="UsingOnClickInXml" />

                <com.google.android.material.floatingactionbutton.FloatingActionButton
                    android:id="@+id/fab_city"
                    android:layout_width="wrap_content"
                    android:layout_height="wrap_content"
                    android:layout_marginBottom="20dp"
                    android:contentDescription="城市"
                    android:src="@mipmap/ic_city"
                    android:visibility="gone"
                    app:backgroundTint="@color/white"
                    app:fabSize="auto"
                    tools:ignore="UsingOnClickInXml" />
            </LinearLayout>


        </RelativeLayout>
        <!-- 抽屉页面 -->
        <LinearLayout
            android:id="@+id/lay"
            android:layout_width="match_parent"
            android:layout_height="match_parent"
            android:layout_gravity="end"
            android:background="@color/white"
            android:orientation="vertical">

        </LinearLayout>
    </androidx.drawerlayout.widget.DrawerLayout>

</layout>
这里我添加了一个城市的浮动按钮,图标到我源码里面去拿,这个按钮同样是在获取到天气预报信息之后才显示出来,因此在MapFragment中需要先去添加,如下图所示:

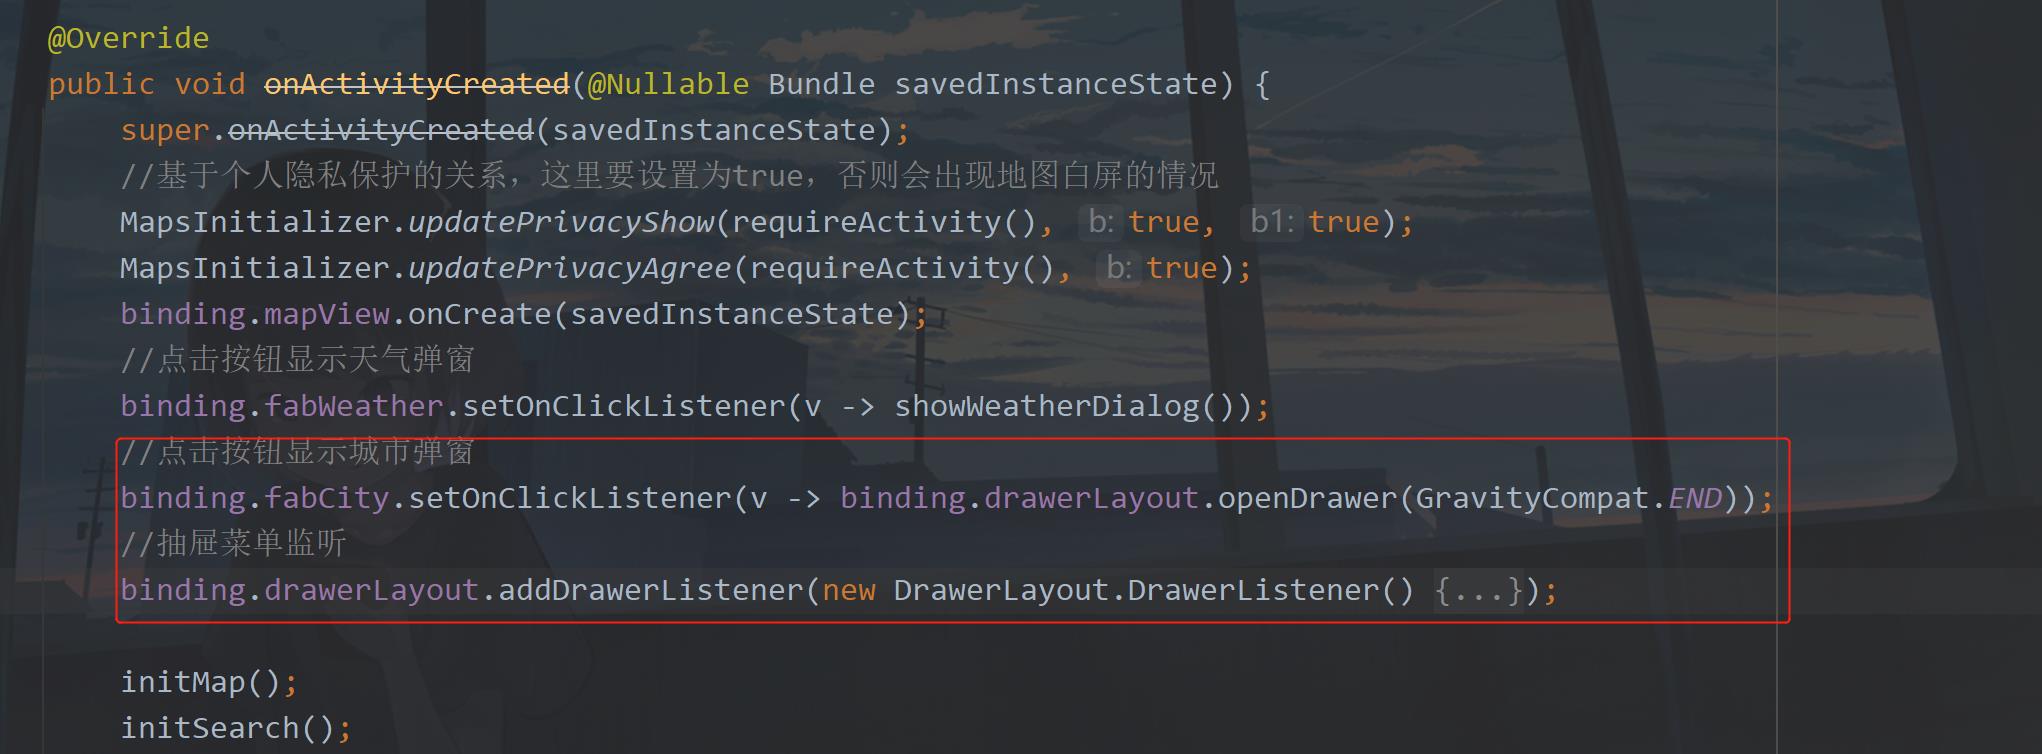
这里我们需要给这个按钮一个点击事件,在onActivityCreated方法中添加如下代码:
		//点击按钮显示城市弹窗
        binding.fabCity.setOnClickListener(v -> binding.drawerLayout.openDrawer(GravityCompat.END));
这里点击按钮是显示这个抽屉页面,这里设置是从屏幕右侧打开,如果不设置则默认是从左侧打开,因为我们在布局中设置抽屉的位置在右侧。
然后就是抽屉的监听,打开和关闭需要控制浮动按钮的显示和隐藏。代码仍然在onActivityCreated方法中,如下所示:
		//抽屉菜单监听
        binding.drawerLayout.addDrawerListener(new DrawerLayout.DrawerListener()
            @Override
            public void onDrawerSlide(@NonNull @NotNull View drawerView, float slideOffset)


            @Override
            public void onDrawerOpened(@NonNull @NotNull View drawerView)
                binding.fabCity.hide();


            @Override
            public void onDrawerClosed(@NonNull @NotNull View drawerView)
                binding.fabCity.show();


            @Override
            public void onDrawerStateChanged(int newState)


        );
一目了然,添加位置没有太多的讲究,如下图所示:
下面我们运行一下,如下图所示:
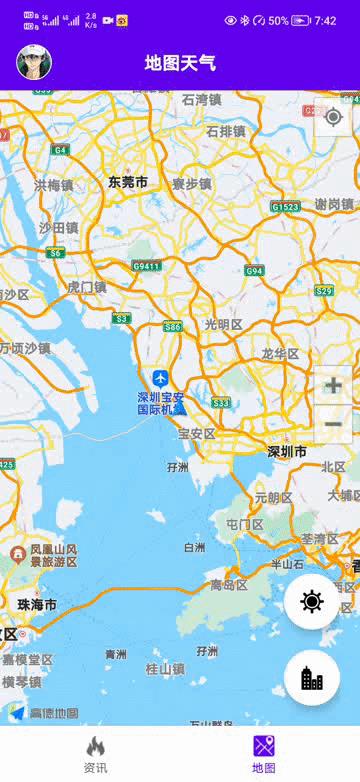
三、行政区搜索
现在抽屉菜单有了,下面就是要获取数据了,从哪里去获取呢?高德给我们提供了API,首先创建对象,在MapFragment中添加如下代码:
	//地区搜索
    private DistrictSearch districtSearch;
    //地区搜索查询
    private DistrictSearchQuery districtSearchQuery;
然后因为同样是搜索,所以我们可以与地理编码搜索放在一个地方,在initSearch方法中添加如下代码:
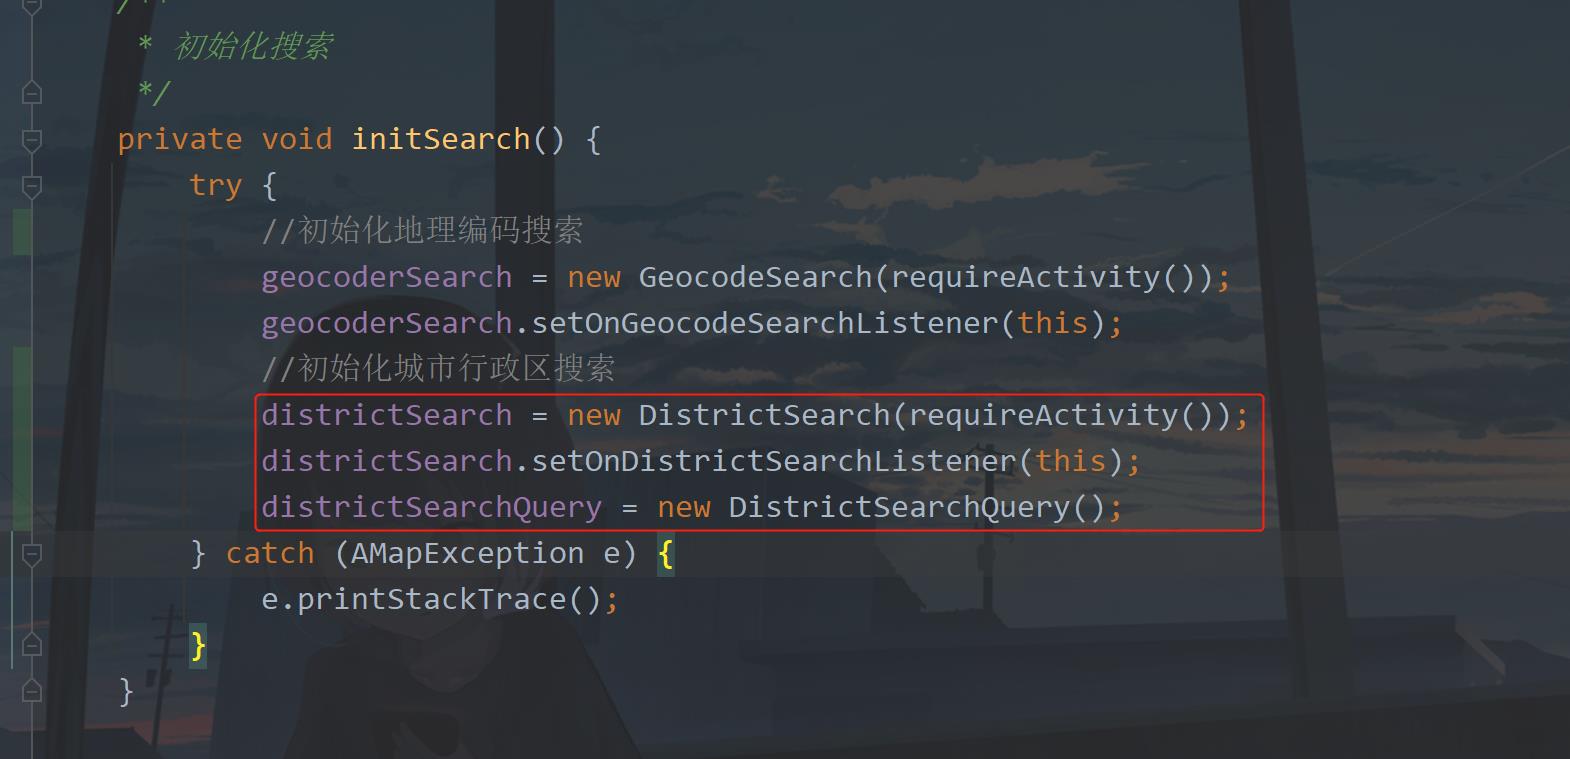
注意这里的this则表示当前的页面需要实现监听的回调,如下图所示:

然后实现方法:
	/**
     * 行政区搜索返回
     *
     * @param districtResult 搜索结果
     */
    @Override
    public void onDistrictSearched(DistrictResult districtResult)
这里的回调就会返回搜索的结果,下面来测试一下,下面写一个方法用来进行地区搜索的启动方法,代码如下:
	/**
     * 行政区搜索
     */
    public void districtSearch(String name)
        //设置查询关键字
        districtSearchQuery.setKeywords(name);
        districtSearch.setQuery(districtSearchQuery);
        // 异步查询行政区
        districtSearch.searchDistrictAsyn();
通过这个方法就能够开始查询了,比如我们一开始就查询国内有多少个省市行政区,创建变量:
	//数组下标
    private int index = 0;
    //行政区数组
    private final String[] districtArray = new String[5];
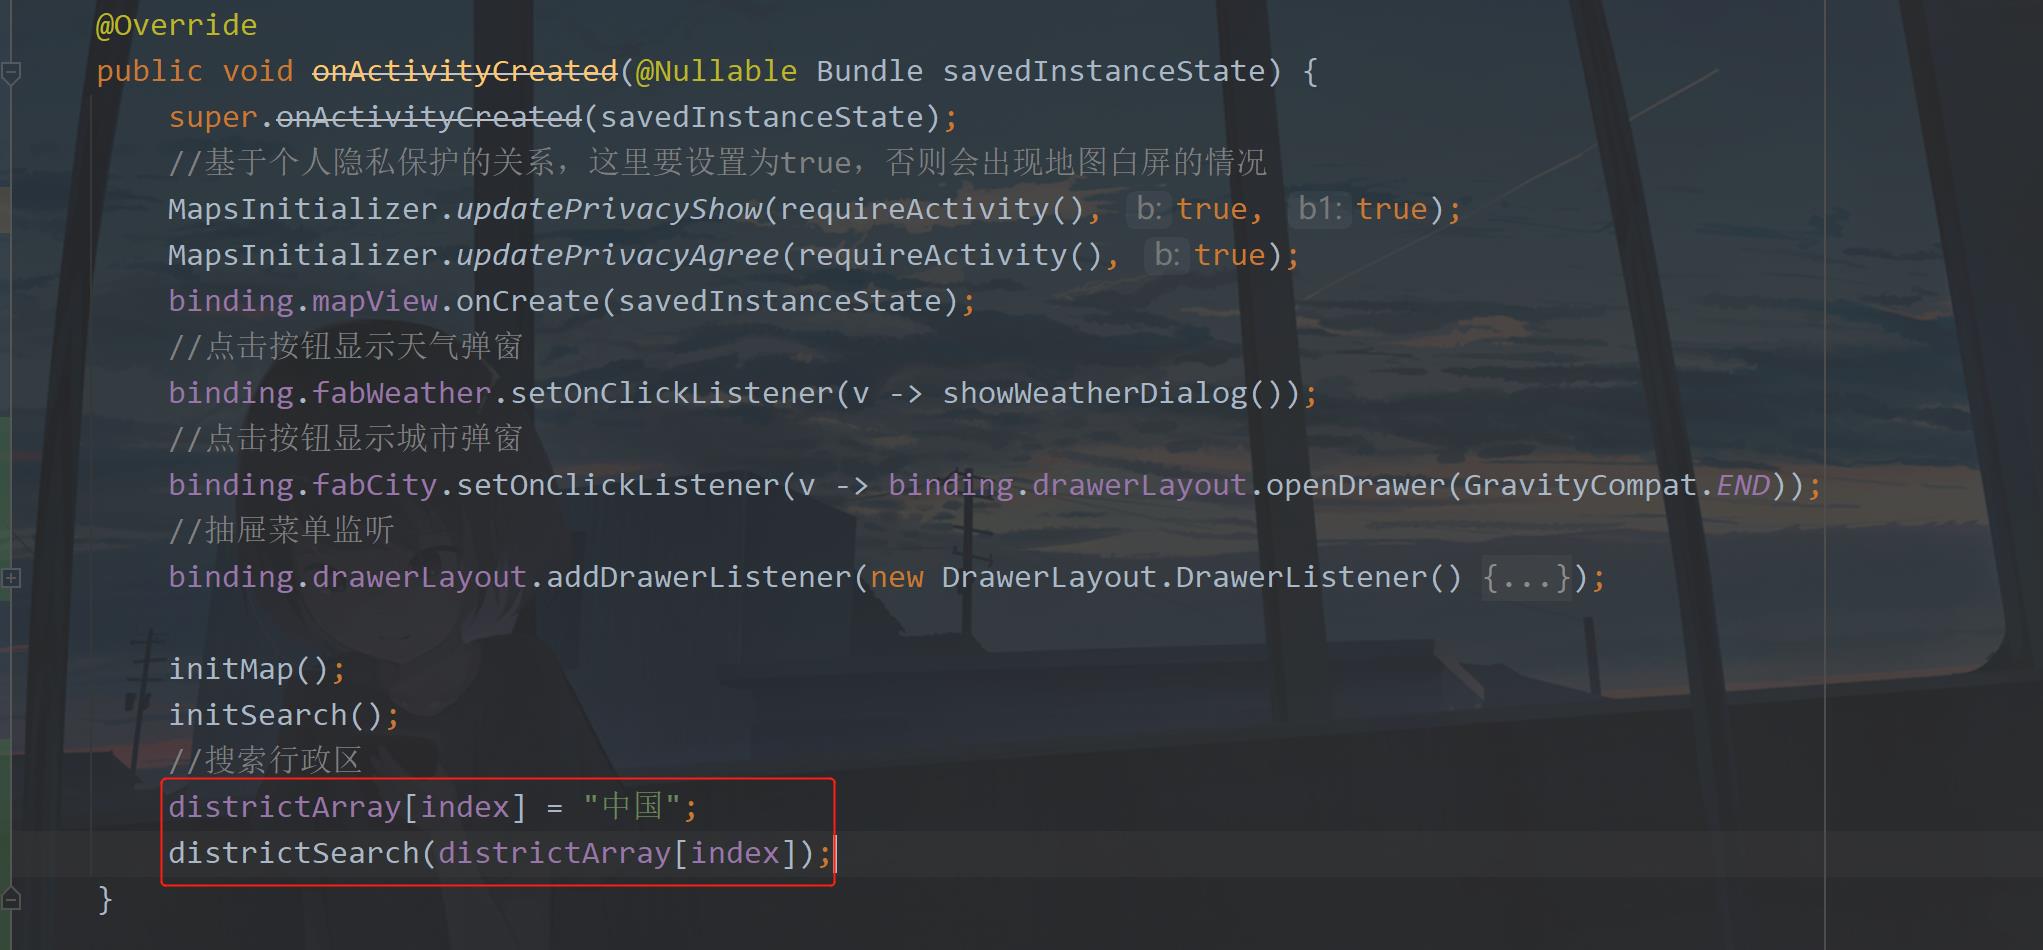
然后我们打印一下区域返回的数据看看是什么样子的,修改onDistrictSearched中的代码如下所示:
	/**
     * 行政区搜索返回
     *
     * @param districtResult 搜索结果
     */
    @Override
    public void onDistrictSearched(DistrictResult districtResult)
        if (districtResult != null)
            if (districtResult.getAMapException().getErrorCode() == AMapException.CODE_AMAP_SUCCESS)
                final List<String> nameList = new ArrayList<>();

                List<DistrictItem> subDistrict1 = districtResult.getDistrict().get(0).getSubDistrict();
                for (int i = 0; i < subDistrict1.size(); i++)
                    String name = subDistrict1.get(i).getName();
                    nameList.add(name);

                Log.e(TAG, "onDistrictSearched: " + subDistrict1.size());
                for (DistrictItem districtItem : subDistrict1)
                    Log.e(TAG, "onDistrictSearched: "+districtItem.getName());

             else
                showMsg(districtResult.getAMapException().getErrorCode() + "");
运行一下,只要切换到地图哪里就能看到控制台打印的数据了,如下图所示:

这说明我们已经拿到了全国的省级行政区了,那么我们给展示到抽屉菜单中。
四、行政区展示
展示数据通常是使用列表进行的,在这里也不例外,所以我们需要修改一下map_fragment.xml,如下图所示:
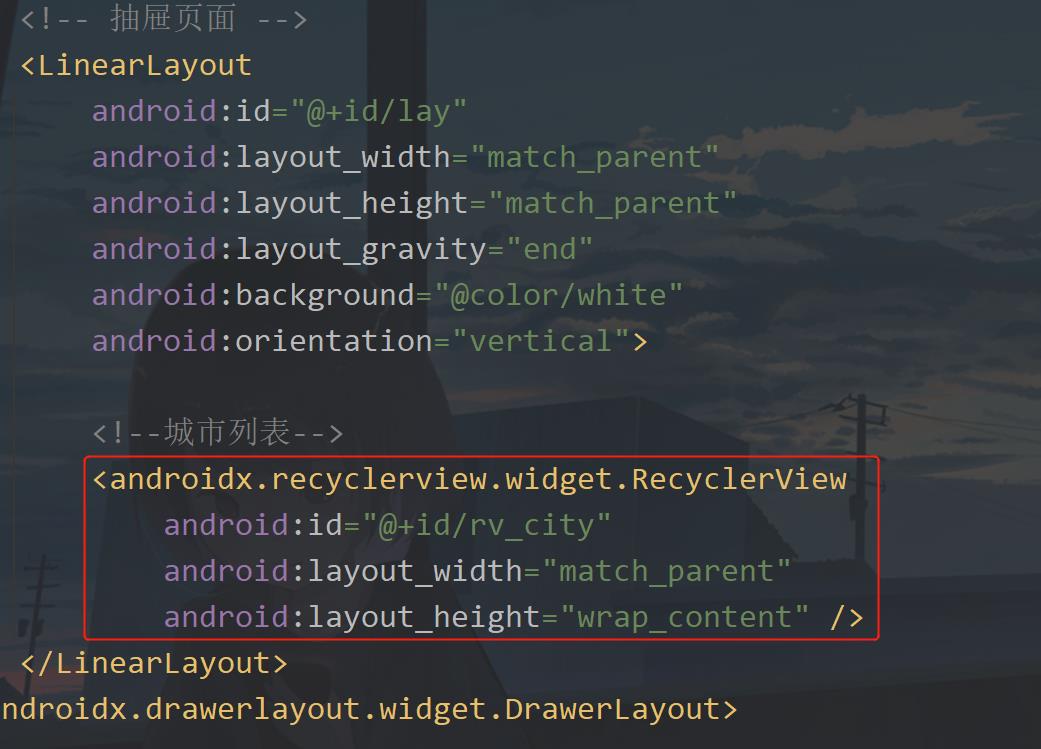
有列表就会有适配器,有适配器就会有一个item布局,首先创建item布局,在layout下新建一个item_city.xml,里面的代码如下:
<?xml version="1.0" encoding="utf-8"?>
<layout xmlns:android="http://schemas.android.com/apk/res/android">

    <data>
        <variable
            name="cityName"
            type="String" />
    </data>

    <TextView
        android:id="@+id/tv_name"
        android:layout_width="match_parent"
        android:foreground="?selectableItemBackground"
        android:layout_height="wrap_content"
        android:background="@drawable/shape_line_black"
        android:gravity="center"
        android:text="@cityName"
        android:padding="12dp"
        android:textColor="@color/black" />
</layout>
这里的shape_line_black.xml是一个下划线,在drawable下创建它,代码如下:
<?xml version="1.0" encoding="utf-8"?>
<layer-list xmlns:android="http://schemas.android.com/apk/res/android" >

    <item
        android:left="-2dp"
        android:right="-2dp"
        android:top="-2dp">
        <shape>
            <solid android:color="#00FFFFFF" />

            <stroke
                android:width="1px"
                android:color="@color/black" />
        </shape>
    </item>

</layer-list>
然后在adapter包下新建一个CityAdapter,代码如下: