结构光三维重建Projector-Camera Calibration投影仪相机标定
Posted pan_jinquan
tags:
篇首语:本文由小常识网(cha138.com)小编为大家整理,主要介绍了结构光三维重建Projector-Camera Calibration投影仪相机标定相关的知识,希望对你有一定的参考价值。
结构光三维重建-Projector-Camera Calibration投影仪相机标定
目录
结构光三维重建-Projector-Camera Calibration投影仪相机标定
3. 编译标定源码:3D Scanning Software
5. 结构光三维重建-3D Scanning Software实现三维重建
1.结构光相机标定软件
结构光相机标定是一件十分复杂的过程,所幸布朗大学开源了一套投影仪摄像机标定系统(Projector-Camera Calibration/3D Scanning Software)
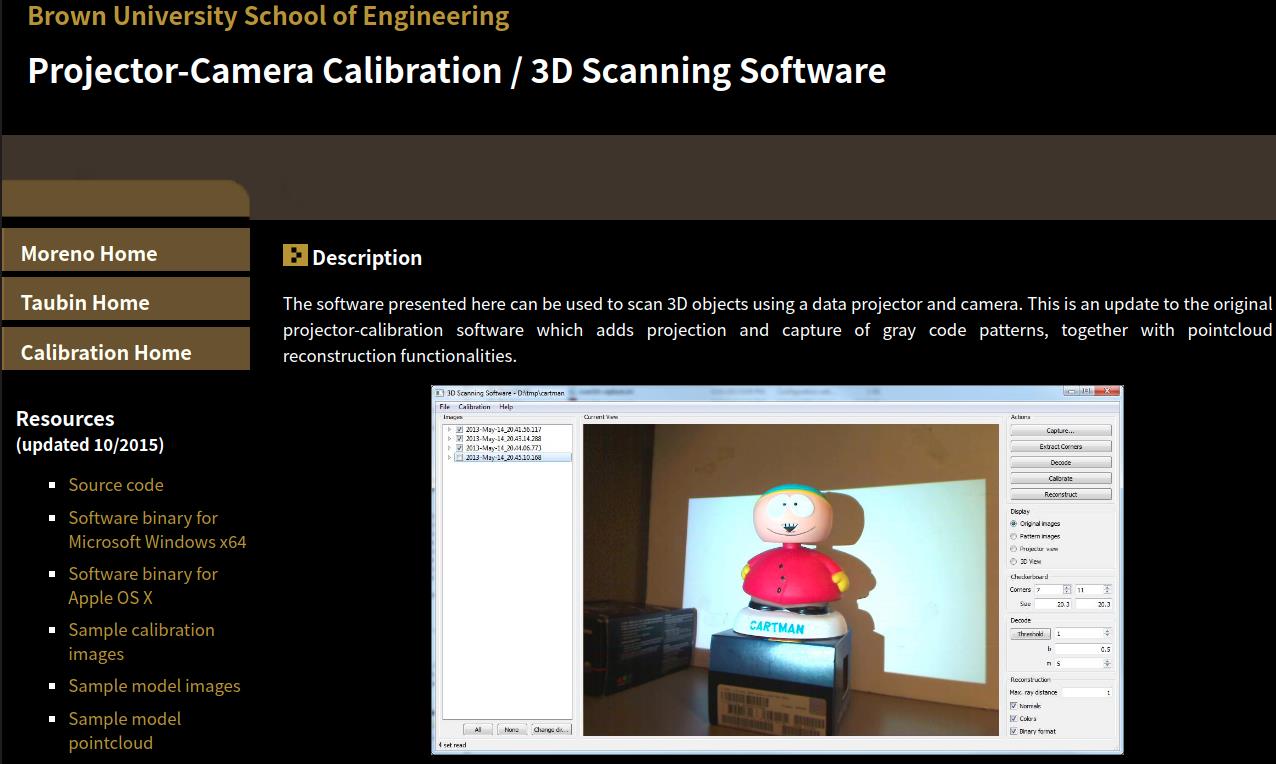
官网提供了Window和Apple OSX编译好的标定软件,很不幸的是,版本比较老旧,仅支持Windows 7 x64,Opencv也是比较老旧的OpenCV 2.4.11,没有提供Linux版本的,你想在Ubuntu成功运行还是要采坑的。
下面手把手教你,如何在Ubuntu上,编译源码
当然,若你不想经历填坑的痛苦,可以直接下载本人已经修改好的源码,已经包括Opencv,TIFF,scan3d-capture-src-2015等源码,直接使用即可
下载地址: https://download.csdn.net/download/guyuealian/36484460
关于如果实现三维重建,请查看下一篇博客《结构光三维重建-3D Scanning Software实现三维重建》:https://panjinquan.blog.csdn.net/article/details/121113787
2. 依赖环境
| 库 | 本地使用版本 | 说明 |
| Ubuntu | Ubuntu18.04 | 本机系统 |
| tiff | tiff-4.3.0 (tiff-4.0.x以上亦可) | opencv编译需要TIFF |
| OpenCV | opencv-4.3.0 (opencv-3.2.0.x以上亦可) | 3D Scanning Software需要用的OpenCV |
| Qt | Qt 5.5.1(Qt 5.0.x以上亦可) | 3D Scanning Software的UI是使用Qt布局的 |
2.1 安装TIFF
下载地址:Index of /libtiff/ ,tiff-4.0.4.tar.gz (tiff-4.0.x以上亦可)
   # 解压tar -zxvf tiff-4.0.4.tar.gz
   # 进入tiff目录
   ./configure
   make
   sudo make install
2.2 安装OpenCV
(1) 源码编译
安装 OpenCV 所需要的库,在终端依次执行以下命令:
sudo apt-get update
sudo apt-get install build-essential
sudo apt-get install cmake git libgtk2.0-dev pkg-config libavcodec-dev libavformat-dev libswscale-dev
sudo apt-get install python-dev python-numpy libtbb2 libtbb-dev libjpeg-dev libpng-dev libtiff-dev libjasper-dev libdc1394-22-dev
官网下载 OpenCV 4.3.0 的源代码(下载地址:Releases - OpenCV)并解压到 opencv4.3.0 目录,然后进入到 opencv4.3.0 的目录,执行
mkdir build
cd build
配置 OpenCV 工程文件
sudo cmake -DBUILD_TIFF=ON -D CMAKE_BUILD_TYPE=Release -D CMAKE_INSTALL_PREFIX=/usr/local ..
PS: 编译选项中,一定要加上-DBUILD_TIFF=ON, 因为标定系统源码需要用到TIFF,否则会出现TIFFReadDirectory@LIBTIFF_4.0’未定义的引用的错误
如果执行命令时出现下载 ippicv 失败,可以参考文章解决:ubuntu编译安装opencv3.3+python3
编译安装
sudo make install编译OpenCV,加上-DBUILD_TIFF=ON选项后,可能会出现以下各种错误
(2) 编译OpenCV常见错误
1.error: ‘O_RDONLY’ undeclared
/home/dm/app/opencv-4.3.0/3rdparty/libtiff/tif_close.c: In function ‘TIFFCleanup’:
/home/dm/app/opencv-4.3.0/3rdparty/libtiff/tif_close.c:50:23: error: ‘O_RDONLY’ undeclared (first use in this function)
if (tif->tif_mode != O_RDONLY)

解决方法:在opencv-4.3.0/3rdparty/libtiff/tiff.h头文件添加头文件#include <fcntl.h>
....
#ifndef _TIFF_
#define	_TIFF_

#include "tiffconf.h"
#include <fcntl.h>
....
PS:如果还有类似的错误,请在发生错误的该源码文件中加入头文件#include <fcntl.h>
2.error: conflicting declaration of ‘int _TIFF_snprintf_f
In file included from /home/dm/app/opencv-4.3.0/3rdparty/libtiff/tif_stream.cxx:28:0:
/home/dm/app/opencv-4.3.0/3rdparty/libtiff/tiffiop.h:60:18: error: conflicting declaration of ‘int _TIFF_snprintf_f(char*, size_t, const char*, ...)’ with ‘C’ linkage
#define snprintf _TIFF_snprintf_f
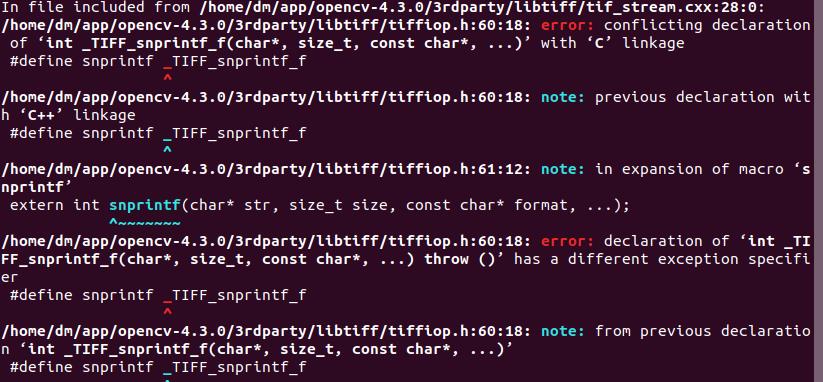
解决方法:声明存在冲突,应该Linux已经存在了,所以可以注释opencv-4.3.0/3rdparty/libtiff/tiffiop.h源码的下面两行:
//#define snprintf _TIFF_snprintf_f
//extern int snprintf(char* str, size_t size, const char* format, ...);
3.error: ‘strchr’ was not declared in this scope
/home/dm/app/opencv-4.3.0/3rdparty/libtiff/tif_stream.cxx:361:6: error: ‘strchr’ was not declared in this scope
if( strchr(mode, 'w') )
^~~~~~
/home/dm/app/opencv-4.3.0/3rdparty/libtiff/tif_stream.cxx:361:6: note: suggested alternative: ‘strtoq’
if( strchr(mode, 'w') )

解决方法:在发生错误的该源码文件中opencv-4.3.0/3rdparty/libtiff/tif_stream.cxx加入头文件 #include <string.h>
2.3 安装QT5
官网下载:https://download.qt.io/archive/qt/
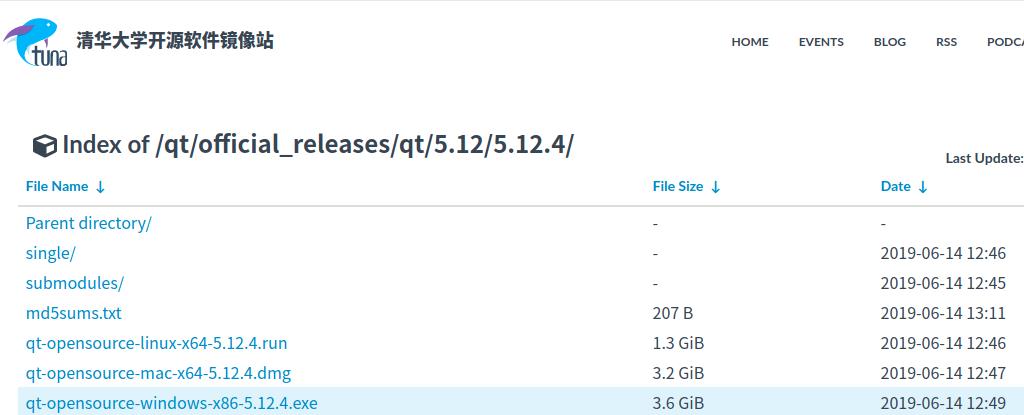
清华镜像:https://mirrors.tuna.tsinghua.edu.cn/qt/official_releases/qt/
下载qt-opensource-linux-x64-5.12.4.run (Qt 5.0.x以上亦可)
对于Linux系统,Qt官方的安装包总是假定C++编译器compiler、调试器debugger、生成器make以及其他开发工具 由该操作系统自己提供,另外构建Qt图形界面程序还需要OpenGL库文件(扩展名为 .a 和 .so)和头文件(扩展名为 .h), OpenGL的开发库也是需要操作系统自己提供。所以在安装Qt官方run文件之前,必须先安装好Linux系统自己软件源里面 的GNU开发工具集和OpenGL开发库。下面针对三类 Linux 操作系统安装相应的GNU开发工具集和OpenGL开发库, 请注意安装软件都需要root权限,并且要联网安装。
sudo apt-get install build-essential libgl1-mesa-dev给QT安装文件可执行权限:
chmod +x qt-opensource-linux-x64-5.12.4.run
安装
./qt-opensource-linux-x64-5.12.4.run
QT安装教程,可参考:https://blog.csdn.net/a435262767/article/details/99317188
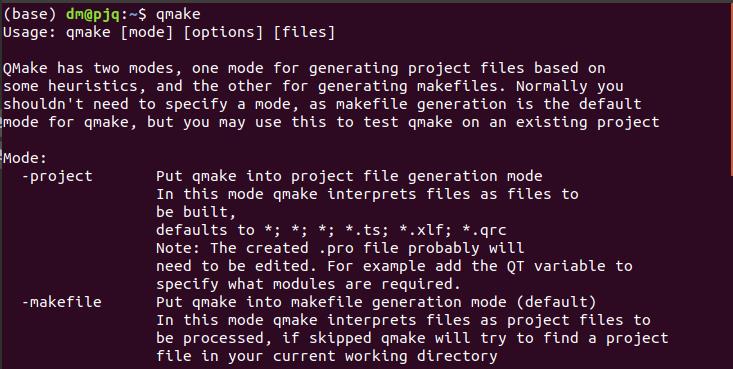
安装后,终端输入qmake,会出现下截图,表示QT已经安装成功:
3. 编译标定源码:3D Scanning Software
(1)源码编译
官方地址: Projector-Camera Calibration / 3D Scanning Software ,把下面的内容都下载下来
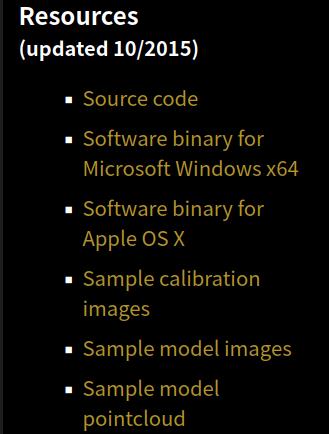
解压scan3d-capture-src-2015.zip
在project/scan3d-capture.pri,配置qmake的opencv路径:
INCLUDEPATH += /usr/local/include/opencv4 \\
                /usr/local/include/opencv4/opencv2


LIBS += /usr/local/lib/libopencv_* \\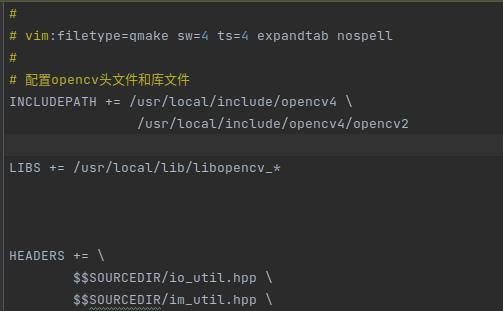
配置好opencv,就可以开始编译标定源码了:
cd scan3d-capture-src
mkdir build
cd build
qmake ../project # 使用QT的qmake进行build
make # (or nmake to build with Microsoft Visual Studio)
每什么意外的话,直接make会出现各种opencv错误的,究其原因是opencv版本对应不上,源码使用的OpenCV 2.4.11,如果需要更高版本的OpenCV,如OpenCV4.3.0,则需要改动地方挺多
(2)常见的错误和解决方法
(1) error: ‘CV_BGR2GRAY’ was not declared in this scope

将所有CV_BGR2GRAY改为cv::COLOR_BGR2GRAY
//cvtColor(rgb_image, gray_image, CV_BGR2GRAY); // 旧版本
cvtColor(rgb_image, gray_image, cv::COLOR_BGR2GRAY);// 新版本
(2)error: ‘CV_RANSAC’ was not declared in this scope

同上,将CV_RANSAC改为cv::RANSAC
//cv::Mat H = cv::findHomography(img_points, proj_points, CV_RANSAC);
cv::Mat H = cv::findHomography(img_points, proj_points, cv::RANSAC);
(3)error: ‘CV_TERMCRIT_EPS’ was not declared in this scope

将参数CV_TERMCRIT_EPS + CV_TERMCRIT_ITER改为cv::TermCriteria::EPS + cv::TermCriteria::MAX_ITER
// cv::cornerSubPix(gray_image, cam_corners, cv::Size(11, 11), cv::Size(-1, -1),
// cv::TermCriteria(CV_TERMCRIT_EPS + CV_TERMCRIT_ITER, 30, 0.1));
cv::cornerSubPix(gray_image, cam_corners, cv::Size(11, 11), cv::Size(-1, -1),
                                 cv::TermCriteria(cv::TermCriteria::EPS + cv::TermCriteria::MAX_ITER, 30, 0.1));
(4)error: no matching function for call to ‘stereoCalibrate

修改参数:cv::stereoCalibrate如下
// calib.stereo_error = cv::stereoCalibrate(world_corners_active, camera_corners_active, projector_corners_active, calib.cam_K, calib.cam_kc, calib.proj_K, calib.proj_kc,
//                                                imageSize /*ignored*/, calib.R, calib.T, E, F,
//                                                cv::TermCriteria(cv::TermCriteria::COUNT + cv::TermCriteria::EPS, 150, DBL_EPSILON),
//                                                cv::CALIB_FIX_INTRINSIC /*cv::CALIB_USE_INTRINSIC_GUESS*/ + cal_flags);
calib.stereo_error = cv::stereoCalibrate(world_corners_active, camera_corners_active, projector_corners_active, calib.cam_K, calib.cam_kc, calib.proj_K, calib.proj_kc,
                                             imageSize /*ignored*/, calib.R, calib.T, E, F,
                                             cv::CALIB_FIX_INTRINSIC /*cv::CALIB_USE_INTRINSIC_GUESS*/ + cal_flags,
                                             cv::TermCriteria(cv::TermCriteria::COUNT + cv::TermCriteria::EPS, 150, DBL_EPSILON));
(5)error: ‘CV_CAP_PROP_FRAME_WIDTH’ was not declared in this scope
(6)error: ‘CV_CAP_PROP_FRAME_HEIGHT’ was not declared in this scope

这些错误都是因为版本差异问题导致的,需要改用的地方很多
修改头文件VideoInput.hpp:
//CvCapture * _video_capture;
cv::VideoCapture * _video_capture;
修改源文件VideoInput.cpp,其他地方也参考修改
//cvSetCaptureProperty(_video_capture, CV_CAP_PROP_FRAME_WIDTH, width);
//cvSetCaptureProperty(_video_capture, CV_CAP_PROP_FRAME_HEIGHT, height);
_video_capture->set(cv::CAP_PROP_FRAME_WIDTH, width);
_video_capture->set(cv::CAP_PROP_FRAME_HEIGHT, height);
(7)error: ‘IplImage’ was not declared in this scope

源码修改如下:
    while(_video_capture && !_stop && error<max_error)

        IplImage * frame = cvQueryFrame(_video_capture);
        if (frame)
           //ok
            error = 0;
            emit new_image(cv::Mat(frame));

        else
           //error
            if (timer.elapsed()>warmup) error++;


/*************************改为****************************/
    while(_video_capture && !_stop && error<max_error)

        //IplImage * frame = cvQueryFrame(_video_capture);
        cv::Mat frame;
        //*_video_capture >> frame;
        _video_capture->read(frame);
        if (not frame.empty())
           //ok
            error = 0;
            emit new_image(cv::Mat(frame));

        else
           //error
            if (timer.elapsed()>warmup) error++;
(7) error: ‘cvReleaseCapture’ was not declared in this scope

如下修改:
        //cvReleaseCapture(&_video_capture);
        _video_capture->release();
(8)error: ‘CV_CAP_V4L2’ was not declared in this scope
将CV_CAP_V4L2修改为cv::CAP_V4L2
(9)error: ‘cvCreateCameraCapture’ was not declared in this scope

修改如下
//_video_capture = cvCreateCameraCapture(CLASS + index);
 _video_capture->open(CLASS + index);
最终,最后。。。。。,NND,还有错
(10)VideoInput.cpp:(.text+0xb73):对‘VideoInput::list_device_resolutions_v4l2(int, bool)’未定义的引用
    //list = list_device_resolutions_v4l2(index, silent);
    list = list_device_resolutions_dshow(index, silent);
OK,终于成功:
然后,你在 bin目录就可以找到一个可执行文件:scan3d-capture,
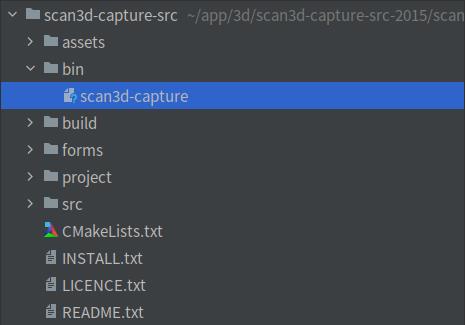
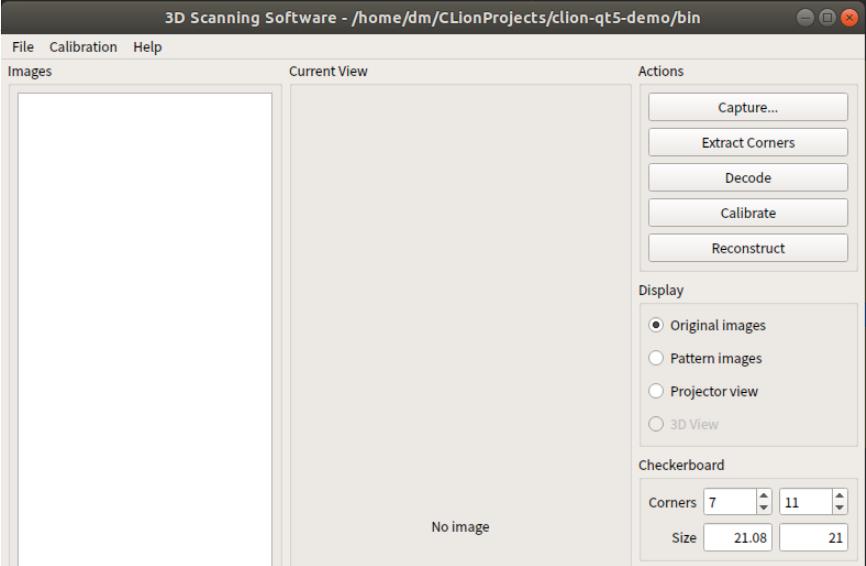
运行他即可:
./scan3d-capture千呼万唤始出来,终于见到这个界面了:
4.懒人必备
兄弟,如果,你不想经历上面填坑的痛苦,可以直接下载本人已经修改好的源码,已经包括Opencv,TIFF,scan3d-capture-src-2015等源码,直接使用即可
下载地址: https://download.csdn.net/download/guyuealian/36484460
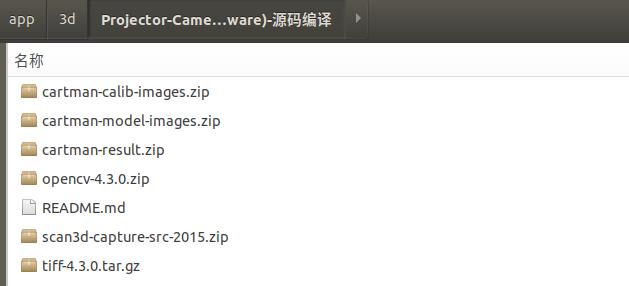
使用方法,如下:
## 安装tiff-4.3.0
```bash
cd tiff-4.3.0
./configure
make
sudo make install```
## 安装OpenCV已经把常见的错误,都修改了,可以直接build
```bash
cd opencv-4.3.0
bash build.sh```
## 安装QT5
```bash
sudo apt-get install build-essential libgl1-mesa-dev
chmod +x qt-opensource-linux-x64-5.12.4.run
./qt-opensource-linux-x64-5.12.4.run```
## 安装3D Scanning Software已经把常见的错误,都修改了,可以直接build
```bash
cd scan3d-capture-src-2015/scan3d-capture-src
mkdir build
cd build
qmake ../project # 使用QT的qmake进行build
make # (or nmake to build with Microsoft Visual Studio)
```## 运行3D Scanning Software
```bash
./bin/scan3d-capture
```
5. 结构光三维重建-3D Scanning Software实现三维重建
关于如果实现三维重建,请查看下一篇博客《结构光三维重建-3D Scanning Software实现三维重建》:https://panjinquan.blog.csdn.net/article/details/121113787
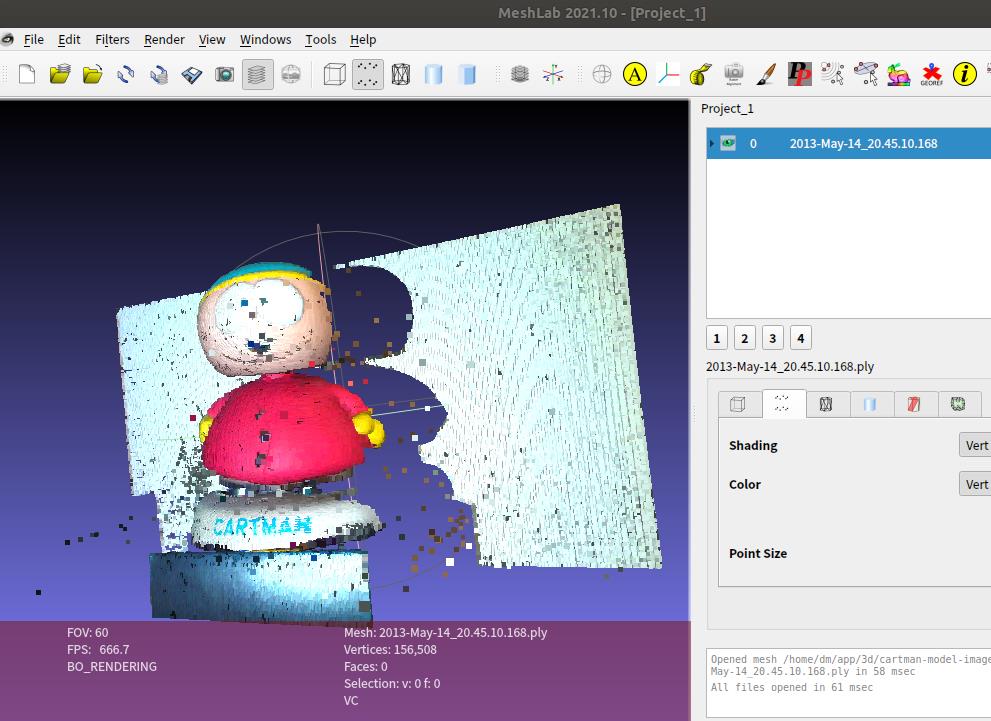
以上是关于结构光三维重建Projector-Camera Calibration投影仪相机标定的主要内容,如果未能解决你的问题,请参考以下文章
结构光三维重建-3D Scanning Software实现三维重建