3.4 haas506开发教程-example-ads1115
Posted 智云服
tags:
篇首语:本文由小常识网(cha138.com)小编为大家整理,主要介绍了3.4 haas506开发教程-example-ads1115相关的知识,希望对你有一定的参考价值。
1.ads1115
- 案例说明
使用ads1115模块获取电压值 - main.py
# coding=utf-8
import utime as time
import usys
usys.path.append('/data/pyamp')
import  ADS1x15
adc = ADS1x15.ADS1115()
GAIN = 2/3
print('Reading ADS1x15 values, press Ctrl-C to quit...')
while True:
    values = [0]*4
    for i in range(4):
        values[i] = adc.read_adc(i, gain=GAIN)
        values[i]=values[i]*0.1875/1000
    print('-'*45)
    print('| 0:>7 | 1:>7 | 2:>7 | 3:>7 |'.format('IN0','IN1','IN2','IN3'))
    print('| 0:>6 | 1:>6 | 2:>6 | 3:>6 |'.format(*values))
    print('-'*45)
    time.sleep(2)
- ADS1x15.py
# coding=utf-8
import utime as time
'''
# Choose a gain of 1 for reading voltages from 0 to 4.09V.
# Or pick a different gain to change the range of voltages that are read:
#  - 2/3 = +/-6.144V
#  -   1 = +/-4.096V
#  -   2 = +/-2.048V
#  -   4 = +/-1.024V
#  -   8 = +/-0.512V
#  -  16 = +/-0.256V
'''

# Register and other configuration values:
ADS1x15_DEFAULT_ADDRESS        = 0x48
ADS1x15_POINTER_CONVERSION     = 0x00
ADS1x15_POINTER_CONFIG         = 0x01
ADS1x15_POINTER_LOW_THRESHOLD  = 0x02
ADS1x15_POINTER_HIGH_THRESHOLD = 0x03
ADS1x15_CONFIG_OS_SINGLE       = 0x8000
ADS1x15_CONFIG_MUX_OFFSET      = 12
# Maping of gain values to config register values.
ADS1x15_CONFIG_GAIN =
    2/3: 0x0000,
    1:   0x0200,
    2:   0x0400,
    4:   0x0600,
    8:   0x0800,
    16:  0x0A00

ADS1x15_CONFIG_MODE_CONTINUOUS  = 0x0000
ADS1x15_CONFIG_MODE_SINGLE      = 0x0100
# Mapping of data/sample rate to config register values for ADS1015 (faster).
ADS1015_CONFIG_DR =
    128:   0x0000,
    250:   0x0020,
    490:   0x0040,
    920:   0x0060,
    1600:  0x0080,
    2400:  0x00A0,
    3300:  0x00C0

# Mapping of data/sample rate to config register values for ADS1115 (slower).
ADS1115_CONFIG_DR =
    8:    0x0000,
    16:   0x0020,
    32:   0x0040,
    64:   0x0060,
    128:  0x0080,
    250:  0x00A0,
    475:  0x00C0,
    860:  0x00E0

ADS1x15_CONFIG_COMP_WINDOW      = 0x0010
ADS1x15_CONFIG_COMP_ACTIVE_HIGH = 0x0008
ADS1x15_CONFIG_COMP_LATCHING    = 0x0004
ADS1x15_CONFIG_COMP_QUE =
    1: 0x0000,
    2: 0x0001,
    4: 0x0002

ADS1x15_CONFIG_COMP_QUE_DISABLE = 0x0003

class ADS1x15(object):
    def __init__(self,**Kwargs):
        #导入I2c
        from driver import I2C
        #实例化
        self._i2c=I2C()
        #打开I2c
        self._i2c.open("ADS1115")


    def _data_rate_default(self):
        #子类需要实现 父类的方法,否则报错
        raise NotImplementedError("subclass must implemet _data_rate_default!")

    def _data_rate_config(self,data_rate):
        #子类需要实现 父类的方法,否则报错
        raise NotImplementedError("subclass must implemet _data_rate_default!")

    def _conversion_value(self, low, high):
        #子类需要实现 父类的方法,否则报错
        raise NotImplementedError('Subclass must implement _conversion_value function!')

    #mux, gain, data_rate, and mode 要在规定的范围内
    def _read(self, mux, gain, data_rate, mode):
        # Go out of power-down mode for conversion.
        config = ADS1x15_CONFIG_OS_SINGLE

        # Specify mux value.
        config |= (mux & 0x07) << ADS1x15_CONFIG_MUX_OFFSET

        #设置增益
        if gain not in ADS1x15_CONFIG_GAIN:
            raise ValueError('Gain must be one of: 2/3, 1, 2, 4, 8, 16')
        config |= ADS1x15_CONFIG_GAIN[gain]

        #设置模式(continuous or single shot)
        config |= mode

        #得到速率,默认128bps
        if data_rate is None:
            data_rate = self._data_rate_default()

        #设置速率
        config |= self._data_rate_config(data_rate)
        #disable 比较器模式
        config |= ADS1x15_CONFIG_COMP_QUE_DISABLE

        #I2C的写函数
        writeData=bytearray(3)
        writeData[0]=ADS1x15_POINTER_CONFIG
        writeData[1]=(config >> 8) & 0xFF
        writeData[2]=config & 0xFF
        self._i2c.write(writeData,3)

        #等待ADC采样(根据采样率加上一个很小的偏置,如0.1ms)
        time.sleep(1.0/data_rate+0.0001)

        #I2C的读函数
        readData=bytearray([ADS1x15_POINTER_CONVERSION,0x00])
        self._i2c.read(readData,2)

        #return 读取到的数据,包含高八位和低八位
        return self._conversion_value(readData[1],readData[0])

    def read_adc(self, channel, gain=1, data_rate=None):
        #读单个ADC通道,通道值取值范围为[0,3]
        assert 0 <= channel <= 3, 'Channel must be a value within 0-3!'
        # Perform a single shot read and set the mux value to the channel plus
        # the highest bit (bit 3) set.
        return self._read(channel + 0x04, gain, data_rate, ADS1x15_CONFIG_MODE_SINGLE)

#继承父类
class ADS1115(ADS1x15):
    """ADS1115 16-bit analog to digital converter instance."""
    def __init__(self, *args, **kwargs):
        super(ADS1115, self).__init__(*args, **kwargs)
    def _data_rate_default(self):
        #默认速率为128bps
        return 128
    def _data_rate_config(self, data_rate):
        if data_rate not in ADS1115_CONFIG_DR:
            raise ValueError('Data rate must be one of: 8, 16, 32, 64, 128, 250, 475, 860')
        return ADS1115_CONFIG_DR[data_rate]
    def _conversion_value(self, low, high):
        #转换16位数据
        value = ((high & 0xFF) << 8) | (low & 0xFF)
        if value & 0x8000 != 0:
            value -= 1 << 16
        return value
- board.json
"name": "haas506",
"version": "1.0.0",
"io":
    "ADS1115":
        "type": "I2C",
        "port": 1,
        "addrWidth": 7,
        "freq": 400000,
        "mode": "master",
        "devAddr": 72
    ,
    "serial1":
        "type":"UART",
        "port":0,
        "dataWidth":8,
        "baudRate":115200,
        "stopBits":1,
        "flowControl":"disable",
        "parity":"none"
    ,
    "serial2":
        "type":"UART",
     "port":1,
        "dataWidth":8,
        "baudRate":115200,
        "stopBits":1,
        "flowControl":"disable",
        "parity":"none"
    ,
    "serial3":
        "type":"UART",
        "port":2,
        "dataWidth":8,
        "baudRate":115200,
        "stopBits":1,
        "flowControl":"disable",
        "parity":"none"

,
"debugLevel": "ERROR",
"repl":"disable"
2.实现步骤
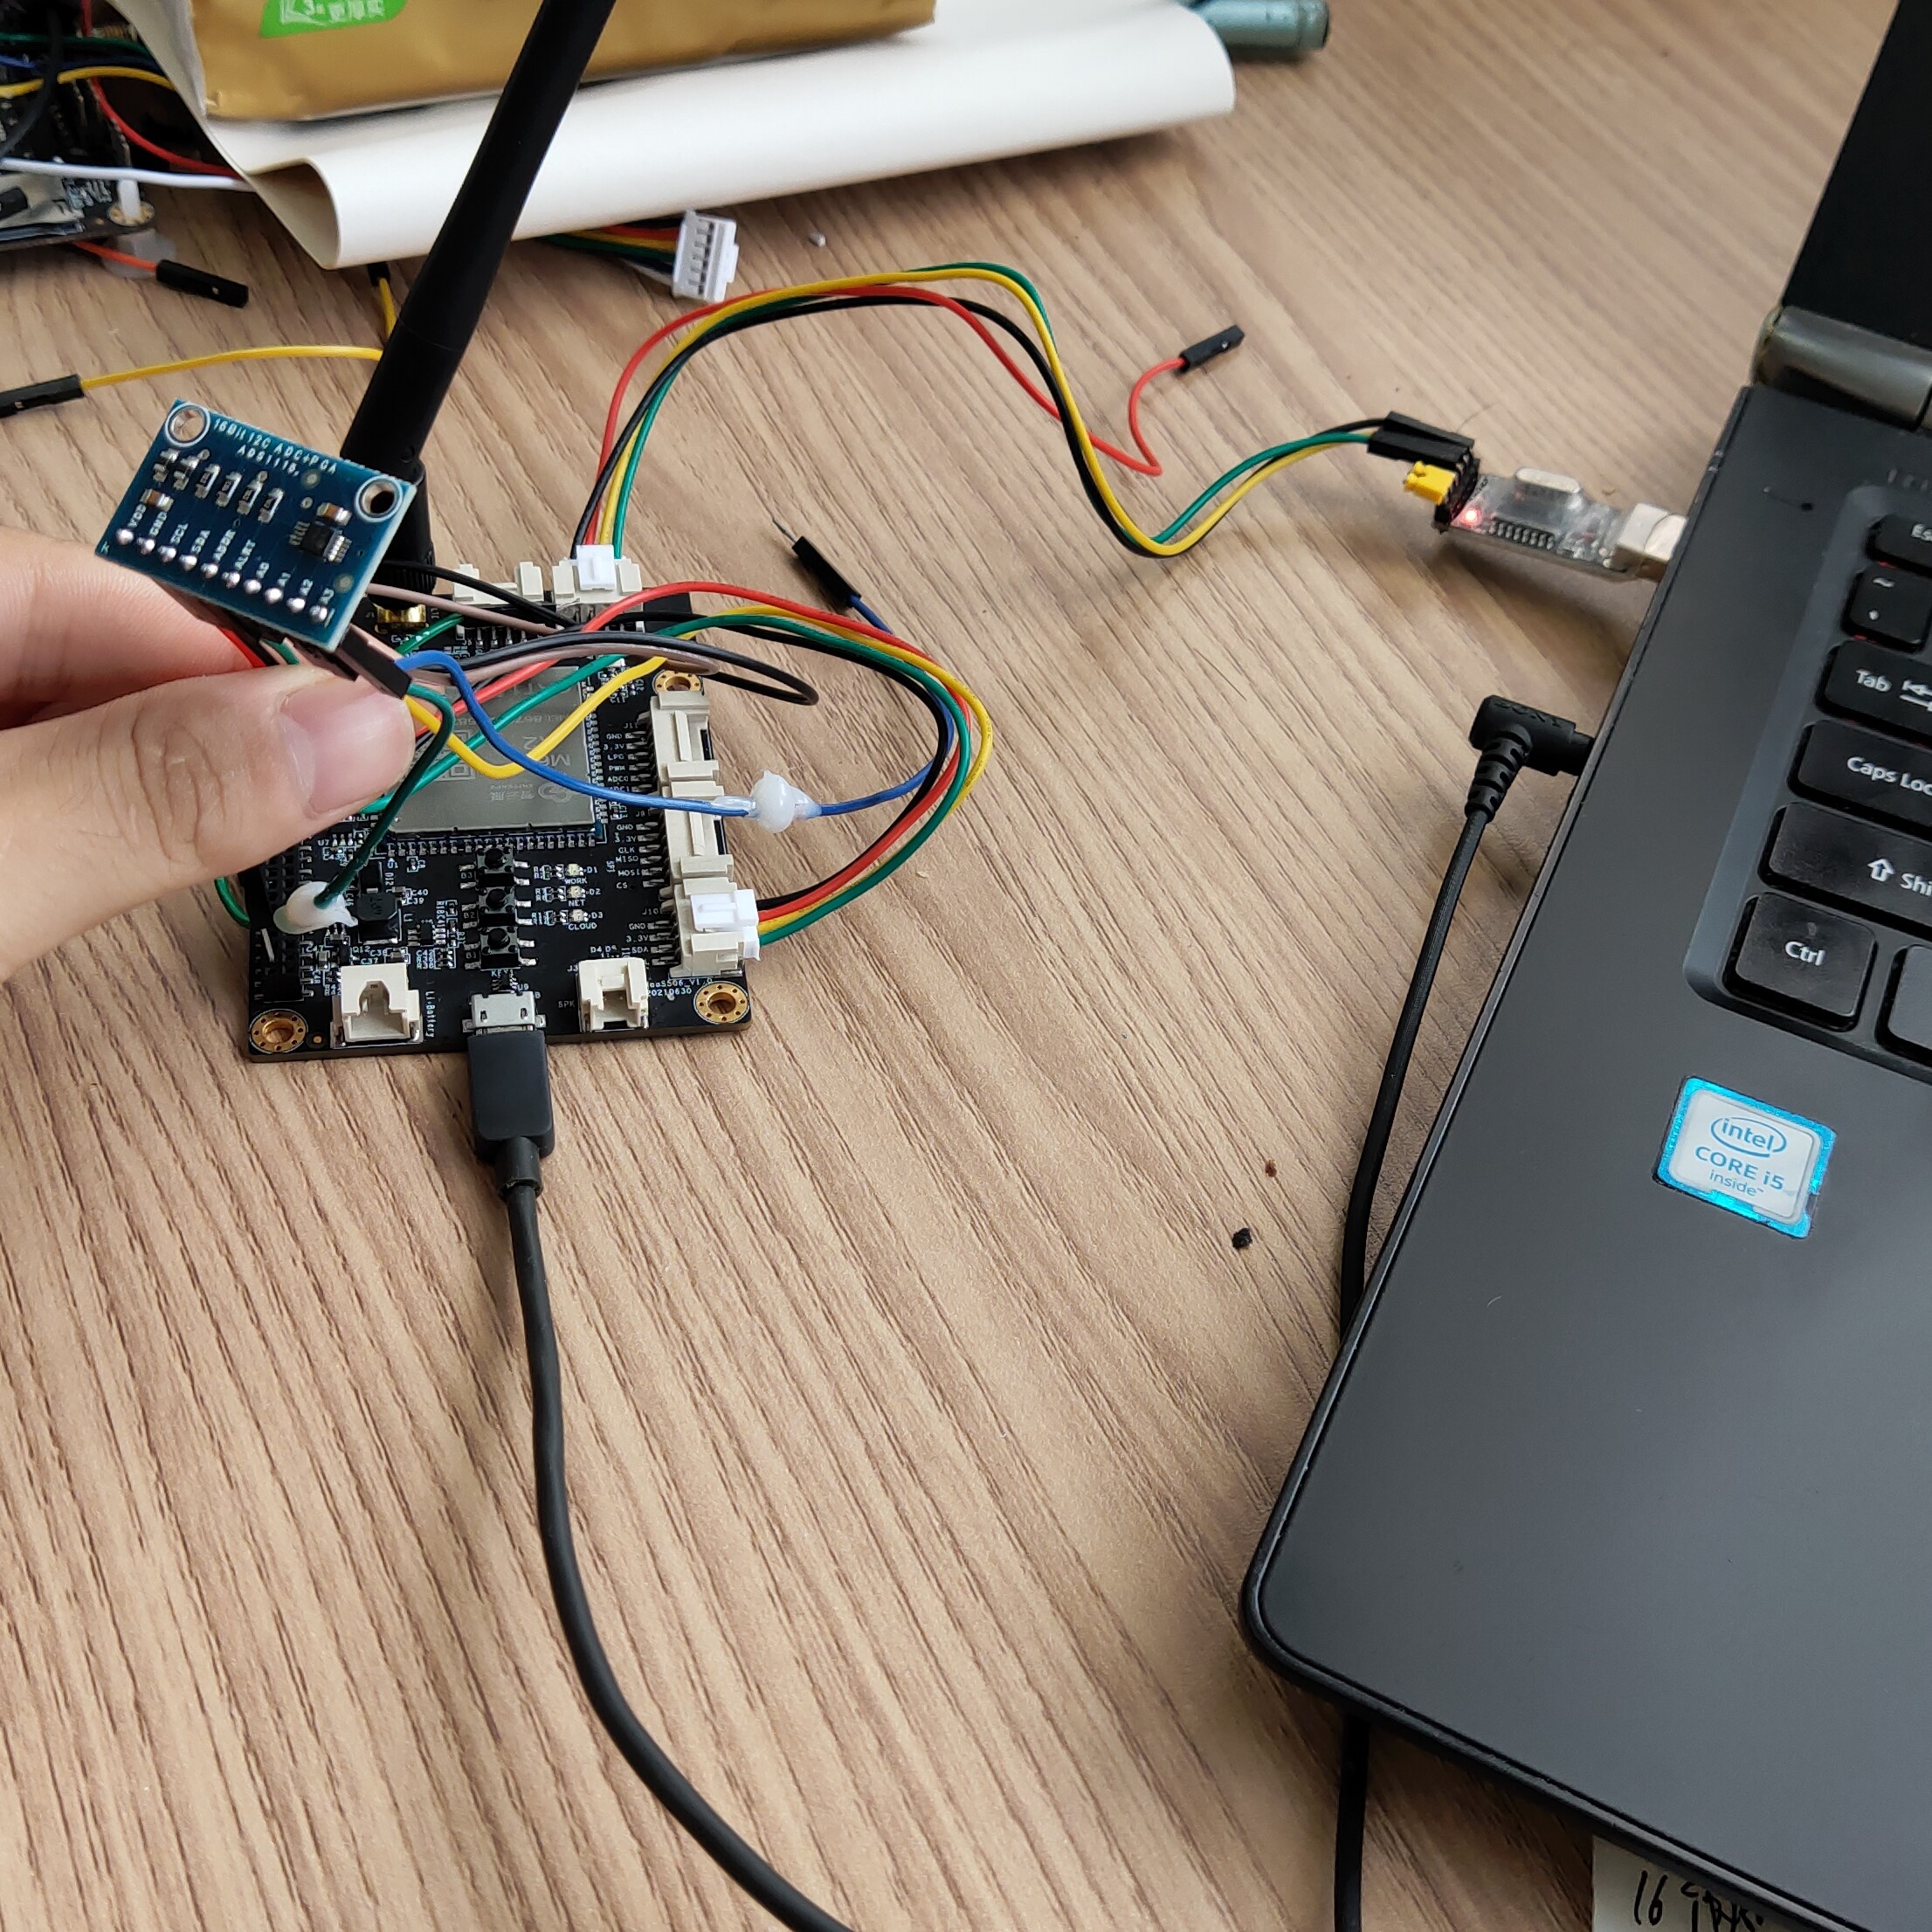
(1)将asd1115模块的VDD、GND、SDA、SCL接入到haas506的I2C接口上,A0、A1、A2、A3接入3.3V以下电源

(2)复制代码到您的文件中
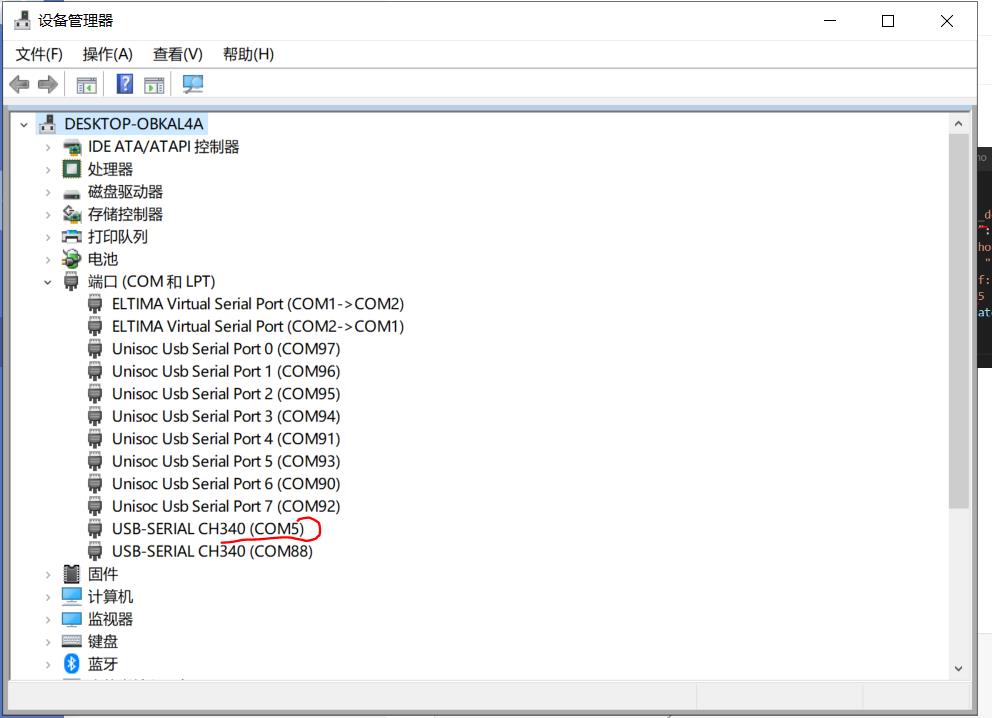
(3)确认端口号

(4)烧录
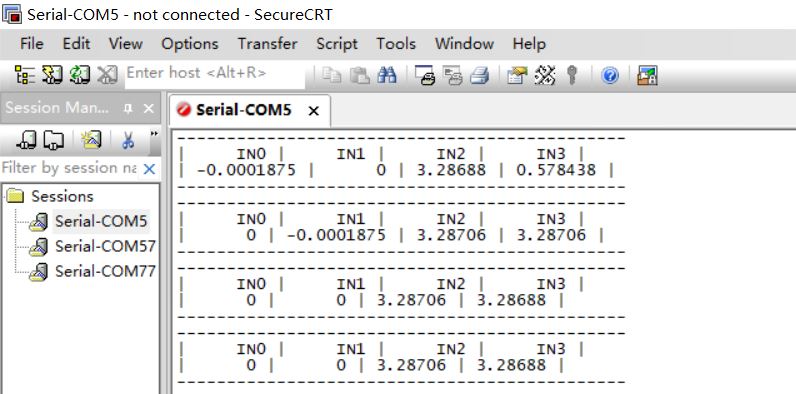
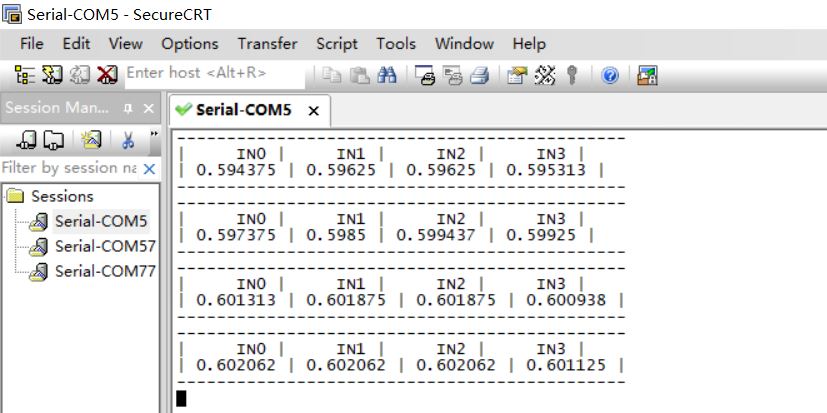
(5)查看日志
A0、A1接入GND,A2、A3接入3v3

都不接电源的情况下,输出默认值

3.总结
本节介绍了如何使用ADS1115模块来获取电压值。需要注意的有2点:
- 当前gain是2/3,可以测6.144V以内的电压值,可以根据需要更改gain的值
- ads1115模块的所测量的电压值不能超过所接入到ads1115的VDD引脚的电压值
以上是关于3.4 haas506开发教程-example-ads1115的主要内容,如果未能解决你的问题,请参考以下文章