嵌入式AI全志 XR806 OpenHarmony 鸿蒙系统固件编译
Posted 极智视界
tags:
篇首语:本文由小常识网(cha138.com)小编为大家整理,主要介绍了嵌入式AI全志 XR806 OpenHarmony 鸿蒙系统固件编译相关的知识,希望对你有一定的参考价值。
欢迎关注我的公众号 [极智视界],回复001获取Google编程规范
O_o >_< o_O O_o ~_~ o_O
大家好,我是极智视界,本教程详细记录了全志 XR806 OpenHarmony 鸿蒙系统固件编译的方法。
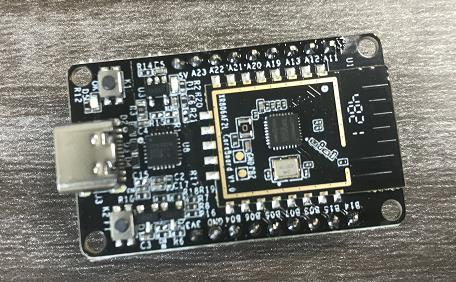
XR806 是全志科技旗下子公司广州芯之联研发设计的一款支持 WiFi 和 BLE 的高集成度无线 MCU 芯片,支持鸿蒙 L0 系统。具有集成度高、硬件设计简单、BOM 成本低、安全可靠等优点。可广泛满足 智能家居、智慧楼宇、工业互联、儿童玩具、电子竞赛、极客DIY 等领域的无线连接需求。上图:
下面开始固件编译。
# 下载 repo
mkdir -p bin
curl https://storage.googleapis.com/git-repo-downloads/repo > bin/repo
chmod a+rx bin/repo
PATH="`pwd`/bin:$PATH"

# 下载 hb
pip install -i https://pypi.douban.com/simple --user ohos-build
PATH="$HOME/.local/bin:$PATH"

# 下载 openharmony 源码
repo init -u ssh://git@gitee.com/openharmony-sig/manifest.git -b OpenHarmony_1.0.1_release --no-repo-verify -m devboard_xr806.xml
这里需要注意一下,直接执行上述命令应该会报错fatal: Cannot get https://gerrit.googlesource.com/git-repo/clone.bundle,解决方法为修改清华源。有两种修改方式,如下:
(1) 修改 bin/repo 中的 REPO_URL
REPO_URL = os.environ.get('REPO_URL', None)
if not REPO_URL:
  # REPO_URL = 'http://gerrit.googlesource.com/git-repo'
  REPO_URL = 'http://mirrors.tuna.tsinghua.edu.cn/git/git-repo/'    # 修改为这个
(2) 在执行命令后指令 --repo-url=http://mirrors.tuna.tsinghua.edu.cn/git/git-repo/,也即:
repo init -u ssh://git@gitee.com/openharmony-sig/manifest.git -b OpenHarmony_1.0.1_release --no-repo-verify -m devboard_xr806.xml --repo-url=http://mirrors.tuna.tsinghua.edu.cn/git/git-repo/
继续:
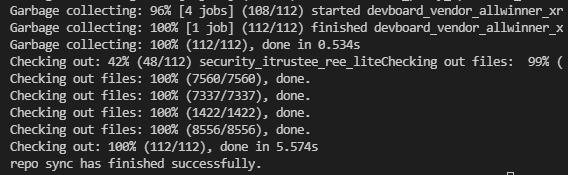
repo sync -c
repo forall -c 'git lfs pull'
# 下载 arm toolchain
wget -c https://developer.arm.com/-/media/Files/downloads/gnu-rm/10-2020q4/gcc-arm-none-eabi-10-2020-q4-major-x86_64-linux.tar.bz2

tar -xf gcc-arm-none-eabi-10-2020-q4-major-x86_64-linux.tar.bz2

# 创建 ~/tools 目录
mkdir ~/tools
cp -r ./gcc-arm-none-eabi-10-2020-q4-major ~/tools

# 更新 toolchain
cd <xr806_openharmony_path>
sed -i "s@~/tools/gcc-arm-none-eabi-10-2020-q4-major/bin/arm-none-eabi-@`pwd`/gcc-arm-none-eabi-10-2020-q4-major/bin/arm-none-eabi-@g" ./device/xradio/xr806/liteos_m/config.gni

sed -i "s@~/tools/gcc-arm-none-eabi-10-2020-q4-major/bin@`pwd`/gcc-arm-none-eabi-10-2020-q4-major/bin@g" ./device/xradio/xr806/xr_skylark/gcc.mk

# 修正 SDKconfig.gni
sed -i "s@open('\\.0/@open('0/@g" ./device/xradio/xr806/xr_skylark/config.py
sed -i "s@open('\\.0/@open('0/@g" ./device/xradio/xr806/libcopy.py
开始编译固件:
cd <xr806_openharmony_path>
cd device/xradio/xr806/xr_skylark
cp project/demo/audio_demo/gcc/deconfig .config
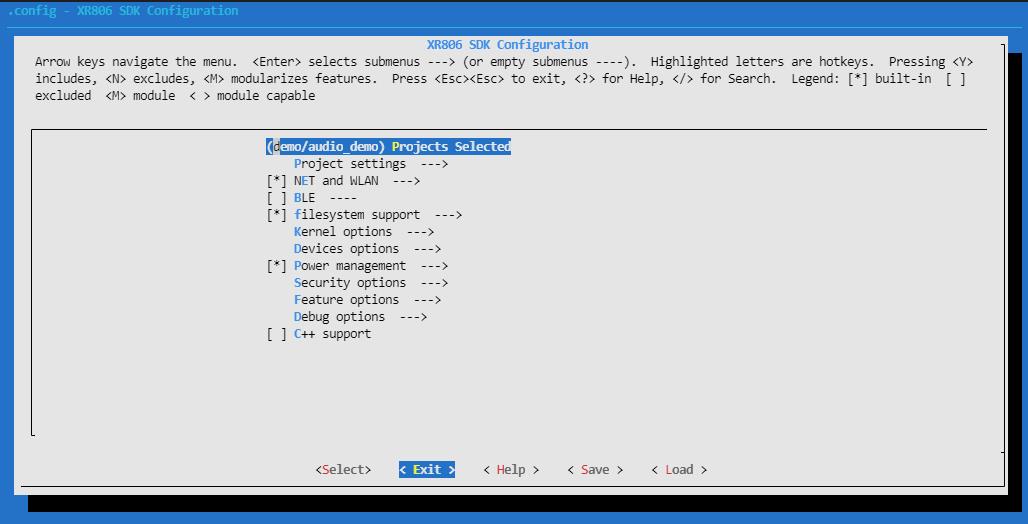
make menuconfig
生成图形化配置界面,直接 EXIT 退出即可。
make build_clean # 清除旧配置
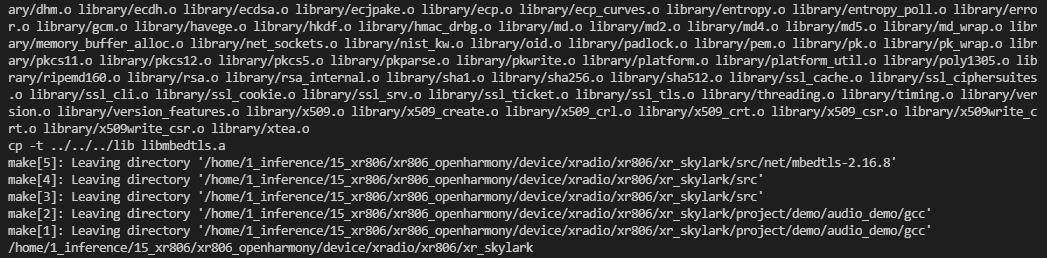
make lib -j # 根据配置生成静态库和全局头文件
cd -

hb set           # 选择 wifi_skylark
此时再按一下回车,选择 wifi_shylark,然后再直接回车就行:

hb build -f # 开始编译
报错 Unable to load SDKconfig.gni
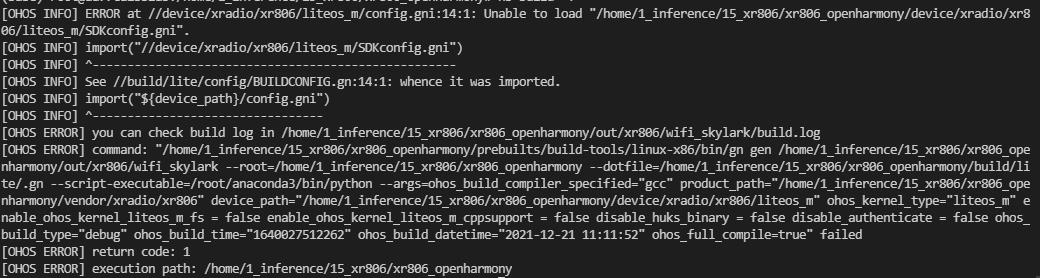
解决办法:
cd <xr806_openharmony_path>
cd device/xradio/xr806/xr_skylark

python config.py
官方提供的 config.py 有路径相关的 Bug,改成如下:
#!/usr/bin/python3

import os

pwd = os.path.dirname (__file__)
f = open('0.config'.format(pwd),'r')                        # 路径改成这样

DATA = ['#XR806 config']
for line in f.readlines():
    if line[0] != '#' and line[0] != '\\n':
        line = line.strip('\\n')
        DATA.append(line)

GNf = open('0../liteos_m/SDKconfig.gni'.format(pwd),'w')   # 路径改成这样
GNf.write('#Build by config.py DO NOT EDIT!\\n\\n')
GNf.write('SDK_cflags = [\\n\\
    "-mcpu=cortex-m33",\\n\\
    "-mtune=cortex-m33",\\n\\
    "-march=armv8-m.main+dsp",\\n\\
    "-mfpu=fpv5-sp-d16",\\n\\
    "-mfloat-abi=softfp",\\n\\
    "-mcmse",\\n\\
    "-mthumb",\\n\\
    "-c",\\n\\
    "-g",\\n\\
    "-fno-common",\\n\\
    "-fmessage-length=0",\\n\\
    "-fno-exceptions",\\n\\
    "-ffunction-sections",\\n\\
    "-fdata-sections",\\n\\
    "-fomit-frame-pointer",\\n\\
    "-Wall",\\n\\
    #"-Werror",\\n\\
    "-Wno-cpp",\\n\\
    "-Wpointer-arith",\\n\\
    "-Wno-error=unused-function",\\n\\
    "-MMD",\\n\\
    "-MP",\\n\\
    "-Os",\\n\\
    "-DNDEBUG",\\n\\
    "-Wno-error=stringop-truncation",\\n\\
    "-Wno-error=restrict",\\n\\
    "-includexr_config.h",\\n\\
    "-includecommon/prj_conf_opt.h",\\n\\
    "-DCONFIG_CHIP_ARCH_VER=3",\\n\\
    "-DCONFIG_ARCH_APP_CORE",\\n\\
    "-DCONFIG_CPU_CM33F",\\n\\
]\\n\\n')

PROJECT = [x for i,x in enumerate(DATA) if x.find('CONFIG_PROJECT=') != -1]
if len(PROJECT) == 1:
    ProjectPath = PROJECT[0]
    ProjectPath = ProjectPath.strip('CONFIG_PROJECT=')
GNf.write('ProjectPath = 0\\n\\n'.format(ProjectPath))
if ProjectPath == '"bootloader"' or ProjectPath == '"test/etf"':
    GNf.write('declare_args() IsBootloader = "true"\\n')
else:
    GNf.write('declare_args() IsBootloader = "false"\\n')
#print (DATA)
完了会在 <xr806_openharmony_path>/device/xradio/xr806/liteos_m 目录下生成 SDKconfig.gni,然后继续:
cd -

hb build -f

完了会在 <xr806_openharmony_path>/device/xradio/xr806/xr_skylark/out 下生成编译好的固件镜像相关文件:
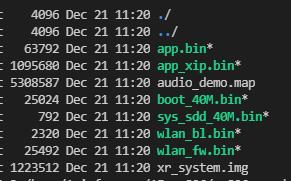
其中 xr_system.img 就是后面我们固件烧录需要用到的镜像文件。
至此就完成了 XR806 OpenHarmony 的固件编译,希望我的分享能对你的学习有一点帮助。
【公众号传送】
扫描下方二维码即可关注我的微信公众号【极智视界】,获取更多AI经验分享,让我们用极致+极客的心态来迎接AI !

以上是关于嵌入式AI全志 XR806 OpenHarmony 鸿蒙系统固件编译的主要内容,如果未能解决你的问题,请参考以下文章