分布式与微服务系列Dubbo入门开发(服务提供方服务消费方)
Posted 一宿君
tags:
篇首语:本文由小常识网(cha138.com)小编为大家整理,主要介绍了分布式与微服务系列Dubbo入门开发(服务提供方服务消费方)相关的知识,希望对你有一定的参考价值。
Dubbo入门开发
一、Dubbo快速入门
Dubbo作为一个RPC框架,其最核心的功能就是要实现跨网路的远程调用。本小结就是要创建两个应用,一个作为服务的提供方,一个作为服务的消费方。通过Dubbo来实现服务消费方调用服务提供方的方法。
二、服务提供方开发(dubbodemo_provider)
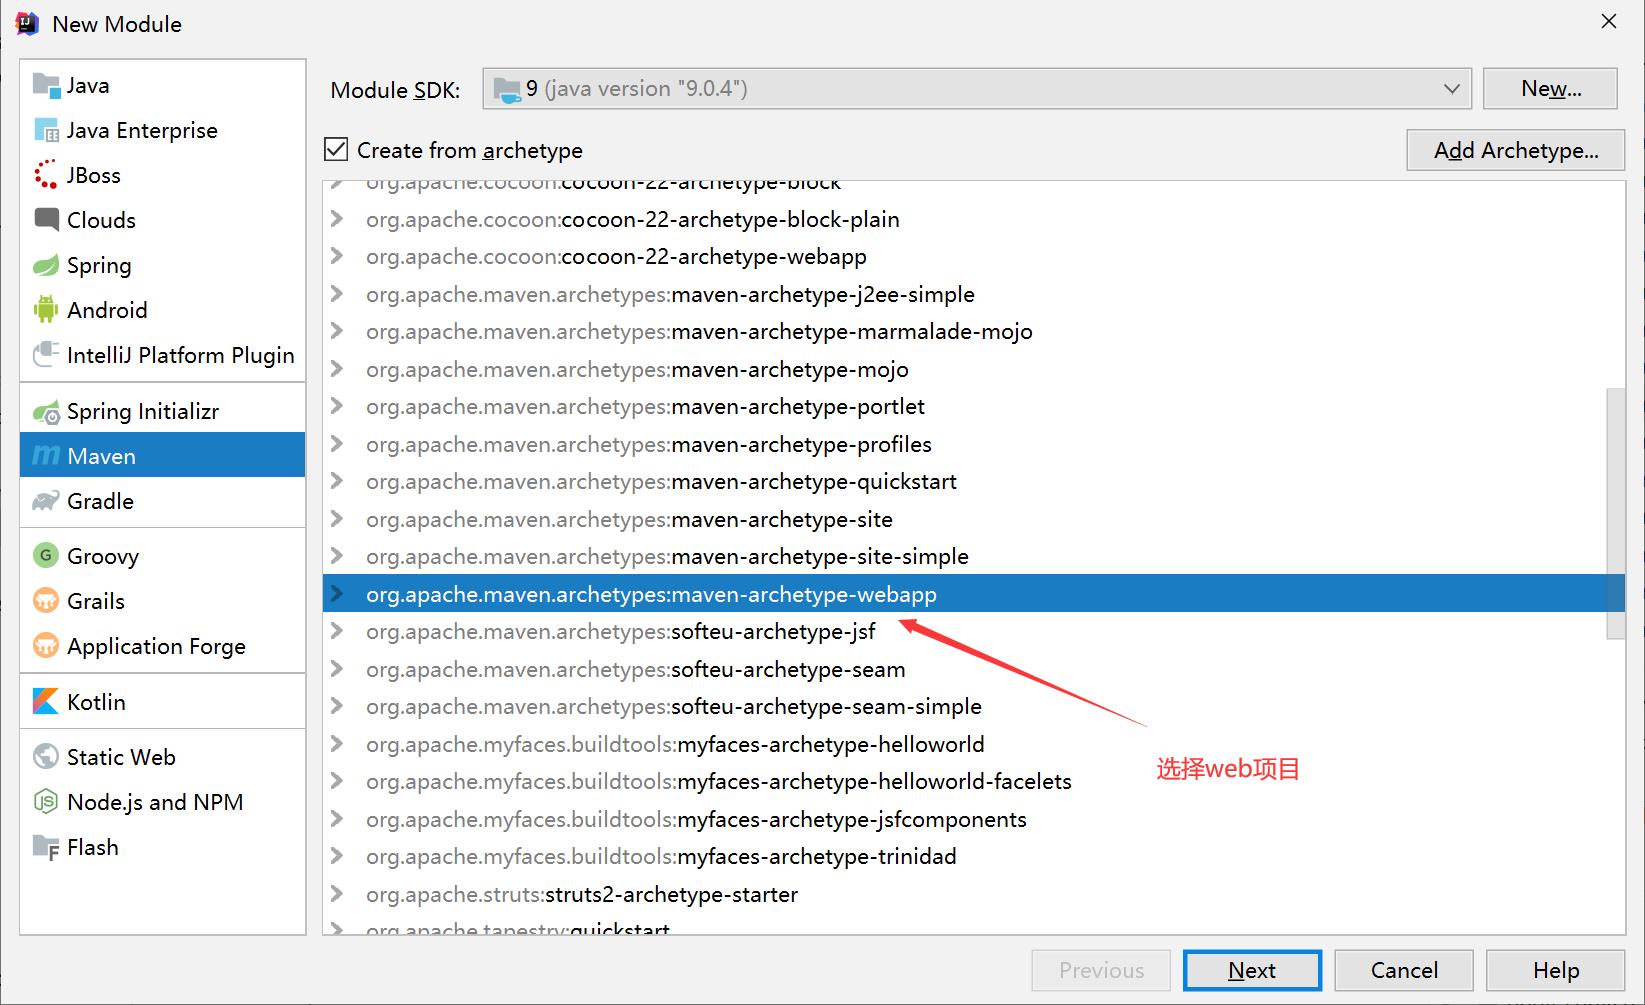
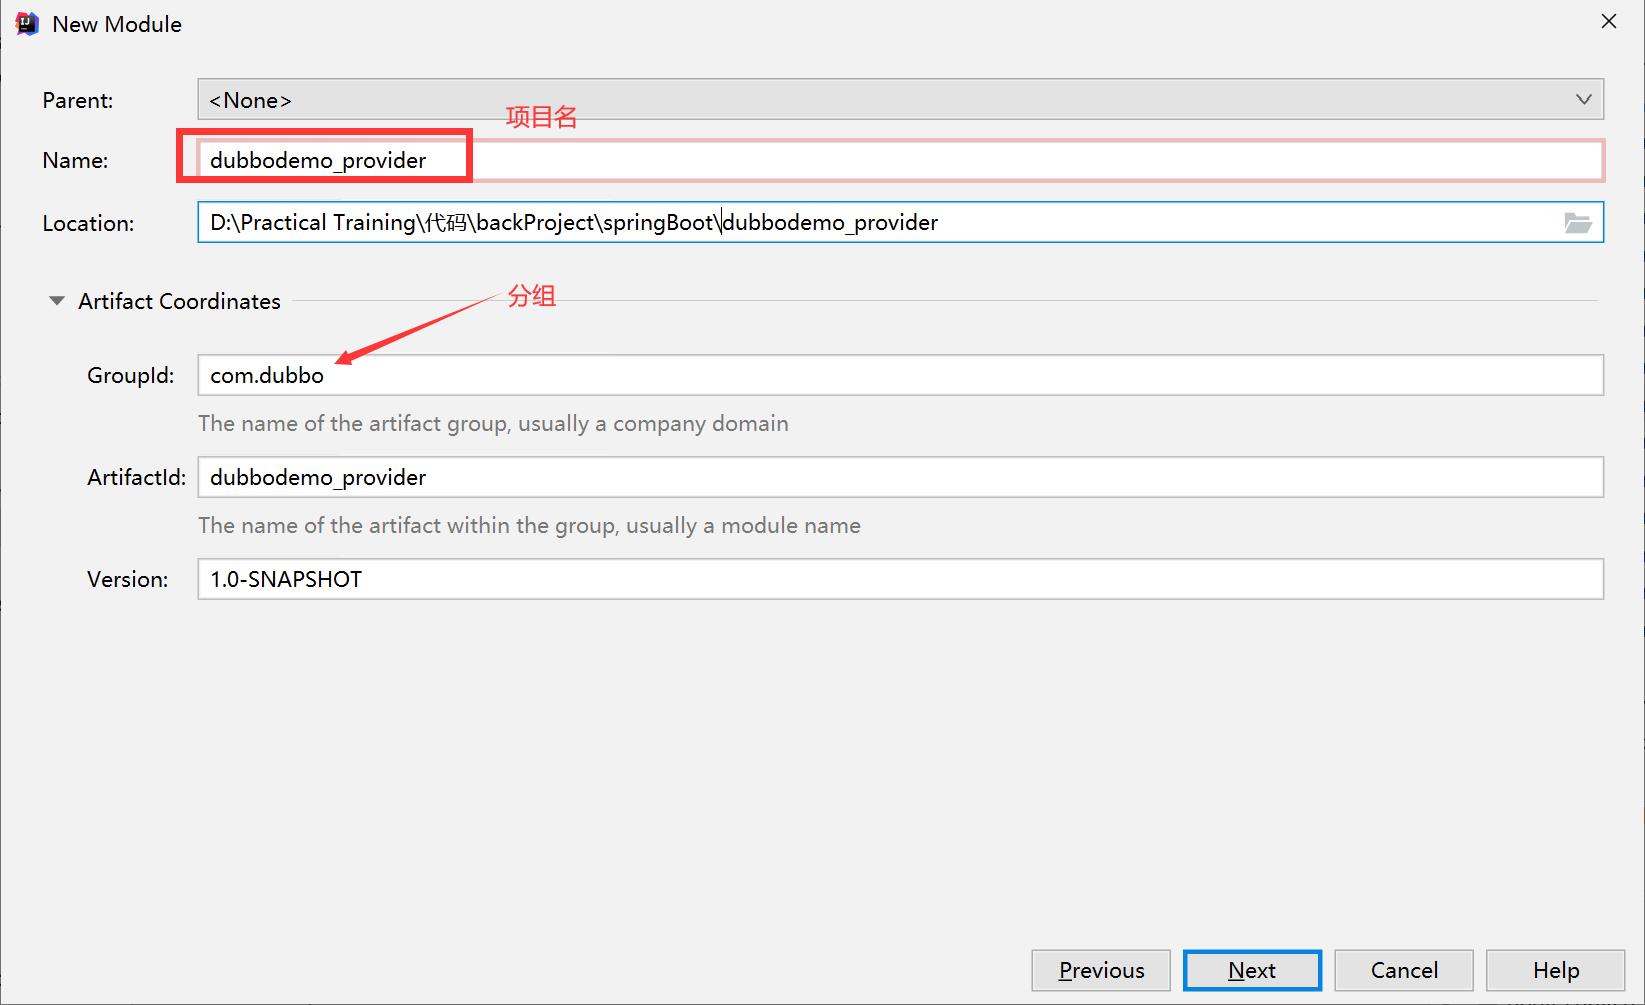
2.1、创建maven webapp工程(打包方式为war)dubbodemo_provider


建好项目后,新建java和resource两个包:

2.2、在pom.xml文件中导入如下坐标
<properties>
  <project.build.sourceEncoding>UTF-8</project.build.sourceEncoding>
  <!--如果你的本地JDK是9就指定1.9;是8就指定1.8-->
  <maven.compiler.source>1.9</maven.compiler.source>
  <maven.compiler.target>1.9</maven.compiler.target>
  <spring.version>5.0.5.RELEASE</spring.version>
</properties>
  <dependencies>
    <dependency>
      <groupId>org.springframework</groupId>
      <artifactId>spring-context</artifactId>
      <version>$spring.version</version>
    </dependency>
    <dependency>
      <groupId>org.springframework</groupId>
      <artifactId>spring-beans</artifactId>
      <version>$spring.version</version>
    </dependency>
    <dependency>
      <groupId>org.springframework</groupId>
      <artifactId>spring-webmvc</artifactId>
      <version>$spring.version</version>
    </dependency>
    <dependency>
      <groupId>org.springframework</groupId>
      <artifactId>spring-jdbc</artifactId>
      <version>$spring.version</version>
    </dependency>
    <dependency>
      <groupId>org.springframework</groupId>
      <artifactId>spring-aspects</artifactId>
      <version>$spring.version</version>
    </dependency>
    <dependency>
      <groupId>org.springframework</groupId>
      <artifactId>spring-jms</artifactId>
      <version>$spring.version</version>
    </dependency>
    <dependency>
      <groupId>org.springframework</groupId>
      <artifactId>spring-context-support</artifactId>
      <version>$spring.version</version>
    </dependency>
    <!-- dubbo相关 -->
    <dependency>
      <groupId>com.alibaba</groupId>
      <artifactId>dubbo</artifactId>
      <version>2.6.0</version>
    </dependency>
    <dependency>
      <groupId>org.apache.zookeeper</groupId>
      <artifactId>zookeeper</artifactId>
      <version>3.4.7</version>
    </dependency>
    <dependency>
      <groupId>com.github.sgroschupf</groupId>
      <artifactId>zkclient</artifactId>
      <version>0.1</version>
    </dependency>
    <dependency>
      <groupId>javassist</groupId>
      <artifactId>javassist</artifactId>
      <version>3.12.1.GA</version>
    </dependency>
    <dependency>
      <groupId>com.alibaba</groupId>
      <artifactId>fastjson</artifactId>
      <version>1.2.47</version>
    </dependency>
    <dependency>
      <groupId>junit</groupId>
      <artifactId>junit</artifactId>
      <version>4.11</version>
      <scope>test</scope>
    </dependency>
  </dependencies>


  <!--这是插件部分-->
  <build>

    <!--使用tomcat插件即可运行项目-->
    <plugins>

      <plugin>
        <groupId>org.apache.maven.plugins</groupId>
        <artifactId>maven-compiler-plugin</artifactId>
        <version>2.3.2</version>
        <configuration>
          <!--如果你的本地JDK是9就指定1.9;是8就指定1.8-->
          <source>1.9</source>
          <target>1.9</target>
        </configuration>
      </plugin>

	  <!--引进tomcat7插件-->
      <plugin>
        <groupId>org.apache.tomcat.maven</groupId>
        <artifactId>tomcat7-maven-plugin</artifactId>
        <!--指定版本号-->
        <version>2.2</version>
        <configuration>
          <!-- 指定端口 -->
          <port>8081</port>
          <!-- 请求路径 -->
          <path>/</path>
        </configuration>
      </plugin>
  </build>
注意:
上述tomcat插件不要建在pluginManagement,否则在插件部分找不到。
2.3、配置web.xml文件
<!DOCTYPE web-app PUBLIC
 "-//Sun Microsystems, Inc.//DTD Web Application 2.3//EN"
 "http://java.sun.com/dtd/web-app_2_3.dtd" >
<web-app>
  <display-name>Archetype Created Web Application</display-name>
  <!--配置容器启动默认加载上下文-->
  <context-param>
    <param-name>contextConfigLocation</param-name>
    <param-value>classpath:applicationContext*.xml</param-value>
  </context-param>
  <!--配置监听器-->
  <listener>
    <listener-class>org.springframework.web.context.ContextLoaderListener</listener-class>
  </listener>
</web-app>
2.4、创建服务接口
package com.ebuy.service;
//服务接口
public interface HelloService
    //提供服务的方法
    String sayHello(String name);
2.5、创建服务的实现类
package com.ebuy.service.impl;

import com.alibaba.dubbo.config.annotation.Service;
import com.ebuy.service.HelloService;


/**
 * 此实现类就是被发布为provider服务
 */
@Service
public class HelloServiceImpl implements HelloService
    @Override
    public String sayHello(String name)
        return "hello:" + name;
注意此处!!!
导入
@Service注解,一定要是alibaba下的dubbo提供的,com.alibaba.dubbo.config.annotation.Service,主要用于对外提供服务。
2.6、在src/main/resources下创建applicationContext-service.xml
<?xml version="1.0" encoding="UTF-8"?>
<beans xmlns="http://www.springframework.org/schema/beans"
       xmlns:xsi="http://www.w3.org/2001/XMLSchema-instance"
       xmlns:p="http://www.springframework.org/schema/p"
       xmlns:context="http://www.springframework.org/schema/context"
       xmlns:dubbo="http://code.alibabatech.com/schema/dubbo"
       xmlns:mvc="http://www.springframework.org/schema/mvc"
       xsi:schemaLocation="http://www.springframework.org/schema/beans
		http://www.springframework.org/schema/beans/spring-beans.xsd
         http://www.springframework.org/schema/mvc
         http://www.springframework.org/schema/mvc/spring-mvc.xsd
         http://code.alibabatech.com/schema/dubbo
         http://code.alibabatech.com/schema/dubbo/dubbo.xsd
         http://www.springframework.org/schema/context
         http://www.springframework.org/schema/context/spring-context.xsd">

    <!-- 当前应用名称,用于注册中心计算应用间依赖关系,注意:消费者和提供者应用名不要一样 -->
    <dubbo:application name="dubbodemo_provider_1"/>

    <!--连接服务注册中心zookeeper    ip地址为zookeeper所在服务器的ip地址   此处的port就是zookeeper的默认端口号-->
    <!--<dubbo:registry address="zookeeper://172.16.30.114:2181"/>-->
    <dubbo:registry address="172.16.30.114:2181" protocol="zookeeper"/>

    <!--此处是由从本地连接注册中心,注册协议是dubbo和port端口号默认是20880-->
    <dubbo:protocol name="dubbo" port="20880"/>

    <!--扫描指定包,加入@service注解的类会被发布为服务-->
    <dubbo:annotation package="com.ebuy.service.impl"/>

</beans>
注意!!!
上述dubbo:registry,是用于连接注册中心zookeeper的,后面的address地址就是zookeeper注册中心所在服务器的ip地址,我们可以在本地Windows开启注册中心,但是下一般情况下我们是把zookeeper部署在linux的远程终端,因为在实际的开发环境中注册中心会记录服务提供者和服务消费者的所有的url,所以不可能是在自己电脑上部署zookeeper,而我们使用linux就是为了模拟远程终端服务器。
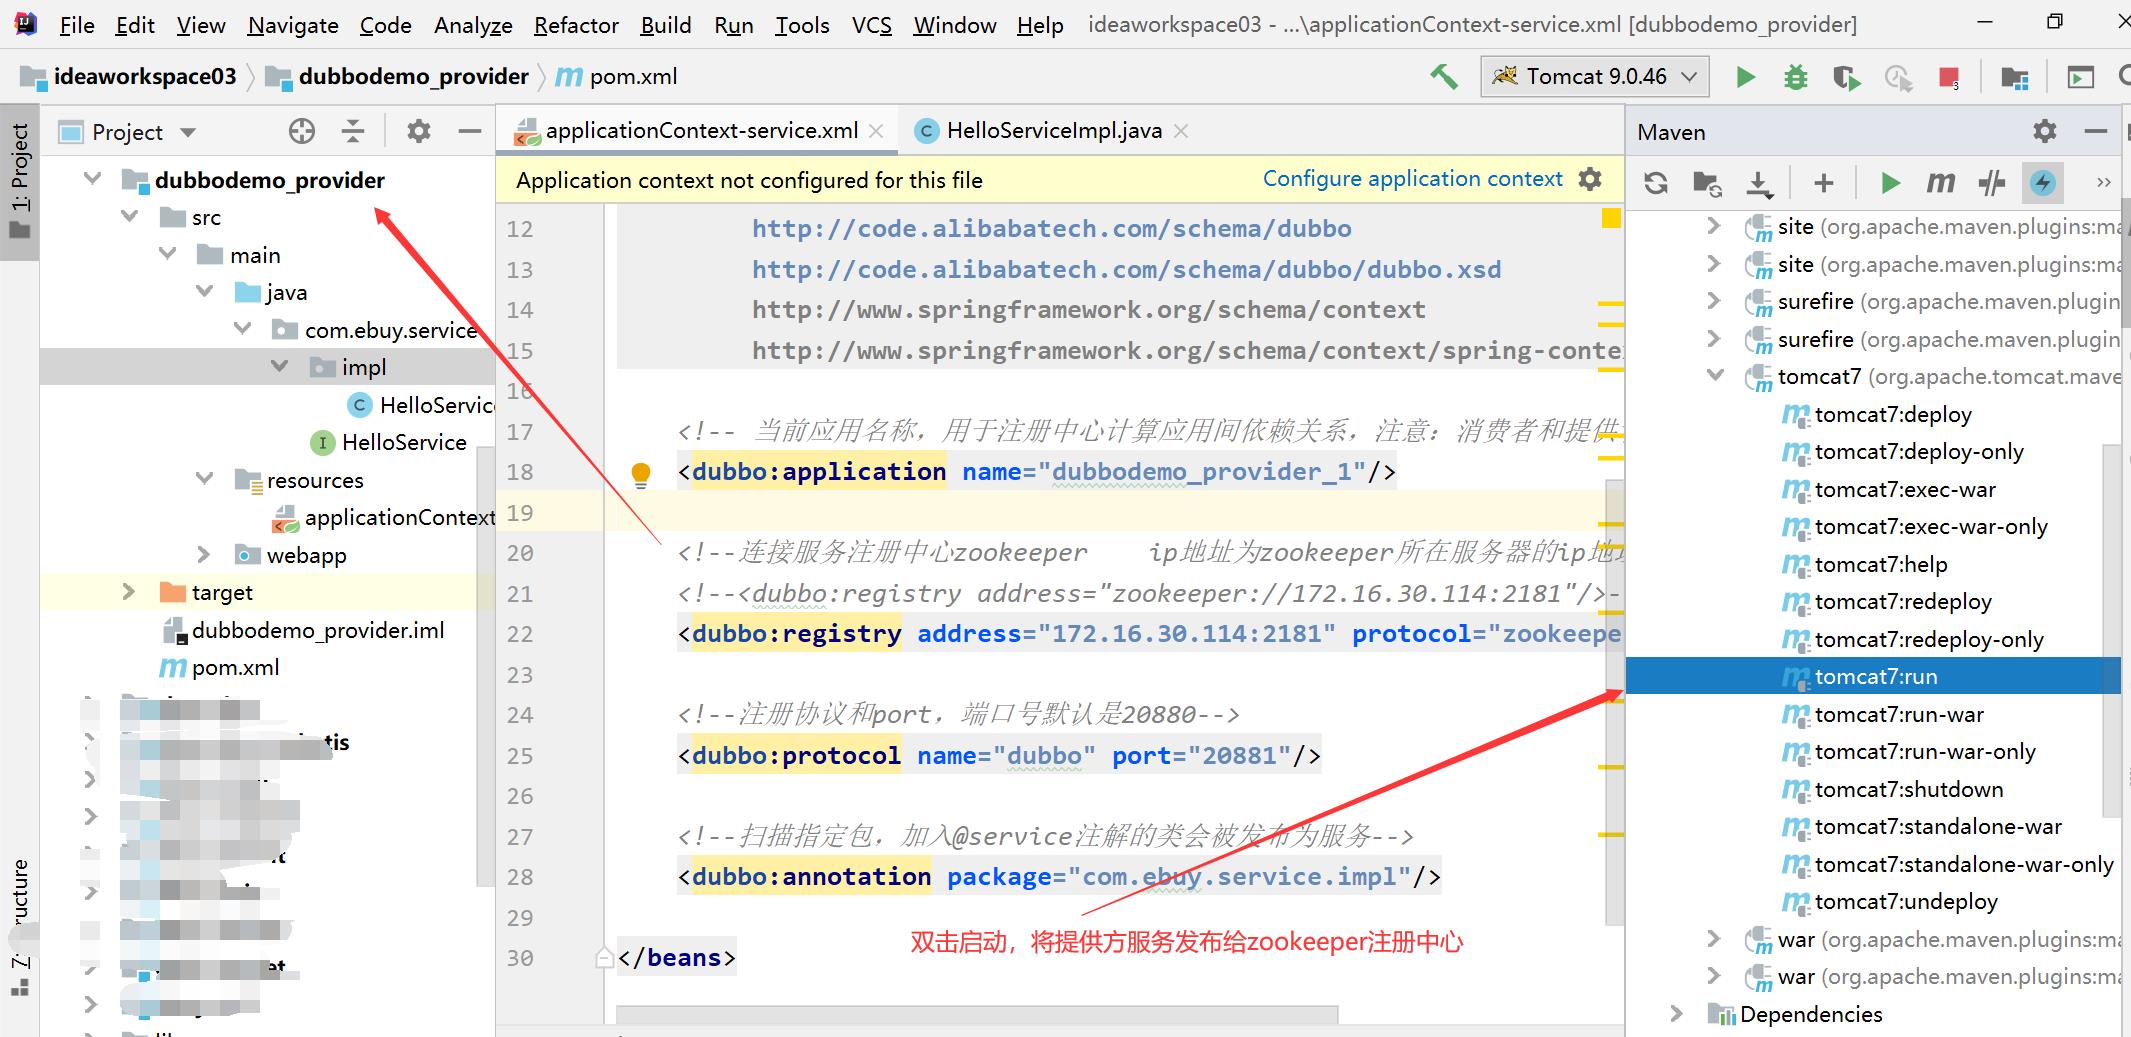
2.7、启动提供方的服务
运行tomcat

三、
以上是关于分布式与微服务系列Dubbo入门开发(服务提供方服务消费方)的主要内容,如果未能解决你的问题,请参考以下文章