cgb2110-day14
Posted cgblpx
tags:
篇首语:本文由小常识网(cha138.com)小编为大家整理,主要介绍了cgb2110-day14相关的知识,希望对你有一定的参考价值。
文章目录
一,Vue项目
–1,前提
必须先安装好 vue脚手架
在哪里执行的下载命令,就下载到哪里去
–2,下载
在你创建好的vue的工作空间文件夹里,执行以下的命令来下载vue项目代码.
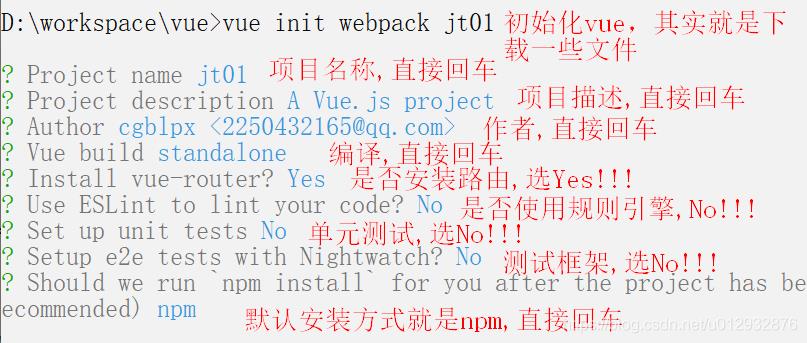
–3,测试
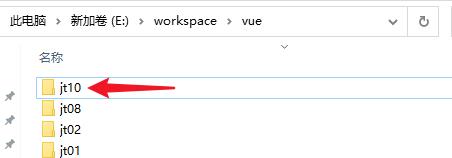
也可以直接把压缩包,解压到你的vue的工作空间(E:\\workspace\\vue)
启动项目
必须进入到项目目录中,再执行启动命令<指即将启动指定项目>

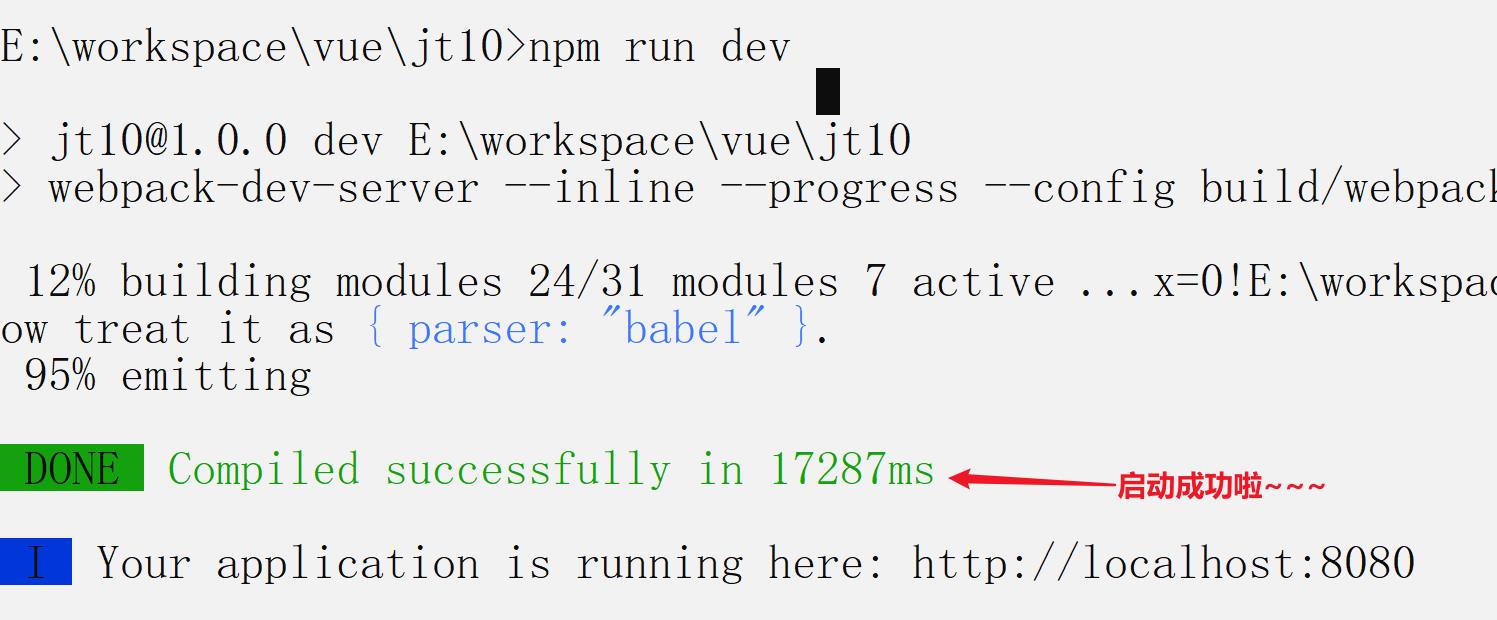
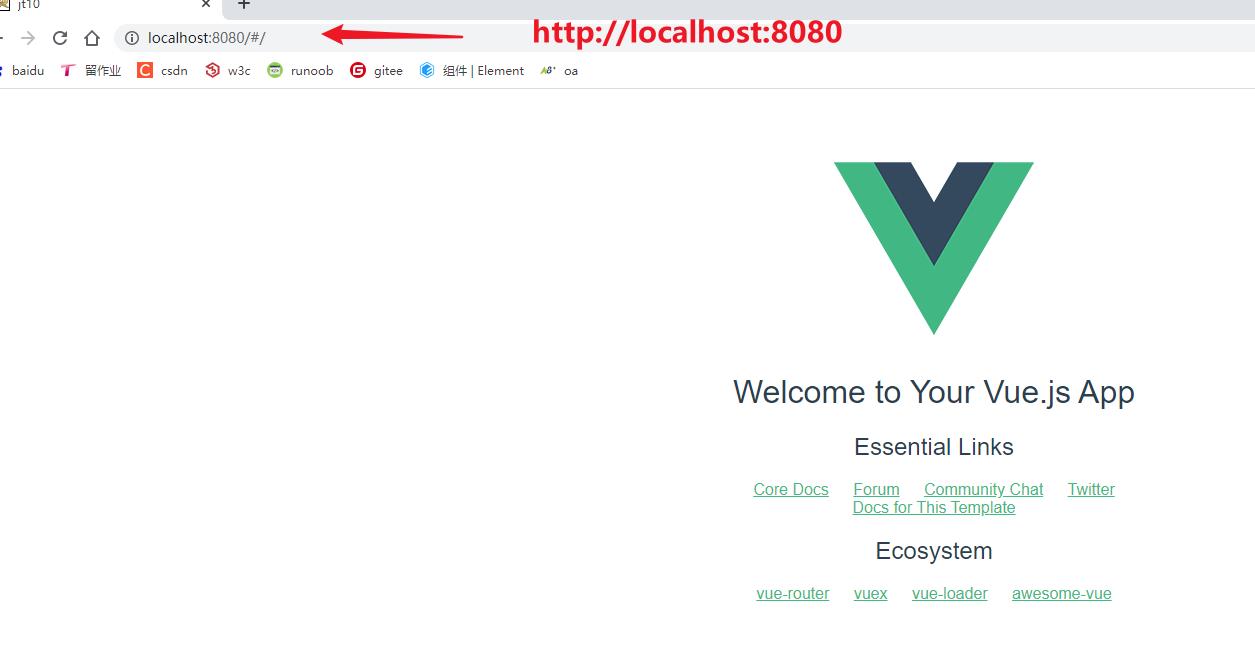
打开浏览器测试
二,自定义Vue组件
扩展了html的标签,可以使用更多的组件,拼接一个大的网页.
–1,创建Person.vue组件(在src/components里)
<template>
  <div>  <!-- 只能有一个根元素,不然报错!!-->
    <h1>name</h1>
    <h1>age</h1>
    <h1>show()</h1>
  </div>
</template>

<script>
// 1,支持导出的组件
export default
  name: 'Person', //类似于组件名称
  data()  //通过data()返回数据
    return
      name:'jack',
      age:20

    ,
  methods:
    show()
      console.log(this.name+this.age);


</script>

<style>
</style>
–2,注册组件(修改App.vue)
<template>
  <div id="app">
    <img src="./assets/logo.png">

    <!-- 3.使用自定义组件,像标签一样的用 -->
    <Person></Person>
  </div>
</template>

<script>
// 1.导入自定义组件Person.vue(路径必须包含./)
import Person from './components/Person.vue'

export default
  name: 'App',
  components:  //2.注册组件: 类似于局部组件
    Person //使用了 1.导入的组件


</script>

<style>
#app
  font-family: 'Avenir', Helvetica, Arial, sans-serif;
  -webkit-font-smoothing: antialiased;
  -moz-osx-font-smoothing: grayscale;
  text-align: center;
  color: #2c3e50;
  margin-top: 60px;

</style>
–3,测试
保证服务器编译了新的代码(敲回车解除命令行的阻塞状态就行),打开浏览器访问,即将看到新数据

三,练习Vue项目里的自定义组件
–1, 创建Car.vue
<template>
  <div>
      <span v-if="age>18">成年人</span>
      <ol>
        <li v-for="o in hobby">o</li>
      </ol>
  </div>
</template>

<script>
  export default
    name:'Car',
    data()
      return
        age:20,
        hobby:['唱','跳','rap']


</script>

<style>
</style>
–2,修改App.vue
<template>
  <div id="app">
    <img src="./assets/logo.png">

    <!-- 3.使用自定义组件,像标签一样的用 -->
    <Person></Person>
    <car></car>
  </div>
</template>

<script>
// 1.导入自定义组件Person.vue(路径必须包含./)
import Person from './components/Person.vue'
import Car from './components/Car.vue'

export default
  name: 'App',
  components:  //2.注册组件: 类似于局部组件
    Person , //使用了 1.导入的组件
    Car


</script>

<style>
#app
  font-family: 'Avenir', Helvetica, Arial, sans-serif;
  -webkit-font-smoothing: antialiased;
  -moz-osx-font-smoothing: grayscale;
  text-align: center;
  color: #2c3e50;
  margin-top: 60px;

</style>
四,Vue项目整合ElementUI
–1,下载
E:\\workspace\\vue\\jt10>npm i element-ui -S
–2,配置
修改main.js文件
// The Vue build version to load with the `import` command
// (runtime-only or standalone) has been set in webpack.base.conf with an alias.
import Vue from 'vue'
import App from './App'
import router from './router'

Vue.config.productionTip = false

//------引入了ElementUI相关的资源
import ElementUI from 'element-ui';
import 'element-ui/lib/theme-chalk/index.css';
Vue.use(ElementUI);//vue项目中使用了ElementUI

/* eslint-disable no-new */
new Vue(
  el: '#app',
  router,
  components:  App ,
  template: '<App/>'
)
–3,使用,修改Person.vue
<template>
  <div>  <!-- 只能有一个根元素,不然报错!!-->
    <h1>name</h1>
    <h1>age</h1>
    <h1>show()</h1>

    <!-- 使用ElementUI的代码-->
    <!-- 1.el-button按钮,type属性用来控制颜色,icon图标,circle圆形,round圆角-->
    <el-row>
      <el-button type="danger">主要按钮</el-button>
      <el-button type="danger" icon="el-icon-share" circle></el-button>
    </el-row>
    <el-row>
      <el-button type="success" round>成功按钮</el-button>
    </el-row>

    <!-- 2.i图标-->
    <i class="el-icon-share"></i>
    <i class="el-icon-s-home"></i>

    <!-- 3.布局 el-row是行,el-col是列,
      :span是合并列,值表示要合并几列,默认一行是有24分栏/列
    -->
    <el-row>
      <el-col :span="3"> 你好1 </el-col>
      <el-col :span="8"> 你好2 </el-col>
      <el-col :span="8"> 你好3 </el-col>
    </el-row>

  </div>
</template>

<script>
// 1,支持导出的组件
export default
  name: 'Person', //类似于组件名称
  data()  //通过data()返回数据
    return
      name:'jack',
      age:20

    ,
  methods:
    show()
       return this.name+this.age;


</script>

<style>
</style>
–4,测试

以上是关于cgb2110-day14的主要内容,如果未能解决你的问题,请参考以下文章