Android MVVM框架搭建ViewModel + LiveData + DataBinding
Posted 初学者-Study
tags:
篇首语:本文由小常识网(cha138.com)小编为大家整理,主要介绍了Android MVVM框架搭建ViewModel + LiveData + DataBinding相关的知识,希望对你有一定的参考价值。
android MVVM框架搭建(一)ViewModel + LiveData + DataBinding
前言
MVVM框架出来已经有一段时间了,现在也有很多的项目运用了MVVM框架,因此也不算是很新的东西,但是从个人的角度来说我希望写出来,因为每年都会有新的Android开发工程师进入,一些框架的使用都是封装好的,或者写的很高级,刚开始不容易看懂,因此我的想法是写一个简单易懂的MVVM框架,并且在这个上面去加入Jetpack的组件,当然了,我技术比较菜,大佬要是看见了高抬贵手。
正文
MVVM框架是有由来的,这个其实说来话长了,还得从最开始的Android 视图、UI来说起。最开始的时候Android编写页面,里面的业务逻辑和UI处理都在Activity中,很符合这样一个图。

一、创建项目
而最开始的解耦框架是MVC,Model + View + Controller。
Model (模型层) 保存数据的状态,比如数据存储,网络请求。同时还与View 存在一定的耦合,可以通过观察者模式通知 View 状态的改变来让view 更新。
View (视图层) 同时响应用户的交互行为并触发 Controller 的逻辑,View 还有可能修改Model 的状态 以使其与 Model 同步,View 还会在model 中注册 model 事件的改变。以此来刷新自己并展示给用户。
Control (控制层)控制器由View 根据用户行为触发并响应来自view 的用户交互,然后根据view 的事件逻辑来修改对应的Model, Control 并不关心 View 如何展示 相关数据或状态,而是通过修改 Model 来实现view 的数据的刷新。
而中间的框架是MVP,Model + View + Presenter。相当于对MVC框架的进一步升级,解耦。不过也有缺点,额外增加了大量的接口、类,不方便进行管理,所以关于MVP的话就还有一个Contract要去处理。
Contract 如其名,是一个契约,将Model、View、Presenter 进行约束管理,方便后期类的查找、维护。
presenter - 逻辑处理层对UI的各种业务事件进行相应处理。不与View产生直接关系。
最后是我们当前最流行的框架MVVM,Model + View + ViewModel。解耦更彻底,如果说之前是藕断丝连的话,现在就是一刀两断。
ViewModel:关联层,将Model和View进行绑定,只做和业务逻辑相关的工作,不涉及任何和UI相关的操作,不持有控件引用,不更新UI。
View只做和UI相关的工作,不涉及任何业务逻辑,不涉及操作数据,不处理数据。UI和数据严格的分开。
好了,说了这么多理论的东西,下面进入实操环节,先说明开发环境,我使用的Android Studio是4.2.1,API版本30,gradle 版本6.7.1,JDK8,电脑Win10。
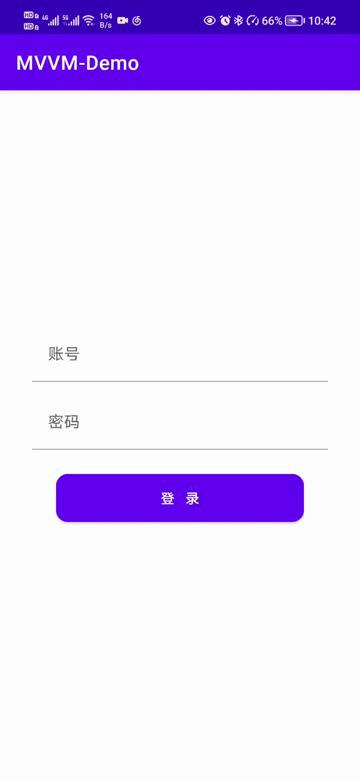
首先创建一个项目,命名为MVVM-Demo。

本文的主要目标是ViewModel 和 DataBinding。
从Google的官方说明来看,ViewModel 类旨在以注重生命周期的方式存储和管理界面相关的数据。ViewModel 类让数据可在发生屏幕旋转等配置更改后继续留存。DataBinding数据绑定库是一种支持库,借助该库,您可以使用声明性格式(而非程序化地)将布局中的界面组件绑定到应用中的数据源。
看懂了之后首先在项目中,启用DataBinding,找到app模块下的build.gradle,在android闭包下添加如下代码:
	//启用DataBinding
    buildFeatures
        dataBinding true
然后点击AS右上角的Sync Now进行工程配置同步,而ViewModel不需要做什么就可以使用了。
二、ViewModel使用
ViewModel的优势在于生命周期和数据持久化,那么它就适用于Activity和Fragment,其次就是异步回调,不会造成内存泄漏,再次就是对View层和Model层进行隔离,是两者不存在耦合性,因此你可以知道ViewModel在整个MVVM框架中的重要性了。
① 绑定Activity
在MVVM的框架中,每一个Activity都应该对应一个ViewModel,而现在我们有一个MainActivity,因此可以新建一个viewmodels包,包下新建一个MainViewModel类,表示与MainActivity进行绑定。
public class MainViewModel extends ViewModel
注意这里要继承ViewModel,虽然现在里面什么都没有的,但后面使用的时候会进行增加,下面先将我们的MainActivity与MainViewModel进行绑定。
回到MainActivity中,修改代码如下图所示;

现在我们的MainActivity和MainViewModel就绑定起来了。ViewModel是数据持久化的,因为对于一些变量就可以直接放在ViewModel当中,而不再放在Activity中,可以根据一个实际的需求来进行。
② 页面布局绘制
比如我现在有一个登录的功能要去实现,要怎么去对数据进行处理呢?
在ViewModel中定义两个变量
	public String account;
    public String pwd;
账号和密码这当然是最基本的两个数据了,下面我们修改一下activity_main.xml中的布局,代码如下:
<?xml version="1.0" encoding="utf-8"?>
<LinearLayout xmlns:android="http://schemas.android.com/apk/res/android"
    xmlns:app="http://schemas.android.com/apk/res-auto"
    xmlns:tools="http://schemas.android.com/tools"
    android:layout_width="match_parent"
    android:layout_height="match_parent"
    android:gravity="center"
    android:orientation="vertical"
    android:padding="32dp"
    tools:context=".MainActivity">

    <com.google.android.material.textfield.TextInputLayout
        android:layout_width="match_parent"
        android:layout_height="wrap_content">

        <com.google.android.material.textfield.TextInputEditText
            android:id="@+id/et_account"
            android:layout_width="match_parent"
            android:layout_height="wrap_content"
            android:background="@color/white"
            android:hint="账号" />
    </com.google.android.material.textfield.TextInputLayout>

    <com.google.android.material.textfield.TextInputLayout
        android:layout_width="match_parent"
        android:layout_height="wrap_content"
        android:layout_marginTop="12dp">

        <com.google.android.material.textfield.TextInputEditText
            android:id="@+id/et_pwd"
            android:layout_width="match_parent"
            android:layout_height="wrap_content"
            android:background="@color/white"
            android:hint="密码"
            android:inputType="textPassword" />
    </com.google.android.material.textfield.TextInputLayout>

    <com.google.android.material.button.MaterialButton
        android:id="@+id/btn_login"
        android:layout_width="match_parent"
        android:layout_height="48dp"
        android:layout_margin="24dp"
        android:insetTop="0dp"
        android:insetBottom="0dp"
        android:text="登  录"
        app:cornerRadius="12dp" />

</LinearLayout>
③ 实现登录
下面回到MainActivity中,增加代码如下图所示:

乍一看好像没啥不同的,无非就是给mainViewModel中的两个变量赋了值。不过这里有一个数据持久化的内容在里面,怎么证明呢?看一下下面这个GIF图

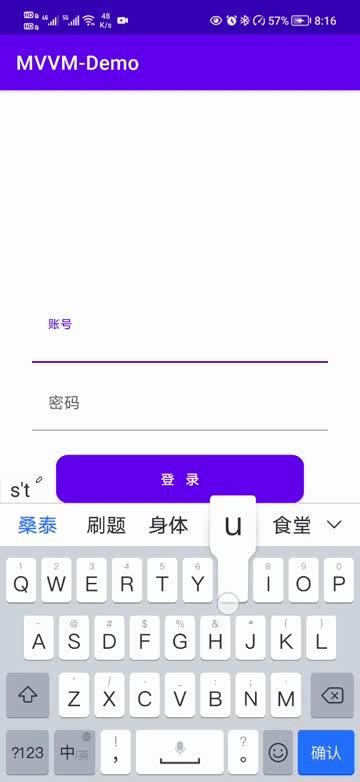
这个图可能有一些黑屏的地方,因为我在给自己的手机做横竖屏切换的时候,手机录屏好像有一点问题,不过没事。因为这个结果是对的,那就是数据持久化,因为我们知道手机在切换屏幕的时候Activity是会重新创建的,因此如果我们的数据是放在Activity中,那么切换屏幕之后就会重置,输入框也不会有值,但是通过ViewModel去保存输入框的值就不同了,虽然你的Activity在切换屏幕的时候销毁并且重新创建了,但是我的MainModel依然稳定,所以我才能在横屏的时候也登陆,这样不会造成数据丢失。
二、LiveData使用
LiveData是用来做什么的?数据变化感知,也就是说如果我一个页面中对一个TextView进行多次赋值的话,可以通过LiveData来操作,只需要在值改变的时候进行设置就好了,可以简化页面上的代码。下面举一个实际的例子来说明。依然是之前那个登录页面,不过需要修改一下MainViewModel中的变量,如下:
① 可修改数据
	public MutableLiveData<String> account = new MutableLiveData<>();
    public MutableLiveData<String> pwd = new MutableLiveData<>();
请注意这里使用的是MutableLiveData,表示值的内容开变动,而LiveData是不可变的。<>中的是泛型,你可以直接将一个对象放进去,当对象的内容有改动时,通知改变就可以了,现在这么写是为了方便理解。下面进入MainActivity中,首先我们改变一下布局activity_main.xml在按钮的下面再加如下代码
	<TextView
        android:id="@+id/tv_account"
        android:layout_width="wrap_content"
        android:layout_height="wrap_content"/>

    <TextView
        android:id="@+id/tv_pwd"
        android:layout_width="wrap_content"
        android:layout_height="wrap_content"/>
② 数据观察
然后回到MainActivity中,修改代码如下图所示:

上面的图中从上往下有四处标注,我们从下面的两处标注来看,首先在给MainViewModel中的account赋值时,采用了MutableLiveData的setValue()的方式,还有一种方式是postValue(),这里要注意一点setValue()只能在主线程中调用,postValue()可以在任何线程中调用。pwd也是一样的,然后在最后一处标注的地方,对MainViewModel中的account和pwd进行数据观察,当这两个值有改变时通知页面最新的值,这里用了lambda表达式进行了一次简化,实际的代码是这样的。

下面我们运行一下:

三、DataBinding使用
Android的DataBinding在已经内置了,因此只需要在app模块的build.gradle中开启就可以使用了。DataBinding,顾名思义就是数据绑定,可以看到现在的三个组件都与数据有关系,ViewModel数据持有,LiveData数据观察、DataBinding数据绑定。
① 单向绑定
而DataBinding的绑定有两种方式:单向数据绑定和双向数据绑定。举个例子:比如我手机上收到一个通知,我需要显示通知的文字内容在页面上,这就是单向绑定,而我页面上的文字内容改变也重新发一个通知出去,这就是双向绑定。可以理解为A和B进行交互。A发消息,B要做出反应。B发消息,A也要相应改变。最常用的就是当我Model中的数据改变时,改变页面上的值。这个是单向绑定。下面我们可以新建一个用户User对象,代码如下:
public class User extends BaseObservable

    private String account;
    private String pwd;

    public String getAccount()
        return account;


    public void setAccount(String account)
        this.account = account;
        notifyChange();//通知改变 所有参数改变


    public String getPwd()
        return pwd;


    public void setPwd(String pwd)
        this.pwd = pwd;


    public User(String account, String pwd)
        this.account = account;
        this.pwd = pwd;
这里我继承了BaseObservable,注意它在androidx.databinding包下。然后我们的数据是需要显示在页面上的,而之前是通过Activity获取xml中的控件,然后显示数据在控件上,而现在有了DataBinding,可以直接和xml的中数据进行绑定,这看起来和JS比较像。下面我们对activity_main.xml进行改变。改变后代码如下:
<?xml version="1.0" encoding="utf-8"?>
<layout xmlns:android="http://schemas.android.com/apk/res/android"
    xmlns:app="http://schemas.android.com/apk/res-auto"
    xmlns:tools="http://schemas.android.com/tools">

    <!--绑定数据-->
    <data>
        <variable
            name="user"
            type="com.llw.mvvm.User" />
    </data>

    <LinearLayout
        android:layout_width="match_parent"
        android:layout_height="match_parent"
        android:gravity="center"
        android:orientation="vertical"
        android:padding="32dp"
        tools:context=".MainActivity">

        <com.google.android.material.textfield.TextInputLayout
            android:layout_width="match_parent"
            android:layout_height="wrap_content">

            <com.google.android.material.textfield.TextInputEditText
                android:id="@+id/et_account"
                android:layout_width="match_parent"
                android:layout_height="wrap_content"
                android:background="@color/white"
                android:hint="账号" />
        </com.google.android.material.textfield.TextInputLayout>

        <com.google.android.material.textfield.TextInputLayout
            android:layout_width="match_parent"
            android:layout_height="wrap_content"
            android:layout_marginTop="12dp">

            <com.google.android.material.textfield.TextInputEditText
                android:id="@+id/et_pwd"
                android:layout_width="match_parent"
                android:layout_height="wrap_content"
                android:background="@color/white"
                android:hint="密码"
                android:inputType="textPassword" />
        </com.google.android.material.textfield.TextInputLayout>

        <com.google.android.material.button.MaterialButton
            android:id="@+id/btn_login"
            android:layout_width="match_parent"
            android:layout_height="48dp"
            android:layout_margin="24dp"
            android:insetTop="0dp"
            android:insetBottom="0dp"
            android:text="登  录"
            app:cornerRadius="12dp" />

        <TextView
            android:id="@+id/tv_account"
            android:text="@user.account"
            android:layout_width="wrap_content"
            android:layout_height="wrap_content"/>

        <TextView
            android:id="@+id/tv_pwd"
            android:text="@user.pwd"
            android:layout_width="wrap_content"
            android:layout_height="wrap_content"/>

    </LinearLayout>
</layout>
这里我在最外层加了一个layout标签,然后将原来的布局放在layout里面,再增加一个数据源,也就是user对象,然后再底部的两个tv_account和tv_pwd两个TextView中的text属性中绑定了user对象中的属性值。当然这样还没有完成,最后一步是在MainActivity中去进行绑定的。
进入MainActivity。在onCreate方法中,先将其他的代码注释掉。

然后修改待明日如下图所示

这里要注意一点,DataBindingUtil.setContentView返回的是一个ViewDataBinding对象,这个对象的生成取决于你的Activity,例如MainActivity,就会生成ActivityMainBinding。然后再通过生成的ActivityMainBinding去设置要显示在xml中控件的值。因此你会看到我完全没有去findViewById,然后控件再去设置这个setText。还有一点就是当你使用了DataBinding之后就不需要去手动findViewById了,通过编译时技术会生成驼峰命名的对象,如上图的btnLogin、etAccount、etPwd。上图的代码就是通过更改数据然后通知到xml做更改,初始化的修改时admin、123456。然后再通过输入框去修改。我将会输入study、666,然后点击登录按钮,也会将输入框的数据显示在TextView上,这样是否会省去很多不必要的繁琐工作呢?下面运行一下:

② 双向绑定
双向绑定是建立在单向绑定的基础上,实际的开发中用到双向绑定的地方并没有单向绑定多,双向绑定举一个例子,在输入框输入数据时候直接将数据源中的数据进行改变,这里会用到ViewModel和LiveData。下面进行双向绑定的使用,修改一下MainViewModel,代码如下:
public class MainViewModel extends ViewModel

    public MutableLiveData<User> user;

    public MutableLiveData<User> getUser()
        if(user == null)
            user = new MutableLiveData<>();

        return user;
下面修改User类,这里面做了一些改变
public class User extends BaseObservable

    public String account;
    public String pwd;

    @Bindable
    public String getAccount()
        return account;


    public void setAccount(String account)
        this.account = account;
        notifyPropertyChanged(BR.account);//只通知改变的参数


    @Bindable
    public String getPwd()
        return pwd;


    public void setPwd(String pwd)
        this.pwd = pwd;
        notifyPropertyChanged(BR.pwd);//只通知改变的参数


    public User(String account, String pwd)
        this.account = account;
        this.pwd = pwd;
不同于notifyChange()改变某一个参数,某一个对象都会通知,现在notifyPropertyChanged()就具有针对性,只通知对应属性改变。之前在activity_main.xml中的data标签中是使用的User,现在我们改成ViewModel,顺便把布局调整一下,代码如下:
<?xml version="1.0" encoding="utf-8"?>
<layout xmlns:android="http://schemas.android.com/apk/res/android"
xmlns:app="http://schemas.android.com/apk/res-auto"
xmlns:tools="http://schemas.android.com/tools">
<!--绑定数据-->
<data>
<variable
name="viewModel"
type="com.llw.mvvm.viewmodels.MainViewModel" />
</data>
<LinearLayout
android:layout_width="match_parent"
android:layout_height="match_parent"
android:gravity="center"
android:orientation="vertical"
android:padding="32dp"
tools:context=".MainActivity">
<TextView
android:id="@+id/tv_account"
android:text="@viewModel.user.account"
android:layout_width="wrap_content"
android:layout_height="wrap_content"/>
<TextView
android:layout_marginBottom="24dp"
android:id="@+id/tv_pwd"
android:text="@viewModel.user.pwd"
android:layout_width="wrap_content"
android:layout_height="wrap_content"/>
<com.google.android.material.textfield.TextInputLayout
android:layout_width="match_parent"
android:layout_height="wrap_content&以上是关于Android MVVM框架搭建ViewModel + LiveData + DataBinding的主要内容,如果未能解决你的问题,请参考以下文章
Android MVVM框架搭建HiltViewBindingActivity Result API