SSD-Pytorch训练自己的VOC数据集&遇到的问题及解决办法
Posted 国服最强貂蝉
tags:
篇首语:本文由小常识网(cha138.com)小编为大家整理,主要介绍了SSD-Pytorch训练自己的VOC数据集&遇到的问题及解决办法相关的知识,希望对你有一定的参考价值。
SSD
- 训练
- 遇到的问题
- train.py
- TypeError: unsupported operand type(s) for /=: 'Tensor' and 'builtin_function_or_method'...
- 找不到数据集里的文件夹/文件
- FileNotFoundError: [Errno 2] No such file or directory: 'C:\\\\Users\\\\Administrator\\\\data/coco/coco_labels.txt'
- RuntimeError: Legacy autograd function with non-static forward method is deprecated. Please use new-style autograd function with static forward method.
- AttributeError: 'NoneType' object has no attribute 'shape'
- eval.py
训练
去GitHub上下载SSD源码
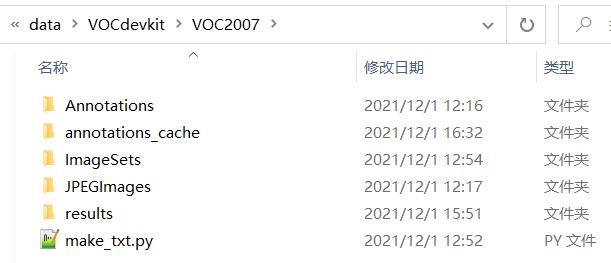
新建一个VOCdevkit文件夹,放入VOC2007数据集
data/init.py
注释 第3行from .coco import COCODetection, COCOAnnotationTransform, COCO_CLASSES, COCO_ROOT, get_label_map
data/config.py
第15行的 num_classes改成自己设定的类别数+1;
设置max_iter最大迭代数
data/voc0712.py
第20行的VOC_CLASSES =改成自己的类别名;
第93行改为 image_sets=[('2007', 'trainval')]
layers/modules/multibox_loss.py
第97行的loss_c[pos] = 0前面加上一句loss_c = loss_c.view(num, -1)
ssd.py
把所有的num_classes的数量(第32、198行)都改为类别数+1
train.py
parser batch_size,learning-rate根据自己电脑情况修改(batchsize=16);
basenet 预训练模型,start_iter迭代起始点,save_folder模型保存地址
搜索这里面的data[0],全部替换为item();
第84、85行注释掉;
# if args.dataset_root == COCO_ROOT:
# parser.error('Must specify dataset if specifying dataset_root')
第198行iteration % 5000 == 0,意味着每5000次保存一次模型,可改为200。后两行可改保存的模型名。
可以在第195行创建txt记录loss值:
with open('loss.txt', 'a') as f:
    f.write(str(loss.item()) + '\\n')
165行的images, targets = next(batch_iterator)改成:
try:
    images, targets = next(batch_iterator)
except StopIteration:
    batch_iterator = iter(data_loader)
    images, targets = next(batch_iterator)
预训练文件vgg16_reducedfc.pth
开始训练时需要一个预训练文件 vgg16_reducedfc.pth
百度云链接:提取码:xg4c
下载之后放在SSD项目下新建的weights文件夹下,然后就可以进行训练了。
注:训练中途遇到 loss=nan 的现象,将train.py中,parser.add_argument('--lr', '--learning-rate', default=1e-3, type=float,中的 default=1e-3改为default=1e-4。*直到loss降低到1左右时即可 *
eval.py
trained_model评估的模型路径,save_folder 评估保存路径
demo.py
新建test_image,在文件夹中放置几张待测图片
import os
import sys
import torch
from torch.autograd import Variable
import numpy as np
import cv2
from ssd import build_ssd
from data import VOC_CLASSES as labels
from matplotlib import pyplot as plt

# ------ 初始化 libiomp5md.dll 报错修改 ------
os.environ["KMP_DUPLICATE_LIB_OK"] = "TRUE"
# -----------------------------------------

module_path = os.path.abspath(os.path.join('..'))
if module_path not in sys.path:
    sys.path.append(module_path)

if torch.cuda.is_available():
    torch.set_default_tensor_type('torch.cuda.FloatTensor')

net = build_ssd('test', 300, 5)    # 第一处修改:类别+1
# 将预训练的权重加载到数据集上
net.load_weights('weights/ssd300_VOC_1995.pth')  # 第二处修改:使用自己训练好的文件

# 加载多张图像
imgs = 'test_image/'# 第三处修改:改成你自己的文件夹
img_list = os.listdir(imgs)
for img in img_list:
    # 对输入图像进行预处理
    current_img = imgs + img
    image = cv2.imread(current_img)
    rgb_image = cv2.cvtColor(image, cv2.COLOR_BGR2RGB)

    x = cv2.resize(image, (300, 300)).astype(np.float32)
    x -= (104.0, 117.0, 123.0)
    x = x.astype(np.float32)
    x = x[:, :, ::-1].copy()
    x = torch.from_numpy(x).permute(2, 0, 1)

    # 把图片设为变量
    xx = Variable(x.unsqueeze(0))
    if torch.cuda.is_available():
        xx = xx.cuda()
    y = net(xx)

    # 解析 查看结果

    top_k = 10

    plt.figure(figsize=(6, 6))
    colors = plt.cm.hsv(np.linspace(0, 1, 21)).tolist()
    currentAxis = plt.gca()

    detections = y.data
    scale = torch.Tensor(rgb_image.shape[1::-1]).repeat(2)
    for i in range(detections.size(1)):
        j = 0
        while detections[0, i, j, 0] >= 0.6:
            score = detections[0, i, j, 0]
            label_name = labels[i-1]
            display_txt = '%s: %.2f'%(label_name, score)
            print(display_txt)
            pt = (detections[0,i,j,1:]*scale).cpu().numpy()
            coords = (pt[0], pt[1]), pt[2]-pt[0]+1, pt[3]-pt[1]+1
            color = colors[i]
            currentAxis.add_patch(plt.Rectangle(*coords, fill=False, edgecolor=color, linewidth=2))
            currentAxis.text(pt[0], pt[1], display_txt, bbox='facecolor':color, 'alpha':0.5)
            j += 1
    plt.imshow(rgb_image)
    plt.show()
demo/live.py
摄像头识别 (没试)
第10行用…/找到上一级目录
parser.add_argument('--weights', default='../weights/xxxxxx.pth',
第78行 类别+1
遇到的问题
报错顺序不记得了,下面是遇到的大部分错误
train.py
TypeError: unsupported operand type(s) for /=: ‘Tensor’ and ‘builtin_function_or_method’…
loss_l /= N这句错误
因为一些教程里还改了layers/modules/multibox_loss.py程序:
第115行N = num_pos.data.sum()改为
 N = num_pos.data.sum().double
 loss_l = loss_l.double()
 loss_c = loss_c.double()
会出现这个问题.
找不到数据集里的文件夹/文件
VOC数据集名字错了 注意名称 和 大小写
FileNotFoundError: [Errno 2] No such file or directory: ‘C:\\Users\\Administrator\\data/coco/coco_labels.txt’
train.py 第二行如果有from data.coco import COCO_ROOT, COCODetection注释掉
RuntimeError: Legacy autograd function with non-static forward method is deprecated. Please use new-style autograd function with static forward method.
版本问题。 参考
改 detection.py为
"""
Copyright (c) 2017 Max deGroot, Ellis Brown
Released under the MIT license
https://github.com/amdegroot/ssd.pytorch
Updated by: Takuya Mouri
"""
import torch
from torch.autograd import Function
from ..box_utils import decode, nms
from data import voc as cfg


class Detect(Function):
    """At test time, Detect is the final layer of SSD.  Decode location preds,
    apply non-maximum suppression to location predictions based on conf
    scores and threshold to a top_k number of output predictions for both
    confidence score and locations.
    """
    # PyTorch1.5.0 support new-style autograd function
    #def __init__(self, num_classes, bkg_label, top_k, conf_thresh, nms_thresh):
    #    self.num_classes = num_classes
    #    self.background_label = bkg_label
    #    self.top_k = top_k
    #    # Parameters used in nms.
    #    self.nms_thresh = nms_thresh
    #    if nms_thresh <= 0:
    #        raise ValueError('nms_threshold must be non negative.')
    #    self.conf_thresh = conf_thresh
    #    self.variance = cfg['variance']

    #def forward(self, loc_data, conf_data, prior_data):
    @staticmethod
    def forward(self, num_classes, bkg_label, top_k, conf_thresh, nms_thresh, loc_data, conf_data, prior_data):
        self.num_classes = num_classes
        self.background_label = bkg_label
        self.top_k = top_k
        # Parameters used in nms.
        self.nms_thresh = nms_thresh
        if nms_thresh <= 0:
            raise ValueError('nms_threshold must be non negative.')
        self.conf_thresh = conf_thresh
        self.variance = cfg['variance']
    # PyTorch1.5.0 support new-style autograd function
        """
        Args:
            loc_data: (tensor) Loc preds from loc layers
                Shape: [batch,num_priors*4]
            conf_data: (tensor) Shape: Conf preds from conf layers
                Shape: [batch*num_priors,num_classes]
            prior_data: (tensor) Prior boxes and variances from priorbox layers
                Shape: [1,num_priors,4]
        """
        num = loc_data.size(0)  # batch size
        num_priors = prior_data.size(0)
        # [バッチサイズN,クラス数5,トップ200件,確信度+位置]のゼロリストを作成
        # 创建一个 [batch size = N,classes = 5,预测框最大数量 top_k = 200,置信度 + 位置] 的零列表
        output = torch.zeros(num, self.num_classes, self.top_k, 5)
        # 確信度を[バッチサイズN,クラス数,ボックス数]の順番に変更
        # 按照 [batch size N, number of classes, number of box] 的顺序改变置信度
        conf_preds = conf_data.view(num, num_priors,
                                    self.num_classes).transpose(2, 1)

        # Decode predictions into bboxes.
        for i in range(num):
            decoded_boxes = decode(loc_data[i], prior_data, self.variance)
            # For each class, perform nms
            conf_scores = conf_preds[i].clone()

            for cl in range(1, self.num_classes):
                # 確信度の閾値を使ってボックスを削除
                # 使用置信阈值删除框
                c_mask = conf_scores[cl].gt(self.conf_thresh)
                scores = conf_scores[cl][c_mask]
                # handbook
                #if scores.dim() == 0:
                if scores.size(0) == 0:
                # handbook
                    continue
                l_mask = c_mask.unsqueeze(1).expand_as(decoded_boxes)
                # ボックスのデコード処理
                # box 解码过程
                boxes = decoded_boxes[l_mask].view(-1, 4)
                # idx of highest scoring and non-overlapping boxes per class
                # boxesからNMSで重複するボックスを削除
                # 使用 NMS 从 boxes 中删除重复的 box
                ids, count = nms(boxes, scores, self.nms_thresh, self.top_k)
                output[i, cl, :count] = \\
                    torch.cat((scores[ids[:count]].unsqueeze(1),
                               boxes[ids[:count]]), 1)
        flt = output.contiguous().view(num, -1, 5)
        _, idx = flt[:, :, 0].sort(1, descending=True)
        _, rank = idx.sort(1)
        flt[(rank < self.top_k).unsqueeze(-1).expand_as(flt)].fill_(0)
        return output
ssd.py中99行左右
output = self.detect(
改为
output = self.detect.apply(self.num_classes, 0, 200, 0.01, 0.45,
AttributeError: ‘NoneType’ object has no attribute ‘shape’
change coco.py:
from: img=cv2.imread(osp.join(self.root,path))
to:img=cv2.imread(path)
eval.py
右键运行变成test模式
打开pycharm进入了test模式,具体表现为用“Run ‘py.test xxx.py’”
左上角File-settings-python integrated tools里面修改,选择unittest修改后记得apply
开始运行后到某一个图片突然出错
改VOC2007的main里边的 test.txt 删掉错误的那一行
eval运行到最后 FileNotFoundError: [Errno 2] No such file or directory: ‘test.txt’
这只是一个符号问题;os.path.join 不接受在原始实现中加入带有括号“😒.txt”的路径。它会忽略所有路径~/VOC2007/ImageSets/Main/test.txt 并简单地假设路径是:currentpath/test.txt
修复指定 imgsetpath 的行,如下所示:
imgsetpath = os.path.join(args.voc_root, 'VOC2007', 'ImageSets', 'Main', '%s.txt')
在函数 do_python_eval 中将
filename, annopath, imgsetpath.format(set_type), cls, cachedir,
改为
filename, annopath, imgsetpath % set_type, cls, cachedir,
以上是关于SSD-Pytorch训练自己的VOC数据集&遇到的问题及解决办法的主要内容,如果未能解决你的问题,请参考以下文章