部署Nginx服务
Posted @kz
tags:
篇首语:本文由小常识网(cha138.com)小编为大家整理,主要介绍了部署Nginx服务相关的知识,希望对你有一定的参考价值。
部署Nginx服务
基础准备
- 规划节点
| IP | 主机名 | 节点 |
| 192.168.2.142 | Nginx节点 |
2.基础准备
使用本地PC环境的VMWare Workstation软件进行实操练习,虚拟机配置为1核/2G内存/20G硬盘。
- 案例实施基础环境的安装
基础环境的安装
- 修改主机名
[root@localhost ~]# hostnamectl set-hostname nginx

[root@localhost ~]# logout

[root@nginx ~]# hostnamectl

   Static hostname: nginx

         Icon name: computer-vm

           Chassis: vm

        Machine ID: 179f6c8f2e7942ef81b0f5565a6883fa

           Boot ID: 9ac638fec1c64c94aab96d0acfa4f542

    Virtualization: vmware

  Operating System: CentOS Linux 7 (Core)

       CPE OS Name: cpe:/o:centos:centos:7

            Kernel: Linux 3.10.0-327.el7.x86_64

      Architecture: x86-64
2.关闭防火墙及SELinux服务
关闭防火墙firewalld及SELinux服务,命令如下:
# setenforce 0

# systemctl stop firewalld
3.安装配置基础服务
自行配置本地YUM源,编译安装基础环境,命令如下:
[root@nginx ~]#yum install gcc gcc-c++ openssl-devel zlib-devel zlib pcre-devel -y创建指定用户,这个nginx用户要和php服务器上创建的nginx两者id一致,这里先创建用户,命令如下:
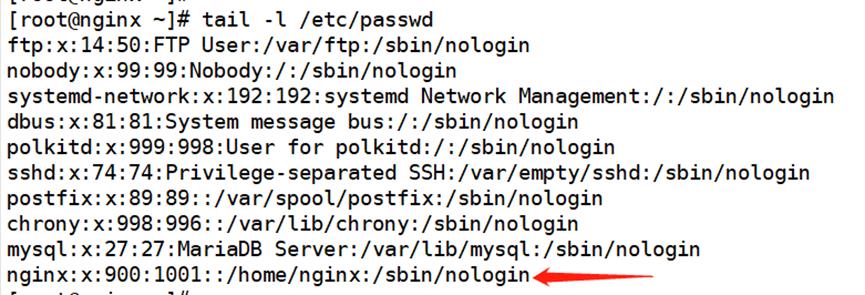
[root@nginx ~]# groupadd -g 1001 nginx

[root@nginx ~]#useradd -u 900 nginx -g nginx -s /sbin/nologin

[root@nginx ~]# tail -1 /etc/passwd 
4.安装配置Nginx服务
使用远程传输工具,将提供的nginx-1.12.2.tar.gz压缩包上传至nginx节点的/usr/local/src/目录下,并解压到当前目录,命令如下:
[root@nginx src]# tar -zxvf nginx-1.12.2.tar.gz进入nginx-1.12.2目录,编译并安装,命令如下:
[root@nginx src]# cd nginx-1.12.2/

[root@nginx-1.12.2]#./configure --prefix=/usr/local/nginx --with-http_dav_module \\

--with-http_stub_status_module --with-http_addition_module \\

--with-http_sub_module --with-http_flv_module --with-http_mp4_module \\

--with-http_ssl_module --with-http_gzip_static_module --user=nginx --group=nginx
如果没有报错提示,请进行下一步安装,命令如下:
[root@nginx-1.12.2]#make && make install编译安装完毕后,创建软连接并启动测试,命令如下:(netstat命令无法使用时,请自行使用YUM源安装net-tools工具)
[root@nginx nginx-1.12.2]# ln -s /usr/local/nginx/sbin/nginx /usr/local/sbin/

[root@nginx nginx-1.12.2]# nginx -t 
[root@nginx nginx-1.12.2]# nginx

[root@nginx nginx-1.12.2]# netstat -ntpl
以上是关于部署Nginx服务的主要内容,如果未能解决你的问题,请参考以下文章