axios笔记
Posted 贴地飞行lyh
tags:
篇首语:本文由小常识网(cha138.com)小编为大家整理,主要介绍了axios笔记相关的知识,希望对你有一定的参考价值。
1. 基本使用
1.1 默认使用get方式请求
//  默认使用get方式请求
<script src="https://unpkg.com/axios/dist/axios.min.js"></script>
<script>
	axios(
		url:'http://localhost:8080/student'
	).then(res=>
		console.log(res);
	)
</script>
1.2 使用get方式无参请求:
// get方式的无参请求
<script src="https://unpkg.com/axios/dist/axios.min.js"></script>
<script>
	axios(
		url:'http://localhost:8080/student',
		method:'get'
	).then(res=>
		console.log(res);
	)
</script>
1.3 使用get方式有参请求:
// get方式的有参请求:
<script src="https://unpkg.com/axios/dist/axios.min.js"></script>
<script>
	axios(
		url:'http://localhost:8080/student?id='+id,
		method:'get'
	).then(res=>
		console.log(res);
	)
</script>
1.4 使用get方式有参其他方式请求:
// get方式有参其他方式请求:
<script src="https://unpkg.com/axios/dist/axios.min.js"></script>
<script>
	axios(
		url:'http://localhost:8080/student',
		params:
			id:'1'

		method:'get'
	).then(res=>
		console.log(res);
	)
</script>
1.5 使用post方式无参请求:
// post方式的无参请求
<script src="https://unpkg.com/axios/dist/axios.min.js"></script>
<script>
	axios(
		url:'http://localhost:8080/student/pGet',
		method:'post'
	).then(res=>
		console.log(res);
	)
</script>
1.6 使用post方式有参请求:
// post方式的有参请求:(不推荐这种方式,用1.2.4的例子比较好)
<script src="https://unpkg.com/axios/dist/axios.min.js"></script>
<script>
	axios(
		url:'http://localhost:8080/student/pGet',
		method:'post',
		// 如果使用data传递数据,
		// 后台控制器接收到的name是null,axios使用post携带参数请求默认使用application/json
		//解决方式一:params属性传递数据
		//解决方式二:"name=张三"
		//解决方式三:服务器端给接收的参数加上@RequestBody注解
		params:
			name:'张三'

	).then(res=>
		console.log(res);
	)
</script>
2. axios请求方式
2.1 axios.get方式发送无参请求:
<script src="https://unpkg.com/axios/dist/axios.min.js"></script>
<script>
	axios.get('http://localhost:8080/student/pGet').then(res=>
		console.log(res);
	).catch(err=>
		// 捕获出错
		consolt.log(err);
	)
</script>
2.2 axios.get方式发送有参请求:
<script src="https://unpkg.com/axios/dist/axios.min.js"></script>
<script>
	axios.get('http://localhost:8080/student/findStudentById',params:id:1,name:zhangsan).then(res=>
		console.log(res);
	).catch(err=>
		// 捕获出错
		consolt.log(err);
	)
</script>
2.3 axios.post方式发送无参请求:
<script src="https://unpkg.com/axios/dist/axios.min.js"></script>
<script>
	axios.post('http://localhost:8080/student/pGet').then(res=>
		console.log(res);
	).catch(err=>
		// 捕获出错
		consolt.log(err);
	)
</script>
2.4 axios.post方式发送有参请求:
<script src="https://unpkg.com/axios/dist/axios.min.js"></script>
<script>
	axios.post('http://localhost:8080/student/findStudentByName',"name=张三&age=10").then(res=>
		console.log(res);
	).catch(err=>
		// 捕获出错
		consolt.log(err);
	)
</script>
2.5 axios.post方式发送有参请求(解决方式三):
<script src="https://unpkg.com/axios/dist/axios.min.js"></script>
<script>
	axios.post('http://localhost:8080/student/findStudentByName',name:'张三').then(res=>
		console.log(res);
	).catch(err=>
		// 捕获出错
		consolt.log(err);
	)
</script>
这个时候服务端参数必须用@RequestBody注解,参数为一个对象:

3. axios并发请求
3.1 方法一(数组方式):
<script src="https://unpkg.com/axios/dist/axios.min.js"></script>
<script>
	axios.all([
		axios.get('http://localhost:8080/student/getAllStudent'),
		axios.get('http://localhost:8080/student/finstudentById',params:id:1)
	]).then(res=> // 请求成功,返回的是一个数组
		console.log(res[0]);
		console.log(res[1]);
	).catch(err=>
		// 捕获出错
		consolt.log(err);
	)
</script>
3.2 方法二(spread方式):
<script src="https://unpkg.com/axios/dist/axios.min.js"></script>
<script>
	axios.all([
		axios.get('http://localhost:8080/student/getAllStudent'),
		axios.get('http://localhost:8080/student/finstudentById',params:id:1)
	]).then(
		axios.spread((res1,res2)=>
			console.log(res1);
			console.log(res2);
		)
	).catch(err=>
		// 捕获出错
		consolt.log(err);
	)
</script>
4. axios全局配置
<script src="https://unpkg.com/axios/dist/axios.min.js"></script>
<script>
	// 配置全局属性
	axios.defaults.baseURL="http://localhost:8080/student";
	axios.defaults.timeout=5000;
	// 在全局配置的基础上去网络请求
	axios.get('/getname').then(res=>
		console.log(res);
	)
	axios.post('/pGet').then(res=>
		console.log(res)
	)
</script>
5. axios实例
<script src="https://unpkg.com/axios/dist/axios.min.js"></script>
<script>
	// 创建axios一个实例
	let newVar = axios.create(
		baseURL:"http://localhost:8080/student",
		timeout:5000
	);
	// 使用实例
	newVar(
		url:'getAllStudent'
	).then(res=>
		console.log(res)
	)
</script>
6. axios拦截器
axios提供了两大拦截器:
一种是 请求 方向的拦截(成功的,失败的)
另一种是 响应 方向的(成功的,失败的)
拦截器的作用:用于在网络请求的时候在发起请求或者响应时对操作进行相应的处理。
发起请求时可以添加到网页加载的动画 使用token认证时 强制登录。
响应的时候可以进行响应的数据处理。
6.1 请求方向的拦截器
<script src="https://unpkg.com/axios/dist/axios.min.js"></script>
<script>
	// 两个参数
	// axios.interceptors.request.use(config=>,err=>)
	axios.interceptors.request.use(config=>
		console.log("进入请求拦截器");
		console.log(config);
		return config; // 放行请求
	,err=>
		console.log("请求方向失败");
		console.log(err);
	)

	axios.get("http://localhost:8080/student/getAllStudent").then(res=>
		console.log(res)
	)
</script>
6.2 响应方向的拦截器
<script src="https://unpkg.com/axios/dist/axios.min.js"></script>
<script>
	// 两个参数
	axios.interceptors.response.use(config=>
		console.log("进入响应拦截器");
		console.log(config);
		// 拿到响应结果的data属性,其实就是对返回数据进行处理的作用
		// 没有return,数据是回不来的
		return config.data;
	,err=>
		console.log("响应方向失败");
		console.log(err);
	)

	axios.get("http://localhost:8080/student/getAllStudent").then(res=>
		console.log(res)
	)
</script>
7. axios在vue中的模块封装
- 1.vue项目安装axios
npm install axios --save
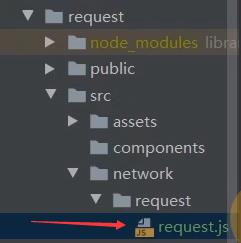
- 2.在src目录下,新建src/network/request/request.js
7.1 方式一:
在自己写的文件中:
// 封装位置 文件位置 ./network/request/request.js
import axios from 'axios'
export function request(config,success,fail)
	axios(
		url:config,
	).then(res=>
		success(res);
	).catch(err=>
		fail(err);
	)
使用:比如在main.js中测试:
// 调用位置
import request from "./network/request/request"
request("http://localhost:8080/student/getAllStudent",res=>
	console.log(res);
,err=>
	console.log(err);
)
7.2 方式二:
在自己写的文件中:
// 封装位置 文件位置 ./network/request/request.js
import axios from 'axios'
export function request(config)
	axios.defaults.baseURL="http://localhost:8080/student";
	axios(config.url).then(res=>
		config.success(res);
	).catch(err=>
		config.fail(err);
	)
使用:比如在main.js中测试:
// 调用位置
import request from "./network/request/request"
request(
	url:'/getAllStudent',
	success:res=>
		console.log(res);
	,
	fail:err=
		console.log(err);

)
7.3 方式三:
在自己写的文件中:
// 封装位置 文件位置 ./network/request/request.js
import axios from 'axios'
export function request(config)
	let newVar = axios.create(
		baseURL:"http://localhost:8080/student",
		timeout:5000
	);
	return new Promise((resolve, reject)=>
		newVar(config).then(res=>
			resolve(res);
		).catch(err=>
			reject(err);
		)
	)
使用:比如在main.js中测试:
// 调用位置
import request from "./network/request/request"
request(
	url:'/getAllStudent'
).then(res=>
	console.log(res);
).catch(err=>
	console.log(err);
)
7.4 方式四:(推荐使用)
在自己写的文件中:
// 封装位置 文件位置 ./network/request/request.js
import axios from 'axios'
export function request(co以上是关于axios笔记的主要内容,如果未能解决你的问题,请参考以下文章