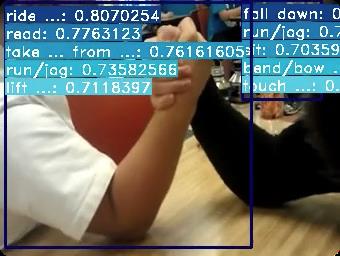
00mmaction2 行为识别商用级别快速搭建mmaction2 pytorch 1.6.0与 pytorch 1.8.0 版本,faster rcnn 与 slowfast
Posted 计算机视觉-杨帆
tags:
篇首语:本文由小常识网(cha138.com)小编为大家整理,主要介绍了00mmaction2 行为识别商用级别快速搭建mmaction2 pytorch 1.6.0与 pytorch 1.8.0 版本,faster rcnn 与 slowfast相关的知识,希望对你有一定的参考价值。
github(新版):https://github.com/Whiffe/mmaction2_YF
码云(新版):https://gitee.com/YFwinston/mmaction2_YF.git
github(老版本):https://github.com/Whiffe/YF-OpenLib-mmaction2
码云(老版本):https://gitee.com/YFwinston/YF-OpenLib-mmaction2.git
mmaction2 官网:https://github.com/open-mmlab/mmaction2
平台:极链AI
b站:https://www.bilibili.com/video/BV1tb4y1b7cy#reply5831466042
之前的mmaction2项目:【mmaction2 slowfast 行为分析(商用级别)】总目录
本系列的链接
00【mmaction2 行为识别商用级别】快速搭建mmaction2 pytorch 1.6.0与 pytorch 1.8.0 版本
03【mmaction2 行为识别商用级别】使用mmaction搭建faster rcnn批量检测图片输出为via格式
目录
前言
为什么会有2个版本呢,原因就在于老版本的pytorch时1.6.0,新版本的pytorch是1.8.0
这一个博客我们会快速搭建老版mmaction2与新版本mmaction2
老版本和新版本只是我按照我的项目环境来区别的
快速搭建mmaction2有多种方式
我从4个方向来讲:
1,pytorch=1.6.0 搭建mmaction2 使用AI平台
2,pytorch=1.6.0 搭建mmaction2
3,pytorch=1.8.0 搭建mmaction2 使用AI平台
2,pytorch=1.8.0 搭建mmaction2
一,mmaction2 pytorch=1.6.0 使用AI平台
1.1 在AI平台上选择镜像
1.2 项目下载
cd home
git clone https://gitee.com/YFwinston/YF-OpenLib-mmaction2.git
1.3 环境搭建+权重下载
复制下面的内容到终端运行
pip install mmcv-full==1.2.7 -f https://download.openmmlab.com/mmcv/dist/cu102/torch1.6.0/index.html
pip install mmpycocotools
pip install moviepy  opencv-python terminaltables seaborn decord -i https://pypi.douban.com/simple
pip install colorama

cd YF-OpenLib-mmaction2/

python setup.py develop

wget https://download.openmmlab.com/mmdetection/v2.0/faster_rcnn/faster_rcnn_r50_fpn_2x_coco/faster_rcnn_r50_fpn_2x_coco_bbox_mAP-0.384_20200504_210434-a5d8aa15.pth -P ./Checkpionts/mmdetection/

wget https://download.openmmlab.com/mmaction/recognition/slowfast/slowfast_r50_8x8x1_256e_kinetics400_rgb/slowfast_r50_8x8x1_256e_kinetics400_rgb_20200716-73547d2b.pth -P ./Checkpionts/mmaction/
1.4 测试
python demo/demo_spatiotemporal_det.py --config configs/detection/ava/slowfast_kinetics_pretrained_r50_8x8x1_20e_ava_rgb.py --checkpoint Checkpionts/mmaction/slowfast_r50_8x8x1_256e_kinetics400_rgb_20200716-73547d2b.pth --det-config demo/faster_rcnn_r50_fpn_2x_coco.py --det-checkpoint Checkpionts/mmdetection/faster_rcnn_r50_fpn_2x_coco_bbox_mAP-0.384_20200504_210434-a5d8aa15.pth --video demo/demo.mp4 --out-filename demo/demoOut.mp4 --det-score-thr 0.9 --action-score-thr 0.5 --output-stepsize 4 --output-fps 6

二,mmaction2 pytorch=1.6.0
2.1 创建环境
conda create -n mmaction -y python=3.6
2.2 激活环境
conda activate mmaction
2.3 项目下载
cd home
git clone https://gitee.com/YFwinston/YF-OpenLib-mmaction2.git
2.3 环境搭建+权重下载
复制下面的内容到终端运行
pip install torch==1.6.0+cu101 torchvision==0.7.0+cu102 -f https://download.pytorch.org/whl/torch_stable.html

pip install mmcv-full==1.2.7 -f https://download.openmmlab.com/mmcv/dist/cu102/torch1.6.0/index.html
pip install mmpycocotools
pip install moviepy  opencv-python terminaltables seaborn decord -i https://pypi.douban.com/simple
pip install colorama

cd YF-OpenLib-mmaction2/

python setup.py develop

wget https://download.openmmlab.com/mmdetection/v2.0/faster_rcnn/faster_rcnn_r50_fpn_2x_coco/faster_rcnn_r50_fpn_2x_coco_bbox_mAP-0.384_20200504_210434-a5d8aa15.pth -P ./Checkpionts/mmdetection/

wget https://download.openmmlab.com/mmaction/recognition/slowfast/slowfast_r50_8x8x1_256e_kinetics400_rgb/slowfast_r50_8x8x1_256e_kinetics400_rgb_20200716-73547d2b.pth -P ./Checkpionts/mmaction/
2.4 测试(faster rcnn + slowfast)
python demo/demo_spatiotemporal_det.py --config configs/detection/ava/slowfast_kinetics_pretrained_r50_8x8x1_20e_ava_rgb.py --checkpoint Checkpionts/mmaction/slowfast_r50_8x8x1_256e_kinetics400_rgb_20200716-73547d2b.pth --det-config demo/faster_rcnn_r50_fpn_2x_coco.py --det-checkpoint Checkpionts/mmdetection/faster_rcnn_r50_fpn_2x_coco_bbox_mAP-0.384_20200504_210434-a5d8aa15.pth --video demo/demo.mp4 --out-filename demo/demoOut.mp4 --det-score-thr 0.9 --action-score-thr 0.5 --output-stepsize 4 --output-fps 6
三,mmaction2 pytorch=1.8.0 使用AI平台
3.1 在AI平台上选择镜像
3.2 项目下载
cd home
git clone https://gitee.com/YFwinston/mmaction2_YF.git
3.3 环境搭建+权重下载
复制下面的内容到终端运行
pip install mmcv-full==1.3.8 -f https://download.openmmlab.com/mmcv/dist/cu111/torch1.8.0/index.html
pip install mmpycocotools
pip install moviepy  opencv-python terminaltables seaborn decord -i https://pypi.douban.com/simple
pip install colorama

cd mmaction2_YF/

python setup.py develop

wget https://download.openmmlab.com/mmdetection/v2.0/faster_rcnn/faster_rcnn_r50_fpn_2x_coco/faster_rcnn_r50_fpn_2x_coco_bbox_mAP-0.384_20200504_210434-a5d8aa15.pth -P ./Checkpionts/mmdetection/

wget https://download.openmmlab.com/mmaction/recognition/slowfast/slowfast_r50_8x8x1_256e_kinetics400_rgb/slowfast_r50_8x8x1_256e_kinetics400_rgb_20200716-73547d2b.pth -P ./Checkpionts/mmaction/
3.4 测试
python demo/demo_spatiotemporal_det.py --config configs/detection/ava/slowfast_kinetics_pretrained_r50_8x8x1_20e_ava_rgb.py --checkpoint Checkpionts/mmaction/slowfast_r50_8x8x1_256e_kinetics400_rgb_20200716-73547d2b.pth --det-config demo/faster_rcnn_r50_fpn_2x_coco.py --det-checkpoint Checkpionts/mmdetection/faster_rcnn_r50_fpn_2x_coco_bbox_mAP-0.384_20200504_210434-a5d8aa15.pth --video demo/demo.mp4 --out-filename demo/demoOut.mp4 --det-score-thr 0.9 --action-score-thr 0.5 --output-stepsize 4 --output-fps 6
四,mmaction2 pytorch=1.8.0
3.1 创建环境
conda create -n mmaction -y python=3.8
3.2 激活环境
conda activate mmaction
3.2 项目下载
cd home
git clone https://gitee.com/YFwinston/mmaction2_YF.git
3.3 环境搭建+权重下载
复制下面的内容到终端运行
pip install torch==1.8.0+cu111 torchvision==0.9.0+cu111 -f https://download.pytorch.org/whl/torch_stable.html

pip install mmcv-full==1.3.8 -f https://download.openmmlab.com/mmcv/dist/cu111/torch1.8.0/index.html
pip install mmpycocotools
pip install moviepy  opencv-python terminaltables seaborn decord -i https://pypi.douban.com/simple
pip install colorama

cd mmaction2_YF/

python setup.py develop

wget https://download.openmmlab.com/mmdetection/v2.0/faster_rcnn/faster_rcnn_r50_fpn_2x_coco/faster_rcnn_r50_fpn_2x_coco_bbox_mAP-0.384_20200504_210434-a5d8aa15.pth -P ./Checkpionts/mmdetection/

wget https://download.openmmlab.com/mmaction/recognition/slowfast/slowfast_r50_8x8x1_256e_kinetics400_rgb/slowfast_r50_8x8x1_256e_kinetics400_rgb_20200716-73547d2b.pth -P ./Checkpionts/mmaction/
3.4 测试
python demo/demo_spatiotemporal_det.py --config configs/detection/ava/slowfast_kinetics_pretrained_r50_8x8x1_20e_ava_rgb.py --checkpoint Checkpionts/mmaction/slowfast_r50_8x8x1_256e_kinetics400_rgb_20200716-73547d2b.pth --det-config demo/faster_rcnn_r50_fpn_2x_coco.py --det-checkpoint Checkpionts/mmdetection/faster_rcnn_r50_fpn_2x_coco_bbox_mAP-0.384_20200504_210434-a5d8aa15.pth --video demo/demo.mp4 --out-filename demo/demoOut.mp4 --det-score-thr 0.9 --action-score-thr 0.5 --output-stepsize 4 --output-fps 6
以上是关于00mmaction2 行为识别商用级别快速搭建mmaction2 pytorch 1.6.0与 pytorch 1.8.0 版本,faster rcnn 与 slowfast的主要内容,如果未能解决你的问题,请参考以下文章

