如何使用Arduino ESP32将数据存储到MicroSD(软SPI和硬SPI)
Posted perseverance52
tags:
篇首语:本文由小常识网(cha138.com)小编为大家整理,主要介绍了如何使用Arduino ESP32将数据存储到MicroSD(软SPI和硬SPI)相关的知识,希望对你有一定的参考价值。
如何使用Arduino ESP32将数据存储到MicroSD(软SPI和硬SPI)
- 主要针对使用这个库:github地址:https://github.com/nhatuan84/esp32-micro-sdcard
如果网页无法加载,将域名改为镜像地址的例如:https://hub.fastgit.org/nhatuan84/esp32-micro-sdcard
- 该库支持软SPI接口和硬SPI接口.如果使用硬SPI接口直接定义:
    if (!SD.begin())
    Serial.println("initialization failed!");
    return;
- 如果是软SPI接口就:
  if (!SD.begin(26, 14, 13, 27))
    Serial.println("initialization failed!");
    return;


接线说明
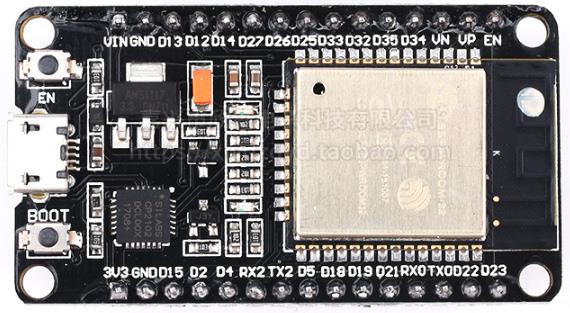
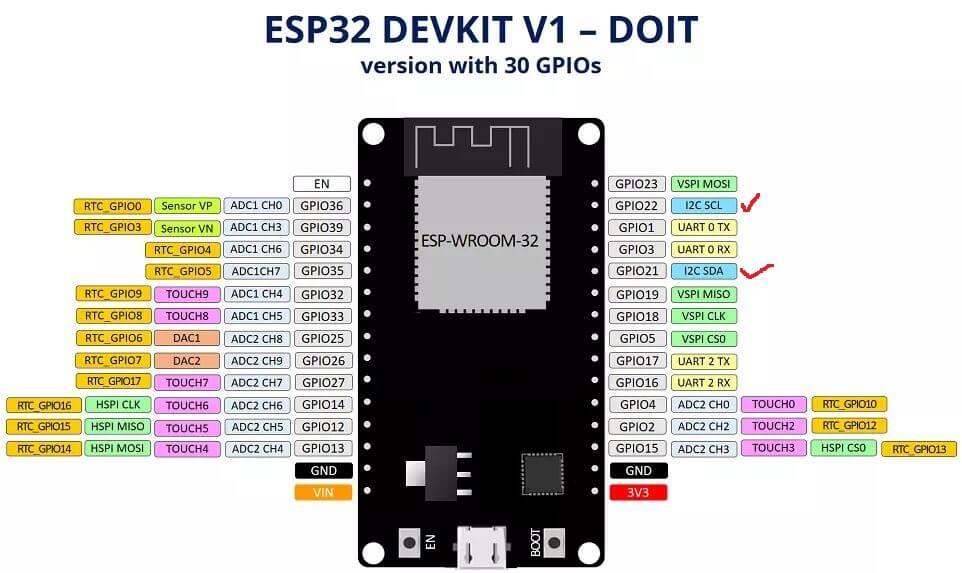
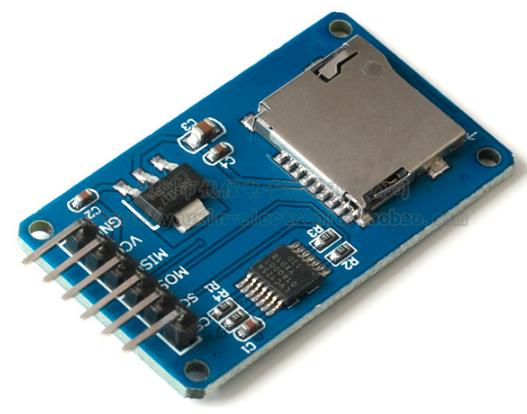
- 软SPI接口接线方式:
		Soft SPI
[ESP32 IO26 – CS MICRO SD]
[ESP32 IO14 – MOSI MICRO SD]
[ESP32 IO13 – MISO MICRO SD]
[ESP32 IO27 – SCK MICRO SD]
[ESP32 GND – GND MICRO SD]
[VIN – VCC MICRO SD]
- 硬SPI接口接线方式:
    		Hard SPI
 * MICROSD CS    -    ESP32 IO5
  MICROSD SCK   -     ESP32 IO18
  MICROSD MOSI  -    ESP32 IO23
  MICROSD MISO   -   ESP32 IO19
  MICROSD Vcc   -      ESP32 VIN
  MICROSD GND   -    ESP32 GND
实例代码
#include <mySD.h>

File root;

void setup()

  Serial.begin(115200);

  Serial.print("Initializing SD card...");
  /* initialize SD library with Soft SPI pins, if using Hard SPI replace with this SD.begin()*/
//  if (!SD.begin(26, 14, 13, 27)) //采用软SPI接口
  if (!SD.begin())  采用硬SPI接口
    Serial.println("initialization failed!");
    return;

  Serial.println("initialization done.");
  /* Begin at the root "/" */
  root = SD.open("/");
  if (root)
    printDirectory(root, 0);
    root.close();
   else
    Serial.println("error opening test.txt");

  /* open "test.txt" for writing */
  root = SD.open("test.txt", FILE_WRITE);
  /* if open succesfully -> root != NULL
    then write string "Hello world!" to it
  */
  if (root)
    root.println("Hello world!");
    root.flush();
   /* close the file */
    root.close();
   else
    /* if the file open error, print an error */
    Serial.println("error opening test.txt");

  delay(1000);
  /* after writing then reopen the file and read it */
  root = SD.open("test.txt");
  if (root)
    /* read from the file until there's nothing else in it */
    while (root.available())
      /* read the file and print to Terminal */
      Serial.write(root.read());

    root.close();
   else
    Serial.println("error opening test.txt");


  Serial.println("done!");


void loop()


void printDirectory(File dir, int numTabs)

  while(true)
     File entry =  dir.openNextFile();
     if (! entry)
       break;

     for (uint8_t i=0; i<numTabs; i++)
       Serial.print('\\t');   // we'll have a nice indentation

     // Print the name
     Serial.print(entry.name());
     /* Recurse for directories, otherwise print the file size */
     if (entry.isDirectory())
       Serial.println("/");
       printDirectory(entry, numTabs+1);
      else
       /* files have sizes, directories do not */
       Serial.print("\\t\\t");
       Serial.println(entry.size());

     entry.close();
相关接口函数
Class SD:
- -
SD.begin(uint8_t cs , int8_t mosi , int8_t miso , int8_t sck): 使用SPI引脚初始化库 SD.open(filename, FILE_WRITE): 打开文件进行写入SD.open(filename): 打开文件进行读取SD.open("/"): 打开sdcard at root“/”
Class File:
openNextFile(): 检查条目是否为目录- name(): get the name of file or directory
- isDirectory(): check if entry is directory
size(): 获取文件大小println(text): 将文本写入打开的文件available(): 检查可用的数据readingread(): 如果数据可用则读取数据close(): 关闭打开的文件
以上是关于如何使用Arduino ESP32将数据存储到MicroSD(软SPI和硬SPI)的主要内容,如果未能解决你的问题,请参考以下文章