搭建企业级别nexus私服
Posted 小黄鸡1992
tags:
篇首语:本文由小常识网(cha138.com)小编为大家整理,主要介绍了搭建企业级别nexus私服相关的知识,希望对你有一定的参考价值。

如果遇到以下两种情况,nexus私服是解决你问题的不二选择
1.在使用pom下载jar包时有时下载过慢
2.自定义了start,需要其他小伙伴导入
下文将带你安装nexus。由于公司服务器原因,博主选择了windows系统。
1.下载安装包
这里可以选择博主提供的百度网盘下载。
链接:https://pan.baidu.com/s/1A5BoMAzP_KvnvJf6xjkNAA
提取码:7pd2
2.安装
1.解压
选择文件夹解压,会出现以下文件夹。(注意解压路径不能有中文)

2.启动
进入以下目录。cmd运行下文命令

nexus /run
如果出现NumberFormatException就是解压路径有中文。
3.进入操作页面
如果没有改配置,那么http://localhost:8081就可以进入页面,初始密码在\\nexus\\sonatype-work\\nexus3位置,里面有一个password文件,然后进入后会提示修改密码。
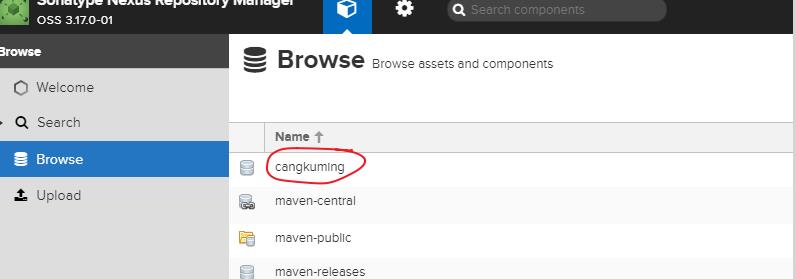
4.新建仓库
一般来说,nexus操作过程是通用一个maven-public仓库,相当于一个仓库组,里面添加了很多仓库,所以我们添加的仓库也需要加入这个仓库组 。这里我们先新建一个仓库。

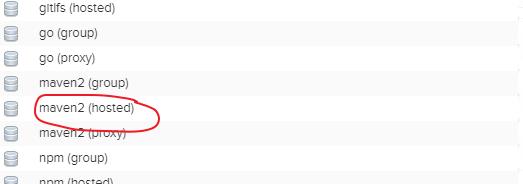
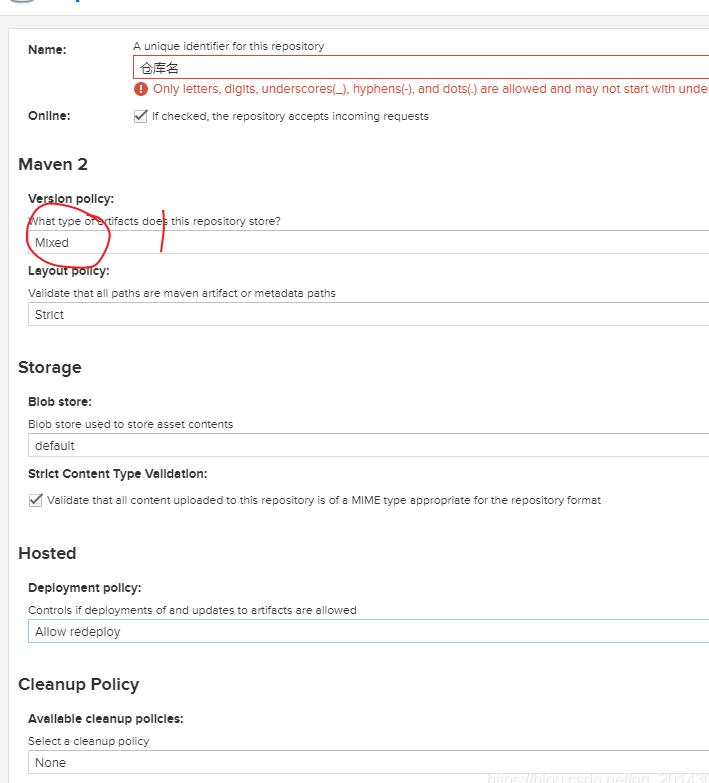
注意
1:仓库名只能为英文 。
2:1处为包的类型。
5.加入仓库组
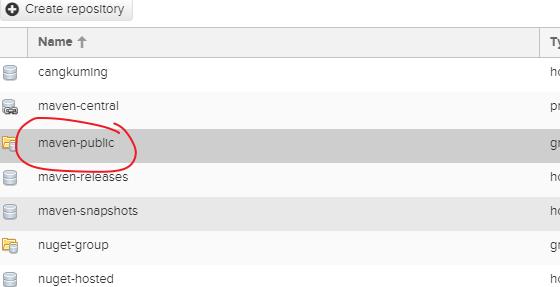
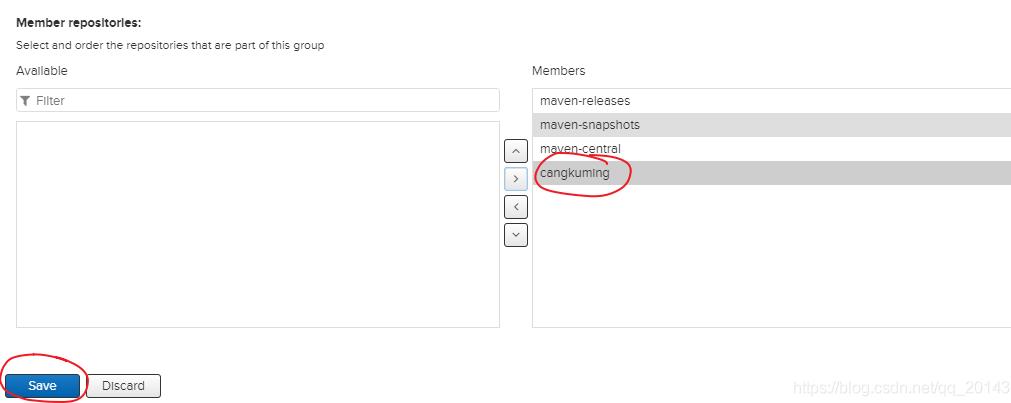
简单的私服就搭建好了。
3.上传jar包


红圈处选择jar包地址,jar包信息填写的就是pom文件的配置,然后添加完成。
4.springboot连接私服
本文连接方法为修改maven/conf文件 。
1.maven/conf配置阿里镜像
<?xml version="1.0" encoding="UTF-8"?>
<settings xmlns="http://maven.apache.org/SETTINGS/1.0.0"
          xmlns:xsi="http://www.w3.org/2001/XMLSchema-instance"
          xsi:schemaLocation="http://maven.apache.org/SETTINGS/1.0.0 http://maven.apache.org/xsd/settings-1.0.0.xsd">
  <pluginGroups>
  </pluginGroups>
  <proxies>
  </proxies>
  <servers>
  </servers>
  <mirrors>
	 <mirror>
          <id>alimaven</id>
          <name>aliyun maven</name>
          <url>http://maven.aliyun.com/nexus/content/groups/public/</url>
          <mirrorOf>central</mirrorOf>
     </mirror>
  </mirrors>
  <profiles>
  </profiles>
</settings>
2.私服conf配置
<?xml version="1.0" encoding="UTF-8"?>
<settings xmlns="http://maven.apache.org/SETTINGS/1.0.0"
          xmlns:xsi="http://www.w3.org/2001/XMLSchema-instance"
          xsi:schemaLocation="http://maven.apache.org/SETTINGS/1.0.0 http://maven.apache.org/xsd/settings-1.0.0.xsd">
  <pluginGroups>
  </pluginGroups>

  <proxies>
  </proxies>

  <servers>
    <server>
      <id>dev</id>
	  <!--用户名密码-->
      <username>账号</username>
      <password>密码</password>
    </server>
  </servers>

  <mirrors>
	<mirror>
      <id>dev</id>
      <mirrorOf>*</mirrorOf>
      <url>http://Nexus-ip:端口/repository/maven-public/</url>
    </mirror>
  </mirrors>

  <profiles>
	  <profile>
	   <!--profile的id-->
	    <id>dev</id>
		<repositories>
		  <repository>
			<!--仓库id,repositories可以配置多个仓库,保证id不重复-->
			<id>nexus</id>
			<!--仓库地址,即nexus仓库组的地址-->
			<url>http://Nexus-ip:端口/repository/maven-public/</url>
			<!--是否下载releases构件-->
			<releases>
			  <enabled>true</enabled>
			</releases>
			<!--是否下载snapshots构件-->
			<snapshots>
			  <enabled>true</enabled>
			</snapshots>
		  </repository>
		</repositories>
		 <pluginRepositories>
			<!-- 插件仓库,maven的运行依赖插件,也需要从私服下载插件 -->
			<pluginRepository>
				<!-- 插件仓库的id不允许重复,如果重复后边配置会覆盖前边 -->
				<id>public</id>
				<name>Public Repositories</name>
				<url>http://Nexus-ip:端口/repository/maven-public/</url>
			</pluginRepository>
		</pluginRepositories>
	  </profile>
  </profiles>

   <!-- 开启私服配置-->
   <activeProfiles>
    <activeProfile>dev</activeProfile>
   </activeProfiles>
</settings>
二.pom文件配置
加入私服地址即可 。
<repositories>
        <repository>
            <id>nexus</id>
            <name>nexus</name>
            <url>http://192.168.xx.xx:8081/repository/maven-public/</url>
        </repository>
    </repositories>
注意需要将私服设置为任何人都可以下载。
以上是关于搭建企业级别nexus私服的主要内容,如果未能解决你的问题,请参考以下文章