springboot集成prometheus和grafana
Posted Biubbbbbbbbiu
tags:
篇首语:本文由小常识网(cha138.com)小编为大家整理,主要介绍了springboot集成prometheus和grafana相关的知识,希望对你有一定的参考价值。
ubuntu20.04系统中springboot集成prometheus和grafana
pom.xml 注意依赖引入版本,避免冲突
<dependency>
	 <groupId>org.springframework.boot</groupId>
	 <artifactId>spring-boot-starter-web</artifactId>
</dependency>
<dependency>
		<groupId>org.springframework.boot</groupId>
		<artifactId>spring-boot-starter-actuator</artifactId>
</dependency>
<dependency>
		<groupId>io.micrometer</groupId>
		<artifactId>micrometer-registry-prometheus</artifactId>
</dependency>
application-dev.yml
spring:
  application:
    name: springboot  #项目名
management:
  endpoints:
    web:
      exposure:
        include: 'prometheus'
  metrics:
    tags:
      application: ${spring.application.name}
启动项目 , 访问 http://localhost:8080/actuator/prometheus
如果下载这样的文件,那就没问题了:
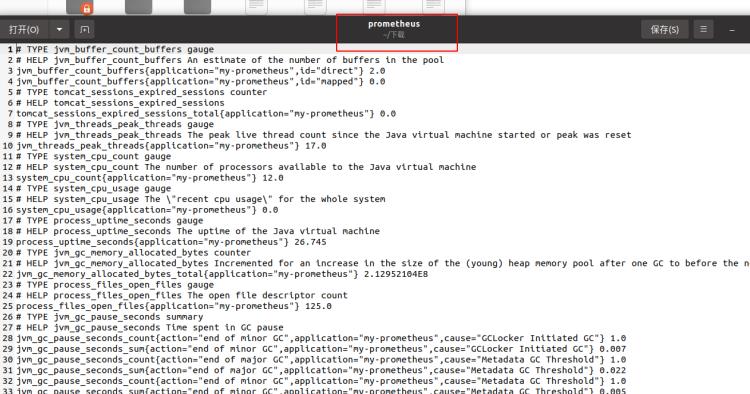
开始下载安装 prometheus
下载地址:https://prometheus.io/download/
sudo tar zxvf prometheus-2.31.1.linux-amd64.tar.gz
修改配置文件:sudo vim prometheus.yml
global:
  scrape_interval:     15s # By default, scrape targets every 15 seconds.
  # Attach these labels to any time series or alerts when communicating with
  # external systems (federation, remote storage, Alertmanager).
  external_labels:
    monitor: 'codelab-monitor'
# A scrape configuration containing exactly one endpoint to scrape:
# Here it's Prometheus itself.
scrape_configs:
  # The job name is added as a label `job=<job_name>` to any timeseries scraped from this config.
  - job_name: 'prometheus'
    # Override the global default and scrape targets from this job every 5 seconds.
    scrape_interval: 5s
    static_configs:
      - targets: ['localhost:9090']
  - job_name: 'springboot'
    scrape_interval: 5s
    metrics_path: '/actuator/prometheus'
    static_configs:
      - targets: ['127.0.0.1:8080']
启动 sudo ./prometheus --config.file=prometheus.yml
Prometheus———Linux系统安装,配置后台启动方式
https://blog.csdn.net/qq_32415063/article/details/105607008
启动类:
@Bean
MeterRegistryCustomizer<MeterRegistry> configurer(@Value("${spring.application.name}") String applicationName) {
    return (registry) -> registry.config().commonTags("application", applicationName);
}
项目中写了两个测试方法
请求执行接口(多请求几次)
http://localhost:8080/test
package com.example.controller;

import org.slf4j.Logger;
import org.slf4j.LoggerFactory;
import org.springframework.web.bind.annotation.GetMapping;
import org.springframework.web.bind.annotation.RestController;

/**
 * @ClassName PrometheusTestController
 * @Description springboot集成普罗米修斯(Prometheus)的方法
 * @Author
 * @Date 2021/11/15 上午10:17
 */
@RestController
public class PrometheusTestController {

    Logger logger = LoggerFactory.getLogger(PrometheusTestController.class);

    @GetMapping("/test")
    public String test() {
        logger.info("test");
        return "ok";
    }

    @GetMapping("")
    public String home() {
        logger.info("home");
        return "ok";
    }

}
然后访问:
http://localhost:9090/graph
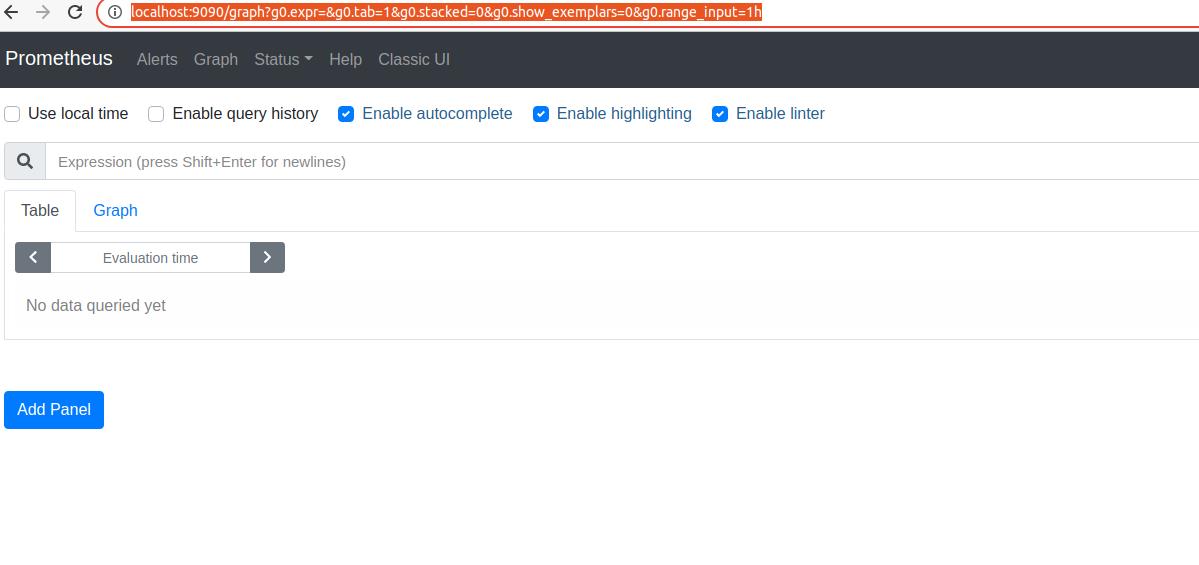
第一步选择:graph
第二部选择:http_server_requests_seconds_count
第三步执行:Execute
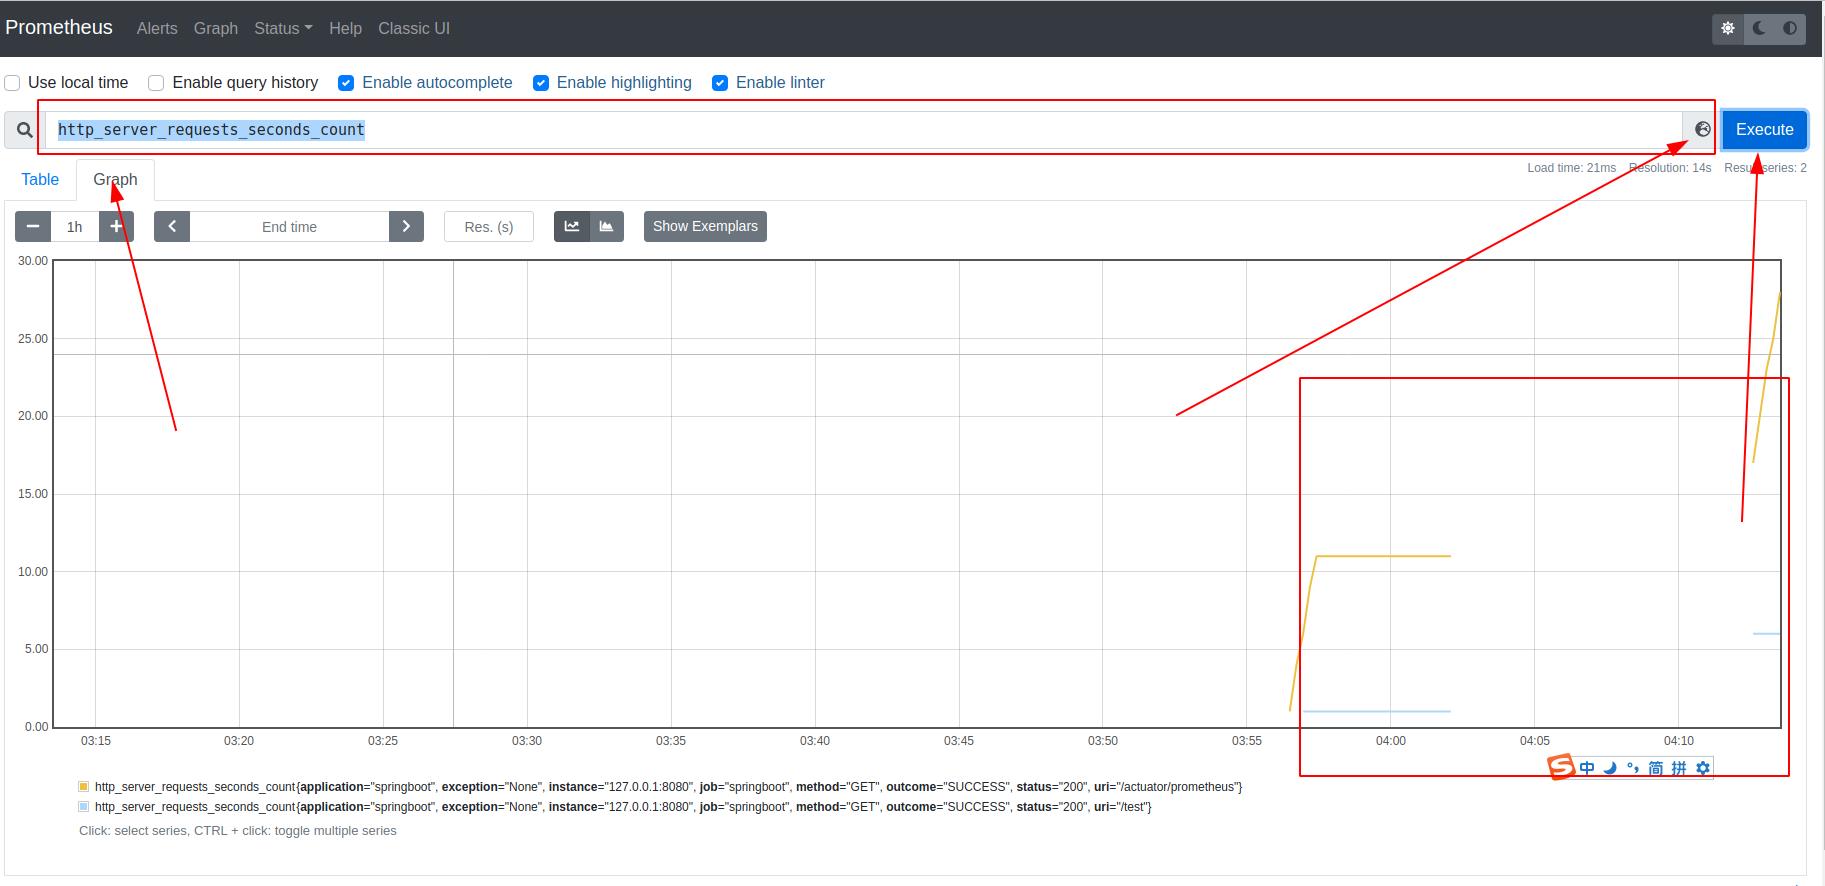
这样prometheus就集成完毕了。
然后是安装grafana。
grafana-5.1.3-1.x86_64.rpm
访问http://localhost:3000/,初始密码:admin/admin
配置数据源:
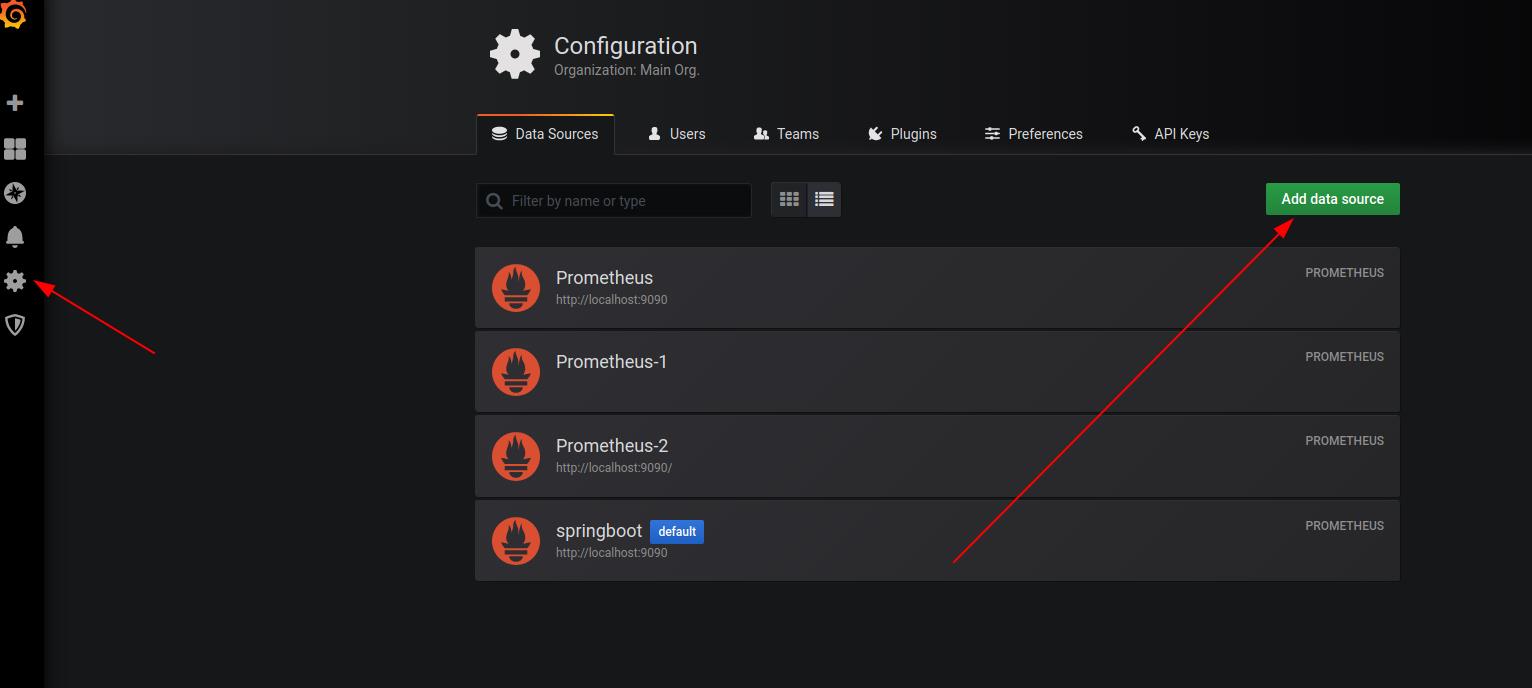
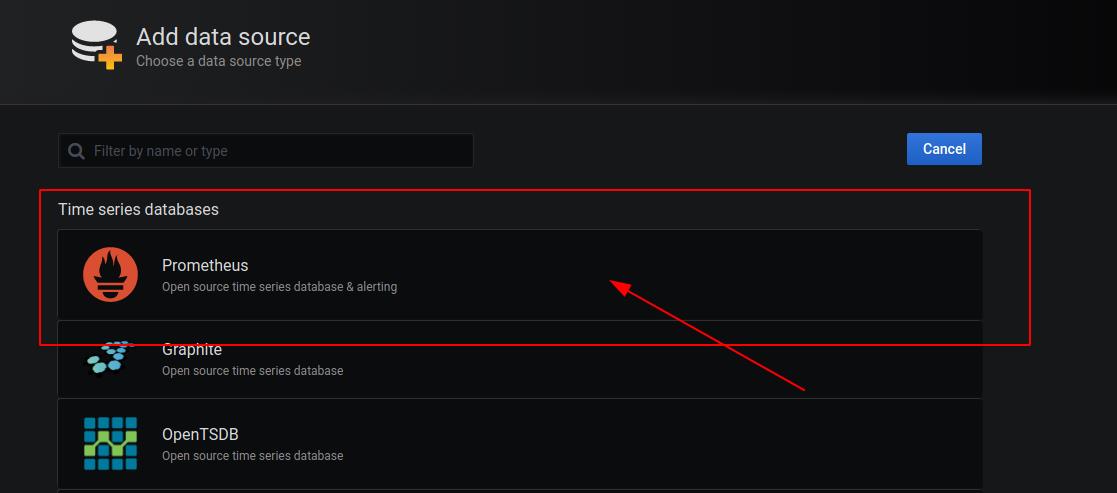
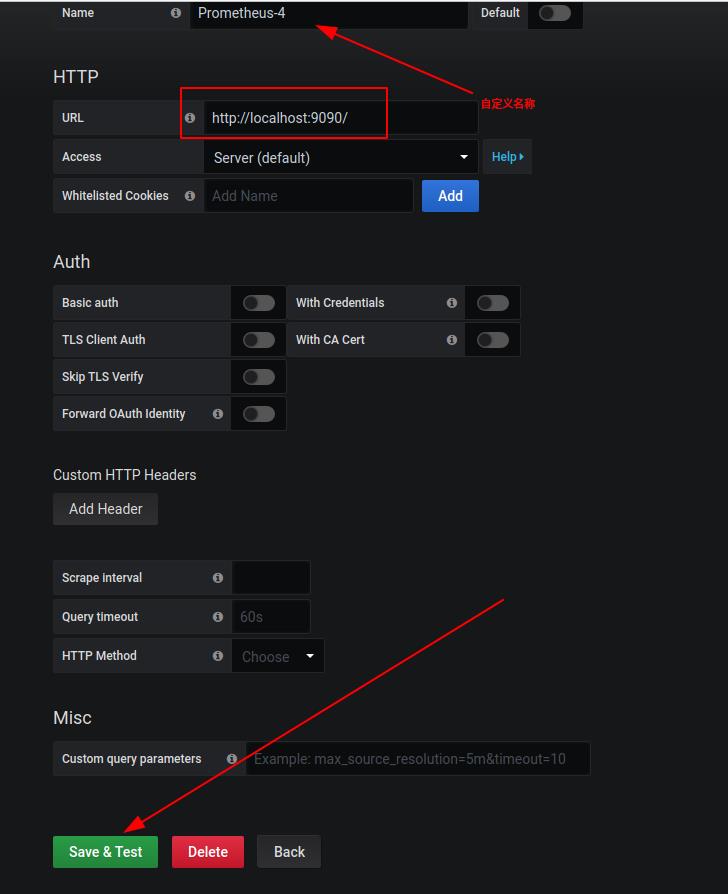
这一步可以选择中间一个,也可以全选
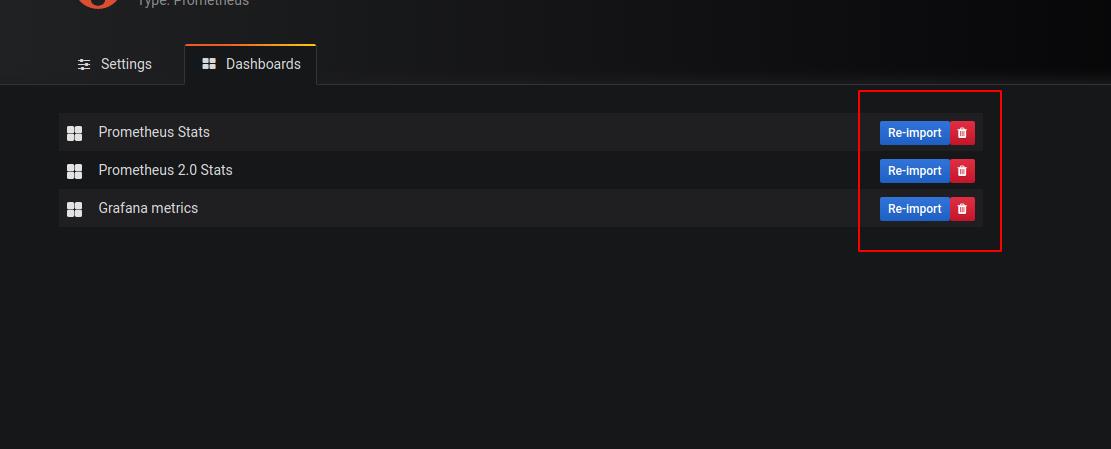
https://grafana.com/grafana/dashboards/ 这个地址进行模板选择
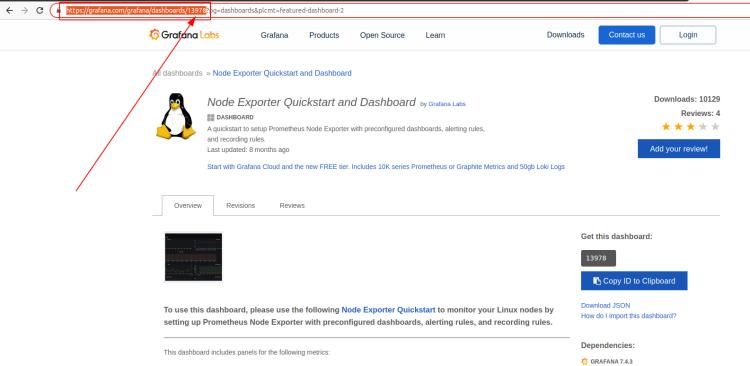
点 + 号,选择Import
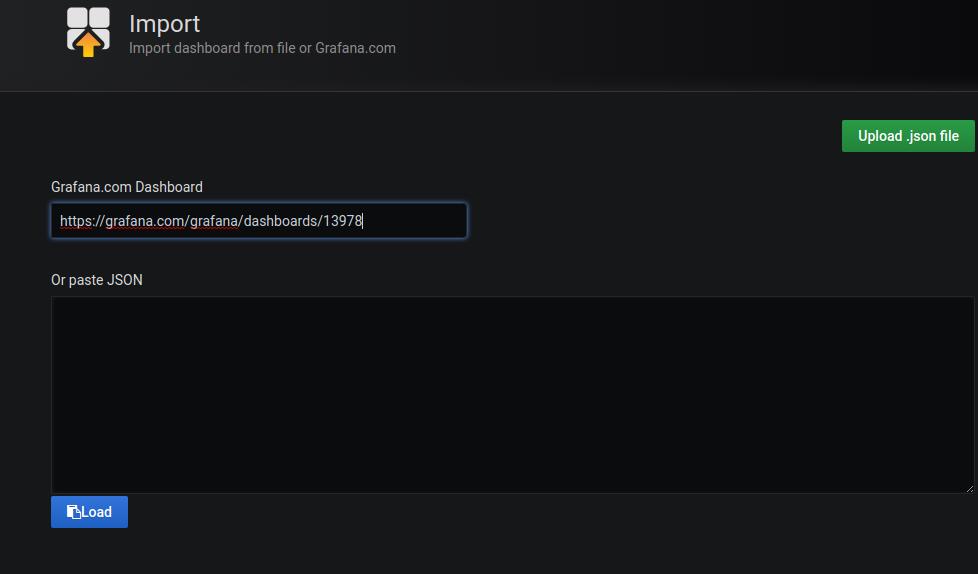
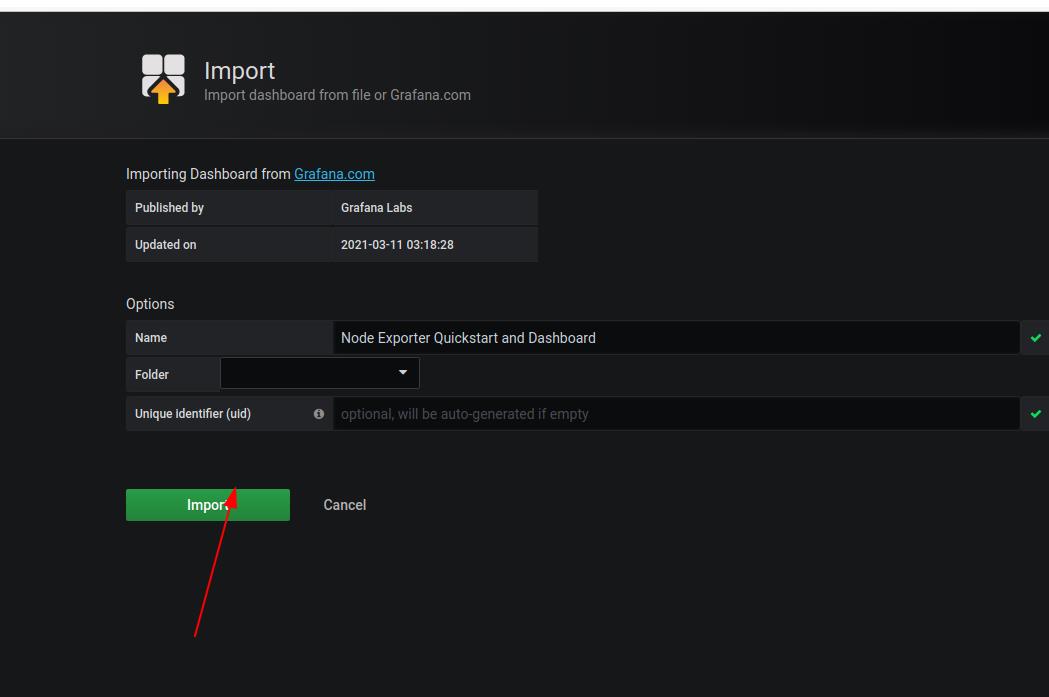
这样模板就选择好了。
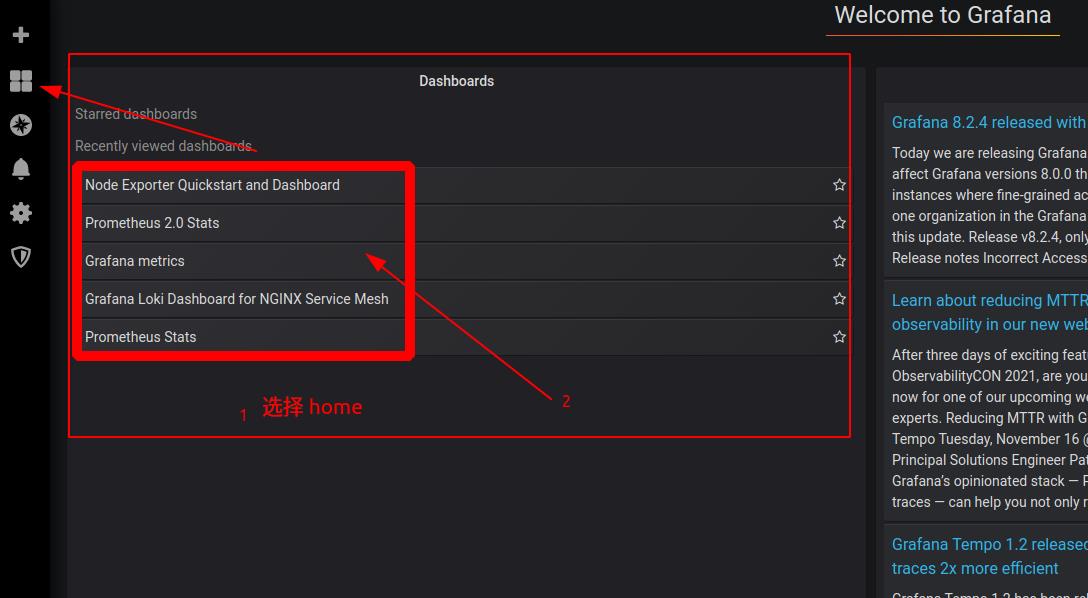
从home中选择模板
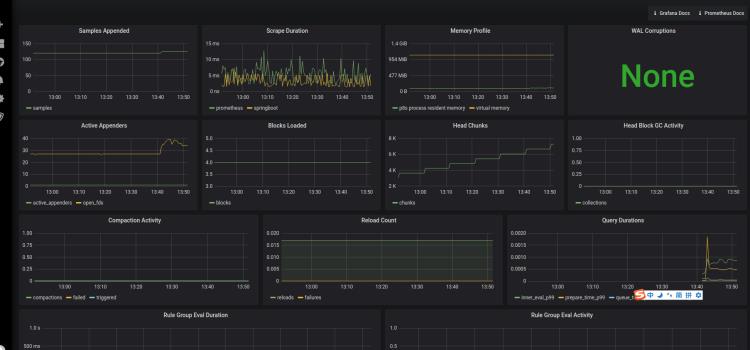
一下就是效果图:
以上是关于springboot集成prometheus和grafana的主要内容,如果未能解决你的问题,请参考以下文章