Python 调用腾讯云接口批量识别图片中指定位置的信息,并保存到excel
Posted 卖山楂啦prss
tags:
篇首语:本文由小常识网(cha138.com)小编为大家整理,主要介绍了Python 调用腾讯云接口批量识别图片中指定位置的信息,并保存到excel相关的知识,希望对你有一定的参考价值。
需求在标题中已经说了哈,具体怎么操作?
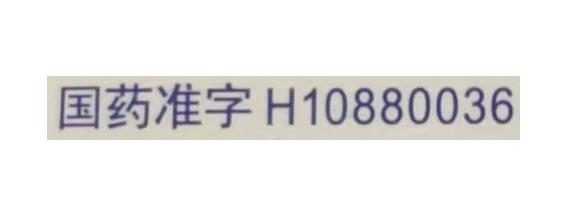
举个例子,这里我随手拿了旁边一个的牙膏盒,用手机照下来,目的是获取包装盒上的国药准字及编码,如下:

我只要上面黄线框起来的内容,Python 走起
第一步:导包
如果有一些包没有安装的,可以用 pip 安装一下
例如
pip install -i https://pypi.doubanio.com/simple/ --trusted-host pypi.doubanio.com pandas
import numpy as np
import pandas as pd
import os
import json
import re
import base64
import xlwings as xw
##导入腾讯AI api
from tencentcloud.common import credential
from tencentcloud.common.profile.client_profile import ClientProfile
from tencentcloud.common.profile.http_profile import HttpProfile
from tencentcloud.common.exception.tencent_cloud_sdk_exception import TencentCloudSDKException
from tencentcloud.ocr.v20181119 import ocr_client, models

# 发票识别
import sys
import cv2
from io import BytesIO
from PIL import Image as PI
第二步:定义两个函数
一个用来调用腾讯云文字识别接口,识别图片中的内容。另一个是获取鼠标点击图片任意一点后的像素坐标
def excelFromPictures(image_text,SecretId,SecretKey):
    '''
    调用腾讯接口
    '''
    output_buffer = BytesIO()
    image_text.save(output_buffer, format='JPEG')
    byte_data = output_buffer.getvalue()
    img_base64 = base64.b64encode(byte_data)
    cred = credential.Credential(SecretId, SecretKey)  #ID和Secret从腾讯云申请
    httpProfile = HttpProfile()
    httpProfile.endpoint = "ocr.tencentcloudapi.com"
    clientProfile = ClientProfile()
    clientProfile.httpProfile = httpProfile
    client = ocr_client.OcrClient(cred, "ap-shanghai", clientProfile)
    req = models.TableOCRRequest()
    params = '{"ImageBase64":"' + str(img_base64, 'utf-8') + '"}'
    req.from_json_string(params)
    resp = client.TableOCR(req)
    ##提取识别出的数据,并且生成json
    result1 = json.loads(resp.to_json_string())
    rowIndex = []
    colIndex = []
    content = []
    for item in result1['TextDetections']:
        rowIndex.append(item['RowTl'])
        colIndex.append(item['ColTl'])
        content.append(item['Text'])
    #print(content[0])
    return content[0]


def on_EVENT_LBUTTONDOWN(event, x, y,flags, param):
    '''
    获取鼠标点击图片任意一点后的像素坐标
    '''
    if event == cv2.EVENT_LBUTTONDOWN:
        xy = "%d,%d" % (x, y)
        a.append(x)
        b.append(y)
        cv2.circle(img, (x, y), 1, (0, 0, 255), thickness=-1)
        cv2.putText(img, xy, (x, y), cv2.FONT_HERSHEY_PLAIN,
                    1.0, (0, 0, 0), thickness=1)
        cv2.imshow("image", img)
第三步:获取SecretID和SecretKey
填写你的密钥(需要去申请),可以百度

SecretId = 'xxxxxxx'
SecretKey = 'xxxxxxx'
第四步:读取图片
这里只有一张图片(建议不用中文命名)
img_url = "13.jpg"
with open(img_url, 'rb') as f:
    a = f.read()
new_img = PI.open(BytesIO(a))
new_img.show()
第五步:裁切图片中想要获取的部分
思路很简单,就是把想要的部分裁剪下来,然后调用OCR接口,识别一下,保存即可。
问题是如何裁切我想要的位置?这时候可以利用PIL,其中有个函数 img.crop 函数
参考博客:img.crop()的用法
img.crop(a0, b0, a1, b1):a代表横坐标,b代表纵坐标。

获取到圈出的坐标后,即可获得裁切内容
因此,接下来的目标就是获取这两个点(左上角、左下角)
参考博客:Python鼠标点击图片,获取点击点的像素坐标,得到on_EVENT_LBUTTONDOWN函数(前面已经定义)
运行代码
# 使用PIL裁切图片
a =[];b = []
img = cv2.imread("13.jpg")
cv2.namedWindow("image")
cv2.setMouseCallback("image", on_EVENT_LBUTTONDOWN)
cv2.imshow("image", img)
cv2.waitKey(0)
cv2.destroyAllWindows()
# img.crop(a0, b0, a1, b1):a代表横坐标,b代表纵坐标
# left, top左上角
# right, bottom右下角
left,top,right,bottom = a[0],b[0],a[1],b[1]
image_text1 = new_img.crop((left,top,right,bottom))
image_text1.show() # #展示图片

如果在获取坐标时,打开的图片只显示一部分,可以用下面的代码,原理就是通过插值的方式来改变图像的尺寸
参考博客:https://blog.csdn.net/baidu_36669549/article/details/103799356

# 使用PIL裁切图片
a =[];b = []
img = cv2.imread("13.jpg")
# 如果图片显示一部分,可加入这部分代码
c1,h1 = img.shape[1],img.shape[0]
img=cv2.resize(img,(1366,768))#小于或等于屏幕分辨率。通过插值的方式来改变图像的尺寸
c2,h2 = img.shape[1],img.shape[0]
cv2.namedWindow("image")
cv2.setMouseCallback("image", on_EVENT_LBUTTONDOWN)
cv2.imshow("image", img)
cv2.waitKey(0)
cv2.destroyAllWindows()
# img.crop(a0, b0, a1, b1):a代表横坐标,b代表纵坐标
# left, top左上角
# right, bottom右下角
# left,top,right,bottom = a[0],b[0],a[1],b[1]
left,top,right,bottom = a[0]*c1/c2,b[0]*h1/h2,a[1]*c1/c2,b[1]*h1/h2
image_text1 = new_img.crop((left,top,right,bottom))
image_text1.show() # #展示图片
裁切的部分

第六步:调用OCR,识别图片内容
# 调用函数
txt1 = excelFromPictures(image_text1,SecretId,SecretKey)
print(txt1)

到此为止,就可以啦
第七步:批量识别,并存入excel(提供思路)
如果是批量识别,每次都打开图片获取坐标很麻烦
可以提前先用这个获取坐标的函数,把想要的部分都准备好,然后循环套用这个代码就行(注:保证图片内容结构一样,不然坐标对不上,就拐求~)
获取文件夹下所有图片
path = 'C:\\\\Users\\\\ABC\\\\Desktop\\\\截图\\\\'#指定文件所在路径
filetype ='.jpg'#指定文件类型
def get_filename(path,filetype):
    name =[]
    final_name = []
    for root,dirs,files in os.walk(path):
        for i in files:
            if filetype in i:
                name.append(i.replace(filetype,''))
    final_name = [item +'.jpg' for item in name]
    return final_name

pic_name = get_filename(path,filetype)
循环识别
writer = pd.ExcelWriter('C:\\\\Users\\\\ABC\\\\Desktop\\\\result.xlsx')
data = []
for k in pic_name:
    with open(path+k, 'rb') as f:
        a = f.read()
    new_img = PI.open(BytesIO(a))
    # 编号
    left,top,right,bottom = 198.94143484626647, 571.2200520833334, 680.0549048316252, 634.50390625
    image_text1 = new_img.crop((left,top,right,bottom))
    txt1 = excelFromPictures(image_text1,SecretId,SecretKey)

    # 药名
    left,top,right,bottom = 822.1559297218155, 393.0260416666667, 1989.4143484626647, 621.1809895833334
    image_text1 = new_img.crop((left,top,right,bottom))
    txt2 = excelFromPictures(image_text1,SecretId,SecretKey)

    # 公司
    left,top,right,bottom = 759.2254758418741, 709.4453125, 2040.1647144948756, 784.38671875
    image_text1 = new_img.crop((left,top,right,bottom))
    txt3 = excelFromPictures(image_text1,SecretId,SecretKey)

    pic_dict = {'编号': txt1, '药名': txt2,'公司': txt3}
    data.append(pic_dict)
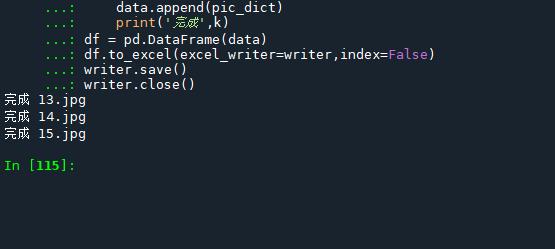
    print('完成',k)
df = pd.DataFrame(data)
df.to_excel(excel_writer=writer,index=False)
writer.save()
writer.close()

这里图片都是一样的

最后,题外
安装OCR引擎,Tesseract-OCR是一个免费,开源的OCR引擎
基于tesseract-OCR进行中文识别
出现问题,报错
# 获取OCR工具
# get_available_tools()返回本地系统上可用的OCR工具列表
tools = pyocr.get_available_tools()[:]
if len(tools) == 0:
    print("No OCR tool found")
    sys.exit(1)
使用pyocr.get_available_tools()时会得到一个空列表。尝试去解决,搞了好久没弄出来,算了算了
以上是关于Python 调用腾讯云接口批量识别图片中指定位置的信息,并保存到excel的主要内容,如果未能解决你的问题,请参考以下文章