RxSwift之UI控件UICollectionView扩展的使用
Posted Forever_wj
tags:
篇首语:本文由小常识网(cha138.com)小编为大家整理,主要介绍了RxSwift之UI控件UICollectionView扩展的使用相关的知识,希望对你有一定的参考价值。
一、基本用法
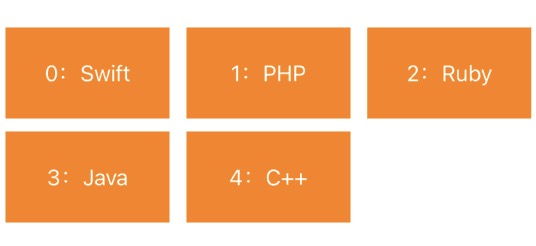
① 单个分区的集合视图
- 效果如下:
- 示例代码:
// 定义布局方式以及单元格大小
let flowLayout = UICollectionViewFlowLayout()
flowLayout.sectionInset = UIEdgeInsets.init(top: 0, left: 5, bottom: 0, right: 5)
flowLayout.itemSize = CGSize(width: (SCREEN_WIDTH-50)/3.0, height: 70)

// 创建集合视图
self.collectionView = UICollectionView(frame: self.view.frame,
                                       collectionViewLayout: flowLayout)
self.collectionView.backgroundColor = UIColor.white

// 创建一个重用的单元格
self.collectionView.register(MyCollectionViewCell.self,
                             forCellWithReuseIdentifier: "Cell")
self.view.addSubview(self.collectionView!)

// 初始化数据
let items = Observable.just([
    "Swift",
    "php",
    "Ruby",
    "Java",
    "C++",
    ])

// 设置单元格数据(其实就是对 cellForItemAt 的封装)
items
    .bind(to: collectionView.rx.items) { (collectionView, row, element) in
        let indexPath = IndexPath(row: row, section: 0)
        let cell = collectionView.dequeueReusableCell(withReuseIdentifier: "Cell",
                                        for: indexPath) as! MyCollectionViewCell
        cell.label.text = "\\(row):\\(element)"
        return cell
    }
    .disposed(by: disposeBag)
② 单元格选中事件响应
- 如下所示,当点击某个单元格时将其索引位置,以及对应的标题打印出来:
选中项的indexPath为:[0, 0]
选中项的标题为:Swift
- 如果业务代码直接放在响应方法内部,可以如下实现:
// 获取选中项的索引
collectionView.rx.itemSelected.subscribe(onNext: { indexPath in
    print("选中项的indexPath为:\\(indexPath)")
}).disposed(by: disposeBag)


// 获取选中项的内容
collectionView.rx.modelSelected(String.self).subscribe(onNext: { item in
    print("选中项的标题为:\\(item)")
}).disposed(by: disposeBag)
- 也可以在响应中调用外部的方法实现:
// 获取选中项的索引
collectionView.rx.itemSelected.subscribe(onNext: { [weak self] indexPath in
	print("选中项的indexPath为:\\(indexPath)")
}).disposed(by: disposeBag)

// 获取选中项的内容
collectionView.rx.modelSelected(String.self).subscribe(onNext: {[weak self] item in
	print("选中项的标题为:\\(item)")
}).disposed(by: disposeBag)
- 如果想要同时获取选中项的索引以及内容,可以如下实现:
Observable.zip(collectionView.rx.itemSelected, collectionView.rx.modelSelected(String.self))
    .bind { [weak self] indexPath, item in
        print("选中项的indexPath为:\\(indexPath)")
        print("选中项的标题为:\\(item)")
    }
    .disposed(by: disposeBag)
③ 单元格取消选中事件响应
被取消选中项的indexPath为:[0, 4]
被取消选中项的的标题为:C++
- 可以分别获取被取消项的索引及内容:
// 获取被取消选中项的索引
collectionView.rx.itemDeselected.subscribe(onNext: { [weak self] indexPath in
	print("被取消选中项的indexPath为:\\(indexPath)")
}).disposed(by: disposeBag)

// 获取被取消选中项的内容
collectionView.rx.modelDeselected(String.self).subscribe(onNext: {[weak self] item in
	print("被取消选中项的的标题为:\\(item)")
}).disposed(by: disposeBag)
- 也可以同时获取:
Observable
    .zip(collectionView.rx.itemDeselected, collectionView.rx.modelDeselected(String.self))
    .bind { [weak self] indexPath, item in
       	print("被取消选中项的indexPath为:\\(indexPath)")
		print("被取消选中项的的标题为:\\(item)")
    }
    .disposed(by: disposeBag)
④ 单元格高亮完成后的事件响应
高亮单元格的indexPath为:[0, 3]
- 示例代码:
// 获取选中并高亮完成后的索引
collectionView.rx.itemHighlighted.subscribe(onNext: { indexPath in
    print("高亮单元格的indexPath为:\\(indexPath)")
}).disposed(by: disposeBag)
⑤ 高亮转成非高亮完成的事件响应
失去高亮的单元格的indexPath为:[0, 3]
- 示例代码:
// 获取高亮转成非高亮完成后的索引
collectionView.rx.itemUnhighlighted.subscribe(onNext: { indexPath in
    print("失去高亮的单元格的indexPath为:\\(indexPath)")
}).disposed(by: disposeBag)
⑥ 单元格将要显示出来的事件响应
将要显示单元格indexPath为:[0, 0]
将要显示单元格cell为:<RxSwift.MyCollectionViewCell: 0x7fe0f1112490; baseClass = UICollectionViewCell; frame = (5 0; 126 70); layer = <CALayer: 0x6000006f1a40>>

将要显示单元格indexPath为:[0, 1]
将要显示单元格cell为:<RxSwift.MyCollectionViewCell: 0x7fe0f0706be0; baseClass = UICollectionViewCell; frame = (144 0; 126 70); layer = <CALayer: 0x6000006f6360>>

将要显示单元格indexPath为:[0, 2]
将要显示单元格cell为:<RxSwift.MyCollectionViewCell: 0x7fe0f1304420; baseClass = UICollectionViewCell; frame = (283 0; 126 70); layer = <CALayer: 0x6000006bd900>>

将要显示单元格indexPath为:[0, 3]
将要显示单元格cell为:<RxSwift.MyCollectionViewCell: 0x7fe0f1304e40; baseClass = UICollectionViewCell; frame = (5 80; 126 70); layer = <CALayer: 0x6000006bd960>>

将要显示单元格indexPath为:[0, 4]
将要显示单元格cell为:<RxSwift.MyCollectionViewCell: 0x7fe0f1113c50; baseClass = UICollectionViewCell; frame = (144 80; 126 70); layer = <CALayer: 0x6000006f18a0>>
- 示例代码:
// 单元格将要显示出来的事件响应
collectionView.rx.willDisplayCell.subscribe(onNext: { cell, indexPath in
    print("将要显示单元格indexPath为:\\(indexPath)")
    print("将要显示单元格cell为:\\(cell)\\n")
}).disposed(by: disposeBag)
⑦ 分区头部或尾部将要显示出来的事件响应
// 分区头部、尾部将要显示出来的事件响应
collectionView.rx.willDisplaySupplementaryView.subscribe(onNext: { view, kind, indexPath in
	print("将要显示分区indexPath为:\\(indexPath)")
	print("将要显示的是头部还是尾部:\\(kind)")
	print("将要显示头部或尾部视图:\\(view)\\n")
}).disposed(by: disposeBag)
二、RxDataSources
① 单分区的 CollectionView
- 如下所示,要实现如下效果:

- 主视图控制器里的功能实现有如下两种写法:
-
- 方式一:使用自带的 Section:
// 定义布局方式以及单元格大小
let flowLayout = UICollectionViewFlowLayout()
flowLayout.sectionInset = UIEdgeInsets.init(top: 0, left: 5, bottom: 0, right: 5)
flowLayout.itemSize = CGSize(width: (SCREEN_WIDTH-50)/3.0, height: 70)

// 创建集合视图
self.collectionView = UICollectionView(frame: self.view.frame,
                                       collectionViewLayout: flowLayout)
self.collectionView.backgroundColor = UIColor.white

// 创建一个重用的单元格
self.collectionView.register(MyCollectionViewCell.self,
                             forCellWithReuseIdentifier: "Cell")
self.view.addSubview(self.collectionView!)

// 初始化数据
let items = Observable.just([
    SectionModel(model: "", items: [
        "Swift",
        "PHP",
        "Python",
        "Java",
        "javascript",
        "C#"
        ])
    ])

// 创建数据源
let dataSource = RxCollectionViewSectionedReloadDataSource
    <SectionModel<String, String>>(
    configureCell: { (dataSource, collectionView, indexPath, element) in
        let cell = collectionView.dequeueReusableCell(withReuseIdentifier: "Cell",
                                        for: indexPath) as! MyCollectionViewCell
        cell.label.text = "\\(element)"
        return cell}
)

// 绑定单元格数据
items
    .bind(to: collectionView.rx.items(dataSource: dataSource))
    .disposed(by: disposeBag)
-
- 方式二:使用自定义的 Section:
// 定义布局方式以及单元格大小
let flowLayout = UICollectionViewFlowLayout()
flowLayout.sectionInset = UIEdgeInsets.init(top: 0, left: 5, bottom: 0, right: 5)
flowLayout.itemSize = CGSize(width: (SCREEN_WIDTH-50)/3.0, height: 70)

// 创建集合视图
self.collectionView = UICollectionView(frame: self.view.frame,
                                       collectionViewLayout: flowLayout)
self.collectionView.backgroundColor = UIColor.white

// 创建一个重用的单元格
self.collectionView.register(MyCollectionViewCell.self,
                             forCellWithReuseIdentifier: "Cell")
self.view.addSubview(self.collectionView!)

// 初始化数据
let sections = Observable.just([
    MySection(header: "", items: [
        "Swift",
        "PHP",
        "Python",
        "Java",
        "javascript",
        "C#"
        ])
    ])

// 创建数据源
let dataSource = RxCollectionViewSectionedReloadDataSource<MySection>(
    configureCell: { (dataSource, collectionView, indexPath, element) in
        let cell = collectionView.dequeueReusableCell(withReuseIdentifier: "Cell",
                                        for: indexPath) as! MyCollectionViewCell
        cell.label.text = "\\(element)"
        return cell}
)

// 绑定单元格数据
sections
    .bind(to: collectionView.rx.items(dataSource: dataSource))
    .disposed(by: disposeBag)


// 自定义Section
struct MySection {
    var header: String
    var items: [Item]
}

extension MySection : AnimatableSectionModelType {
    typealias Item = String

    var identity: String {
        return header
    }

    init(original: MySection, items: [Item]) {
        self = original
        self.items = items
    }
}
- 注意:RxDataSources 是以 section 来做为数据结构的,因此不管 collectionView 是单分区还是多分区,在使用 RxDataSources 的过程中,都需要返回一个 section 的数组。
② 多分区的 CollectionView
- 如下所示,要实现如下效果:
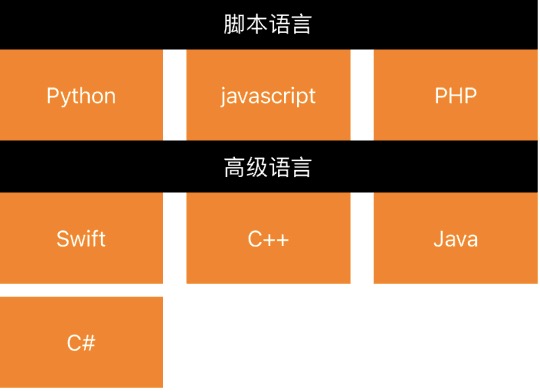
- 使用自带的 Section:
// 定义布局方式以及单元格大小
let flowLayout = UICollectionViewFlowLayout()
flowLayout.itemSize = CGSize(width: (SCREEN_WIDTH-50)/3.0, height: 70)
flowLayout.headerReferenceSize = CGSize(width: self.view.frame.width, height: 40)

// 创建集合视图
self.collectionView = UICollectionView(frame: self.view.frame,
                                       collectionViewLayout: flowLayout)
self.collectionView.backgroundColor = UIColor.white

// 创建一个重用的单元格
self.collectionView.register(MyCollectionViewCell.self,
                             forCellWithReuseIdentifier: "Cell")
// 创建一个重用的分区头
self.collectionView.register(MySectionHeader.self,
                             forSupplementaryViewOfKind: UICollectionView.elementKindSectionHeader,
                             withReuseIdentifier: "Section")
self.view.addSubview(self.collectionView!)


// 初始化数据
let items = Observable.just([
    SectionModel(model: "脚本语言", items: [
        "Python",
        "javascript",
        "PHP",
        ]),
    SectionModel(model: "高级语言", items: [
        "Swift",
        "C++",
        "Java",
        "C#"
        ])
    ])

// 创建数据源
let dataSource = RxCollectionViewSectionedReloadDataSource
    <SectionModel<String, String>>(
    configureCell: { (dataSource, collectionView, indexPath, element) in
        let cell = collectionView.dequeueReusableCell(withReuseIdentifier: "Cell",
                                        for: indexPath) as! MyCollectionViewCell
        cell.label.text = "\\(element)"
        return cell},
    configureSupplementaryView: {
        (ds ,cv, kind, ip) in
        let section = cv.dequeueReusableSupplementaryView(ofKind: kind,
                    withReuseIdentifier: "Section", for: ip) as! MySectionHeader
        section.label.text = "\\(ds[ip.section].model)"
        return section
})

// 绑定单元格数据
items
    .bind(t以上是关于RxSwift之UI控件UICollectionView扩展的使用的主要内容,如果未能解决你的问题,请参考以下文章