图像处理:图像的几何变换
Posted GeniusAng
tags:
篇首语:本文由小常识网(cha138.com)小编为大家整理,主要介绍了图像处理:图像的几何变换相关的知识,希望对你有一定的参考价值。
图像处理笔记总目录
1 图像缩放
缩放是对图像的大小进行调整,即使图像放大或缩小。
API:cv2.resize(src,dsize,fx=0,fy=0,interpolation=cv2.INTER_LINEAR)
参数:
- src : 输入图像
- dsize: 绝对尺寸,直接指定调整后图像的大小
- fx,fy: 相对尺寸,将dsize设置为None,然后将fx和fy设置为比例因子即可
- interpolation:插值方法
| 插值 | 含义 |
|---|---|
| cv2.INTER_LINEAR | 双线性插值法 |
| cv2.INTER_NEAREST | 最近邻插值 |
| cv2.INTER_AREA | 像素区域重采样(默认) |
| cv2.INTER_CUBIC | 双三次插值 |
在缩小时推荐
cv2.INTER_ARER,扩大时推荐cv2.INTER_CUBIC和cv2.INTER_LINEAR
示例:
import cv2.cv2 as cv
# 1. 读取图片
img1 = cv.imread("./image/dog.jpeg")
# 2.图像缩放
# 2.1 绝对尺寸
rows,cols = img1.shape[:2]
res = cv.resize(img1,(2*cols,2*rows),interpolation=cv.INTER_CUBIC)

# 2.2 相对尺寸
res1 = cv.resize(img1,None,fx=0.5,fy=0.5)

# 3 图像显示
# 3.1 使用opencv显示图像(不推荐)
cv.imshow("orignal",img1)
cv.imshow("enlarge",res)
cv.imshow("shrink)",res1)
cv.waitKey(0)

# 3.2 使用matplotlib显示图像
fig,axes=plt.subplots(nrows=1,ncols=3,figsize=(10,8),dpi=100)
axes[0].imshow(res[:,:,::-1])
axes[0].set_title("绝对尺度(放大)")
axes[1].imshow(img1[:,:,::-1])
axes[1].set_title("原图")
axes[2].imshow(res1[:,:,::-1])
axes[2].set_title("相对尺度(缩小)")
plt.show()

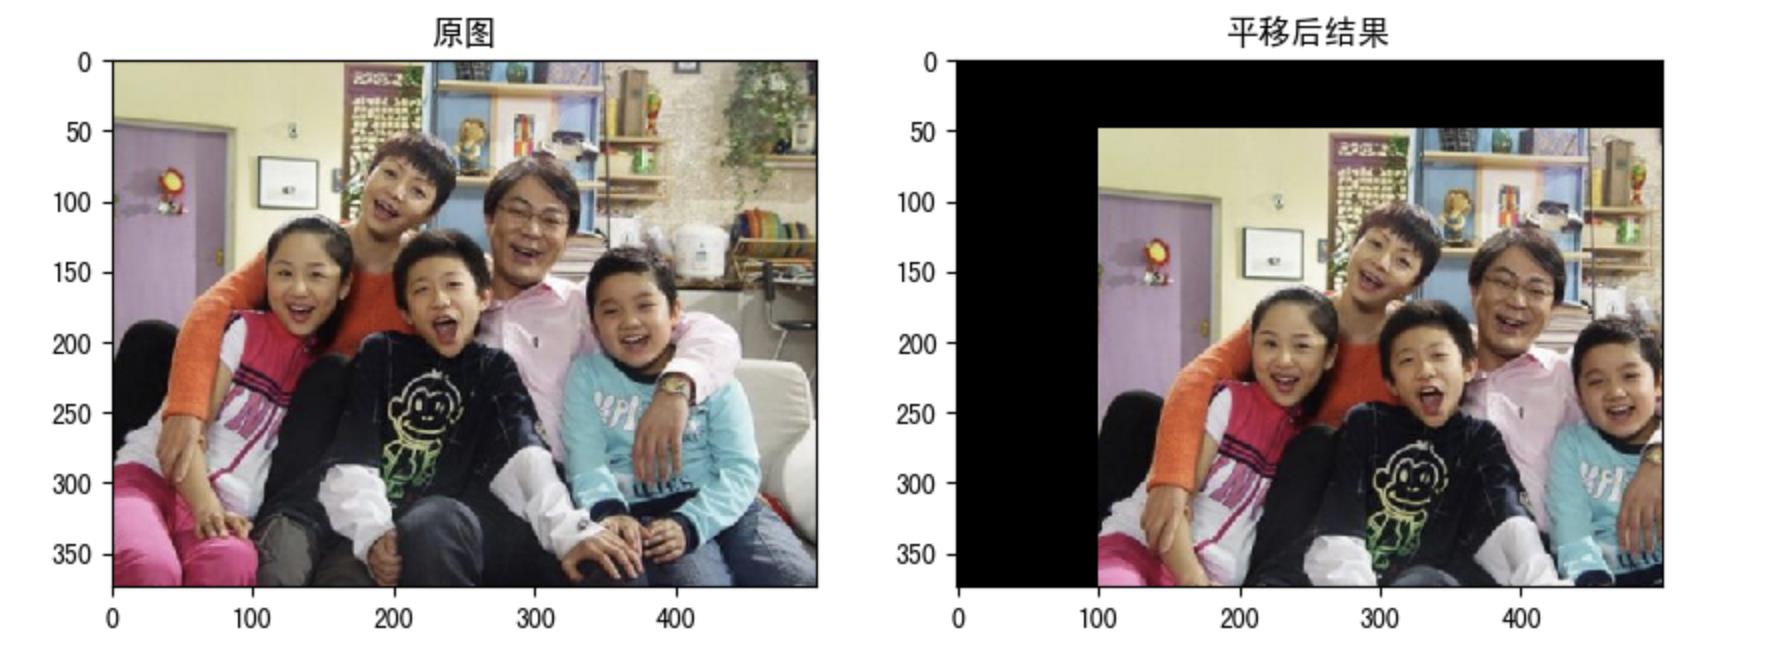
2 图像平移
图像平移将图像按照指定方向和距离,移动到相应的位置。
API:cv.warpAffine(img,M,dsize)
参数:
- img:输入图像
- M:2
∗
*
∗ 3移动矩阵
对于 ( x , y ) (x,y) (x,y)处的像素点,要把它移动到 ( x + t x , y + t y ) (x+t_x , y+t_y) (x+tx,y+ty) 处时,M矩阵应如下设置:
M = [ 1 0 t x 0 1 t y ] M=\\left[\\begin{array}{lll} 1 & 0 & t_{x} \\\\ 0 & 1 & t_{y} \\end{array}\\right] M=[1001txty]
注意:将M设置为np.float32类型的Numpy数组。 - dsize: 输出图像的大小
注意:输出图像的大小,它应该是(宽度,高度)的形式。请记住,width=列数,height=行数。
示例:需求是将图像的像素点移动 (100,50) 的距离
import numpy as np
import cv2.cv2 as cv
import matplotlib.pyplot as plt
# 1. 读取图像
img1 = cv.imread("./image/image2.jpg")

# 2. 图像平移
rows,cols = img1.shape[:2]
M = M = np.float32([[1,0,100],[0,1,50]])# 平移矩阵
dst = cv.warpAffine(img1,M,(cols,rows))

# 3. 图像显示
fig,axes=plt.subplots(nrows=1,ncols=2,figsize=(10,8),dpi=100)
axes[0].imshow(img1[:,:,::-1])
axes[0].set_title("原图")
axes[1].imshow(dst[:,:,::-1])
axes[1].set_title("平移后结果")
plt.show()
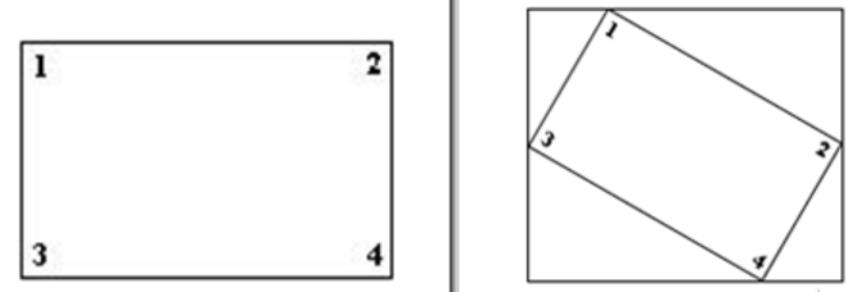
3 图像旋转
图像旋转是指图像按照某个位置转动一定角度的过程,旋转中图像仍保持这原始尺寸。图像旋转后图像的水平对称轴、垂直对称轴及中心坐标原点都可能会发生变换,因此需要对图像旋转中的坐标进行相应转换。
那图像是怎么进行旋转的呢?如下图所示:

假设图像逆时针旋转
θ
\\theta
θ,则根据坐标转换可得旋转转换为:
{
x
′
=
r
cos
(
α
−
θ
)
y
′
=
r
sin
(
α
−
θ
)
\\left\\{\\begin{array}{l} x^{\\prime}=r \\cos (\\alpha-\\theta) \\\\ y^{\\prime}=r \\sin (\\alpha-\\theta) \\end{array} \\right.
{x′=rcos(α−θ)y′=rsin(α−θ)
其中:
r = x 2 + y 2 , sin α = y x 2 + y 2 , cos α = x x 2 + y 2 r=\\sqrt{x^{2}+y^{2}}, \\sin \\alpha=\\frac{y}{\\sqrt{x^{2}+y^{2}}}, \\cos \\alpha=\\frac{x}{\\sqrt{x^{2}+y^{2}}} r=x2+y2,sinα=x2+y2y,cosα=x2+y2x
带入上面的公式中,有:
{
x
′
=
x
cos
θ
+
y
sin
θ
y
′
=
−
x
sin
θ
+
y
cos
θ
\\left\\{\\begin{array}{l} x^{\\prime}=x \\cos \\theta+y \\sin \\theta \\\\ y^{\\prime}=-x \\sin \\theta+y \\cos \\theta \\end{array}\\right.
{x′=xcosθ+ysinθy′=−xsinθ+ycosθ
也可以写成:
[
x
′
y
′
1
]
=
[
x
y
1
]
[
cos
θ
−
sin
θ
0
sin
θ
cos
θ
0
0
0
1
]
\\left[\\begin{array}{lll} x^{\\prime} & y^{\\prime} & 1 \\end{array}\\right]=\\left[\\begin{array}{lll} x & y & 1 \\end{array}\\right]\\left[\\begin{array}{ccc} \\cos \\theta & -\\sin \\theta & 0 \\\\ \\sin \\theta & \\cos \\theta & 0 \\\\ 0 & 0 & 1 \\end{array}\\right]
[x′y′1]=[xy1]⎣⎡cosθsinθ0−sinθcosθ0001⎦⎤
同时我们要修正原点的位置,因为原图像中的坐标原点在图像的左上角,经过旋转后图像的大小会有所变化,原点也需要修正。
假设在旋转的时候是以旋转中心为坐标原点的,旋转结束后还需要将坐标原点移到图像左上角,也就是还要进行一次变换。 以上是关于图像处理:图像的几何变换的主要内容,如果未能解决你的问题,请参考以下文章
[
x
′
′
y
′
′
1
]
=
[
x
′
y
′
1
]
[
1
0
0
0
−
1
0
l
e
f
t
top
1
]
=
[
x
y
1
]
[
cos
θ
−
sin
θ