HBase之集群搭建与快速入门
Posted 何如千泷
tags:
篇首语:本文由小常识网(cha138.com)小编为大家整理,主要介绍了HBase之集群搭建与快速入门相关的知识,希望对你有一定的参考价值。
HBase快速入门
1. HBase安装部署
-
Zookeeper 正常部署
[codecat@hadoop102 zookeeper-3.5.9]$ bin/zkServer.sh start [codecat@hadoop103 zookeeper-3.5.9]$ bin/zkServer.sh start [codecat@hadoop104 zookeeper-3.5.9]$ bin/zkServer.sh start -
Hadoop 正常部署
[codecat@hadoop102 hadoop-3.1.3]$ sbin/start-dfs.sh [codecat@hadoop103 hadoop-3.1.3]$ sbin/start-yarn.sh -
HBase 的解压
[codecat@hadoop102 software]$ tar -zxvf hbase-1.3.1-bin.tar.gz -C /opt/module -
HBase 的配置文件
hbase-env.sh修改内容如下:export JAVA_HOME=/opt/module/jdk1.8.0_212 export HBASE_MANAGES_ZK=falsehbase-site.xml修改内容如下:<configuration> <property> <name>hbase.rootdir</name> <value>hdfs://hadoop102:8020/HBase</value> </property> <property> <name>hbase.cluster.distributed</name> <value>true</value> </property> <!--0.98后的新变动,之前版本没有.port,默认端口为60000 --> <property> <name>hbase.master.port</name> <value>16000</value> </property> <property> <name>hbase.zookeeper.quorum</name> <value>hadoop102,hadoop103,hadoop104</value> </property> <property> <name>hbase.zookeeper.property.dataDir</name> <value>/opt/module/zookeeper-3.5.9/zkData</value> </property> </configuration>regionservers修改内容如下:hadoop102 hadoop103 hadoop104- 软连接
hadoop配置文件到HBase[codecat@hadoop102 module]$ ln -s /opt/module/hadoop-3.1.3/etc/hadoop/core-site.xml /opt/module/hbase-1.3.1/conf/core-site.xml [codecat@hadoop102 module]$ ln -s /opt/module/hadoop-3.1.3/etc/hadoop/hdfs-site.xml /opt/module/hbase-1.3.1/conf/hdfs-site.xml
-
HBase 远程发送到其他集群
[codecat@hadoop102 hbase-1.3.1]$ xsync hbase-1.3.1/ -
HBase 服务的启动与关闭
- 单节点启动
注意: 如果集群之间的节点时间不同步,会导致[codecat@hadoop102 hbase-1.3.1]$ bin/hbase-daemon.sh start master [codecat@hadoop102 hbase-1.3.1]$ bin/hbase-daemon.sh start regionserverregionserver无法启动,抛出ClockOutOfSyncException异常。 - 群起
[codecat@hadoop102 hbase-1.3.1]$ bin/start-hbase.sh - 服务停止
[codecat@hadoop102 hbase-1.3.1]$ bin/stop-hbase.sh
- 单节点启动
-
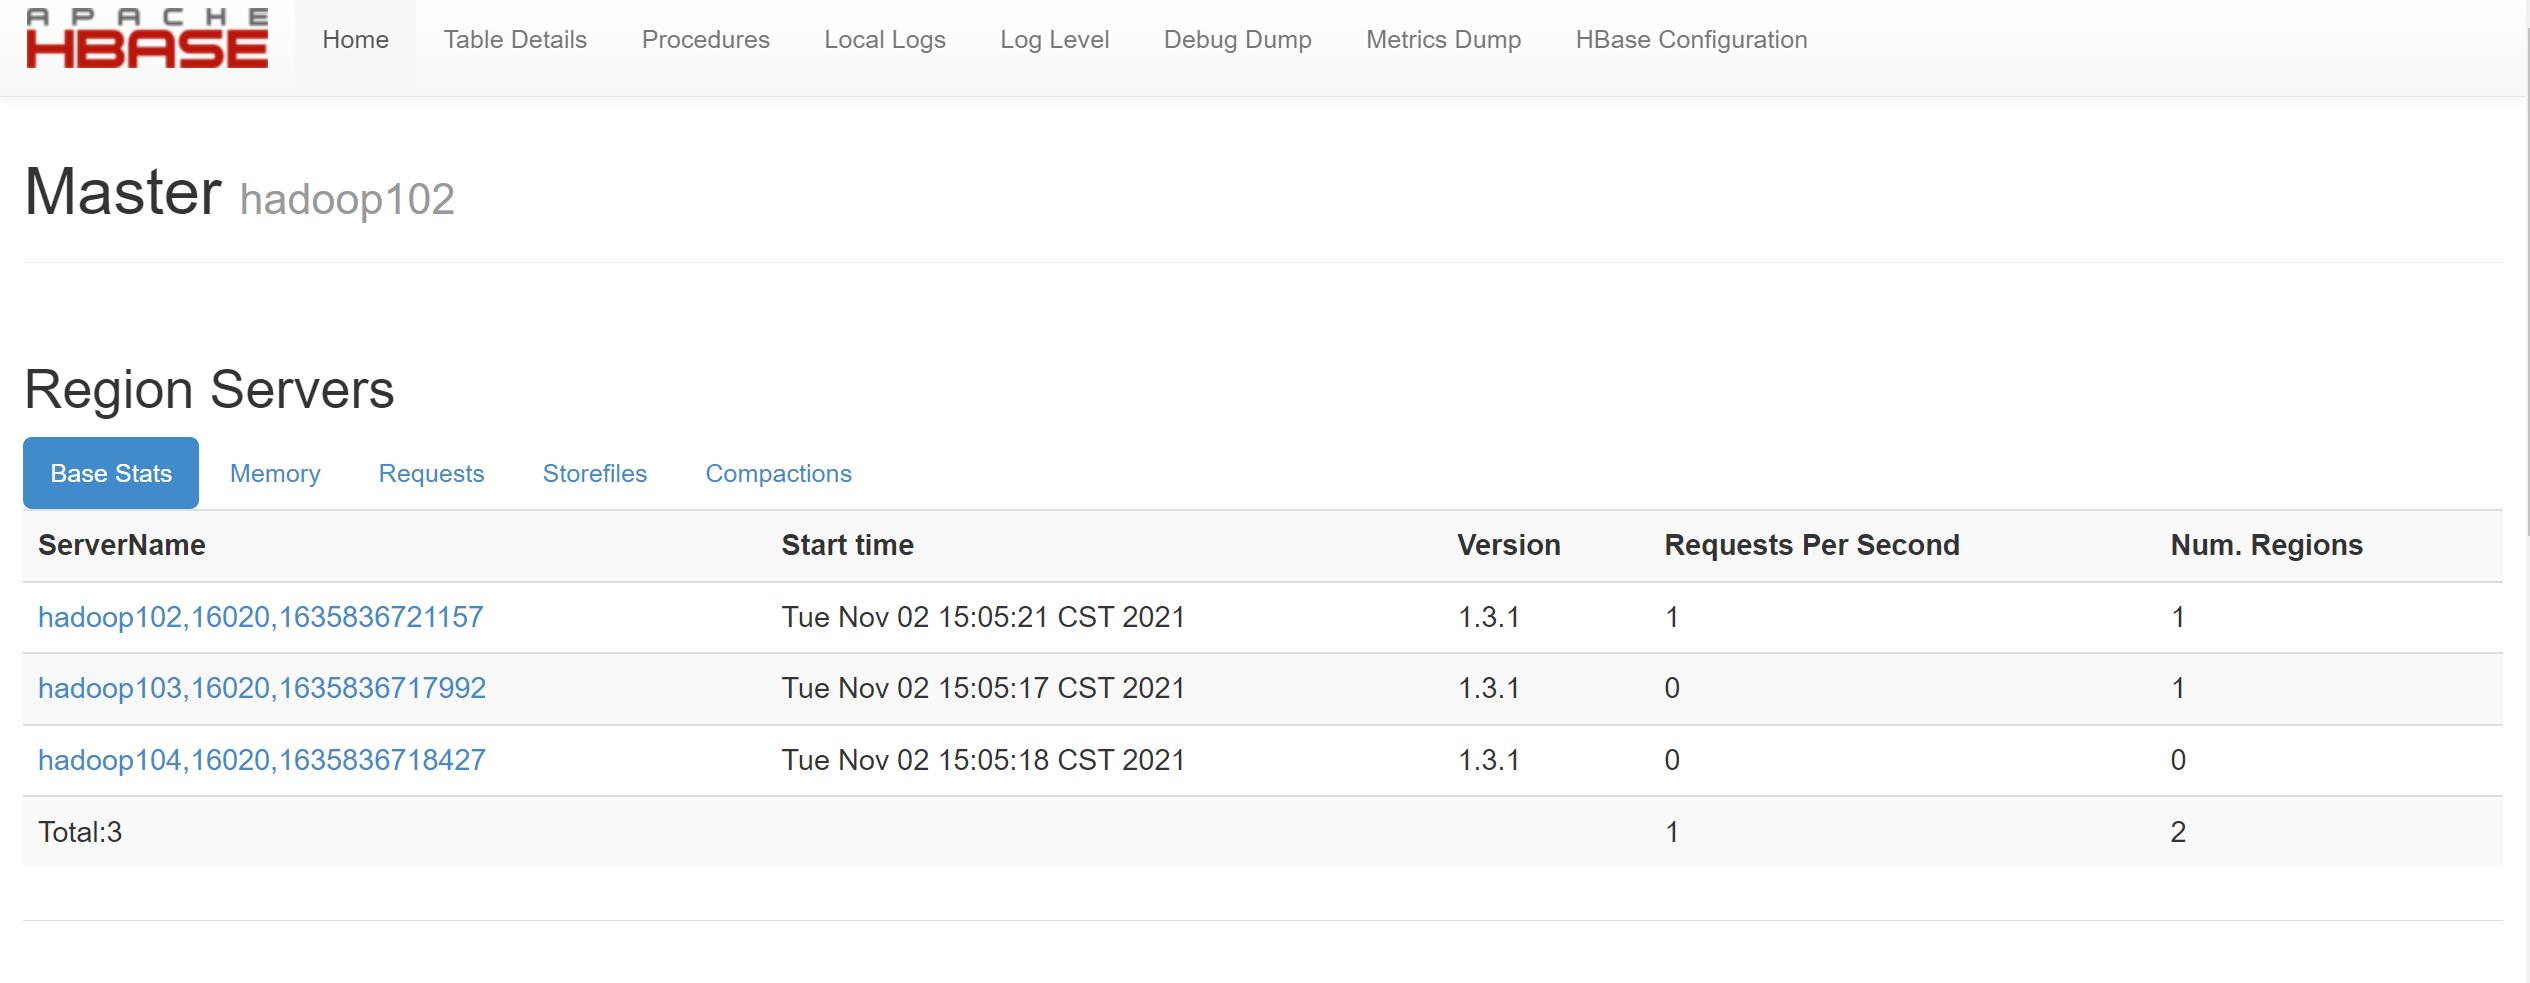
查看 Hbase 页面
启动成功后,可以通过
host:port的方式来访问HBase管理页面,例如:http://hadoop102:16010

2. HBase Shell 操作
2.1 基本操作
-
进入 HBase 客户端命令行
[codecat@hadoop102 hbase-1.3.1]$ hbase shell -
查看帮助命令
hbase(main):001:0> help -
查看当前数据库中有哪些表
hbase(main):002:0> list
2.2 表的操作
-
创建表
# 创建表名为student,列簇为info的表 hbase(main):003:0> create 'student', 'info' -
插入数据到表
# rowkey 为 1001;列为sex和age hbase(main):004:0> put 'student','1001','info:sex','male' hbase(main):005:0> put 'student','1001','info:age','18' # rowkey 为 1002;列为name、sex和age hbase(main):006:0> put 'student','1002','info:name','Janna' hbase(main):007:0> put 'student','1002','info:sex','female' hbase(main):008:0> put 'student','1002','info:age','20' -
扫描查看表数据
# 扫描整个表
hbase(main):001:0> scan 'student'
# rowkey从1001到1002扫描表
hbase(main):002:0> scan 'student',{STARTROW=>'1001',STOPROW=>'1002'}
可以看出区间是左闭右开
-
查看表结构
hbase(main):003:0> describe 'student'
-
更新指定字段的数据
# 向rowkey为1001中的列簇info增加name列,并设置值为Nick hbase(main):004:0> put 'student','1001','info:name','Nick' # 修改rowkey为1001中列簇为info列为age的值 hbase(main):005:0> put 'student','1001','info:age','100' -
查看指定行或指定列族:列的数据
hbase(main):006:0> get 'student','1001'
hbase(main):007:0> get 'student','1001','info:name'
-
统计表数据行数
hbase(main):008:0> count 'student' -
变更表信息
# 查看rowkey为1001,列簇为info,列为age,版本为2的信息
hbase(main):009:0> get 'student','1001',{COLUMN=>'info:age',VERSIONS=>2}
由于创建info列族时,默认数据存放1个版本,所以这里只显示了一条数据,现将info列族中的数据存放设置为2个版本,再次执行上述查询
hbase(main):010:0> alter 'student',{NAME=>'info',VERSIONS=>2}
hbase(main):012:0> put 'student','1001','info:age','98'
hbase(main):013:0> get 'student','1001',{COLUMN=>'info:age',VERSIONS=>2}
-
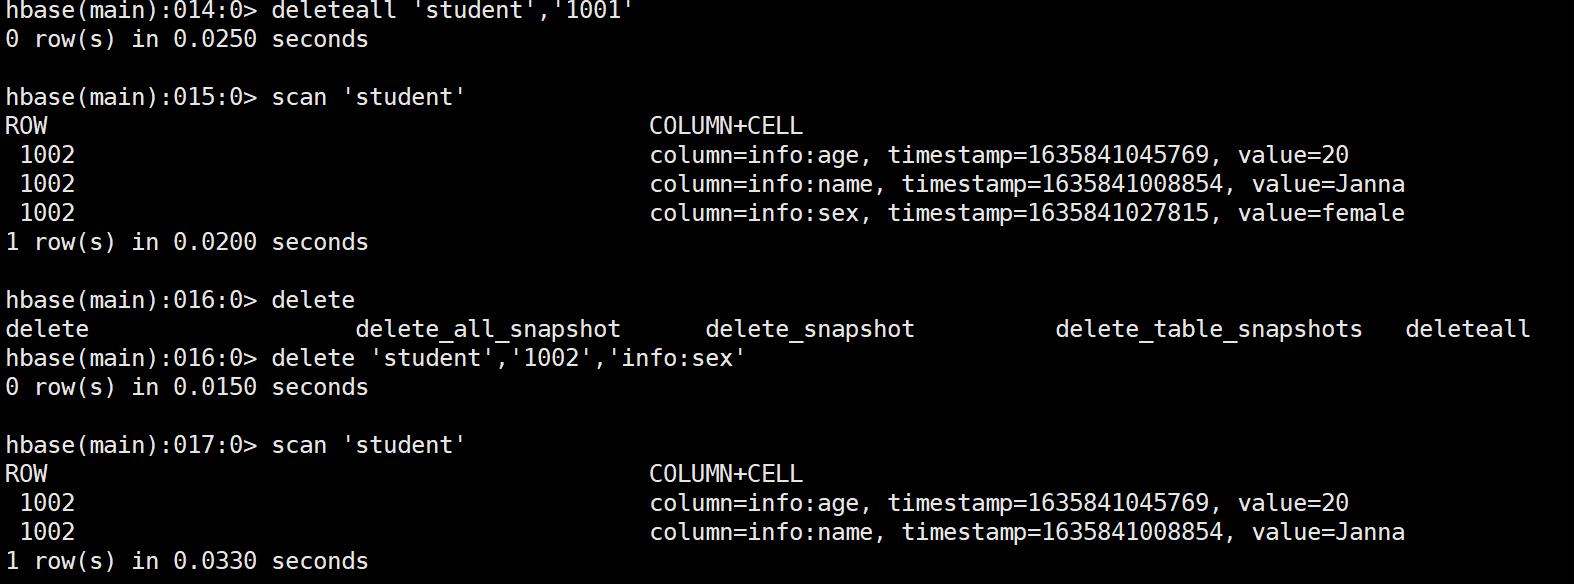
删除数据
# 删除rowkey为1001的全部数据
hbase(main):014:0> deleteall 'student','1001'

# 删除rowkey为1002,列族为info,列为sex的数据
hbase(main):016:0> delete 'student','1002','info:sex'
-
清空表数据
hbase(main):020:0> truncate 'student'
清空表的操作顺序为先
disable,然后再truncate -
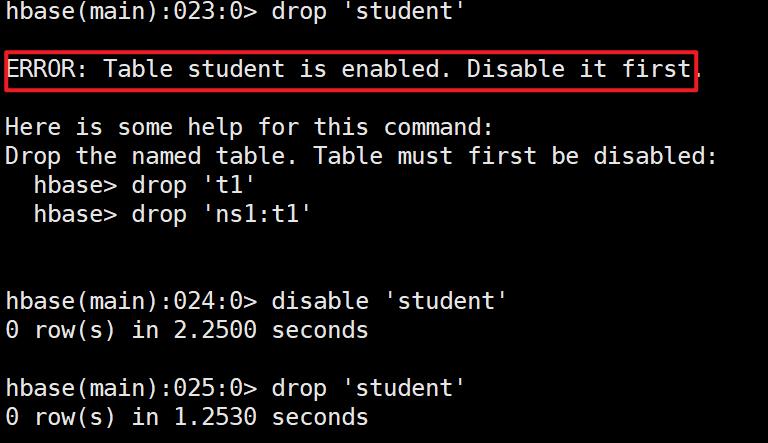
删除表
hbase(main):024:0> disable 'student'
hbase(main):025:0> drop 'student'
如果直接
drop表,会报错
以上是关于HBase之集群搭建与快速入门的主要内容,如果未能解决你的问题,请参考以下文章