Spring框架详解(了解IOC,AOP)
Posted 3 ERROR(s)
tags:
篇首语:本文由小常识网(cha138.com)小编为大家整理,主要介绍了Spring框架详解(了解IOC,AOP)相关的知识,希望对你有一定的参考价值。
一、spring入门
1.理解IOC
- IOC是Inversion of Control的缩写,多数书籍翻译成“控制反转”。
- IOC理论提出的观点大体是这样的:借助于“第三方”实现具有依赖关系的对象之间的解耦。
我们知道在面向对象设计的软件系统中,它的底层都是由N个对象构成的,各个对象之间通过相互合作,最终实现系统地业务逻辑。
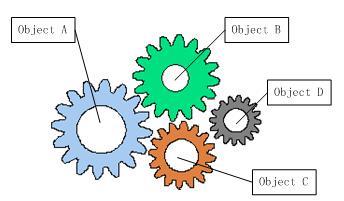
大家看到了吧,由于引进了中间位置的“第三方”,也就是IOC容器,使得A、B、C、D这4个对象没有了耦合关系,齿轮之间的传动全部依靠“第三方”了,全部对象的控制权全部上缴给“第三方”IOC容器,所以,IOC容器成了整个系统的关键核心,

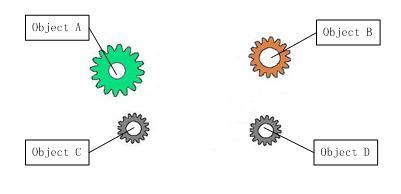
把上图中间的IOC容器拿掉,然后再来看看这套系统:我们现在看到的画面,就是我们要实现整个系统所需要完成的全部内容。这时候,A、B、C、D这4个对象之间已经没有了耦合关系,彼此毫无联系,这样的话,当你在实现A的时候,根本无须再去考虑B、C和D了,对象之间的依赖关系已经降低到了最低程度。
软件系统在没有引入IOC容器之前,如图1所示,对象A依赖于对象B,那么对象A在初始化或者运行到某一点的时候,自己必须主动去创建对象B或者使用已经创建的对象B。无论是创建还是使用对象B,控制权都在自己手上。通过前后的对比,我们不难看出来:对象A获得依赖对象B的过程,由主动行为变为了被动行为,控制权颠倒过来了,这就是“控制反转”这个名称的由来。
2.导入依赖
<dependencies>
        <!--WebMvc-->
        <dependency>
    <groupId>org.springframework</groupId>
    <artifactId>spring-webmvc</artifactId>
    <version>5.3.10</version>
        </dependency>
    </dependencies>
3.核心配置文件
<?xml version="1.0" encoding="UTF-8"?>
<beans xmlns="http://www.springframework.org/schema/beans"
       xmlns:xsi="http://www.w3.org/2001/XMLSchema-instance"
       xsi:schemaLocation="http://www.springframework.org/schema/beans
http://www.springframework.org/schema/beans/spring-beans.xsd">
4.spring容器创建对象之无参构造法
无参构造法:
在实体类中写一个无参构造,并做出标记。
public class Hello {
    private String name;
    private int age;

    public Hello() {
        System.out.println("这是无参构造");
    }

    public void setName(String name) {
        this.name = name;
    }

    public void setAge(int age) {
        this.age = age;
    }

}
注入bean:
<bean id="hello" class="com.rcy.pojo.Hello">
    <property name="name" value="Spring"/>
    </bean>
测试:
public class MyTest {
    public static void main(String[] args) {
        ApplicationContext context = new ClassPathXmlApplicationContext("applicationContext.xml");
        Hello hello = (Hello) context.getBean("hello");
        // hello.show();
    }
}
结果:
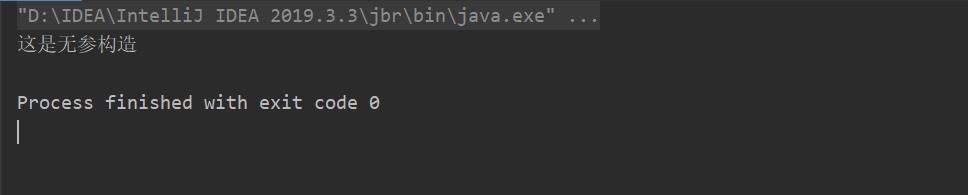
无参构造注意事项:
- 使用property注入
- 必须要有set方法**
5.spring容器创建对象之有参构造法
实体类:
public class People {
    private String name;
    private int age;

    public People(String name, int age) {
        this.name = name;
        this.age = age;
        System.out.println("people");
    }

    public void setName(String name) {
        this.name = name;
    }

    public void setAge(int age) {
        this.age = age;
    }
    public void show(){
        System.out.println("name+"+name);
    }

}
注入bean:
    <bean id="hello2" class="com.rcy.pojo.People">
        <constructor-arg name="age" value="20"/>
        <constructor-arg name="name" value="lala"/>
    </bean>
测试:

有参构造注意事项:
- 使用constructor来注入
- 可以使用name=也可以使用index=,后者指的是实体类中的第几个属性。
二、spring配置
1.别名
<bean id="hello2" class="com.rcy.pojo.People" name="c,a,v p">
        <constructor-arg name="age" value="20"/>
        <constructor-arg name="name" value="lala"/>
    </bean>
    <alias name="hello2" alias="dududu"/>
有两种起别名方法:
使用"alias"标签起别名
使用name起别名,使用name可以起多个别名,中间可以用逗号分号空格分开。
2.bean的配置
<!--    id:bean的唯一标识
        class:bean的全限定名称包名加类型
 -->
    <bean id="hello2" class="com.rcy.pojo.People" name="c,a,v p">
        <constructor-arg name="age" value="20"/>
        <constructor-arg name="name" value="lala"/>
3.import
import一般用于团队开发,可以将多个bean.xml文件合并为一个applicationContext.xml。
三、依赖注入
1.set方式注入
- 依赖:bean对象的创建依赖于容器
- 注入:bean对象中的所有属性由容器来注入
Student实体类
public class Student {

        private String name;
        private Adress adress;
        private String[]book;
        private List<String>hobbys;
        private Map<String,String> card;
        private Set<String> games;
        private String wife;
        private Properties info;
Adress实体类,作为Student的引用对象。
public class Adress {
    private String Adress;
}
applicationContext.xml文件,里面有各种不同类型的注入方法
<bean id="adress" class="com.rcy.pojo.Adress">
        <property name="adress" value="西安"/>
    </bean>
    <bean id="student" class="com.rcy.pojo.Student">
        <!-- 第一种,普通注入value-->
        <property name="name" value="董瑞龙"/>

        <!-- 第二种,bean注入ref-->
        <property name="adress" ref="adress"/>

        <!-- 第三种,数组注入-->
        <property name="book">
            <array>
                <value>董瑞龙是怎么炼成的</value>
                <value>党员</value>
            </array>
        </property>

        <!--第四种List-->
        <property name="hobbys">
            <list>
                <value>吃屎</value>
                <value>骂人</value>
            </list>
        </property>

        <!--第五种Map-->
        <property name="card">
            <map>
                <entry key="身份证" value="610121214566"/>
                <entry key="学号" value="1401541"/>
            </map>
        </property>

        <!--第六种Set-->
        <property name="games">
            <set>
                <value>LOL</value>
                <value>王者</value>
            </set>
        </property>

        <!--第七种null-->
        <property name="wife">
            <null/>
        </property>

        <!--第八种properties-->
        <property name="info">
            <props>
                <prop key="url">男</prop>
                <prop key="班级">2班</prop>
            </props>
        </property>

    </bean>
2.拓展注入方式
2.1 p命名方式
加入p约束:xmlns:p=“http://www.springframework.org/schema/p”
实体类:
public class Hello {
    private String name;
    private int age;

    public Hello() {
    }

    public void setName(String name) {
        this.name = name;
    }

    public void setAge(int age) {
        this.age = age;
    }

    @Override
    public String toString() {
        return "Hello{" +
                "name='" + name + '\\'' +
                ", age=" + age +
                '}';
    }
}
p命名方式注入方法:
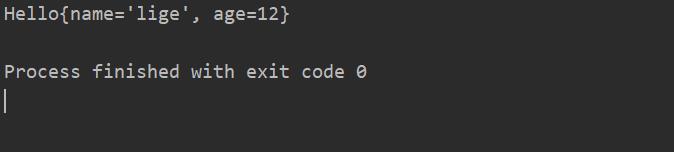
  <bean id="hello" class="com.rcy.pojo.Hello" scope="singleton" p:name="lige" p:age="12">
    </bean>
测试类:
public void test3(){
            ApplicationContext context = new ClassPathXmlApplicationContext("applicationContext.xml");
            Hello student = (Hello) context.getBean("hello");
            System.out.println(student);
        }
结果:
2.2c命名方式
加入c约束:xmlns:c=“http://www.springframework.org/schema/c”
实体类:
public class People {
    private String name;
    private int age;

    public People(String name, int age) {
        this.name = name;
        this.age = age;
    }

    public void setName(String name) {
        this.name = name;
    }
    public void setAge(int age) {
        this.age = age;
    }
    @Override
    public String toString() {
        return "People{" +
                "name='" + name + '\\'' +
                ", age=" + age +
                '}';
    }
}
c命名方式注入方法:
<bean id="people" class="com.rcy.pojo.People" c:name="张龙飞" c:age="20">
    </bean>
测试类:
public void test4(){
        ApplicationContext context = new ClassPathXmlApplicationContext("applicationContext.xml");
        People people= (People) context.getBean("people");
        System.out.println(people);
    }
结果:

3.bean的作用域
bean的作用域有以下五种:
singleton:单例模式
prototype:原型模式
request,session,application,websoket,这些在Web中使用。
3.1单例模式
单例模式是spring的默认机制,当多次调用bean时,IOC容器指挥创建一个对象。
创建一个bean:
 <bean id="hello" class="com.rcy.pojo.Hello" scope="singleton" p:name="lige" p:age="12">
    </bean>
调用两次bean,测试IOC到底创建了几个对象
public void test2(){
ApplicationContext context = new ClassPathXmlApplicationContext("applicationContext.xml");
Hello hello = (Hello) context.getBean("hello");
Hello hello2 = (Hello) context.getBean("hello");
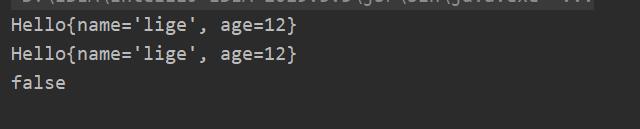
System.out.println(hello);
System.out.println(hello2);
System.out.println(hello==hello2);
}
结果:

3.2原型模式
原型模式与单例模式相反,每次调用bean就会创建一个对象
创建一个bean:
<bean id="hello" class="com.rcy.pojo.Hello" scope="prototype" p:name="lige" p:age="12">
    </bean>
测试类:
public  void test2(){
       ApplicationContext context = new ClassPathXmlApplicationContext("applicationContext.xml");
       Hello hello = (Hello) context.getBean("hello");
       Hello hello2 = (Hello) context.getBean("hello");
        System.out.println(hello);
        System.out.println(hello2);
        System.out.println(hello==hello2);
    }
结果:
四、Bean的自动装配
动物类:
import org.springframework.beans.factory.annotation.Autowired;

import javax.xml.catalog.Catalog;

public class animals {

    private String name;
    @Autowired
    private Cat cat;
    @Autowired
    private Dog dog;

    public String getName() {
        return name;
    }

    public void setName(String name) {
        this.name = name;
    }

    public Cat getCat() {
        return cat;
    }

    public void setCat(Cat cat) {
        this.cat = cat;
    }

    public Dog getDog() {
        return dog;
    }

    public void setDog(Dog dog) {
        this.dog = dog;
    }

    @Override
    public String toString() {
        return "animals{" +
                "name='" + name + '\\'' +
                ", cat=" + cat +
                ", dog=" + dog +
                '}';
    }
}
猫类:
public class Cat {
public void showSSM框架Spring笔记 --- Spring概述;IOC控制反转详解