深度学习项目演练:如何使用Python和OpenCV进行人脸识别
Posted TSINGSEE
tags:
篇首语:本文由小常识网(cha138.com)小编为大家整理,主要介绍了深度学习项目演练:如何使用Python和OpenCV进行人脸识别相关的知识,希望对你有一定的参考价值。
本文将和大家一起分享如何使用 Python 进行人脸识别 - 在实时实时视频中检测和识别出一个人。
在这个深度学习项目中,我们将学习如何使用 Python 识别实时视频中的人脸。我们将使用 python dlib 的面部识别网络构建这个项目。Dlib 是一个通用的软件库。 使用 dlib 工具包,我们可以制作真实世界的机器学习应用程序。
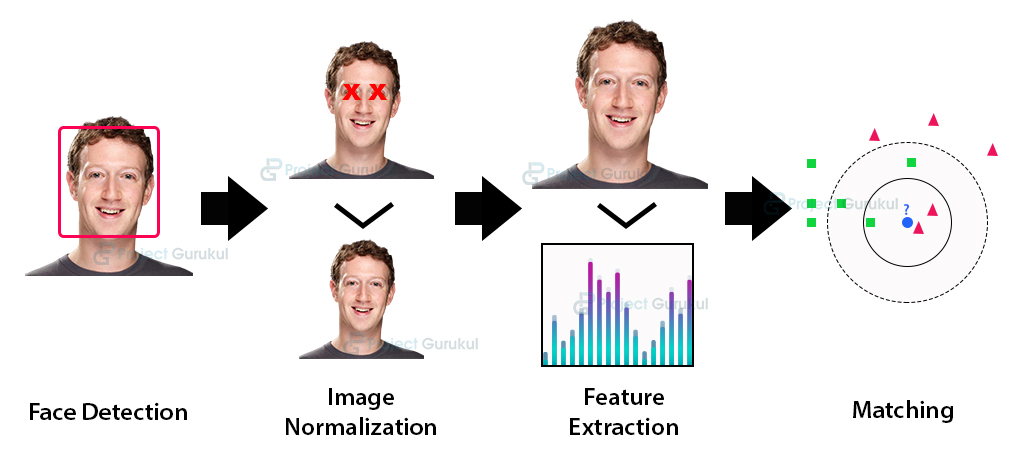
在这个项目中,我们将首先了解人脸识别器的工作原理,然后我们将使用 Python 构建人脸识别。

使用 Python、OpenCV 和深度学习进行人脸识别
关于dlib的人脸识别:
Python 提供了 face_recognition API,它是通过 dlib 的人脸识别算法构建的。 这个 face_recognition API 允许我们实现人脸检测、实时人脸跟踪和人脸识别应用。
项目准备:
首先,你需要从 PyPI 安装 dlib 库和 face_recognition API:
pip3 install dlib
pip3 install face_recognition
下载源代码:
人脸识别源代码(评论区)
用Python实现人脸识别的步骤:
我们将分两部分构建这个 python 项目。 首先,为这两部分构建两个不同的python文件:
- embedding.py:在这一步中,我们将以人的图像作为输入。 我们将对这些图像进行人脸嵌入。
- recognition.py:现在,我们将从相机帧中识别出那个特定的人。

1. embedding.py:
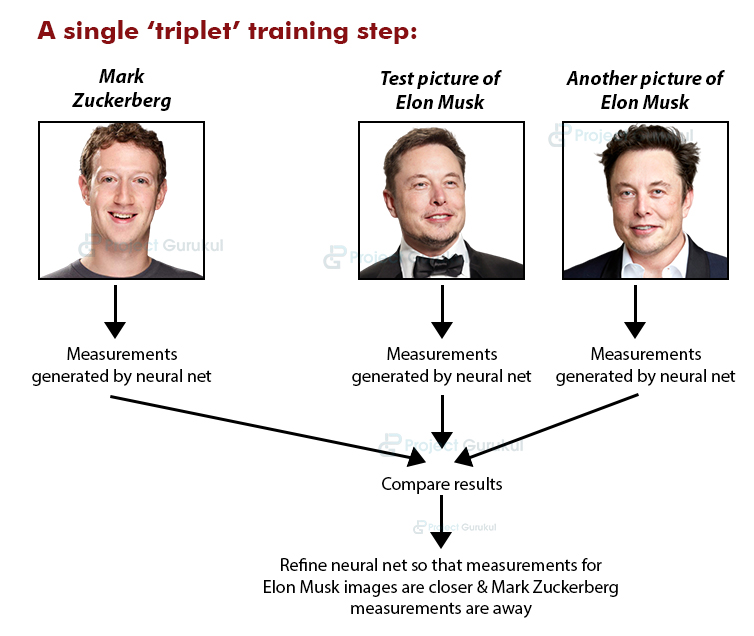
首先,在您的工作目录中创建一个文件 embedding.py。 在此文件中,我们将创建特定人脸的人脸嵌入。 使用 face_recognition.face_encodings 方法制作人脸嵌入。这些人脸嵌入是一个 128 维的向量。 在这个向量空间中,同一个人图像的不同向量彼此靠近。 进行人脸嵌入后,我们将它们存储在一个pickle文件中。
将以下代码粘贴到此 embedding.py 文件中。
- 导入相关的库:
import sys
import cv2
import face_recognition
import pickle- 要识别 pickle 文件中的人,请将其姓名和唯一 id 作为输入:
name=input("enter name")
ref_id=input("enter id")- 创建一个pickle文件和字典来存储人脸编码:
try:
    f=open("ref_name.pkl","rb")

    ref_dictt=pickle.load(f)
    f.close()
except:
    ref_dictt={}
ref_dictt[ref_id]=name


f=open("ref_name.pkl","wb")
pickle.dump(ref_dictt,f)
f.close()

try:
    f=open("ref_embed.pkl","rb")

    embed_dictt=pickle.load(f)
    f.close()
except:
embed_dictt={}- 打开网络摄像头和一个人的 5 张照片作为输入并创建其嵌入:

在这里,我们将特定人的嵌入存储在 embed_dictt 字典中。 我们已经在之前的状态中创建了 embed_dictt。 在这本字典中,我们将使用那个人的 ref_id 作为键。
要拍摄图像,请按“s”五次。 如果要停止相机,请按“q”:
for i in range(5):
    key = cv2. waitKey(1)
    webcam = cv2.VideoCapture(0)
    while True:

        check, frame = webcam.read()

        cv2.imshow("Capturing", frame)
        small_frame = cv2.resize(frame, (0, 0), fx=0.25, fy=0.25)
        rgb_small_frame = small_frame[:, :, ::-1]

        key = cv2.waitKey(1)

        if key == ord('s') :
            face_locations = face_recognition.face_locations(rgb_small_frame)
            if face_locations != []:
                face_encoding = face_recognition.face_encodings(frame)[0]
                if ref_id in embed_dictt:
                    embed_dictt[ref_id]+=[face_encoding]
                else:
                    embed_dictt[ref_id]=[face_encoding]
                webcam.release()
                cv2.waitKey(1)
                cv2.destroyAllWindows()
                break
        elif key == ord('q'):
            print("Turning off camera.")
            webcam.release()
            print("Camera off.")
            print("Program ended.")
            cv2.destroyAllWindows()
break- 使用面部嵌入更新 pickle 文件。
在这里,我们将 embed_dictt 存储在 pickle 文件中。 因此,为了识别那个人,我们可以直接从这个文件中加载它的嵌入:
f=open("ref_embed.pkl","wb")
pickle.dump(embed_dictt,f)
f.close()- 现在是时候执行 python 项目的第一部分了。
运行 python 文件并使用人名及其 ref_id 获取五个图像输入:
python3 embedding.py2.recognition.py:
在这里,我们将再次从相机帧创建人物嵌入。然后,我们将新的嵌入与 pickle 文件中存储的嵌入进行匹配。同一个人的新嵌入将接近其在向量空间中的嵌入。因此,我们将能够识别出这个人。
现在,创建一个新的 python 文件识别.py 并粘贴以下代码:
- 导入库:
import face_recognition
import cv2
import numpy as np
import glob
import pickle- 加载存储的 pickle 文件:
f=open("ref_name.pkl","rb")
ref_dictt=pickle.load(f)
f.close()

f=open("ref_embed.pkl","rb")
embed_dictt=pickle.load(f)
f.close()- 创建两个列表,一个用于存储 ref_id,另一个用于各自的嵌入:
known_face_encodings = []
known_face_names = []


for ref_id , embed_list in embed_dictt.items():
    for my_embed in embed_list:
        known_face_encodings +=[my_embed]
known_face_names += [ref_id]- 启动网络摄像头以识别此人:
video_capture = cv2.VideoCapture(0)

face_locations = []
face_encodings = []
face_names = []
process_this_frame = True

while True  :

    ret, frame = video_capture.read()

    small_frame = cv2.resize(frame, (0, 0), fx=0.25, fy=0.25)
    rgb_small_frame = small_frame[:, :, ::-1]

    if process_this_frame:

        face_locations = face_recognition.face_locations(rgb_small_frame)
        face_encodings = face_recognition.face_encodings(rgb_small_frame, face_locations)

        face_names = []
        for face_encoding in face_encodings:

            matches = face_recognition.compare_faces(known_face_encodings, face_encoding)
            name = "Unknown"

            face_distances = face_recognition.face_distance(known_face_encodings, face_encoding)
            best_match_index = np.argmin(face_distances)
            if matches[best_match_index]:
                name = known_face_names[best_match_index]
            face_names.append(name)

    process_this_frame = not process_this_frame

    for (top_s, right, bottom, left), name in zip(face_locations, face_names):
        top_s *= 4
        right *= 4
        bottom *= 4
        left *= 4

        cv2.rectangle(frame, (left, top_s), (right, bottom), (0, 0, 255), 2)

        cv2.rectangle(frame, (left, bottom - 35), (right, bottom), (0, 0, 255), cv2.FILLED)
        font = cv2.FONT_HERSHEY_DUPLEX
        cv2.putText(frame, ref_dictt[name], (left + 6, bottom - 6), font, 1.0, (255, 255, 255), 1)
    font = cv2.FONT_HERSHEY_DUPLEX

    cv2.imshow('Video', frame)

    if cv2.waitKey(1) & 0xFF == ord('q'):
        break

video_capture.release()
cv2.destroyAllWindows()
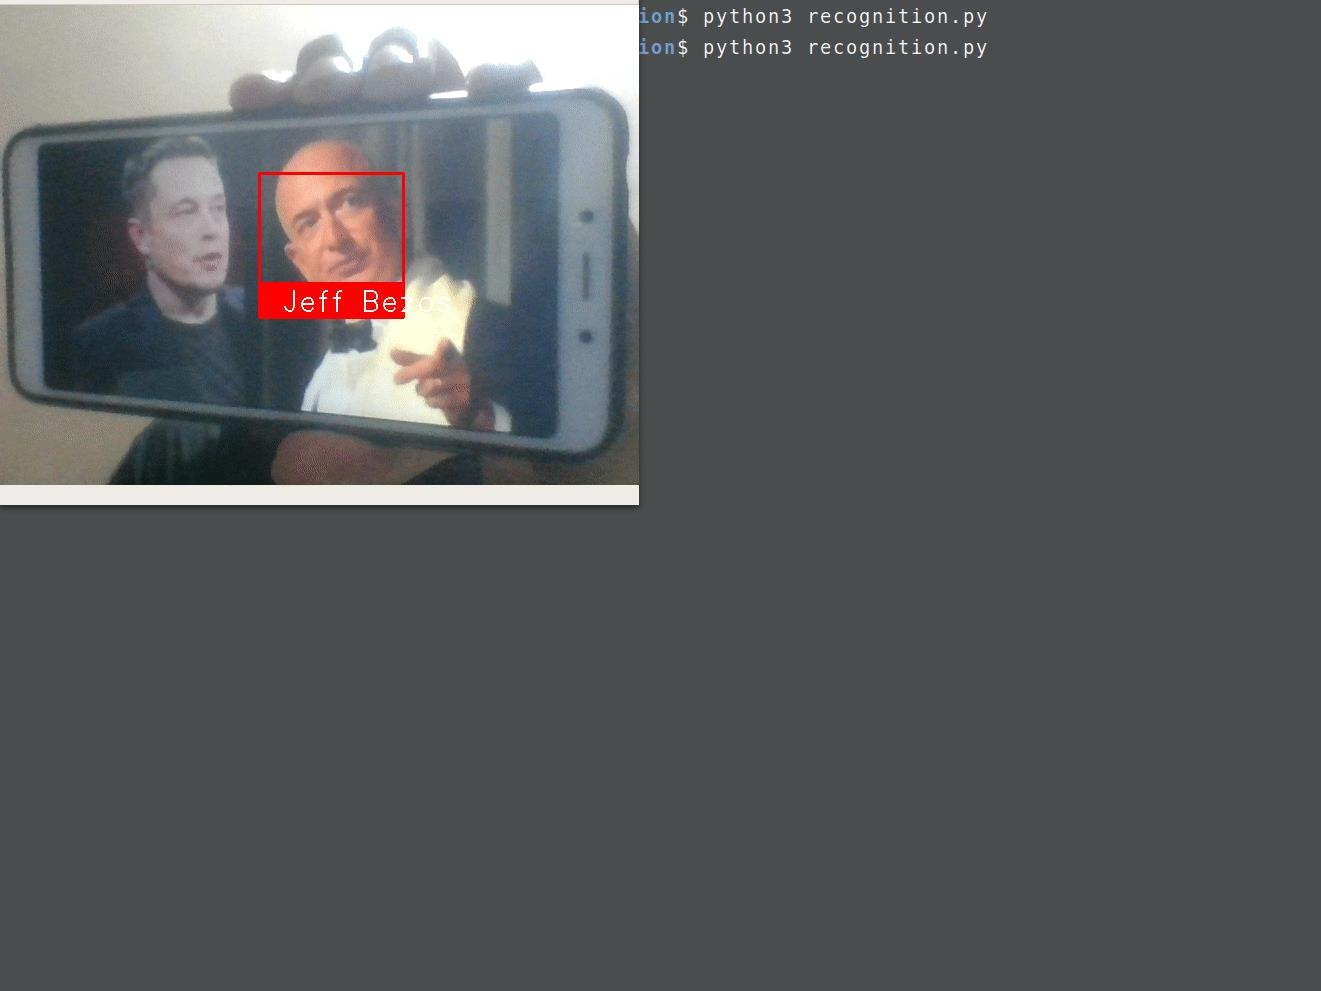
现在运行项目的第二部分来识别这个人:
python3 recognise.py概括:
今天分享的这个深度学习项目教你如何使用python库dlib和face_recognition APIs(OpenCV的)开发人脸识别项目。它介绍了 face_recognition API。 我们分两部分实现了这个python项目:
- 在第一部分中,我们已经看到了如何存储有关人脸结构的信息,即人脸嵌入。 然后我们学习如何存储这些嵌入。
- 在第二部分中,我们已经看到了如何通过将新的人脸嵌入与存储的人脸嵌入进行比较来识别人。
人脸识别技术的应用
目前,从我国人脸识别技术应用来看,主要集中在三大领域:考勤门禁、安防以及金融。具体如:安防监控、视频中的人脸检测、人脸识别、人流量统计等,广泛应用在小区、楼宇的智能门禁,周界可疑人员徘徊检测、景区人流量统计等等。
TSINGSEE青犀视频基于多年视频领域的技术经验积累,将AI检测、智能识别技术融合到各个应用场景中,典型的示例如EasyCVR视频融合云服务,具有AI人脸识别、车牌识别、语音对讲、云台控制、声光告警、监控视频分析与数据汇总的能力。
以上是关于深度学习项目演练:如何使用Python和OpenCV进行人脸识别的主要内容,如果未能解决你的问题,请参考以下文章