游戏开发创新使用Unity制作方阵编队,CSDN方阵迎面走来,感谢CSDN的中秋礼物(图像采样 | 点阵 | 方阵 | 队形 | 变换 | 动画)
Posted 林新发
tags:
篇首语:本文由小常识网(cha138.com)小编为大家整理,主要介绍了游戏开发创新使用Unity制作方阵编队,CSDN方阵迎面走来,感谢CSDN的中秋礼物(图像采样 | 点阵 | 方阵 | 队形 | 变换 | 动画)相关的知识,希望对你有一定的参考价值。
一、前言
嗨,大家好,我是新发。
最近一直在忙一些事情,好几天没写文章了,前天收到CSDN的中秋礼物通知,非常感谢,特地做个小Demo感谢一下CSDN。
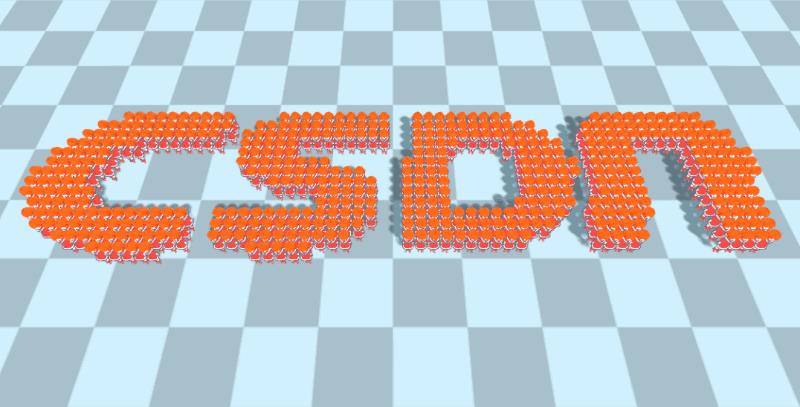
二、运行效果
运行效果如下,方阵迎面跑来,
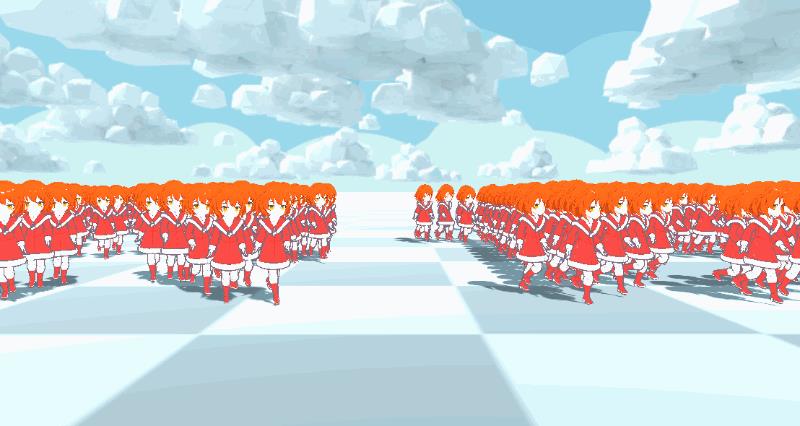
CSDN方阵,
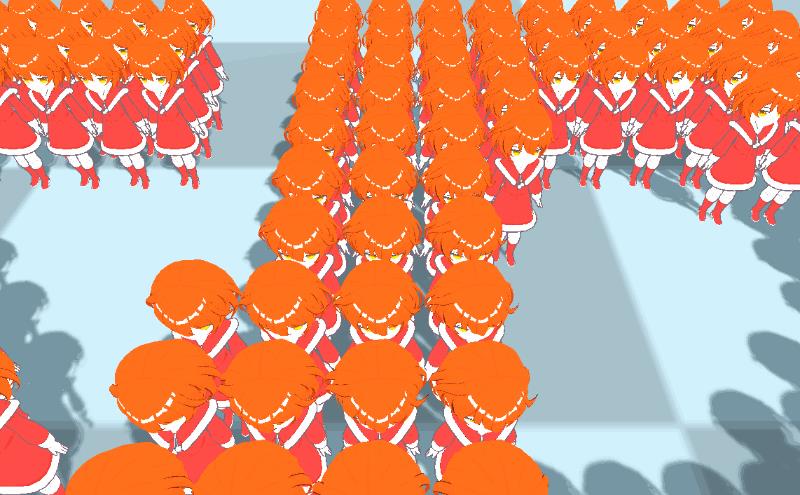
阵型变换,

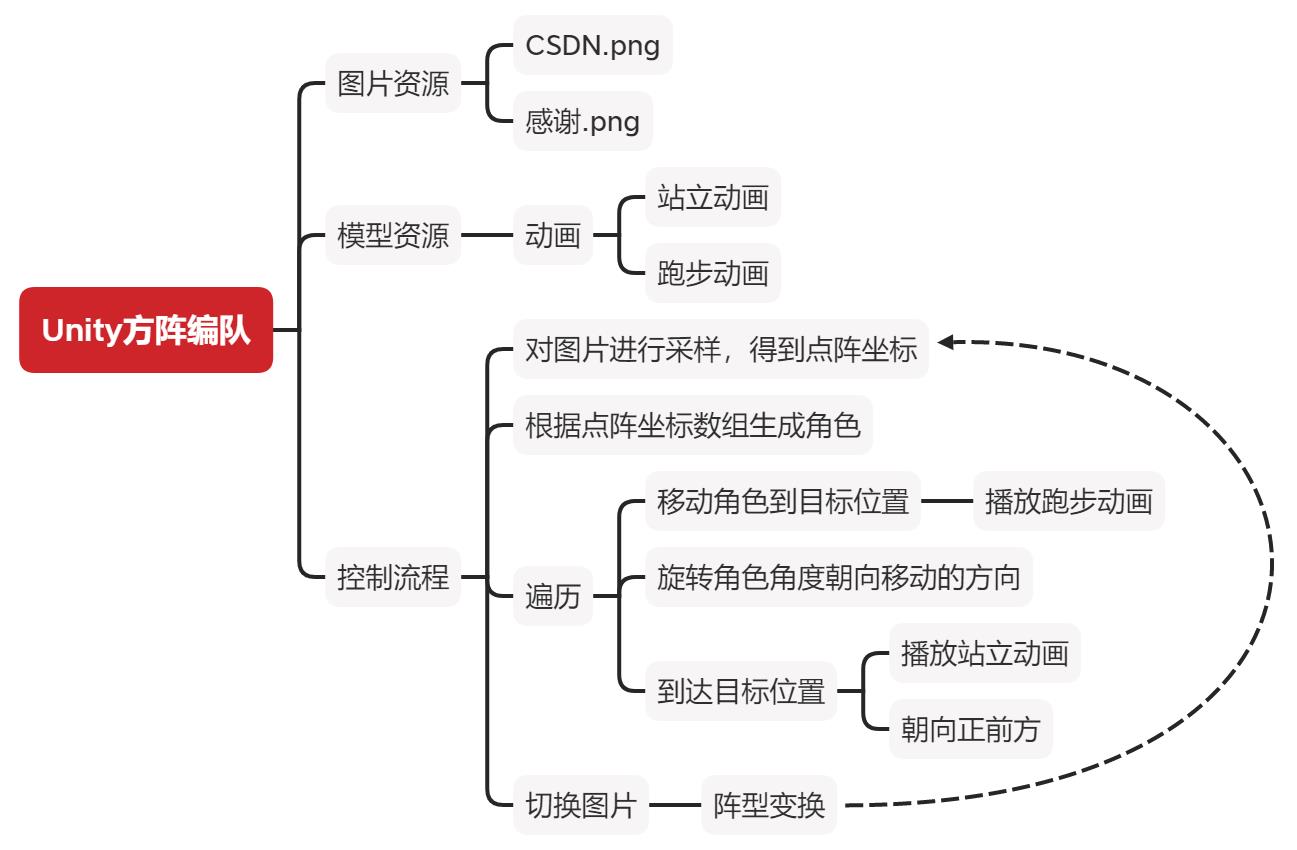
三、实现原理
实现原理很简单,画成图是这样子,
下面我来讲下具体的实现细节~
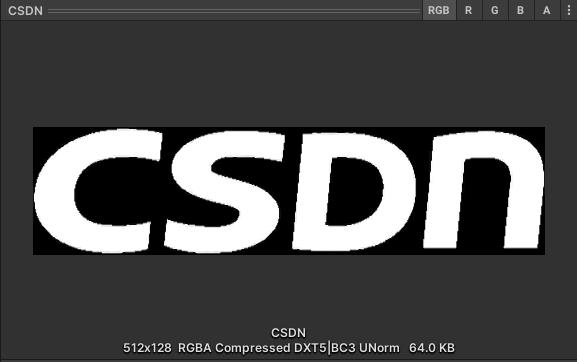
四、图片资源
准备两张图片,如下:

勾选Read/Write Enabled,设置图片为可读,如下:

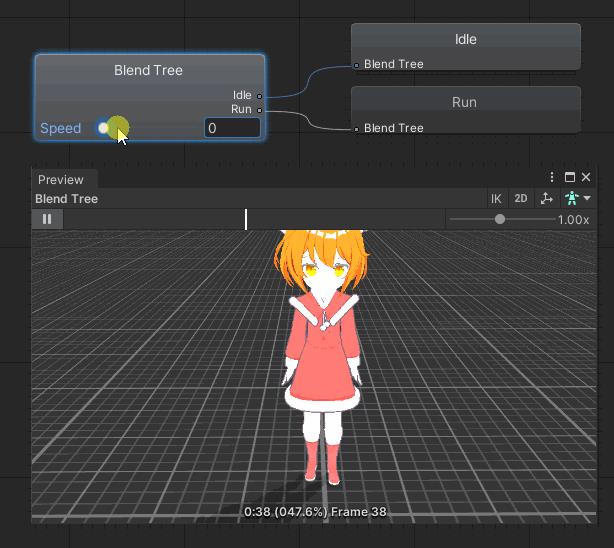
五、模型资源
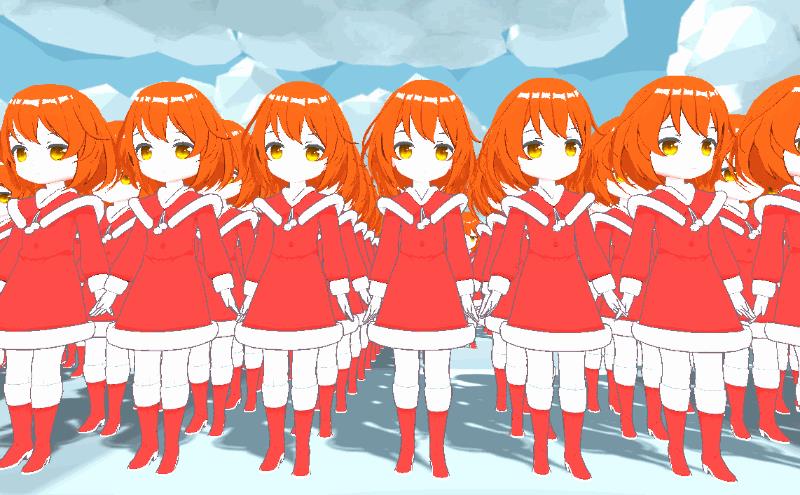
准备一个模型资源,
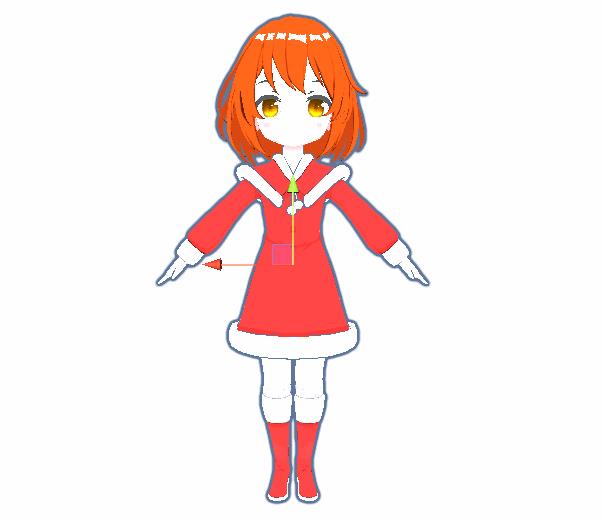
带一个站立和跑步动画,

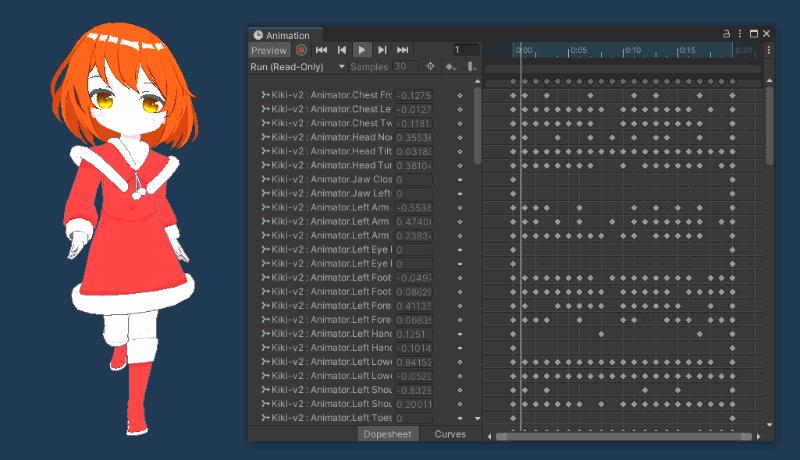
动画状态机如下,使用混合树(Blend Tree)来过渡站立和跑动画,
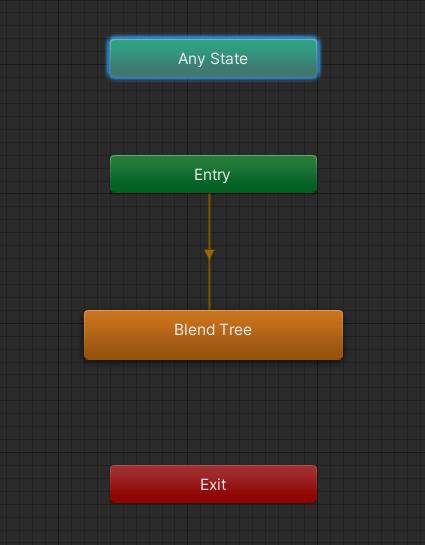
混合树内部如下,通过Speed变量来控制混合:
Speed变量(Float类型)如下:

混合设置如下:

六、像素采样,生成点阵
像素采样生成点阵的逻辑,我封装在TextureFormation脚本中。
图片像素采样,我们可以使用Texture2D的GetPixel接口,
public Color GetPixel(int x, int y);
我们可以把一张图切割成很多个小正方块(小方块的边长为samplingStep),比如像这样子,

对每个小方块进行逐像素采样,我们知道,一个像素的颜色是由RGBA四个通道值来表示的,每个通道的取值范围是0~255,
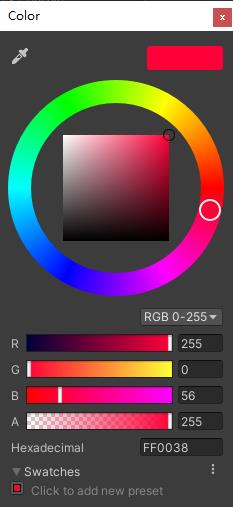
对应到Color这个类,就是r、g、b、a,
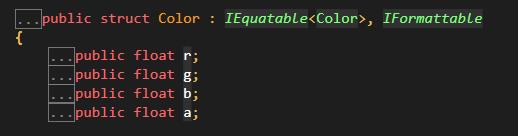
这里要注意,Color的rgba是归一化的,也就是取值范围是0~1,如果想用0~255的取值范围表示颜色,则对应的类是Color32。
GetPixel接口返回的是Color对象,我们可以通过rgb来简单判断一个像素是否有颜色,例:
if (color.r + color.g + color.b > 1f)
{
	// 像素有颜色
}
如果一个方块中有颜色的像素超过了方块的边长samplingStep,则认为这个小方块中央需要安排一个人,否则留空。
我们声明一个数组来存放点阵数据:
// 点阵
private List<Vector3> posList = new List<Vector3>();
生成点阵的逻辑如下:
// TextureFormation.cs

/// <summary>
/// 采样梯度,梯度越小,进度越高
/// </summary>
public int samplingStep = 5;
/// <summary>
/// 坐标缩放
/// </summary>
public float scale = 1f;
/// <summary>
/// 要采样的图片纹理
/// </summary>
public Texture2D texture;

// ...

/// <summary>
/// 计算点阵
/// </summary>
private void CalculatePoints()
{
    if(Application.isPlaying)
    {
        if (0 != posList.Count)
            return;
    }
    else
    {
        posList.Clear();
    }

    var widthStep = texture.width / samplingStep;
    var heightStep = texture.height / samplingStep;
    for (int i = 0; i <= heightStep; i += samplingStep)
    {
        for (int j = 0; j <= widthStep; j += samplingStep)
        {
            // 一个block
            int colorPixelCnt = 0;
            for (int ii = 0; ii <= samplingStep; ++ii)
            {
                for (int jj = 0; jj <= samplingStep; ++jj)
                {
                    var color = texture.GetPixel(j * samplingStep + jj, i * samplingStep + ii);
                    if (color.r + color.g + color.b > 1f)
                    {
                        ++colorPixelCnt;
                    }
                }
            }
            // 有颜色的像素超数量过了方块的边长
            if (colorPixelCnt > samplingStep)
            {
                var pos = new Vector3(-texture.width / 2 + j * samplingStep + samplingStep / 2f, 0, -texture.height / 2 + i * samplingStep + samplingStep / 2f);
                // 对坐标进行缩放
                pos *= scale;
                posList.Add(pos);
            }
        }
    }
}
我们再提供一个获取点阵数据的接口供外部调用:
// TextureFormation.cs

/// <summary>
/// 获取点阵数据
/// </summary>
/// <returns></returns>
public IEnumerable<Vector3> EvaluatePoints()
{
    CalculatePoints();
    var rootPos = Vector3.zero;
    if (null != trans)
        rootPos = trans.position;
    for (int i = 0; i < posList.Count; ++i)
    {
        yield return rootPos + posList[i];
    }
}
为了方便在编辑器下预览点阵,我们可以写个OnDrawGizmos()方法,通过Gizmos来绘制几何体,如下:
// FormationRenderer.cs

using UnityEngine;

public class FormationRenderer : MonoBehaviour
{
    private TextureFormation _formation;
    public TextureFormation Formation
    {
        get
        {
            if (_formation == null) _formation = GetComponent<TextureFormation>();
            return _formation;
        }
        set => _formation = value;
    }

    [SerializeField] private Vector3 _unitGizmoSize;
    [SerializeField] private Color _gizmoColor;

    private void OnDrawGizmos()
    {
        if (Formation == null || Application.isPlaying) return;
        Gizmos.color = _gizmoColor;

        foreach (var pos in Formation.EvaluatePoints())
        {
            Gizmos.DrawCube(transform.position + pos + new Vector3(0, _unitGizmoSize.y * 0.5f, 0), _unitGizmoSize);
        }
    }
}
效果:

可以调节采样梯度和坐标缩放,

如下:

七、根据点阵生成角色方阵
我们创建一个Main.cs脚本来实现这部分的逻辑。
有了点阵数据,我们就可以生成相应的角色啦,不过我们这里的每个角色都有各自的一些信息,比如动画、速度等,这里我们封装一个PlayerUnit类来包装一下,
// Main.cs

public class PlayerUnit
{
    public GameObject obj;
    public Transform trans;
    public Animator ani;
    public float speed;
}
封装一下生成角色和删除角色的接口,
// Main.cs

private readonly List<PlayerUnit> spawnedUnits = new List<PlayerUnit>();

// 生成角色
private void SpawnAvatar(IEnumerable<Vector3> points)
{
    foreach (var pos in points)
    {
        var unit = new PlayerUnit();
        var obj = Instantiate(unitPrefab, transform.position + pos, Quaternion.identity, parentTrans);
        unit.obj = obj;
        unit.trans = obj.transform;
        unit.ani = obj.GetComponent<Animator>();
        spawnedUnits.Add(unit);
    }
}

// 删除多余的角色
private void DeleteAvatar(int num)
{
    for (var i = 0; i < num; i++)
    {
        var unit = _spawnedUnits.Last();
        spawnedUnits.Remove(unit);
        Destroy(unit.obj);
    }
}
根据点阵图生成角色,
// 根据点阵图生成角色
private void GenFormation()
{
    points = formation.EvaluatePoints().ToList();

    if (points.Count > spawnedUnits.Count)
    {
        var remainingPoints = points.Skip(spawnedUnits.Count);
        SpawnAvatar(remainingPoints);
    }
    else if (points.Count < spawnedUnits.Count)
    {
        DeleteAvatar(spawnedUnits.Count - points.Count);
    }

    for (var i = 0; i < spawnedUnits.Count; i++)
    {
    	// 设置坐标
		unit.trans.position = points[i];
        // TODO 移动、旋转、播动画

    }
}
此时的效果:

八、方阵行走
我们要让方阵跑起来,每个角色朝着自己的位置移动、旋转,并且配套播放跑步和站立的动画。
这里需要要让状态过渡比较自然,我是根据距离来决定动画混合,使用线性差值来计算旋转,代码如下:
代码如下:
for (var i = 0; i < spawnedUnits.Count; i++)
{
    var unit = spawnedUnits[i];
    // 距离
    var distance = Vector3.Distance(points[i], unit.trans.position);

    if (distance > unitSpeed)
    {
        // 方向
        var dir = points[i] - unit.trans.position;
        // 线性差值设置方向,朝向目标点方向
        unit.trans.forward = Vector3.Lerp(unit.trans.forward, new Vector3(dir.x, 0, dir.z), 5 * Time.deltaTime);
        // 动画混合
        unit.speed = distance > 0.8f ? distance : 0.8f;
        unit.ani.SetFloat("Speed", unit.speed);
        // 移动
        unit.trans.position = unit.trans.position + (points[i] - unit.trans.position).normalized * unitSpeed;
    }
    else
    {
    	// 距离很小,直接设置目标点位置
        unit.trans.position = points[i];
        if (unit.speed > 0)
        {
        	// 慢慢过渡为站立
            unit.speed -= Time.deltaTime * 0.5f;
            if (unit.speed < 0)
                unit.speed = 0;
            unit.ani.SetFloat("Speed", unit.speed);
        }
        // 线性差值设置方向,统一朝向正前方
        unit.trans.forward = Vector3.Lerp(unit.trans.forward, -Vector3.forward, 5 * Time.deltaTime);
    }
}
我们想点击地面时让整个方阵移动,这里我用了射线检测,
if (Input.GetMouseButtonDown(0))
{
Ray ray = Camera.main.ScreenPointToRay(Input.mousePosition);
RaycastHit hitInfo;
if (Physics.Raycast(ray, out hitInfo, 200))
{
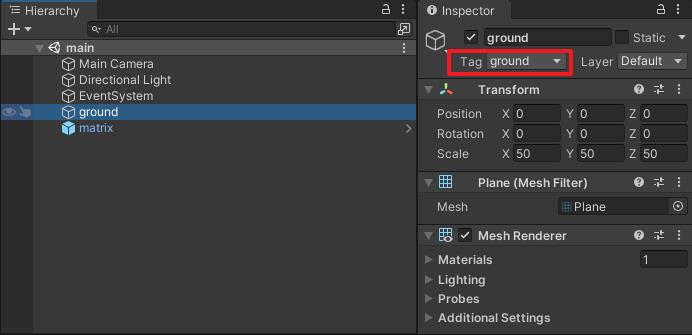
if ("ground" == hitInfo.collider.tag)
{
formation.transform.position = hitInfo.point;
}
}
}
其中,地面的tag设置为ground,
效果如下:
如果你强行把某个角色拉到别处,她会自动乖乖跑回去站好,
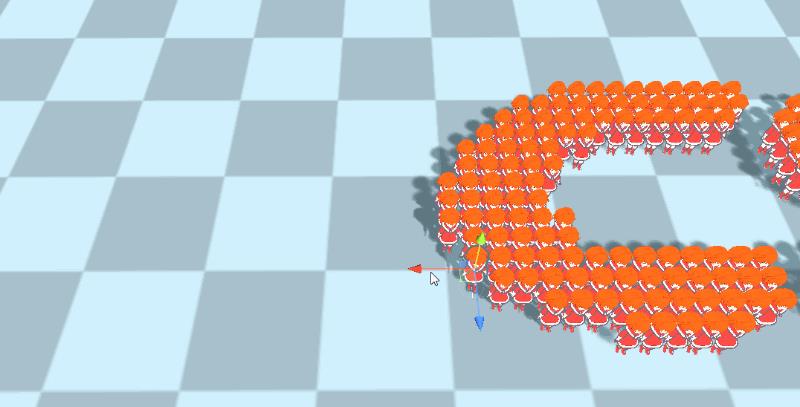
九、方阵变换
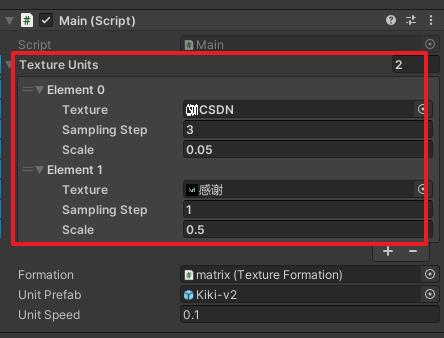
我们想要实现多个方阵的变换,需要中途切换图片,并且可能需要设置对应的采样梯度和坐标缩放,我这里封装成可序列化的类,如下:
[System.Serializable]
public class TextureUnit
{
    public Texture2D texture;
    public int samplingStep;
    public float scale;
}
声明一个public的数组:
public TextureUnit[] textureUnits = new TextureUnit[0];
这样就可以在Inspector面板中设置数据啦~
写个方法实现方阵变换,
// Main.cs

// 方阵变换
private void ChangeFormation()
{
    if (curTextureIndex > (textureUnits.Length - 1))
    {
        curTextureIndex = 0;
    }
    var curTextureUnit = textureUnits[curTextureIndex];
    formation.texture = curTextureUnit.texture;
    formation.samplingStep = curTextureUnit.samplingStep;
    formation.scale = curTextureUnit.scale;
    formation.ReCalculate();
}
在Update中检测空白键按下,如果按下则调用方阵变换,
// Main.cs

private int curTextureIndex = 0;

private void Update()
{
   // ...
   if (Input.GetKeyDown(KeyCode.Space))
   {
       ++curTextureIndex;
       ChangeFormation();
   }
}
效果如下:
十、工程源码
本工程我已上传到CODE CHINA,感兴趣的同学可自行下载学习。
地址:https://codechina.csdn.net/linxinfa/UnityFormationsDemo
注:我使用的Unity版本为Unity 2021.1.9f1c1 (64-bit)。

十一、完毕
好了,就到这里吧,
我是林新发:https://blog.csdn.net/linxinfa

原创不易,若转载请注明出处,感谢大家~
喜欢我的可以点赞、关注、收藏,如果有什么技术上的疑问,欢迎留言或私信,我们下期见~
以上是关于游戏开发创新使用Unity制作方阵编队,CSDN方阵迎面走来,感谢CSDN的中秋礼物(图像采样 | 点阵 | 方阵 | 队形 | 变换 | 动画)的主要内容,如果未能解决你的问题,请参考以下文章