Python测试框架pytest(16)运行上次失败用例查看与清除缓存cache自定义标记mark
Posted AllTests软件测试
tags:
篇首语:本文由小常识网(cha138.com)小编为大家整理,主要介绍了Python测试框架pytest(16)运行上次失败用例查看与清除缓存cache自定义标记mark相关的知识,希望对你有一定的参考价值。
目录
1、运行上次失败用例
执行全部用例,第一次部分用例执行失败,此时当被测系统修复后,可执行上次失败的用例。
命令行输入 pytest -h
可以查询到两个命令行参数:--lf 和 --ff
参数:
-
--lf, --last-failed 只重新运行上次运行失败的用例(或如果没有失败的话会全部跑)。
-
--ff, --failed-first 运行所有测试,但首先运行上次运行失败的测试(这可能会重新测试,从而导致重复的fixture setup/teardown)。

创建test_lf_ff.py文件
脚本代码:
#!/usr/bin/env python
# -*- coding: utf-8 -*-
"""
微信公众号:AllTests软件测试
"""

import pytest

@pytest.fixture()
def open():
    name = "AllTests软件测试"
    return name

def test_case1(open):
    assert open == "AllTests软件测试"

def test_case2(open):
    assert open == "AllTests"

def test_case3(open2):
    assert open == "AllTests软件测试"
打开命令行,输入执行脚本命令:
pytest test_lf_ff.py运行结果:
第一次运行3个测试用例,1个passed、1个failed、1个error。
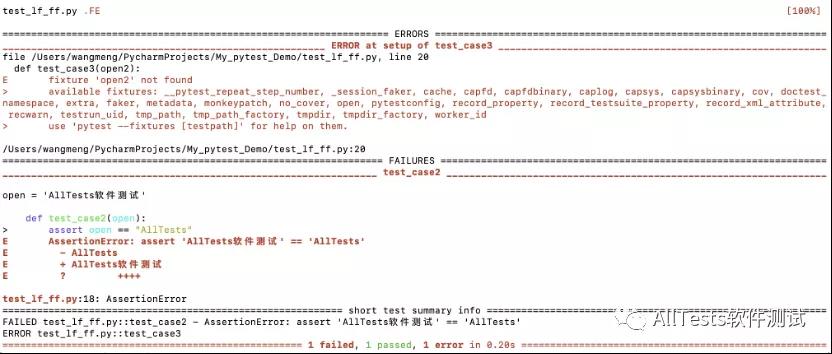
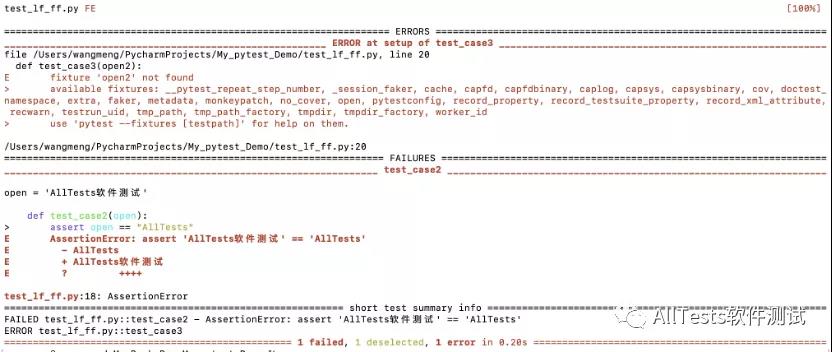
1、如果只想运行 failed 和 error 用例,使用参数 --lf
在命令行输入:
pytest --lf test_lf_ff.py运行结果:
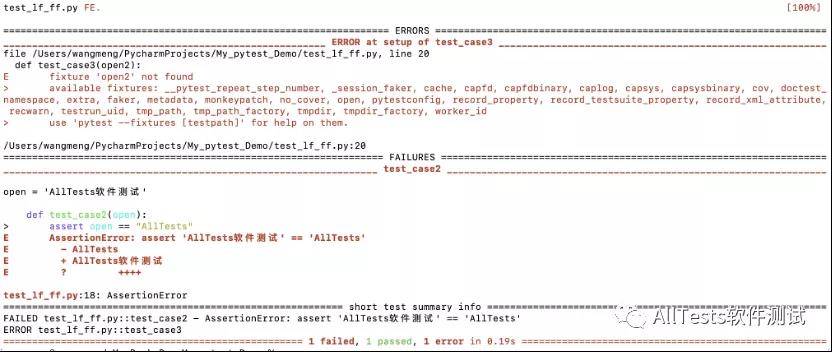
2、如果想先运行上次失败的,后运行其它通过的用例,使用参数 --ff
在命令行输入:
pytest --ff test_lf_ff.py运行结果:
2、查看与清除缓存cache
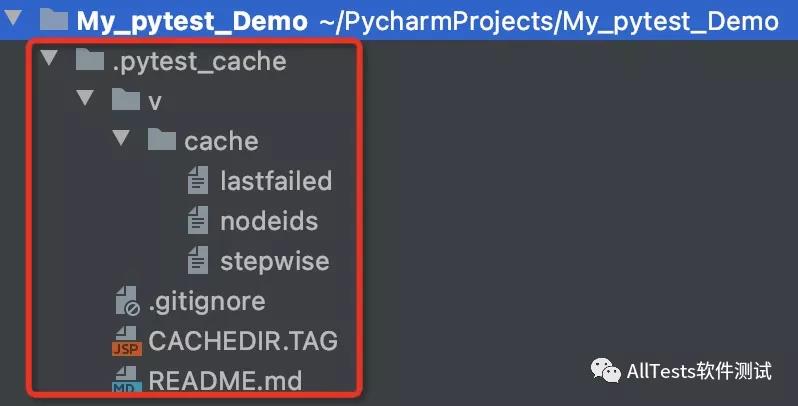
pytest 执行完测试用例之后会生成一个 .pytest_cache 的缓存文件夹,用于记录上一次失败的用例和用例的 ids 等。
pytest 命令行参数:
-
--cache-show=[CACHESHOW] 显示缓存内容,不执行收集用例或测试用例。可选参数:glob(默认值:"*")。
-
--cache-clear 在测试运行开始时删除所有缓存内容。
创建test_cache.py文件
编写4条测试用例
脚本代码:
#!/usr/bin/env python
# -*- coding: utf-8 -*-
"""
微信公众号:AllTests软件测试
"""

def test_case1():
    assert 0 == 0

def test_case2():
    assert 0 == 1

def test_case3():
    assert 0 == 0

def test_case4():
    assert 0 == 2
命令行输入执行命令:
pytest test_cache.py运行结果:
2条用例失败,2条用例成功。
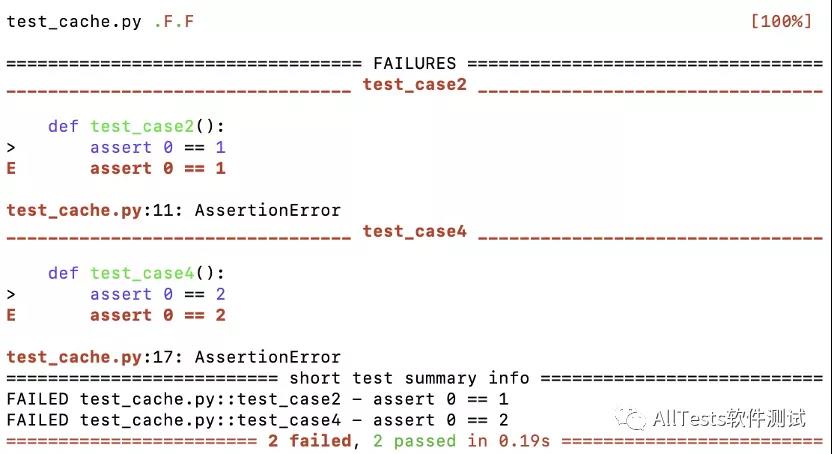
运行完成后,项目根目录会生成.pytest_cache的缓存文件夹。
目录结构:
lastfailed文件记录之前运行用例为失败的
可以看到刚执行完的用例,用例2和用例4为失败的用例。

nodeids文件记录之前所有运行用例的节点
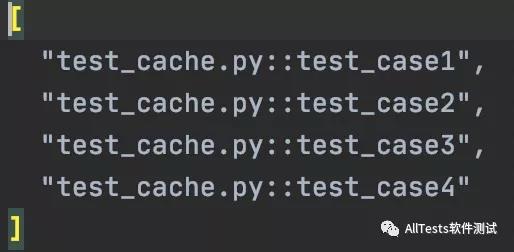
2.1、--cache-show
命令行输入执行命令:
pytest --cache-show运行结果:
显示缓存内容

2.2、--cache-clear
修改test_cache.py文件
脚本代码:
#!/usr/bin/env python
# -*- coding: utf-8 -*-
"""
微信公众号:AllTests软件测试
"""
def test_case5():
    assert 0 == 0

def test_case6():
    assert 0 == 1

def test_case7():
    assert 0 == 0

def test_case8():
    assert 0 == 2
命令行输入执行命令:
pytest test_cache.py运行结果:
2条用例失败,2条用例成功。
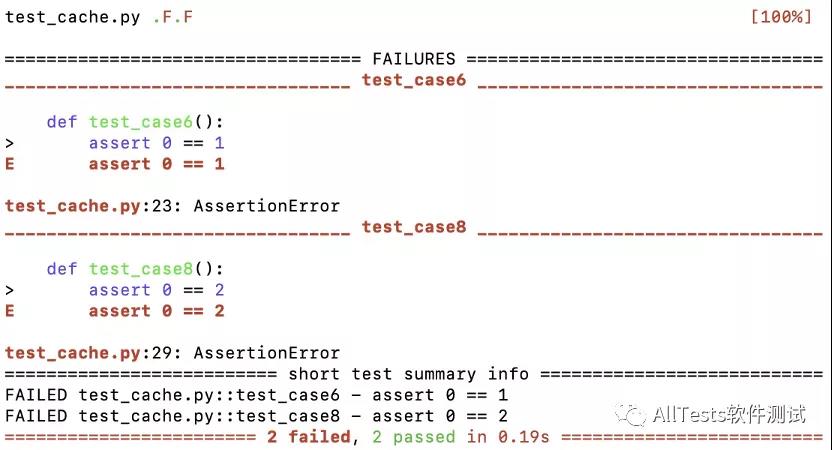
查看.pytest_cache的缓存文件夹(里面的文件记录是累加的)
lastfailed文件(包含修改test_cache.py文件之前执行的失败用例记录)
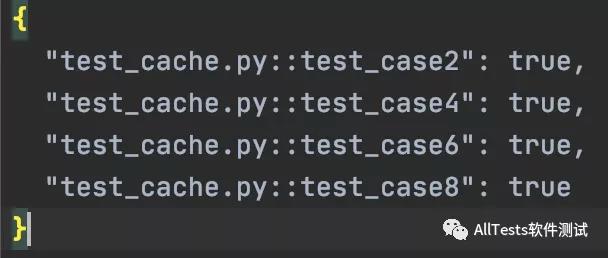
nodeids文件(包含修改test_cache.py文件之前执行的用例节点)
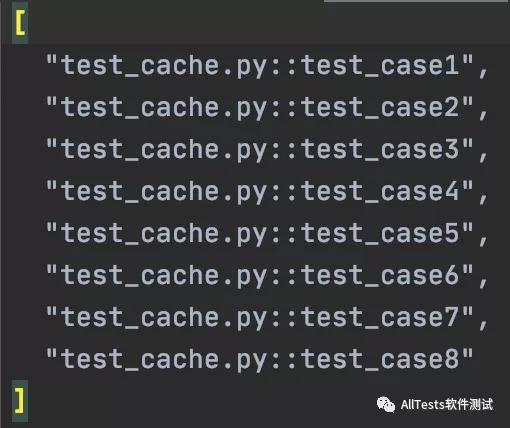
使用命令行参数--cache-clear
命令行输入执行命令:
pytest --cache-clear test_cache.py运行结果:
执行用例之前,清空所有的缓存内容。

再次查看.pytest_cache的缓存文件夹
lastfailed文件,显示最新的用例失败的记录

nodeids文件,显示最新的用例节点

3、自定义标记mark
pytest 可以支持自定义标记,自定义标记可以把一个项目划分多个模块,然后指定模块名称执行。
例如:可以标明哪些用例是在 Windows 下执行的,哪些用例是在 Mac 下执行的,在运行代码时指定 mark 即可。
示例一:
1、创建test_mark.py文件
脚本代码:
#!/usr/bin/env python
# -*- coding: utf-8 -*-
"""
微信公众号:AllTests软件测试
"""

import pytest

@pytest.mark.case1
def test_case1():
    print("====执行 test_case1====")

@pytest.mark.case2
def test_case2():
    print("====执行 test_case2====")

@pytest.mark.case2
def test_case3():
    print("====执行 test_case3====")

@pytest.mark.case3
class TestClass:
    def test_method(self):
        print("====执行 test_method====")

def test_noMark():
    print("====没有标记测试====")
2、打开命令行,输入执行命令:
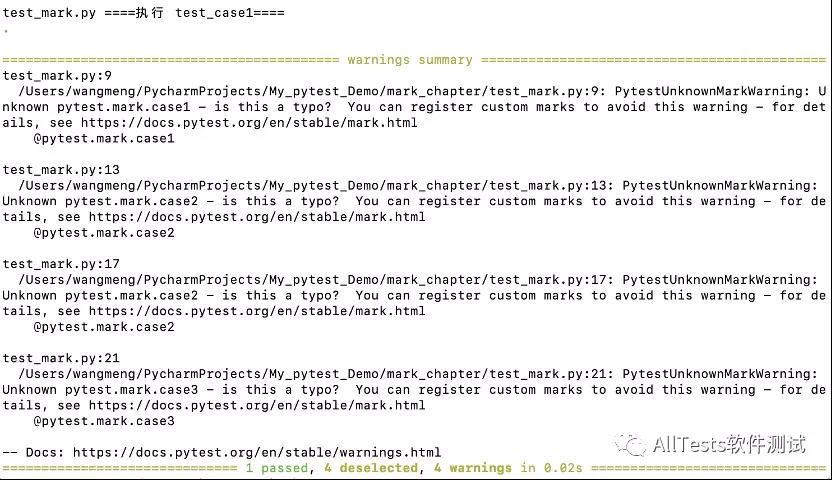
pytest -s -m case1 test_mark.py运行结果:
只执行标记是case1的(函数test_case1)。
示例二:
还是使用test_mark.py文件。
如果不想执行标记是case1,其他的都执行,直接取反即可。
打开命令行,输入执行命令:
pytest -s -m "not case1" test_mark.py运行结果:
除了标记是case1的(函数test_case1)没有执行,其他的标记都执行了。

示例三:
还是使用test_mark.py文件。
如果想执行多个自定义标记的用例,可以用or
打开命令行,输入执行命令:
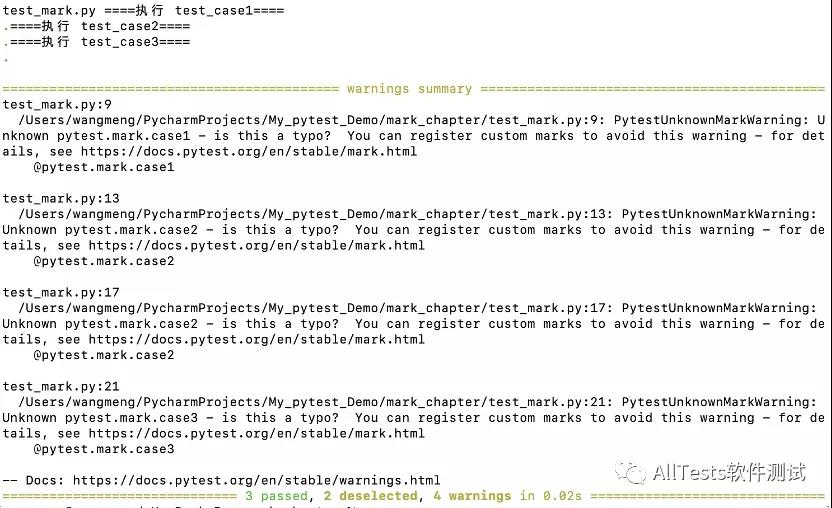
pytest -s -m "case2 or case1" test_mark.py运行结果:
执行自定义标记case1、case2。注意:执行的顺序,不一定在命令前就先执行。
示例四:
如上面几个示例,如何避免执行后有warnings信息。
1、还是使用test_mark.py文件。之后再创建一个pytest.ini文件(注意:pytest.ini需要和运行的测试用例同一个目录,或在根目录下作用于全局)。
例如:
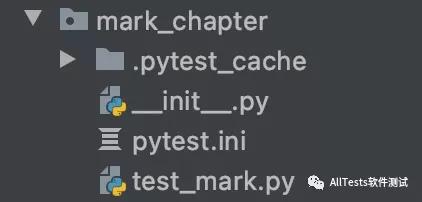
文件内容:
[pytest]
markers =
    case1: 执行case1的测试用例
    case2: 执行case2的测试用例
    case3: 执行case3的测试用例
2、打开命令行,输入执行命令:
pytest -s -m "case2 or case1" test_mark.py运行结果:
warnings信息不显示了。


以上是关于Python测试框架pytest(16)运行上次失败用例查看与清除缓存cache自定义标记mark的主要内容,如果未能解决你的问题,请参考以下文章