❤️Android 12 高斯模糊-RenderEffect❤️
Posted 帅次
tags:
篇首语:本文由小常识网(cha138.com)小编为大家整理,主要介绍了❤️Android 12 高斯模糊-RenderEffect❤️相关的知识,希望对你有一定的参考价值。
🔥 android 12 高斯模糊
新功能:更易用的模糊、彩色滤镜等特效 。
新的 API 让你能更轻松地将常见图形效果应用到视图和渲染结构上。
-
使用 RenderEffect 将模糊、色彩滤镜等效果应用于 RenderNode 或 View。
-
使用新的 Window.setBackgroundBlurRadius() API 为窗口背景创建雾面玻璃效果,
-
使用 blurBehindRadius 来模糊窗口后面的所有内容。
咱们一个一个玩。
🔥 RenderEffect
💥 实现效果
    private void setBlur(){
        View.setRenderEffect(RenderEffect.createBlurEffect(3, 3, Shader.TileMode.REPEAT));
        ...
    }
使用特别简单,走你。
🌀 X 轴的模糊效果图

咱再看看代码
    private void setBlur(){
        agb.iv1.setRenderEffect(RenderEffect.createBlurEffect(3, 0, Shader.TileMode.CLAMP));
        agb.iv2.setRenderEffect(RenderEffect.createBlurEffect(8, 0, Shader.TileMode.REPEAT));
        agb.iv3.setRenderEffect(RenderEffect.createBlurEffect(18, 0 ,Shader.TileMode.MIRROR));
        agb.iv4.setRenderEffect(RenderEffect.createBlurEffect(36, 0,Shader.TileMode.DECAL));
    }
RenderEffect.createBlurEffect()的四个参数:
-
radiusX 沿 X 轴的模糊半径
-
radiusY 沿 Y 轴的模糊半径
-
inputEffect 模糊一次(传入 RenderEffect)
-
edgeTreatment 用于如何模糊模糊内核边缘附近的内容
下面两种仅看效果图。就不做代码设置了。
🌀 Y 轴的模糊效果图

🌀 XY同时模糊效果图

第四个参数对边缘模糊,效果图如下:

Shader.TileMode 提供了四个选项恕我没看出来。。
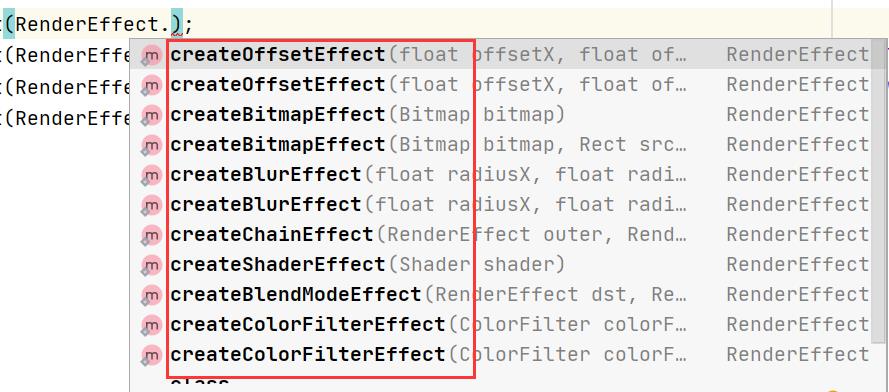
这里还有一堆方法等你玩。

注意:注意如此完美的画面只能在 Android 12(SDK31)及以上的设备上使用,其他版本的设备使用会导致崩溃,谨记谨记。 效果有了,下面咱们一起看看源码。
💥 源码
🌀 View.setRenderEffect()
    public void setRenderEffect(@Nullable RenderEffect renderEffect) {
        ...
    }
这个方法就是:renderEffect 应用于 View。 传入 null清除之前配置的RenderEffect 。这里咱们先看传入的 RenderEffect。
🌀 RenderEffect.createBlurEffect()
    public static RenderEffect createBlurEffect(
            float radiusX,
            float radiusY,
            @NonNull RenderEffect inputEffect,
            @NonNull TileMode edgeTreatment
    ) {
        long nativeInputEffect = inputEffect != null ? inputEffect.mNativeRenderEffect : 0;
        return new RenderEffect(
                nativeCreateBlurEffect(
                        radiusX,
                        radiusY,
                        nativeInputEffect,
                        edgeTreatment.nativeInt
                )
            );
    }
两个 createBlurEffect() 方法,分别为三参(模糊一次)和四参(模糊两次)。inputEffect 先进行了一次模糊。
看效果图:

模糊程度一样,但是实现方式不同:
    private void setBlur() {
        RenderEffect radiusXRenderEffect = RenderEffect.createBlurEffect(10, 0, Shader.TileMode.MIRROR);
        RenderEffect radiusYRenderEffect = RenderEffect.createBlurEffect(0, 10, Shader.TileMode.MIRROR);
        agb.iv1.setRenderEffect(RenderEffect.createBlurEffect(10, 10, Shader.TileMode.CLAMP));
        agb.iv2.setRenderEffect(RenderEffect.createBlurEffect(10, 10, Shader.TileMode.REPEAT));
        //自身radiusY 为 0 ,传入的radiusYRenderEffect设置的radiusY为10;
        agb.iv3.setRenderEffect(RenderEffect.createBlurEffect(10, 0, radiusYRenderEffect, Shader.TileMode.MIRROR));
        //自身radiusX 为 0 ,传入的radiusXRenderEffect设置的radiusX为10;
        agb.iv4.setRenderEffect(RenderEffect.createBlurEffect(0, 10, radiusXRenderEffect, Shader.TileMode.DECAL));
    }
这个方法返回一个 new RenderEffect(nativeCreateBlurEffect(...)。
那咱们去看看 nativeCreateBlurEffect()
🌀 nativeCreateBlurEffect()
frameworks/base/libs/hwui/jni/RenderEffect.cpp
static const JNINativeMethod gRenderEffectMethods[] = {
    ...
    {"nativeCreateBlurEffect", "(FFJI)J", (void*)createBlurEffect},
    ...
};

static jlong createBlurEffect(JNIEnv* env , jobject, jfloat radiusX,
        jfloat radiusY, jlong inputFilterHandle, jint edgeTreatment) {
    auto* inputImageFilter = reinterpret_cast<SkImageFilter*>(inputFilterHandle);
    sk_sp<SkImageFilter> blurFilter =
            SkImageFilters::Blur(
                    Blur::convertRadiusToSigma(radiusX),
                    Blur::convertRadiusToSigma(radiusY),
                    static_cast<SkTileMode>(edgeTreatment),
                    sk_ref_sp(inputImageFilter),
                    nullptr);
    return reinterpret_cast<jlong>(blurFilter.release());
}
这里有两个函数来处理我们传过来的模糊的值,咱进去看看。
🌀 convertRadiusToSigma(convertSigmaToRadius)
//该常数近似于在SkBlurMask::Blur()(1/sqrt(3)中,在软件路径的"高质量"模式下进行的缩放。
static const float BLUR_SIGMA_SCALE = 0.57735f;

float Blur::convertRadiusToSigma(float radius) {
    return radius > 0 ? BLUR_SIGMA_SCALE * radius + 0.5f : 0.0f;
}

float Blur::convertSigmaToRadius(float sigma) {
    return sigma > 0.5f ? (sigma - 0.5f) / BLUR_SIGMA_SCALE : 0.0f;
}
🌀 sk_ref_sp(inputImageFilter)
external/skia/include/core/SkRefCnt.h
/*
 *  返回包装提供的 ptr 的 sk_sp 并对其调用 ref (如果不为空)
 */
template <typename T> sk_sp<T> sk_ref_sp(T* obj) {
    //sk_sp<SkImageFilter> :
    return sk_sp<T>(SkSafeRef(obj));
}

//SkSafeRef:检查参数是否为非空,如果是,则调用 obj->ref() 并返回 obj。
template <typename T> static inline T* SkSafeRef(T* obj) {
    if (obj) {
        obj->ref();
    }
    return obj;
}
🌀 SkImageFilters::Blur()
#define SK_Scalar1                  1.0f
#define SK_ScalarNearlyZero         (SK_Scalar1 / (1 << 12))

sk_sp<SkImageFilter> SkImageFilters::Blur(
        SkScalar sigmaX, SkScalar sigmaY, SkTileMode tileMode, sk_sp<SkImageFilter> input,
        const CropRect& cropRect) {
    if (sigmaX < SK_ScalarNearlyZero && sigmaY < SK_ScalarNearlyZero && !cropRect) {
        return input;
    }
    return sk_sp<SkImageFilter>(
          new SkBlurImageFilter(sigmaX, sigmaY, tileMode, input, cropRect));
}
附上最后的倔强
    constexpr sk_sp() : fPtr(nullptr) {}
    constexpr sk_sp(std::nullptr_t) : fPtr(nullptr) {}

    /**
     *  Shares the underlying object by calling ref(), so that both the argument and the newly
     *  created sk_sp both have a reference to it.
     */
    sk_sp(const sk_sp<T>& that) : fPtr(SkSafeRef(that.get())) {}
    template <typename U,
              typename = typename std::enable_if<std::is_convertible<U*, T*>::value>::type>
    sk_sp(const sk_sp<U>& that) : fPtr(SkSafeRef(that.get())) {}

    /**
     *  Move the underlying object from the argument to the newly created sk_sp. Afterwards only
     *  the new sk_sp will have a reference to the object, and the argument will point to null.
     *  No call to ref() or unref() will be made.
     */
    sk_sp(sk_sp<T>&& that) : fPtr(that.release()) {}
    template <typename U,
              typename = typename std::enable_if<std::is_convertible<U*, T*>::value>::type>
    sk_sp(sk_sp<U>&& that) : fPtr(that.release()) {}

    /**
     *  Adopt the bare pointer into the newly created sk_sp.
     *  No call to ref() or unref() will be made.
     */
    explicit sk_sp(T* obj) : fPtr(obj) {}
createBlurEffect() 得到 long 类型的 native 分配的的非零地址, 传入 new RenderEffect()
🌀 new RenderEffect()
    /* 构造方法:仅从静态工厂方法构造 */
    private RenderEffect(long nativeRenderEffect) {
        mNativeRenderEffect = nativeRenderEffect;
        RenderEffectHolder.RENDER_EFFECT_REGISTRY.registerNativeAllocation(
                this, mNativeRenderEffect);
    }
继续
    /**
      * @param classLoader ClassLoader 类加载器。
      * @param freeFunction 类型为 nativePtr 的本机函数的地址,用于释放这种本机分配
      * @return 由系统内存分配器分配的本机内存的 NativeAllocationRegistry。此版本更适合较小的对象(通常小于几百 KB)。
      */
    private static class RenderEffectHolder {
        public static final NativeAllocationRegistry RENDER_EFFECT_REGISTRY =
                NativeAllocationRegistry.createMalloced(
                        RenderEffect.class.getClassLoader(), nativeGetFinalizer());
    }
🌀 NativeAllocationRegistry.createMalloced()
libcore/luni/src/main/java/libcore/util/NativeAllocationRegistry.java
    @SystemApi(client = MODULE_LIBRARIES)
    public static NativeAllocationRegistry createMalloced(
            @NonNull ClassLoader classLoader, long freeFunction, long size) {
        return new NativeAllocationRegistry(classLoader, freeFunction, size, true);
    }
🌀 NativeAllocationRegistry()
libcore/luni/src/main/java/libcore/util/NativeAllocationRegistry.java
    private NativeAllocationRegistry(ClassLoader classLoader, long freeFunction, long size,
            boolean mallocAllocation) {
        if (size < 0) {
            throw new IllegalArgumentException("Invalid native allocation size: " + size);
        }
        this.classLoader = classLoader;
        this.freeFunction = freeFunction;
        this.size = mallocAllocation ? (size | IS_MALLOCED) : (size & ~IS_MALLOCED);
    }
既然拿到 NativeAllocationRegistry 那就继续调用其 registerNativeAllocation() 方法。
🌀 registerNativeAllocation ()
    @SystemApi(client = MODULE_LIBRARIES)
    @libcore.api.IntraCoreApi
    public @NonNull Runnable registerNativeAllocation(@NonNull Object referent, long nativePtr) {
        //当 referent 或nativePtr 为空
        ...
        CleanerThunk thunk;
        CleanerRunner result;
        try {
            thunk = new CleanerThunk();
            Cleaner cleaner = Cleaner.create(referent, thunk);
            result = new CleanerRunner(cleaner);
            registerNativeAllocation(this.size);
        } catch (VirtualMachineError vme /* probably OutOfMemoryError */) {
            applyFreeFunction(freeFunction, nativePtr);
            throw vme;
        }
        // Enable the cleaner only after we can no longer throw anything, including OOME.
        thunk.setNativePtr(nativePtr);
        // Ensure that cleaner doesn't get invoked before we enable it.
        Reference.reachabilityFence(referent);
        return result;
    }
向 ART 注册新的 NativePtr 和关联的 Java 对象(也就是咱们设置的模糊类)。
返回的 Runnable 可用于在引用变得无法访问之前释放本机分配。如果运行时或使用 runnable 已经释放了本机分配,则 runnable 将不起作用。
RenderEffect 算是搞完了,咱们回到View.setRenderEffect()
🌀 View.setRenderEffect()
    public void setRenderEffect(@Nullable RenderEffect renderEffect) {
        if (mRenderNode.setRenderEffect(renderEffect)) {
            //视图属性更改(alpha、translationXY 等)的快速失效。
            invalidateViewProperty(true, true);
        }
    }
这里有个 mRenderNode.setRenderEffect(renderEffect)。咱们近距离观望一番。
🌀 mRenderNode 的创建
咱们先找找他是在什么地方创建的。
    public View(Context context) {
        ...
        //在View的构造方法中创建
        mRenderNode = RenderNode.create(getClass().getName(), new ViewAnimationHostBridge(this));
        ...
    }
🌀 RenderNode.create()
    /** @hide */
    public static RenderNode create(String name, @Nullable AnimationHost animationHost) {
        return new RenderNode(name, animationHost);
    }

    private RenderNode(String name, AnimationHost animationHost) {
        mNativeRenderNode = nCreate(name);
        //注册 Native Allocation。
        NoImagePreloadHolder.sRegistry.registerNativeAllocation(this, mNativeRenderNode);
        mAnimationHost = animationHost;
    }
再往下感觉也看不到啥了 跟上面类似,看.cpp动态分配类的地址还是有点懵。让我缓缓~以后补充。
以上是关于❤️Android 12 高斯模糊-RenderEffect❤️的主要内容,如果未能解决你的问题,请参考以下文章