pyqt开发技巧及实例
Posted 狂奔的CD
tags:
篇首语:本文由小常识网(cha138.com)小编为大家整理,主要介绍了pyqt开发技巧及实例相关的知识,希望对你有一定的参考价值。
环境准备
conda+python+pycharm+pyqt
配置好pycharm的工具
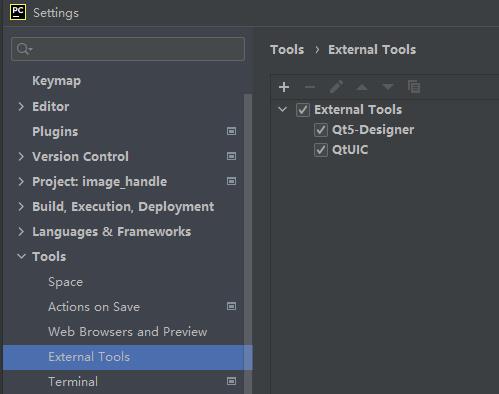
制作界面
使用Qt5-Designer做好界面后,再使用QtUIC转换为python 代码
显示界面
main函数中继承界面,并显示
from ui.mainUI import Ui_MainWindow
class Ui_MainWindow(QtWidgets.QMainWindow, Ui_MainWindow):
    def __init__(self, parent=None):
        super(Ui_MainWindow, self).__init__(parent)
        self.set_ui()
        self.exit = 0

    def set_ui(self):
        self.setupUi(self)

        # 窗口背景色
        palette1 = QtGui.QPalette()
        palette1.setColor(palette1.Background, QtGui.QColor(255, 255, 255))
        self.setPalette(palette1)


    def closeEvent(self, a0: QtGui.QCloseEvent) -> None:
        print("窗口关闭")
        self.exit = 1


if __name__ == "__main__":
    app = QApplication(sys.argv)
    window = Ui_MainWindow()
    window.show()
    sys.exit(app.exec_())
其他控件的实现
视频或者图像控件
使用一个label作为载体, 设置背景色为黑色
def set_ui(self):
    ...
	# 视频区域背景色
	palette2 = QtGui.QPalette()
	palette2.setColor(palette2.Background, QtGui.QColor(0, 0, 0))
	self.label_img.setAutoFillBackground(True)
	self.label_img.setPalette(palette2)
	self.label_img.setAlignment(QtCore.Qt.AlignTop)
填充图像或者视频的一帧
	img = cv2.imread(filename)
    t_frame = cv2.resize(img, (640, 480))
    t_frame = cv2.cvtColor(t_frame,cv2.COLOR_BGR2RGB)
    showImage = QtGui.QImage(t_frame.data, t_frame.shape[1], t_frame.shape[0],
                             QtGui.QImage.Format_RGB888)
    qtFrame = QtGui.QPixmap.fromImage(showImage)
    self.label_img.setPixmap(qtFrame)
选择本地文件
 # 选择文件
 filename, _ = QFileDialog.getOpenFileName(self, "getOpenFileName",
                                            '',  # 文件的起始路径,不填代表从上一次的位置打开
                                            'Images (*.png *.xpm *.jpg)')  # 设置文件类型
view绑定自定义属性
self.checkBox11.setProperty("tag","1-1")
多个view共用点击事件
# 绑定事件
self.checkBox11.setProperty("tag","1-1")
self.checkBox11.clicked.connect(self.checkBoxClicked)
self.checkBox21.setProperty("tag","2-1")
self.checkBox21.clicked.connect(self.checkBoxClicked)
self.checkBox31.setProperty("tag", "3-1")
self.checkBox31.clicked.connect(self.checkBoxClicked)
self.checkBox32.setProperty("tag", "3-2")
self.checkBox32.clicked.connect(self.checkBoxClicked)
self.checkBox41.setProperty("tag", "4-1")
self.checkBox41.clicked.connect(self.checkBoxClicked)
self.checkBox51.setProperty("tag", "5-1")
self.checkBox51.clicked.connect(self.checkBoxClicked)
self.checkBox61.setProperty("tag", "6-1")
self.checkBox61.clicked.connect(self.checkBoxClicked)


# 事件中确定谁被点击
def checkBoxClicked(self):
    print('click: ' + self.sender().property("tag"))
QListView的使用
自定义绘制(只显示,无法添加事件)
# 定义委托
class MyDelegate(QStyledItemDelegate):
    """
    自定义的委托
    用来在Model获取后,view显示前,再将数据渲染一次
    """

    def paint(self, painter, option, index):
        if index.isValid():
            painter.save()

            # 首先,从索引获取数据,这里获取当前索引角色为DisplayRole的数据
            item_var = index.data(QtCore.Qt.DisplayRole)

            if not item_var:
                return
            # item区域
            rect = QRectF()
            rect.setCoords(option.rect.x(), option.rect.y(), option.rect.x() + option.rect.width(),
                           option.rect.y() + option.rect.height())

            # 选中时高亮
            if option.state & QStyle.State_Selected:
                painter.setBrush(QColor(180, 0, 0))
                painter.drawRect(rect.topLeft().x(), rect.topLeft().y(), rect.width(), rect.height())


            '''
            # 图像区域
            imageRect = QRect(rect.x() + 10, rect.y() + 10, 80, 80)
            # 绘制图像
            if item_var.image is None:
                show = np.zeros((80, 80, 3))
            else:
                show = cv2.cvtColor(item_var.image, cv2.COLOR_BGR2RGB)
            showImage = QtGui.QImage(show.data, show.shape[1], show.shape[0], QtGui.QImage.Format_RGB888)
            painter.drawImage(imageRect, showImage)
            '''

            # 文本区域
            titleRect = QRect(rect.x() + 10, rect.y() + 10, rect.width() - 10, 20)
            if option.state & QStyle.State_Selected:
                painter.setPen(QtGui.QPen(QtCore.Qt.white))
            else:
                painter.setPen(QtGui.QPen(QtCore.Qt.black))
            painter.setFont(QFont("Microsoft Yahei", 12))
            painter.drawText(titleRect, 0, "第%s步 :%s %s-%s" % (index.row() + 1, item_var.name, item_var.title, item_var.method))


            painter.restore()

    # 需要指定item宽高
    def sizeHint(self, option: 'QStyleOptionViewItem', index: QtCore.QModelIndex) -> QtCore.QSize:
        return QSize(option.rect.width(), 90)
# 初始化列表
self.list_model = QtGui.QStandardItemModel()
self.listView.setModel(self.list_model)
# 新建一个委托(Delagate)
delegate = MyDelegate()
# 设置view的delegate
self.listView.setItemDelegate(delegate)
# 添加点击事件
self.listView.clicked.connect(self.listItemClicked)
item增删改
1)新增并填充数据
#
self.list_model.clear()
for w in self.workflow:
    item = QtGui.QStandardItem()
    item.setData(w, QtCore.Qt.DisplayRole)
    self.list_model.appendRow(item)
self.listView.update()
self.listView.scrollToBottom()
2)删除item
#
# 获取行数
row = qModelIndex.row()
# 数据移除
self.workflow.pop(row)
# 界面刷新
self.list_model.takeRow(row)
以上是关于pyqt开发技巧及实例的主要内容,如果未能解决你的问题,请参考以下文章