视觉slam学习笔记以及课后习题《第四讲相机模型和非线性优化》
Posted 啦啦啦1231213
tags:
篇首语:本文由小常识网(cha138.com)小编为大家整理,主要介绍了视觉slam学习笔记以及课后习题《第四讲相机模型和非线性优化》相关的知识,希望对你有一定的参考价值。
这篇博客主要记录了我在深蓝学院视觉slam课程中的课后习题,因为是为了统计知识点来方便自己以后查阅,所以有部分知识可能不太严谨,如果给大家造成了困扰请见谅,大家发现了问题也可以私信或者评论给我及时改正,欢迎大家一起探讨。其他章的笔记可以在我的首页文章中查看。
整个作业的代码和文档都可以参考我的GitHub存储库GitHub - 1481588643/vslam
如果想要了解视觉slam其他章节的内容,也可以查阅以下链接视觉slam学习笔记以及课后习题《第三讲李群李代数》_m0_61238051的博客-CSDN博客
视觉slam学习笔记以及课后习题《第一讲初识slam》_m0_61238051的博客-CSDN博客_slam下载地址
视觉slam学习笔记以及课后习题《第二讲三维物体刚体运动》_m0_61238051的博客-CSDN博客
一.图像去畸变 (2 分,约 小时)
现实生活中的图像总存在畸变。原则上来说,针孔透视相机应该将三维世界中的直线投影成直线,但 是当我们使用广角和鱼眼镜头时,由于畸变的原因,直线在图像里看起来是扭曲的。本次作业,你将尝试 如何对一张图像去畸变,得到畸变前的图像。
|
| |
图 1: 测试图像
图 1 是本次习题的测试图像(code/test.png),来自 EuRoC 数据集 [1]。可以明显看到实际的柱子、箱子的直线边缘在图像中被扭曲成了曲线。这就是由相机畸变造成的。根据我们在课上的介绍,畸变前后的 坐标变换为
xdistorted = x 1 + k1r2 + k2r4 + 2p1xy + p2 r2 + 2x2
ydistorted = y 1 + k1r2 + k2r4 + p1 r2 + 2y2 + 2p2xy
其中 x, y 为去畸变后的坐标,xdistorted, ydistroted 为去畸变前的坐标。现给定参数:
k1 = −0.28340811, k2 = 0.07395907, p1 = 0.00019359, p2 = 1.76187114e − 05.
(1)以及相机内参
fx = 458.654, fy = 457.296, cx = 367.215, cy = 248.375.
请根据 undistort_image.cpp 文件中内容,完成对该图像的去畸变操作。
注:本题不要使用 OpenCV 自带的去畸变函数,你需要自己理解去畸变的过程。我给你准备的程序中已经有了基本的提示。作为验证,去畸变后图像如图 2 所示。如你所见,直线应该是直的。
|
|
图 2: 验证图像
#include <iostream>
#include <opencv2/opencv.hpp>
#include <Eigen/Core>
#include <Eigen/Dense>

using namespace std;
using namespace Eigen;

int main(int argc, char **argv) {
    double ar = 1.0, br = 2.0, cr = 1.0;         // 真实参数值
    double ae = 2.0, be = -1.0, ce = 5.0;        // 估计参数值
    int N = 100;                                 // 数据点
    double w_sigma = 1.0;                        // 噪声Sigma值
    double inv_sigma=1/w_sigma;


    cv::RNG rng;                                 // OpenCV随机数产生器

    vector<double> x_data, y_data;      // 数据
    for (int i = 0; i < N; i++) {
        double x = i / 100.0;
        x_data.push_back(x);
        y_data.push_back(exp(ar * x * x + br * x + cr) + rng.gaussian(w_sigma));
    }

    // 开始Gauss-Newton迭代
    int iterations = 100;    // 迭代次数
    double cost = 0, lastCost = 0;  // 本次迭代的cost和上一次迭代的cost

    for (int iter = 0; iter < iterations; iter++) {

        Matrix3d H = Matrix3d::Zero();             // Hessian = J^T J in Gauss-Newton
        Vector3d b = Vector3d::Zero();             // bias
        cost = 0;

        for (int i = 0; i < N; i++) {
            double xi = x_data[i], yi = y_data[i];  // 第i个数据点
            // start your code here
            double error = yi-exp(ae*xi*xi+be*xi+ce);   // 第i个数据点的计算误差
   // 填写计算error的表达式
            Vector3d J; // 雅可比矩阵
            J[0] = -xi*xi*exp(ae*xi*xi+be*xi+ce);  // de/da
            J[1] = -xi*exp(ae*xi*xi+be*xi+ce);  // de/db
            J[2] = -exp(ae*xi*xi+be*xi+ce);  // de/dc

            H +=J * J.transpose(); // GN近似的H
            b += -error * J;
            // end your code here

            cost += error * error;
        }

        // 求解线性方程 Hx=b,建议用ldlt
 	// start your code here
        Vector3d dx=H.ldlt().solve(b);
	// end your code here

        if (isnan(dx[0])) {
            cout << "result is nan!" << endl;
            break;
        }

        if (iter > 0 && cost > lastCost) {
            // 误差增长了,说明近似的不够好
            cout << "cost: " << cost << ", last cost: " << lastCost << endl;
            break;
        }

        // 更新abc估计值
        ae += dx[0];
        be += dx[1];
        ce += dx[2];

        lastCost = cost;

        cout << "total cost: " << cost << endl;
    }

    cout << "estimated abc = " << ae << ", " << be << ", " << ce << endl;
    return 0;
}
二.鱼眼模型与去畸变 ( 分,约 小时)
在很多视觉 SLAM 的应用里,我们都会选择广角或鱼眼相机作为主要的视觉传感器。与针孔相机不同,鱼眼相机的视野往往可以在 150◦ 以上,甚至超过 180◦。普通的畸变模型在鱼眼相机下工作的并不好, 幸好鱼眼相机有自己定义的畸变模型。
请参阅 OpenCV 文档 (https://docs.opencv.org/3.4/db/d58/group calib3d fisheye.html), 完成以下问题:
- 请说明鱼眼相机相比于普通针孔相机在 SLAM 方面的优势。
大多数视觉SLAM系统都受到普通针孔摄像机视场有限的影响,这很容易由于视角的突然变化或捕捉无纹理场景而导致跟踪过程失败.在用于测绘的移动测绘系统(MMS)中,由于成像和存储器访问速度有限,大尺寸传感器(例如与计算机视觉中使用的640×480传感器相比,8000×4000像素)需要宽基线拍摄模式,这一问题会加剧.因此,宽FoV的光学传感器,如鱼眼或全景/全向相机,成为一个很好的选择.全景相机可以一次拍摄360°的场景,越来越多地应用于街景地图收集、交通监控、虚拟现实和机器人导航.
2.请整理并描述 OpenCV 中使用的鱼眼畸变模型(等距投影)是如何定义的,它与上题的畸变模型有何不同。
鱼眼相机和单目相机的畸变模型可以参考以下两篇博文:
鱼眼相机成像模型_m0_61238051的博客-CSDN博客
机器视觉——单目相机模型(坐标标定以及去畸变)_m0_61238051的博客-CSDN博客
3.完成 fisheye.cpp 文件中的内容。针对给定的图像,实现它的畸变校正。要求:通过手写方式实现, 不允许调用 OpenCV 的 API。
#include <iostream>
#include <opencv2/opencv.hpp>
#include <Eigen/Core>
#include <Eigen/Dense>

using namespace std;
using namespace Eigen;

int main(int argc, char **argv) {
    double ar = 1.0, br = 2.0, cr = 1.0;         // 真实参数值
    double ae = 2.0, be = -1.0, ce = 5.0;        // 估计参数值
    int N = 100;                                 // 数据点
    double w_sigma = 1.0;                        // 噪声Sigma值
    double inv_sigma=1/w_sigma;


    cv::RNG rng;                                 // OpenCV随机数产生器

    vector<double> x_data, y_data;      // 数据
    for (int i = 0; i < N; i++) {
        double x = i / 100.0;
        x_data.push_back(x);
        y_data.push_back(exp(ar * x * x + br * x + cr) + rng.gaussian(w_sigma));
    }

    // 开始Gauss-Newton迭代
    int iterations = 100;    // 迭代次数
    double cost = 0, lastCost = 0;  // 本次迭代的cost和上一次迭代的cost

    for (int iter = 0; iter < iterations; iter++) {

        Matrix3d H = Matrix3d::Zero();             // Hessian = J^T J in Gauss-Newton
        Vector3d b = Vector3d::Zero();             // bias
        cost = 0;

        for (int i = 0; i < N; i++) {
            double xi = x_data[i], yi = y_data[i];  // 第i个数据点
            // start your code here
            double error = yi-exp(ae*xi*xi+be*xi+ce);   // 第i个数据点的计算误差
   // 填写计算error的表达式
            Vector3d J; // 雅可比矩阵
            J[0] = -xi*xi*exp(ae*xi*xi+be*xi+ce);  // de/da
            J[1] = -xi*exp(ae*xi*xi+be*xi+ce);  // de/db
            J[2] = -exp(ae*xi*xi+be*xi+ce);  // de/dc

            H +=J * J.transpose(); // GN近似的H
            b += -error * J;
            // end your code here

            cost += error * error;
        }

        // 求解线性方程 Hx=b,建议用ldlt
 	// start your code here
        Vector3d dx=H.ldlt().solve(b);
	// end your code here

        if (isnan(dx[0])) {
            cout << "result is nan!" << endl;
            break;
        }

        if (iter > 0 && cost > lastCost) {
            // 误差增长了,说明近似的不够好
            cout << "cost: " << cost << ", last cost: " << lastCost << endl;
            break;
        }

        // 更新abc估计值
        ae += dx[0];
        be += dx[1];
        ce += dx[2];

        lastCost = cost;

        cout << "total cost: " << cost << endl;
    }

    cout << "estimated abc = " << ae << ", " << be << ", " << ce << endl;
    return 0;
}- 什么在这张图像中,我们令畸变参数 k1, . . . , k4 = 0,依然可以产生去畸变的效果?
答:在k1;k2;k3;k4都为0时,theta_d就等于theta。此时也可以使鱼眼相机达到去畸变的效果
5.在鱼眼模型中,去畸变是否带来了图像内容的损失?如何避免这种图像内容上的损失呢?
答:在鱼眼模型中,去畸变带来了图像内容的损失。
|
| |
三.双目视差的使用 (2 分,约 1 小时)
双目相机的一大好处是可以通过左右目的视差来恢复深度。课程中我们介绍了由视差计算深度的过程。 本题,你需要根据视差计算深度,进而生成点云数据。本题的数据来自 Kitti 数据集 [2]。
Kitti 中的相机部分使用了一个双目模型。双目采集到左图和右图,然后我们可以通过左右视图恢复出深度。经典双目恢复深度的算法有 BM(Block Matching), SGBM(Semi-Global Block Matching)[3, 4] 等, 但本题不探讨立体视觉内容(那是一个大问题)。我们假设双目计算的视差已经给定,请你根据双目模型, 画出图像对应的点云,并显示到 Pangolin 中。
理论部分:
1.推导双目相机模型下,视差与 XY Z 坐标的关系式。请给出由像素坐标加视差 u, v, d 推导 XY Z与已知 XY Z 推导 u, v, d 两个关系。
双目相机模型可以参考此博文:
机器视觉——双目视觉的基础知识(视差深度、标定、立体匹配)_m0_61238051的博客-CSDN博客
2.推导在右目相机下该模型将发生什么改变。
单目相机模型可以参考此博文:
机器视觉——单目相机模型(坐标标定以及去畸变)_m0_61238051的博客-CSDN博客
编程部分:
本题给定的左右图见 code/left.png 和 code/right.png,视差图亦给定,见 code/right.png。双目的参数如下:
fx = 718.856, fy = 718.856, cx = 607.1928, cy = 185.2157.
且双目左右间距(即基线)为:
d = 0.573 m.
请根据以上参数,计算相机数据对应的点云,并显示到 Pangolin 中。程序请参考 code/disparity.cpp 文件。


图 4: 双目图像的左图、右图与视差
作为验证,生成点云应如图 5 所示。
|
| |
图 5: 双目生成点云结果
#include <opencv2/opencv.hpp>
#include <string>
#include <Eigen/Core>
#include <pangolin/pangolin.h>
#include <unistd.h>

using namespace std;
using namespace Eigen;

// 文件路径,如果不对,请调整
string left_file = "/home/wang/桌面/L4/code/left.png";
string right_file = "/home/wang/桌面/L4/code/right.png";
string disparity_file = "/home/wang/桌面/L4/code/disparity.png";

// 在panglin中画图,已写好,无需调整
void showPointCloud(const vector<Vector4d, Eigen::aligned_allocator<Vector4d>> &pointcloud);

int main(int argc, char **argv) {

    // 内参
    double fx = 718.856, fy = 718.856, cx = 607.1928, cy = 185.2157;
    // 间距
    double d = 0.573;
    // 读取图像
    cv::Mat left = cv::imread(left_file, 0);
    cv::Mat right = cv::imread(right_file, 0);
    cv::Mat disparity = cv::imread(disparity_file, 0); // disparty 为CV_8U,单位为像素
    // 生成点云
    vector<Vector4d, Eigen::aligned_allocator<Vector4d>> pointcloud;

    for (int v = 0; v < left.rows; v++)
        for (int u = 0; u < left.cols; u++) {

            Vector4d point(0, 0, 0, left.at<uchar>(v, u) / 255.0); // 前三维为xyz,第四维为颜色

            // 根据双目模型计算 point 的位置
             unsigned int depth = disparity.ptr<unsigned short>(v)[u]; //深度值
            // if(depth == 0)continue; //深度为0表示未测量到

            point[2]=(fx*d*1000)/depth;
            point[1]=(v-cy)*point[2]/fy;
            point[0]=(u-cx)*point[2]/fx;

            pointcloud.push_back(point);
        }

    // 画出点云
    showPointCloud(pointcloud);
    return 0;
}


void showPointCloud(const vector<Vector4d, Eigen::aligned_allocator<Vector4d>> &pointcloud) {

    if (pointcloud.empty()) {
        cerr << "Point cloud is empty!" << endl;
        return;
    }

    pangolin::CreateWindowAndBind("Point Cloud Viewer", 1024, 768);
    glEnable(GL_DEPTH_TEST);
    glEnable(GL_BLEND);
    glBlendFunc(GL_SRC_ALPHA, GL_ONE_MINUS_SRC_ALPHA);

    pangolin::OpenGlRenderState s_cam(
            pangolin::ProjectionMatrix(1024, 768, 500, 500, 512, 389, 0.1, 1000),
            pangolin::ModelViewLookAt(0, -0.1, -1.8, 0, 0, 0, 0.0, -1.0, 0.0)
    );

    pangolin::View &d_cam = pangolin::CreateDisplay()
            .SetBounds(0.0, 1.0, pangolin::Attach::Pix(175), 1.0, -1024.0f / 768.0f)
            .SetHandler(new pangolin::Handler3D(s_cam));

    while (pangolin::ShouldQuit() == false) {
        glClear(GL_COLOR_BUFFER_BIT | GL_DEPTH_BUFFER_BIT);

        d_cam.Activate(s_cam);
        glClearColor(1.0f, 1.0f, 1.0f, 1.0f);

        glPointSize(2);
        glBegin(GL_POINTS);
        for (auto &p: pointcloud) {
            glColor3f(p[3], p[3], p[3]);
            glVertex3d(p[0], p[1], p[2]);
        }
        glEnd();
        pangolin::FinishFrame();
        usleep(5000);   // sleep 5 ms
    }
    return;
}

四.矩阵运算微分 (2 分,约 1.5 小时)
在优化中经常会遇到矩阵微分的问题。例如,当自变量为向量 x,求标量函数 u(x) 对 x 的导数时,即为矩阵微分。通常线性代数教材不会深入探讨此事,这往往是矩阵论的内容。我在 ppt/目录下为你准备了一份清华研究生课的矩阵论课件(仅矩阵微分部分)。阅读此 ppt,回答下列问题:
设变量为 x ∈ RN ,那么:
- 矩阵 A ∈ RN ×N ,那么 d(Ax)/dx 是什么1?
- 矩阵 A ∈ RN ×N ,那么 d(xTAx)/dx 是什么?
- 证明:xTAx = tr(AxxT). (2)
 | |
1严格的写法必须对行向量求导,所以应该写成 d(Ax)/dxT。但有些时候我们为了公式简洁,也会省略这个 T。
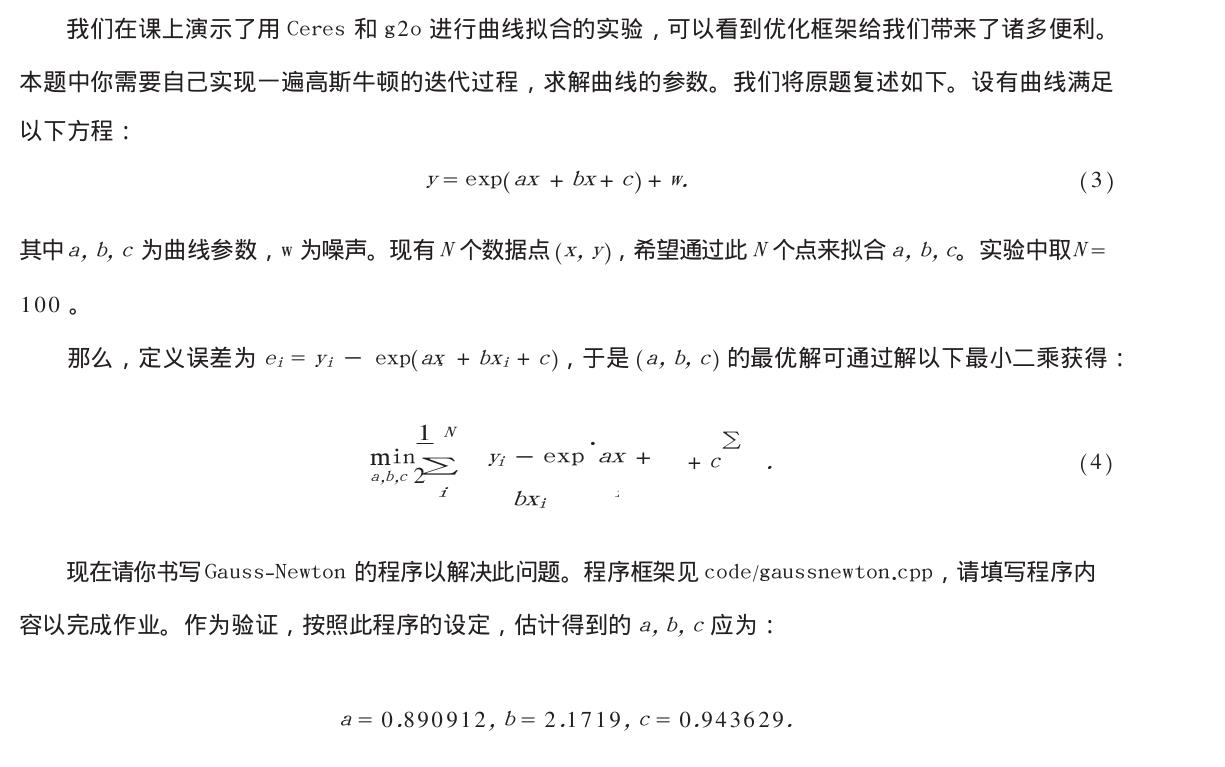
五.高斯牛顿法的曲线拟合实验 (2 分,约 1 小时)

#include <iostream>
#include <opencv2/opencv.hpp>
#include <Eigen/Core>
#include <Eigen/Dense>

using namespace std;
using namespace Eigen;

int main(int argc, char **argv) {
    double ar = 1.0, br = 2.0, cr = 1.0;         // 真实参数值
    double ae = 2.0, be = -1.0, ce = 5.0;        // 估计参数值
    int N = 100;                                 // 数据点
    double w_sigma = 1.0;                        // 噪声Sigma值
    double inv_sigma=1/w_sigma;


    cv::RNG rng;                                 // OpenCV随机数产生器

    vector<double> x_data, y_data;      // 数据
    for (int i = 0; i < N; i++) {
        double x = i / 100.0;
        x_data.push_back(x);
        y_data.push_back(exp(ar * x * x + br * x + cr) + rng.gaussian(w_sigma));
    }

    // 开始Gauss-Newton迭代
    int iterations = 100;    // 迭代次数
    double cost = 0, lastCost = 0;  // 本次迭代的cost和上一次迭代的cost

    for (int iter = 0; iter < iterations; iter++) {

        Matrix3d H = Matrix3d::Zero();             // Hessian = J^T J in Gauss-Newton
        Vector3d b = Vector3d::Zero();             // bias
        cost = 0;

        for (int i = 0; i < N; i++) {
            double xi = x_data[i], yi = y_data[i];  // 第i个数据点
            // start your code here
            double error = yi-exp(ae*xi*xi+be*xi+ce);   // 第i个数据点的计算误差
   // 填写计算error的表达式
            Vector3d J; // 雅可比矩阵
            J[0] = -xi*xi*exp(ae*xi*xi+be*xi+ce);  // de/da
            J[1] = -xi*exp(ae*xi*xi+be*xi+ce);  // de/db
            J[2] = -exp(ae*xi*xi+be*xi+ce);  // de/dc

            H +=J * J.transpose(); // GN近似的H
            b += -error * J;
            // end your code here

            cost += error * error;
        }

        // 求解线性方程 Hx=b,建议用ldlt
 	// start your code here
        Vector3d dx=H.ldlt().solve(b);
	// end your code here

        if (isnan(dx[0])) {
            cout << "result is nan!" << endl;
            break;
        }

        if (iter > 0 && cost > lastCost) {
            // 误差增长了,说明近似的不够好
            cout << "cost: " << cost << ", last cost: " << lastCost << endl;
            break;
        }

        // 更新abc估计值
        ae += dx[0];
        be += dx[1];
        ce += dx[2];

        lastCost = cost;

        cout << "total cost: " << cost << endl;
    }

    cout << "estimated abc = " << ae << ", " << be << ", " << ce << endl;
    return 0;
}
六.* 批量最大似然估计 (2 分,约 2 小时)
考虑离散时间系统:
xk = xk−1 + vk + wk, w ∼ N (0, Q)
yk = xk + nk, nk ∼ N (0, R)
这可以表达一辆沿 x 轴前进或后退的汽车。第一个公式为运动方程,vk 为输入,wk 为噪声;第二个公式为观测方程,yk 为路标点。取时间 k = 1, . . . , 3,现希望根据已有的 v, y 进行状态估计。设初始状态 x0 已知。
请根据本题题设,推导批量(batch)最大似然估计。首先,令批量状态变量为 x = [x0, x1, x2, x3]T, 令批量观测为 z = [v1, v2, v3, y1, y2, y3]T,那么:
- 可以定义矩阵 H,使得批量误差为 e = z − Hx。请给出此处 H 的具体形式。
- 据上问,最大似然估计可转换为最小二乘问题:
x∗ = arg min 1 (z − Hx)TW−1 (z − Hx) , (5)
其中 W 为此问题的信息矩阵,可以从最大似然的概率定义给出。请给出此问题下 W 的具体取值。
- 假设所有噪声相互无关,该问题存在唯一的解吗?若有,唯一解是什么?若没有,说明理由。

Bibliography
- M. Burri, J. Nikolic, P. Gohl, T. Schneider, J. Rehder, S. Omari, M. W. Achtelik, and R. Siegwart, “The euroc micro aerial vehicle datasets,” The International Journal of Robotics Research, 2016.
- A. Geiger, P. Lenz, and R. Urtasun, “Are we ready for autonomous driving? the kitti vision benchmark suite,” 2012 IEEE Conference On Computer Vision And Pattern Recognition (cvpr), pp. 3354–3361, 2012.
- H. Hirschmuller, “Accurate and efficient stereo processing by semi-global matching and mutual infor- mation,” in Computer Vision and Pattern Recognition, 2005. CVPR 2005. IEEE Computer Society Conference on, vol. 2, pp. 807–814, IEEE, 2005.
- D. Scharstein and R. Szeliski, “A taxonomy and evaluation of dense two-frame stereo correspondence algorithms,” International journal of computer vision, vol. 47, no. 1-3, pp. 7–42, 2002.
以上是关于视觉slam学习笔记以及课后习题《第四讲相机模型和非线性优化》的主要内容,如果未能解决你的问题,请参考以下文章


