PyTorch学习Lesson3
Posted Stars-Chan
tags:
篇首语:本文由小常识网(cha138.com)小编为大家整理,主要介绍了PyTorch学习Lesson3相关的知识,希望对你有一定的参考价值。
必做题:
(1) 把模型改为 resnet18,加载相应的模型权重(Lesson2 的物料包中有),跑一下 0.jpg和 1.jpg,看一下输出结果。官方 torchvision 训练 mobilenet 和训练 resnet 的方式是一样的,所以数据预处理和数据后处理部分完全相同。
('umbrella', 0.2279825508594513)
('peacock', 0.9976727366447449)
(2) 自己找 2 张其他图,用 resnet18 做下推理。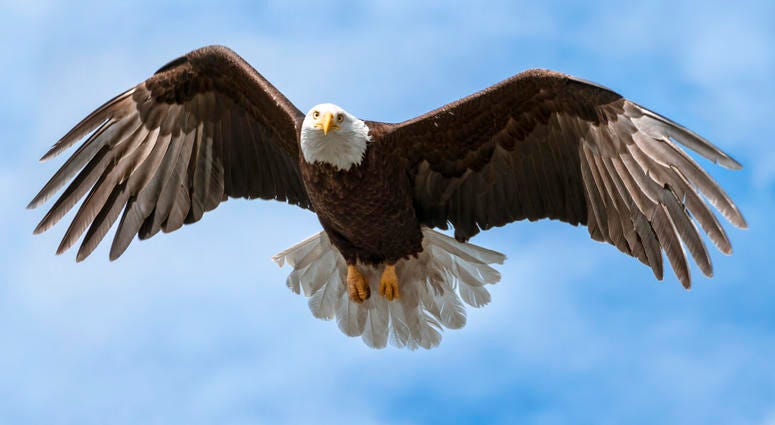

翻车了
('kite', 0.3684402108192444) # bald-eagle.jpg
('quill', 0.013711282052099705) # hen.jpg
思考题:
(1) 以 ResNet18 为例,用 time 模块和 for 循环,对”./images/0.jpg”连续推理 100次,统计时间开销,比如:
# 有 CUDA 的,改下代码:self.device=torch.device('cuda')。用上述相同方法测试时间开销。
model_classify=ModelPipline()
import time
image=cv2.imread("./images/0.jpg")
t_all=0
for i in range(100):
	t_start=time.time()
	result=model_classify.predict(image)
	t_end=time.time()
	t_all+=t_end-t_start
print(t_all)
测试结果
('kite', 0.3684402108192444)
4.733127117156982
(2) 在数据预处理和数据后处理的代码实现中,到处在用 numpy, opencv, torch 对数组做相应变换,大家至少要把课程中出现的函数们给理解。
作业源码
import torch
import torchvision.models as models
import numpy as np
import cv2
import time


class ModelPipline(object):
    def __init__(self):
        # 进入模型的图片大小:为数据预处理和后处理做准备
        self.inputs_size = (224, 224)
        # CPU or CUDA:为数据预处理和模型加载做准备
        self.device = torch.device('cuda')
        # 载入模型结构和模型权重
        self.model = self.get_model()
        # 载入标签,为数据后处理做准备
        label_names = open('./labels/imagenet_label.txt', 'r').readlines()
        self.label_names = [line.strip('\\n') for line in label_names]

    def predict(self, image):
        # 数据预处理
        inputs = self.preprocess(image)
        # 数据进网络
        outputs = self.model(inputs)
        # 数据后处理
        results = self.postprocess(outputs)
        return results

    def get_model(self):
        # 上一节课的内容
        model = models.resnet18()
        pretrained_state_dict = torch.load('./weights/resnet18-5c106cde.pth',
                                           map_location=lambda storage, loc: storage)
        model.load_state_dict(pretrained_state_dict, strict=True)
        model.to(self.device)
        model.eval()
        return model

    def preprocess(self, image):
        # opencv默认读入是BGR,需要转为RGB,和训练时保持一致
        image = cv2.cvtColor(image, cv2.COLOR_BGR2RGB)
        # resize成模型输入的大小,和训练时保持一致        image = cv2.resize(image, dsize=self.inputs_size)
        # 归一化和标准化,和训练时保持一致
        inputs = image / 255
        inputs = (inputs - np.array([0.485, 0.456, 0.406])) / np.array([0.229, 0.224, 0.225])
        ##以下是图像任务的通用处理
        # (H,W,C) ——> (C,H,W)
        inputs = inputs.transpose(2, 0, 1)
        # (C,H,W) ——> (1,C,H,W)
        inputs = inputs[np.newaxis, :, :, :]
        # NumpyArray ——> Tensor
        inputs = torch.from_numpy(inputs)
        # dtype float32
        inputs = inputs.type(torch.float32)
        # 与self.model放在相同硬件上
        inputs = inputs.to(self.device)
        return inputs

    def postprocess(self, outputs):
        # 取softmax得到每个类别的置信度
        outputs = torch.softmax(outputs, dim=1)
        # 取最高置信度的类别和分数
        score, label_id = torch.max(outputs, dim=1)
        # Tensor ——> float
        score, label_id = score.item(), label_id.item()
        # 查找标签名称
        label_name = self.label_names[label_id]
        return label_name, score


if __name__ == '__main__':
    model_classify = ModelPipline()

    t_all = 0
    image = cv2.imread('./images/bald-eagle.jpg')
    for i in range(100):
        t_start = time.time()
        result = model_classify.predict(image)
        t_end = time.time()
        t_all += (t_end - t_start)
    print(result)
    print(t_all)

    # image = cv2.imread('./images/hen.jpg')
    # result = model_classify.predict(image)
    # print(result)
打卡说明
答题格式:
必做题:
题(1)提交下推理的输出结果(标签和置信度)。
题(2)提交下找的 2 张图片,以及推理的输出结果。
思考题:
题(1)CPU 推理和 CUDA 推理,各自的时间开销。
题(2)无
以上是关于PyTorch学习Lesson3的主要内容,如果未能解决你的问题,请参考以下文章