超详细!手把手教你使用YOLOX进行物体检测(附数据集)
Posted AI浩
tags:
篇首语:本文由小常识网(cha138.com)小编为大家整理,主要介绍了超详细!手把手教你使用YOLOX进行物体检测(附数据集)相关的知识,希望对你有一定的参考价值。
版权声明:本文为奥比中光3D视觉开发者社区特约作者授权原创发布,未经授权不得转载,本文仅做学术分享,版权归原作者所有,若涉及侵权内容请联系删文。公众号:“3D视觉开发者社区”
摘要
YOLOX: Exceeding YOLO Series in 2021
- 作者单位:旷视科技
- 代码:https://github.com/Megvii-BaseDetection/YOLOX
- 论文:https://arxiv.org/abs/2107.08430
YOLOX 是旷视开源的高性能检测器。旷视的研究者将解耦头、数据增强、无锚点以及标签分类等目标检测领域的优秀进展与 YOLO 进行了巧妙的集成组合,提出了 YOLOX,不仅实现了超越 YOLOv3、YOLOv4 和 YOLOv5 的 AP,而且取得了极具竞争力的推理速度。如下图:
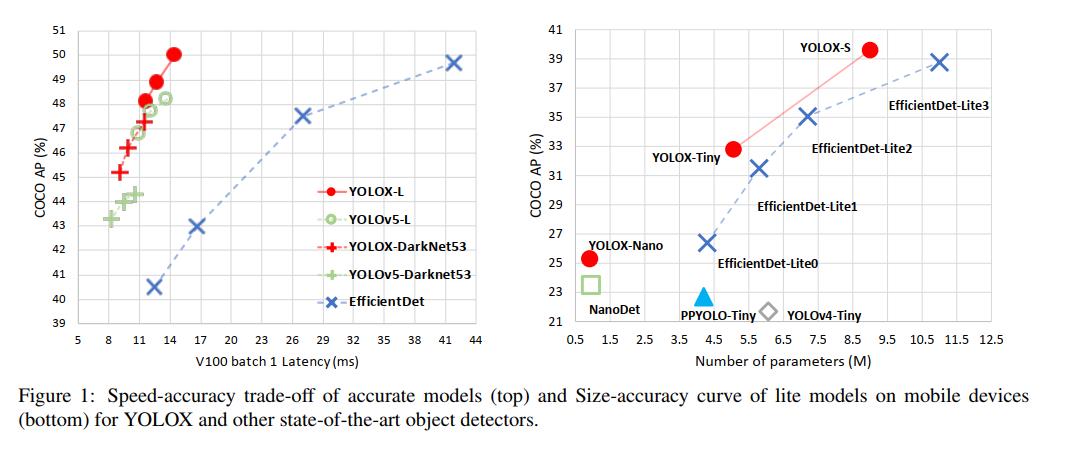
其中YOLOX-L版本以 68.9 FPS 的速度在 COCO 上实现了 50.0% AP,比 YOLOv5-L 高出 1.8% AP!还提供了支持 ONNX、TensorRT、NCNN 和 Openvino 的部署版本。
1 配置环境
本机的环境:
| 操作系统 | Win10 |
|---|---|
| Pytorch版本 | 1.8.0 |
| Cuda版本 | 11.1 |
1.1 下载源码:
GitHub地址:https://github.com/Megvii-BaseDetection/YOLOX,下载完成后放到D盘根目录,然后用PyCharm打开。
1.2 安装依赖包
点击“Terminal”,如下图,
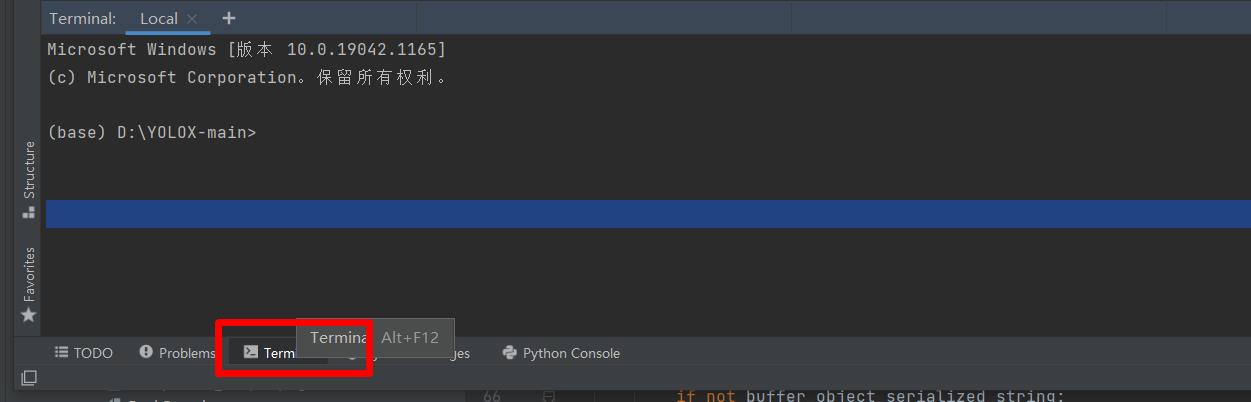
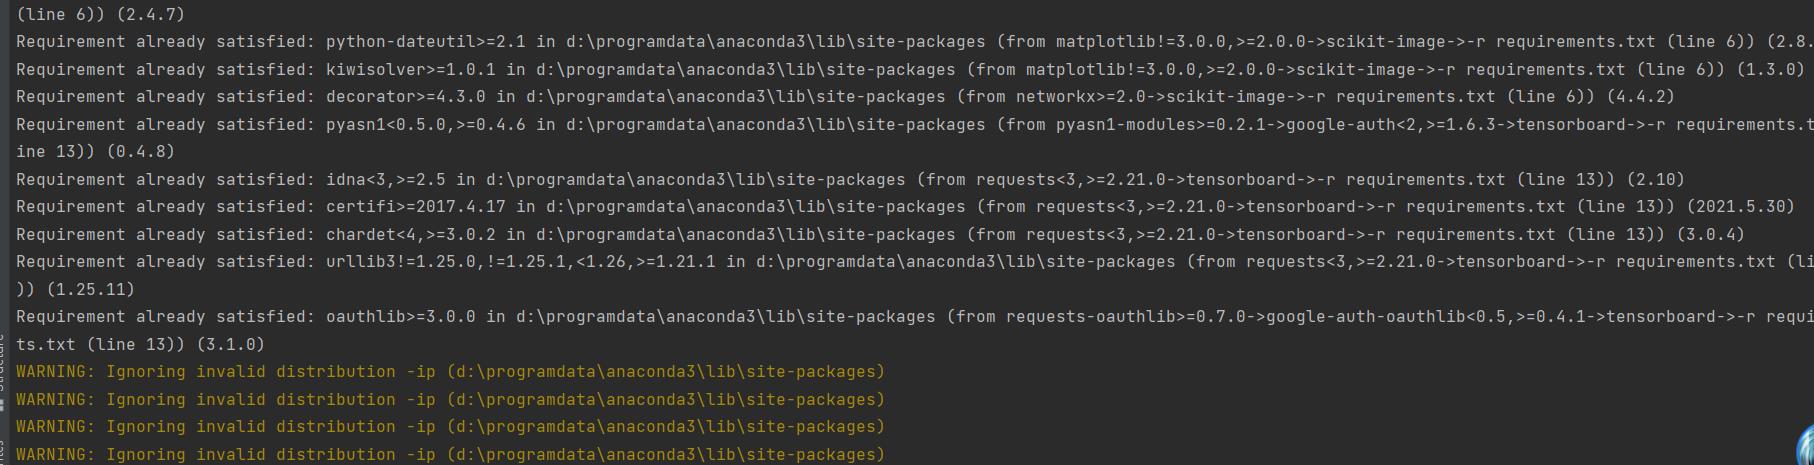
然后执行下面的命令,安装所有的依赖包。
pip install -r requirements.txt
1.3 安装yolox
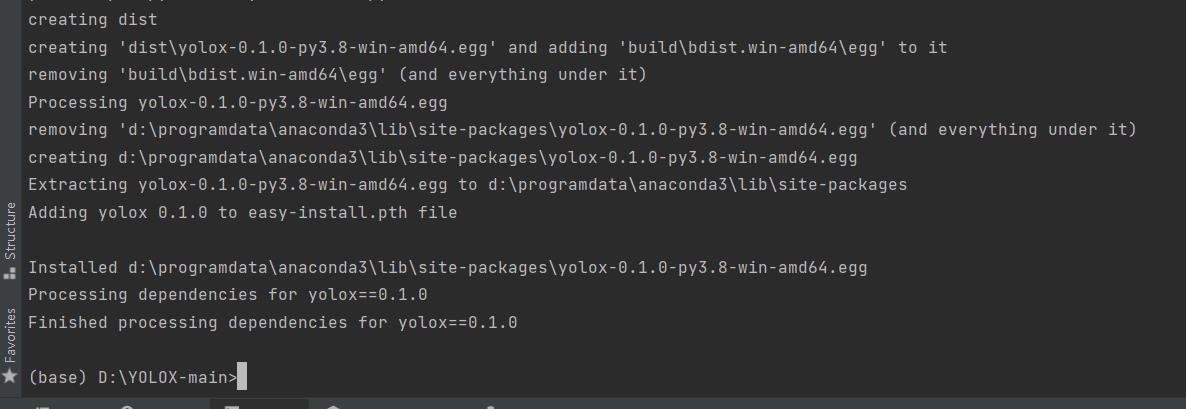
python setup.py install
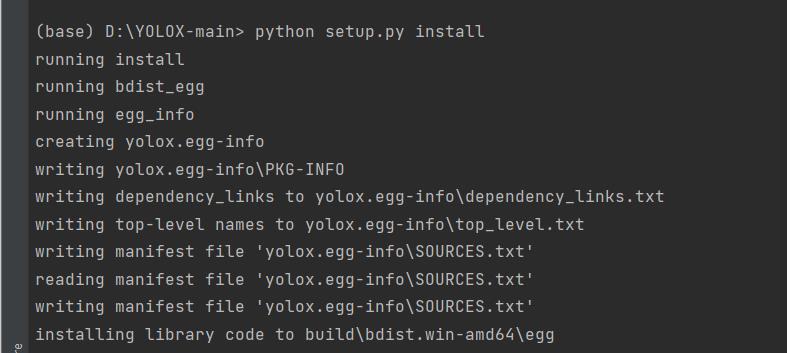
看到如下信息,则说明安装完成了
1.4 安装apex
APEX是英伟达开源的,完美支持PyTorch框架,用于改变数据格式来减小模型显存占用的工具。其中最有价值的是amp(Automatic Mixed Precision),将模型的大部分操作都用Float16数据类型测试,一些特别操作仍然使用Float32。并且用户仅仅通过三行代码即可完美将自己的训练代码迁移到该模型。实验证明,使用Float16作为大部分操作的数据类型,并没有降低参数,在一些实验中,反而由于可以增大Batch size,带来精度上的提升,以及训练速度上的提升。
安装步骤:
-
到官网下载apex,地址:mirrors / nvidia / apex · CODE CHINA (csdn.net)
-
下载完成后,解压后,在Shell里,进入到apex-master中。

-
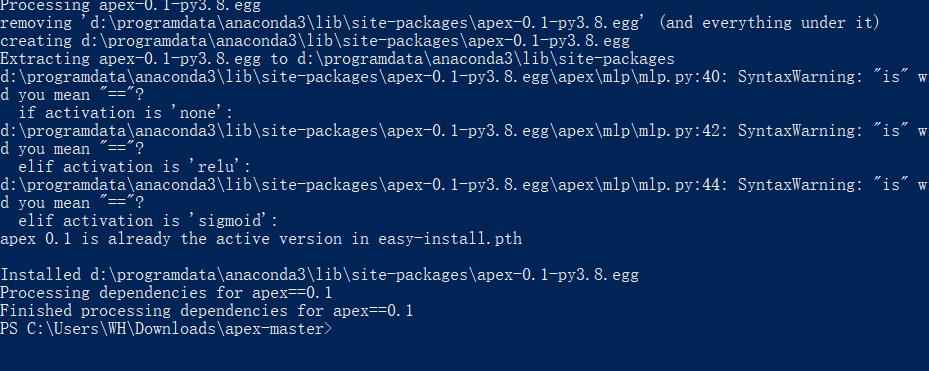
执行安装命令
pip install -r requirements.txt
python setup.py install
看到如下log,则表明安装成功。
1.5 安装pycocotools
pip install pycocotools
注:如果出现环境问题,可以参考:
Win10 安装pycocotools_AI浩-CSDN博客
1.6 验证环境
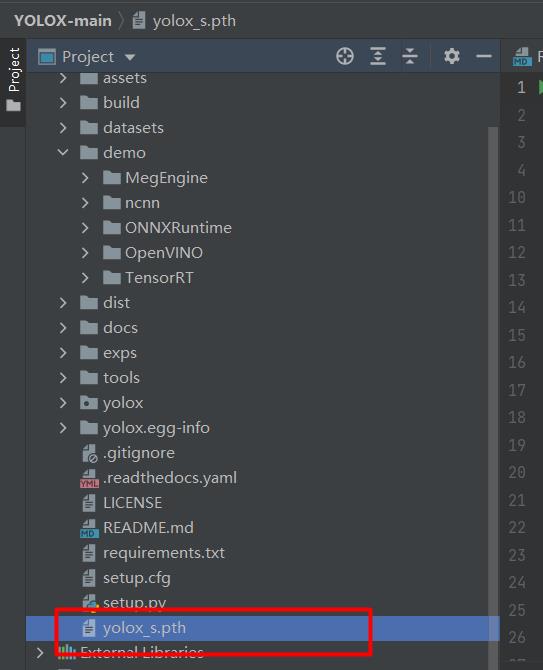
下载预训练模型,本文选用的是YOLOX-s,下载地址: https://github.com/Megvii-BaseDetection/YOLOX/releases/download/0.1.1rc0/yolox_s.pth。
下载完成后,将预训练模型放到工程的根目录,如下图:
然后验证环境,执行:
python tools/demo.py image -f exps/default/yolox_s.py -c ./yolox_s.pth --path assets/dog.jpg --conf 0.3 --nms 0.65 --tsize 640 --save_result --device gpu
参数说明
| 参数 | 说明 |
|---|---|
| -c | 权重的路径 |
| -path | 测试图片的路径 |
| -conf | 置信度阈值 |
| -nms | nms的IOU阈值 |
| -tsize | 测试图片resize的大小 |
| -save_result | 是否保存推理结果 |
| –device | 选用gpu或cpu推理 |

查看运行结果:
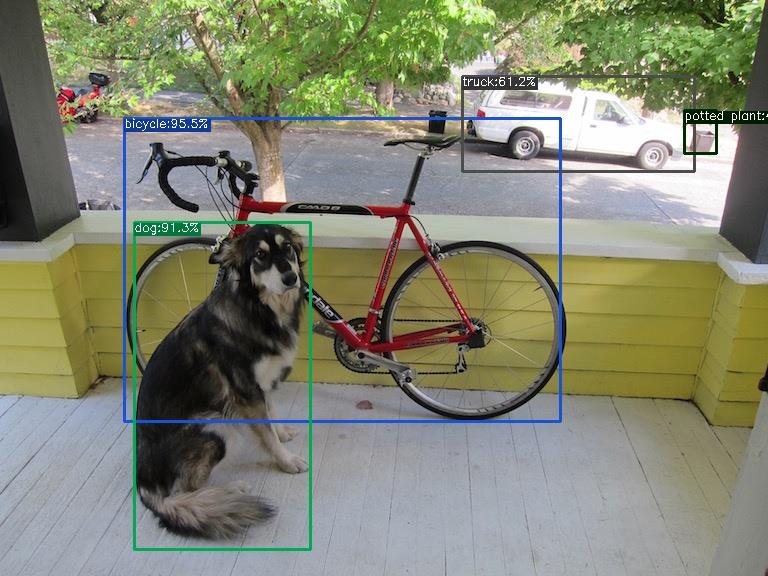
看到上图说明环境没有问题了。
2 制作数据集
数据集我们采用VOC数据集,原始数据集是Labelme标注的数据集。下载地址:https://download.csdn.net/download/hhhhhhhhhhwwwwwwwwww/14003627。
新建labelme2voc.py文件
import os
from typing import List, Any
import numpy as np
import codecs
import json
from glob import glob
import cv2
import shutil
from sklearn.model_selection import train_test_split

# 1.标签路径

labelme_path = "LabelmeData/"  # 原始labelme标注数据路径
saved_path = "VOC2007/"  # 保存路径
isUseTest = True  # 是否创建test集
# 2.创建要求文件夹
if not os.path.exists(saved_path + "Annotations"):
    os.makedirs(saved_path + "Annotations")
if not os.path.exists(saved_path + "JPEGImages/"):
    os.makedirs(saved_path + "JPEGImages/")
if not os.path.exists(saved_path + "ImageSets/Main/"):
    os.makedirs(saved_path + "ImageSets/Main/")
# 3.获取待处理文件
files = glob(labelme_path + "*.json")
files = [i.replace("\\\\", "/").split("/")[-1].split(".json")[0] for i in files]
print(files)
# 4.读取标注信息并写入 xml
for json_file_ in files:
    json_filename = labelme_path + json_file_ + ".json"
    json_file = json.load(open(json_filename, "r", encoding="utf-8"))
    height, width, channels = cv2.imread(labelme_path + json_file_ + ".jpg").shape
    with codecs.open(saved_path + "Annotations/" + json_file_ + ".xml", "w", "utf-8") as xml:
        xml.write('<annotation>\\n')
        xml.write('\\t<folder>' + 'WH_data' + '</folder>\\n')
        xml.write('\\t<filename>' + json_file_ + ".jpg" + '</filename>\\n')
        xml.write('\\t<source>\\n')
        xml.write('\\t\\t<database>WH Data</database>\\n')
        xml.write('\\t\\t<annotation>WH</annotation>\\n')
        xml.write('\\t\\t<image>flickr</image>\\n')
        xml.write('\\t\\t<flickrid>NULL</flickrid>\\n')
        xml.write('\\t</source>\\n')
        xml.write('\\t<owner>\\n')
        xml.write('\\t\\t<flickrid>NULL</flickrid>\\n')
        xml.write('\\t\\t<name>WH</name>\\n')
        xml.write('\\t</owner>\\n')
        xml.write('\\t<size>\\n')
        xml.write('\\t\\t<width>' + str(width) + '</width>\\n')
        xml.write('\\t\\t<height>' + str(height) + '</height>\\n')
        xml.write('\\t\\t<depth>' + str(channels) + '</depth>\\n')
        xml.write('\\t</size>\\n')
        xml.write('\\t\\t<segmented>0</segmented>\\n')
        for multi in json_file["shapes"]:
            points = np.array(multi["points"])
            labelName = multi["label"]
            xmin = min(points[:, 0])
            xmax = max(points[:, 0])
            ymin = min(points[:, 1])
            ymax = max(points[:, 1])
            label = multi["label"]
            if xmax <= xmin:
                pass
            elif ymax <= ymin:
                pass
            else:
                xml.write('\\t<object>\\n')
                xml.write('\\t\\t<name>' + labelName + '</name>\\n')
                xml.write('\\t\\t<pose>Unspecified</pose>\\n')
                xml.write('\\t\\t<truncated>1</truncated>\\n')
                xml.write('\\t\\t<difficult>0</difficult>\\n')
                xml.write('\\t\\t<bndbox>\\n')
                xml.write('\\t\\t\\t<xmin>' + str(int(xmin)) + '</xmin>\\n')
                xml.write('\\t\\t\\t<ymin>' + str(int(ymin)) + '</ymin>\\n')
                xml.write('\\t\\t\\t<xmax>' + str(int(xmax)) + '</xmax>\\n')
                xml.write('\\t\\t\\t<ymax>' + str(int(ymax)) + '</ymax>\\n')
                xml.write('\\t\\t</bndbox>\\n')
                xml.write('\\t</object>\\n')
                print(json_filename, xmin, ymin, xmax, ymax, label)
        xml.write('</annotation>')
# 5.复制图片到 VOC2007/JPEGImages/下
image_files = glob(labelme_path + "*.jpg")
print("copy image files to VOC007/JPEGImages/")
for image in image_files:
    shutil.copy(image, saved_path + "JPEGImages/")
# 6.split files for txt
txtsavepath = saved_path + "ImageSets/Main/"
ftrainval = open(txtsavepath + '/trainval.txt', 'w')
ftest = open(txtsavepath + '/test.txt', 'w')
ftrain = open(txtsavepath + '/train.txt', 'w')
fval = open(txtsavepath + '/val.txt', 'w')
total_files = glob("./VOC2007/Annotations/*.xml")
total_files = [i.replace("\\\\", "/").split("/")[-1].split(".xml")[0] for i in total_files]
trainval_files = []
test_files = []
if isUseTest:
    trainval_files, test_files = train_test_split(total_files, test_size=0.15, random_state=55)
else:
    trainval_files = total_files
for file in trainval_files:
    ftrainval.write(file + "\\n")
# split
train_files, val_files = train_test_split(trainval_files, test_size=0.15, random_state=55)
# train
for file in train_files:
    ftrain.write(file + "\\n")
# val
for file in val_files:
    fval.write(file + "\\n")
for file in test_files:
    print(file)
    ftest.write(file + "\\n")
ftrainval.close()
ftrain.close()
fval.close()
ftest.close()
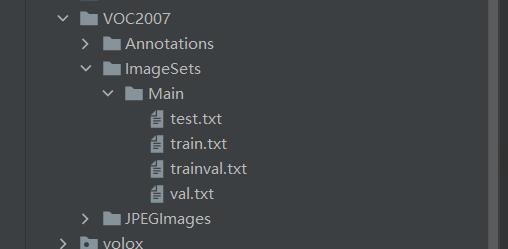
运行上面的代码就可以得到VOC2007数据集。如下图所示:
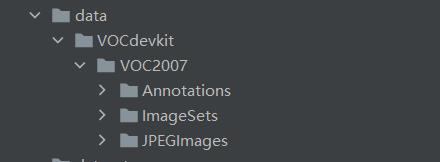
VOC的目录如下,所以要新建data/VOCdevkit目录,然后将上面的结果复制进去
├── data
│   ├── VOCdevkit
│   │   ├── VOC2007
│   │   │   ├── Annotations #xml文件
│   │   │   ├── JPEGImages #图片
│   │   │   ├── ImageSets
│   │   │   │   ├── Main
│   │   │   │   │   ├── test.txt
│   │   │   │   │   ├── trainval.txt
到这里,数据集制作完成。
3 修改数据配置文件
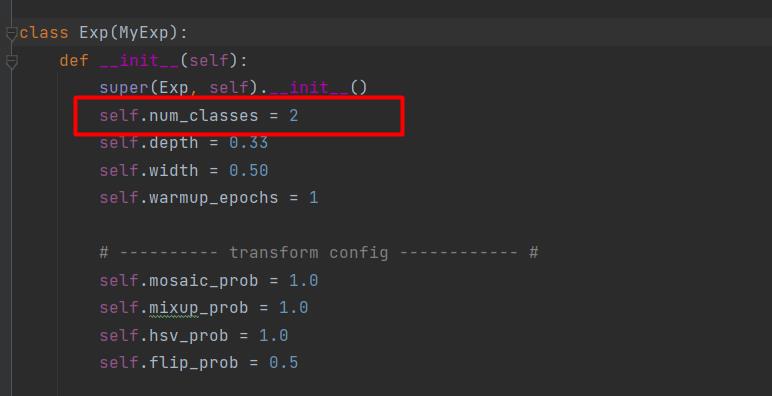
3.1 修改类别
文件路径:exps/example/yolox_voc/yolox_voc_s.py,本次使用的类别有2类,所以将num_classes修改为2。
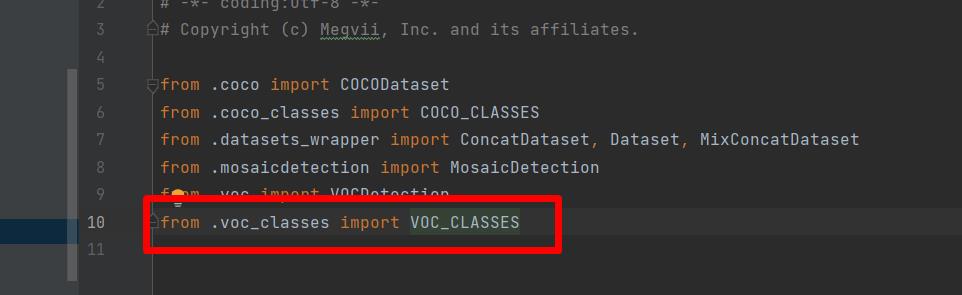
打开yolox/data/datasets/voc_classes.py文件,修改为自己的类别名:

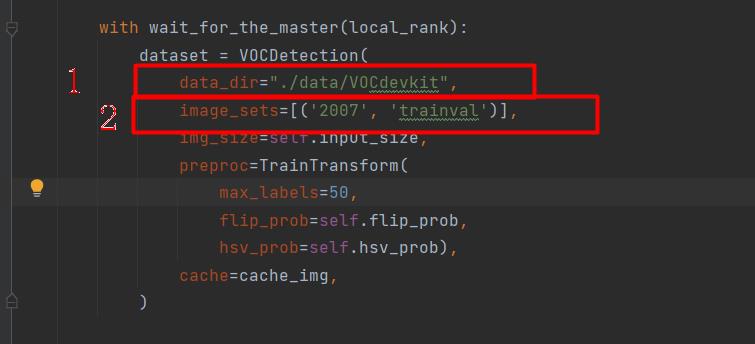
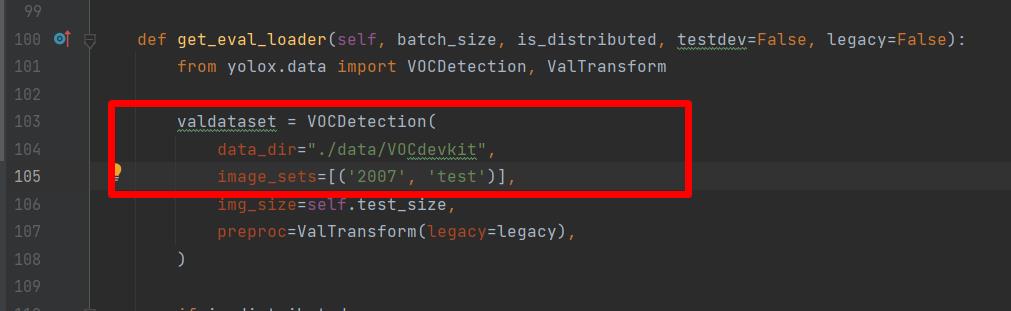
3.2 修改数据集目录
文件路径:exps/example/yolox_voc/yolox_voc_s.py,data_dir修改为“./data/VOCdevkit”,image_sets删除2012的,最终结果如下:
接着往下翻,修改test的路径,如下图:
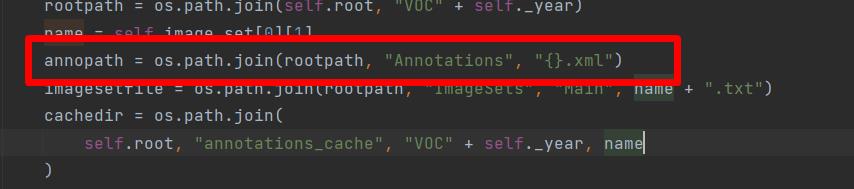
打开yolox/data/datasets/voc.py,这里面有个错误。画框位置,将大括号的“%s”去掉,否则验证的时候一直报找不到文件的错误。
修改完成后,执行
python setup.py install
重新编译yolox
4 训练
推荐使用命令行的方式训练。
执行命令:
python tools/train.py -f exps/example/yolox_voc/yolox_voc_s.py -d 1 -b 4 --fp16 -c yolox_s.pth
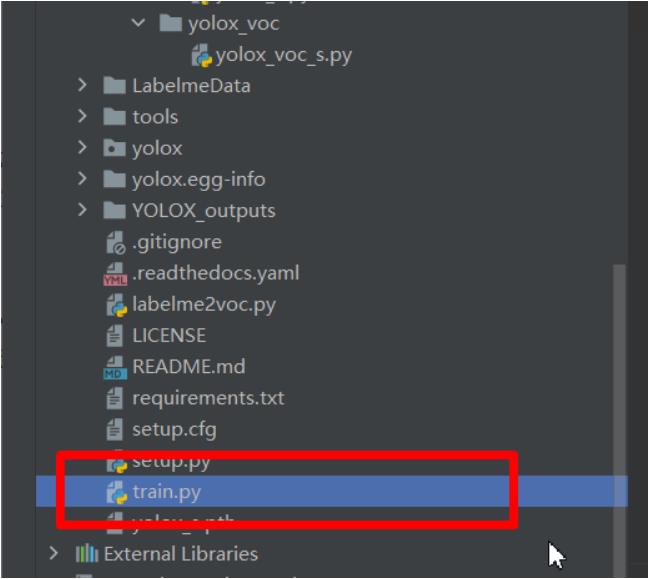
就可以开始训练了。如果不喜欢使用命令行的方式,想直接运行train.py,那就需要就如train.py修改参数了。首先把train.py从tools里面复制一份到工程的根目录(建议这样做,否则需要修改的路径比较多,新手容易犯错误),如图:
打开,修改里面的参数。需要修改的参数如下:
   parser.add_argument("-b", "--batch-size", type=int, default=4, help="batch size")
    parser.add_argument(
        "-d", "--devices", default=1, type=int, help="device for training"
    )
    parser.add_argument(
        "-f",
        "--exp_file",
        default="exps/example/yolox_voc/yolox_voc_s.py",
        type=str,
        help="plz input your expriment description file",
    )
    parser.add_argument("-c", "--ckpt", default='yolox_s.pth', type=str, help="checkpoint file")
    parser.add_argument(
        "--fp16",
        dest="fp16",
        default=True,
        action="store_true",
        help="Adopting mix precision training.",
    )
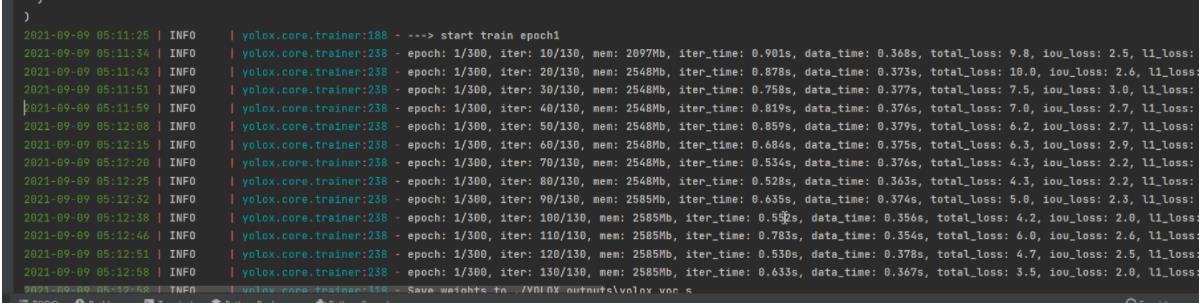
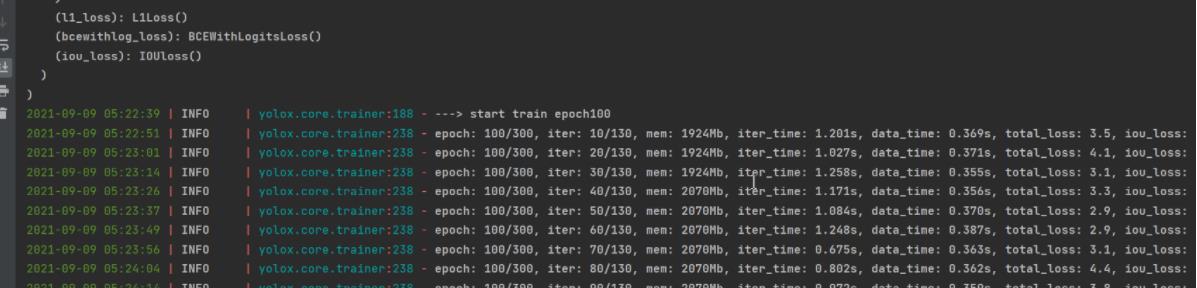
按照上面的参数配置就可以运行了,如下图:
如果训练了一段时间,再想接着以前的模型再训练,应该如何做呢?修改train.py的参数即可,需要修改的参数如下:
   parser.add_argument(
        "--resume", default=True, action="store_true", help="resume training"
    )
  parser.add_argument("-c", "--ckpt", default='YOLOX_outputs/yolox_voc_s/best_ckpt.pth', type=str, help="checkpoint file")
    parser.add_argument(
        "-e",
        "--start_epoch",
        default=100,
        type=int,
        help="resume training start epoch",
    )
命令行:
python tools/train.py -f exps/example/yolox_voc/yolox_voc_s.py -d 1 -b 4 -c YOLOX_outputs/yolox_voc_s/latest_ckpt.pth.tar -resume -start_epoch=100
再次训练,你发现epoch不是从0开始了。
5 测试
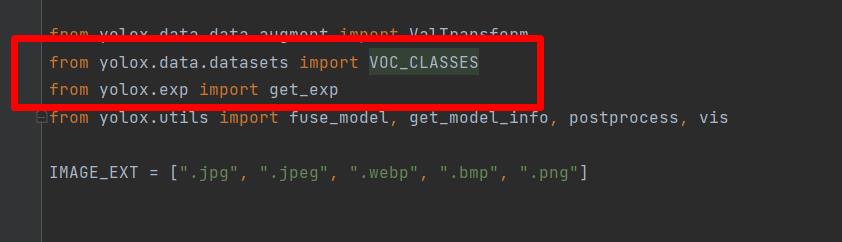
修改yolox/data/datasets/_init_.py,导入“VOC_CLASSES”,如下图:
修改tools/demo.py中代码,将“COCO_CLASSES”,改为“VOC_CLASSES”。
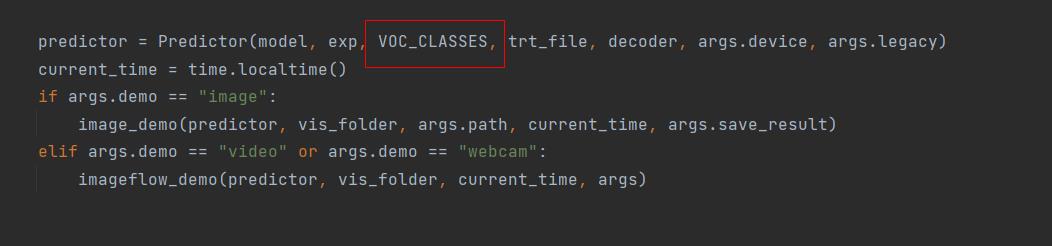
将“295”行的Predictor类初始化传入的“COCO_CLASSES”改为“VOC_CLASSES”,如下图:
5.1 单张图片预测
使用训练好的模型进行测试。测试调用tools/demo.py,先用命令行的方式演示:
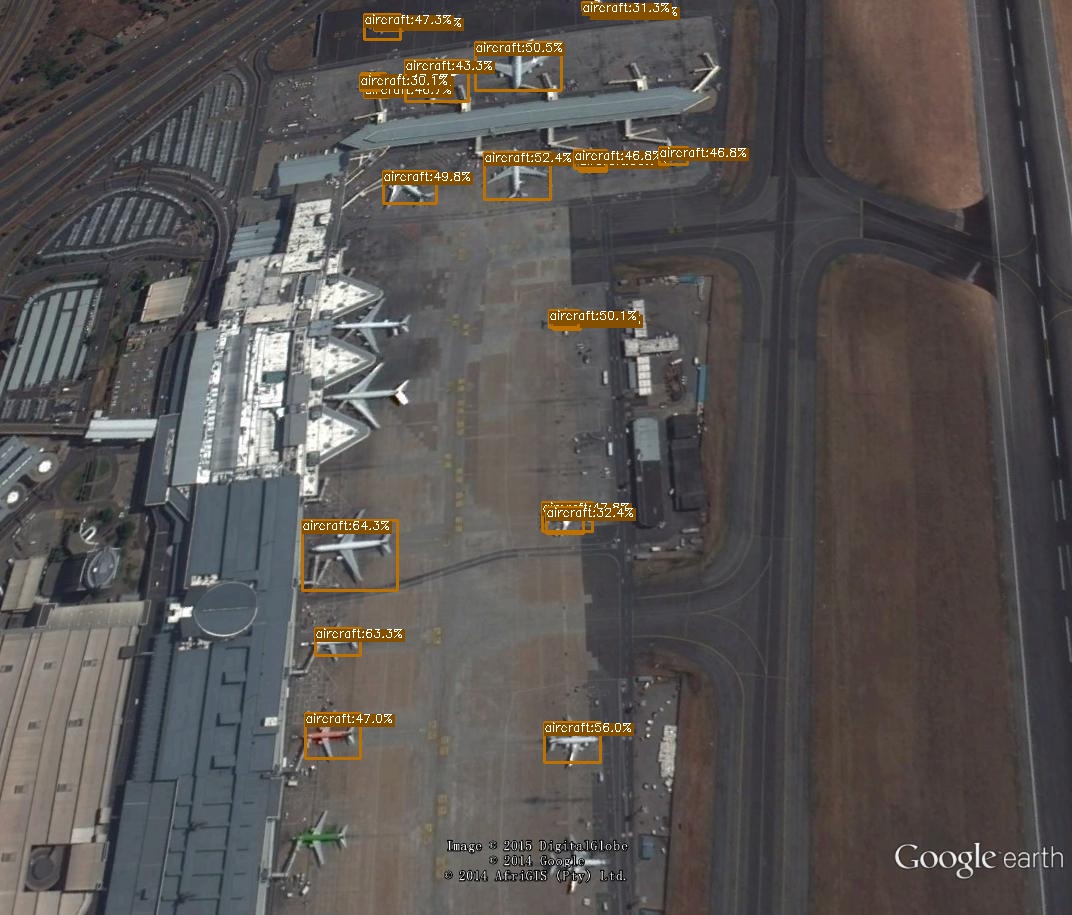
python tools/demo.py image -f exps/example/yolox_voc/yolox_voc_s.py -c YOLOX_outputs/yolox_voc_s/latest_ckpt.pth --path ./assets/aircraft_107.jpg --conf 0.3 --nms 0.65 --tsize 640 --save_result --device gpu
运行结果:
如果不想使用命令行,将demo.py复制一份放到工程的根目录,然后修改里面的参数。
parser = argparse.ArgumentParser("YOLOX Demo!")
    parser.add_argument("-do","--demo", default="image", help="demo type, eg. image, video and webcam")
    parser.add_argument("-expn", "--experiment-name", type=str, default=None)
    parser.add_argument("-n", "--name", type=str, default=None, help="model name")
    parser.add_argument(
        "--path", default="./assets/aircraft_107.jpg", help="path to images or video"
    )
    # exp file
    parser.add_argument(
        "-f",
        "--exp_file",
        default="exps/example/yolox_voc/yolox_voc_s.py",
        type=str,
        help="pls input your expriment description file",
    )
    parser.add_argument("-c", "--ckpt", default="YOLOX_outputs/yolox_voc_s/best_ckpt.pth", type=str, help="ckpt for eval")
    parser.add_argument(
        "--device",
        default="gpu",
        type=str,
        help="device to run our model, can either be cpu or gpu",
    )
    parser.add_argument("--conf", default=0.3, type=float, help="test conf")
    parser.add_argument("--nms", default=0.45, type=float, help="test nms threshold")
    parser.add_argument("--tsize", default=640, type=int, help="test img size")
    parser.add_argument(
        "--fp16",
        dest="fp16",
        default=False,
        action="store_true",
        help="Adopting mix precision evaluating.",
    )

    parser.add_argument(
        "--fuse",
        dest="fuse",
        default=False,
        action="store_true",
        help="Fuse conv and bn for testing.",
    )
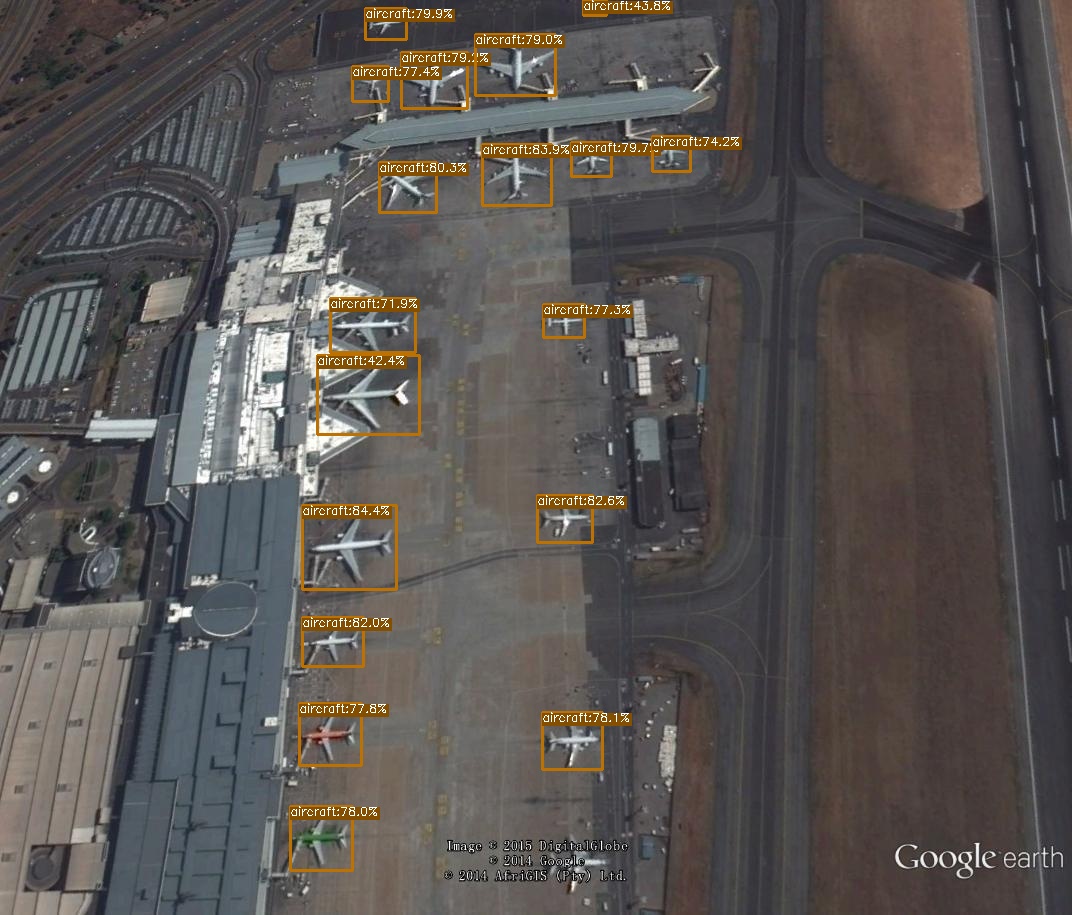
然后直接运行demo.py,运行结果如下图:
5.2 批量预测
批量预测很简单,将path参数由文件路径改为图片的文件夹路径就可以。例:
    parser.add_argument(
        "--path", default="./assets", help="path to images or video"
    )
这样就可以预测assets文件夹下面所有的图片了。
6 保存测试结果
demo.py只有将结果画到图片上,没有保存结果,所以要增加这部分的功能。
打开yolox/utils.visualize.py文件,修改vis方法,将结果返回到上层的方法。
def vis(img, boxes, scores, cls_ids, conf=0.5, class_names=None):
    result_list = []
    for i in range(len(boxes)):
        box = boxes[i]
        cls_id = int(cls_ids[i])
        score = scores[i]
        if score < conf:
            continue
        x0 = int(box[0])
        y0 = int(box[1])
        x1 = int(box[2])
        y1 = int(box[3])
        class_name = class_names[cls_id]
        one_line = (str(x0), str(y0), str(x1), str(y1), class_name, str(float(score)))
        str_one_line = " ".join(one_line)
        result_list.append(str_one_line)
        color = (_COLORS[cls_id] * 255).astype(np.uint8).tolist()
        text = '{}:{:.1f}%'.format(class_name, score * 100)
        txt_color = (0, 0, 0) if np.mean(_COLORS[cls_id]) > 0.5 else (255, 255, 255)
        font = cv2.FONT_HERSHEY_SIMPLEX

        txt_size = cv2.getTextSize以上是关于超详细!手把手教你使用YOLOX进行物体检测(附数据集)的主要内容,如果未能解决你的问题,请参考以下文章