Android Studio微信界面开发
Posted 一顿不能吃十个馒头
tags:
篇首语:本文由小常识网(cha138.com)小编为大家整理,主要介绍了Android Studio微信界面开发相关的知识,希望对你有一定的参考价值。
目录
一、页面布局
第一步:除去自带的activity_main.xml文件之外,还需另外创建两个xml文件,分别是top.xml和bottom.xml.
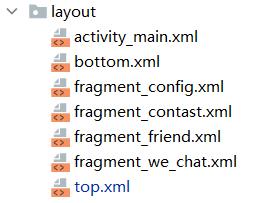
top.xml(顶部布局)
<LinearLayout xmlns:android="http://schemas.android.com/apk/res/android"
    android:layout_width="match_parent"
    android:layout_height="wrap_content"
    android:background="@color/teal_200">

    <TextView
        android:id="@+id/textView"
        android:layout_width="match_parent"
        android:layout_height="wrap_content"
        android:gravity="center"
        android:text="lsy的应用"
        android:textColor="@color/black"
        android:textSize="30sp" />
</LinearLayout>
bottom.xml(底部布局)
四个linearlayout(线性布局)中均包含一个textview和一个imageview。
<LinearLayout xmlns:android="http://schemas.android.com/apk/res/android"
    xmlns:app="http://schemas.android.com/apk/res-auto"
    xmlns:tools="http://schemas.android.com/tools"
    android:layout_width="match_parent"
    android:layout_height="100dp"
    android:background="@color/teal_200"
    >

    <LinearLayout
        android:id="@+id/linearlayout_1"
        android:layout_width="0dp"
        android:layout_height="match_parent"
        android:layout_weight="1"
        android:gravity="center"
        android:orientation="vertical">

        <ImageView
            android:id="@+id/imageView"
            android:layout_width="50dp"
            android:layout_height="50dp"
            android:src="@drawable/p1" />

        <TextView
            android:id="@+id/textView1"
            android:layout_width="match_parent"
            android:layout_height="wrap_content"
            android:gravity="center"
            android:text="微信"
            android:textSize="24sp"
            android:textColor="@color/black"/>
    </LinearLayout>

    <LinearLayout
        android:id="@+id/linearlayout_2"
        android:layout_width="0dp"
        android:layout_height="match_parent"
        android:layout_weight="1"
        android:gravity="center"
        android:orientation="vertical"
        >

        <ImageView
            android:id="@+id/imageView2"
            android:layout_width="50dp"
            android:layout_height="50dp"
            android:src="@drawable/p2" />

        <TextView
            android:id="@+id/textView2"
            android:layout_width="match_parent"
            android:layout_height="wrap_content"
            android:gravity="center"
            android:text="联系人"
            android:textColor="@color/black"
            android:textSize="24sp" />
    </LinearLayout>

    <LinearLayout
        android:id="@+id/linearlayout_3"
        android:layout_width="0dp"
        android:layout_height="match_parent"
        android:layout_weight="1"
        android:gravity="center"
        android:orientation="vertical"
        >

        <ImageView
            android:id="@+id/imageView3"
            android:layout_width="50dp"
            android:layout_height="50dp"
            android:src="@drawable/p3" />

        <TextView
            android:id="@+id/textView3"
            android:layout_width="match_parent"
            android:layout_height="wrap_content"
            android:gravity="center"
            android:text="新闻"
            android:textColor="@color/black"
            android:textSize="24sp" />
    </LinearLayout>

    <LinearLayout
        android:id="@+id/linearlayout_4"
        android:layout_width="0dp"
        android:layout_height="match_parent"
        android:layout_weight="1"
        android:gravity="center"
        android:orientation="vertical"
        >

        <ImageView
            android:id="@+id/imageView4"
            android:layout_width="50dp"
            android:layout_height="50dp"
            android:src="@drawable/p4" />

        <TextView
            android:id="@+id/textView4"
            android:layout_width="match_parent"
            android:layout_height="wrap_content"
            android:gravity="center"
            android:text="设置"
            android:textColor="@color/black"
            android:textSize="24sp" />
    </LinearLayout>
</LinearLayout>
activity_main.xml(主界面布局)
导入顶部布局和底部布局,中间界面使用Framlayout(帧布局:所有放在布局里的控件,都按照层次堆叠在屏幕的左上角,后加进来的控件覆盖前面的控件。)
<LinearLayout xmlns:android="http://schemas.android.com/apk/res/android"
    xmlns:app="http://schemas.android.com/apk/res-auto"
    xmlns:tools="http://schemas.android.com/tools"
    android:layout_width="match_parent"
    android:layout_height="match_parent"
    android:orientation="vertical"
    tools:context=".MainActivity">

    <include
        layout="@layout/top"
        android:layout_width="match_parent"
        android:layout_height="wrap_content" />

    <FrameLayout
        android:id="@+id/content"
        android:layout_width="match_parent"
        android:layout_height="wrap_content"
        android:layout_weight="1">

    </FrameLayout>

    <include
        layout="@layout/bottom"
        android:layout_width="match_parent"
        android:layout_height="wrap_content" />

</LinearLayout>
第二步:创建切换时四个界面的xml文件。如图,代码只展示config界面,其他三个与此类似。
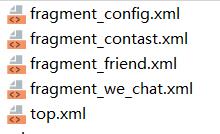
<LinearLayout xmlns:android="http://schemas.android.com/apk/res/android"
    xmlns:tools="http://schemas.android.com/tools"
    android:layout_width="match_parent"
    android:layout_height="match_parent"
    tools:context=".WeChatFragment">

    <!-- TODO: Update blank fragment layout -->
    <TextView
        android:layout_width="match_parent"
        android:layout_height="match_parent"
        android:text="这是微信设置界面"
        android:textSize="50sp"
        android:gravity="center"/>

</LinearLayout>
二、代码实现
主要实现的功能有:
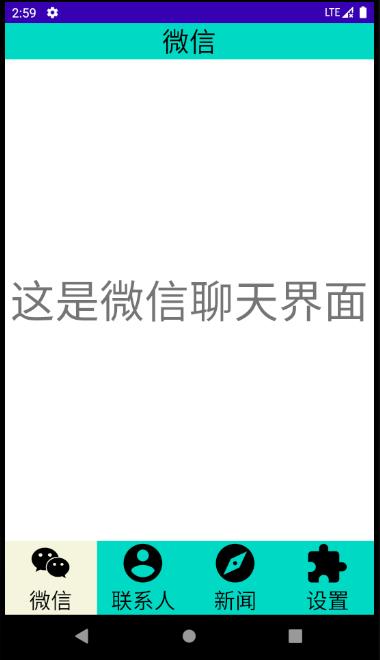
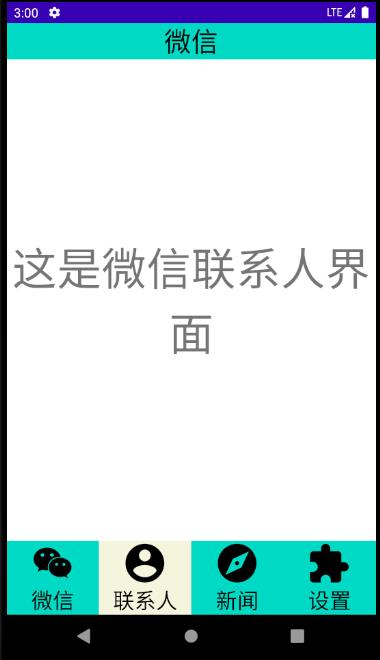
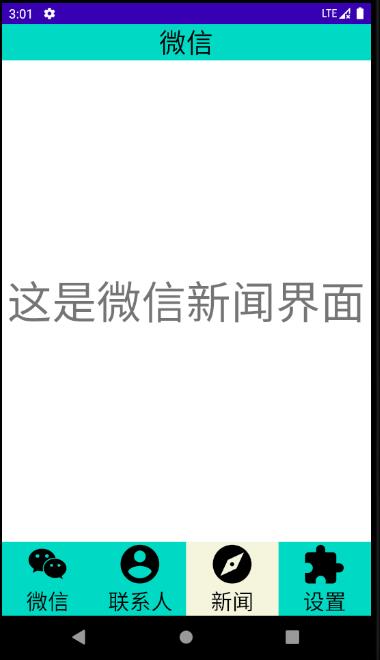
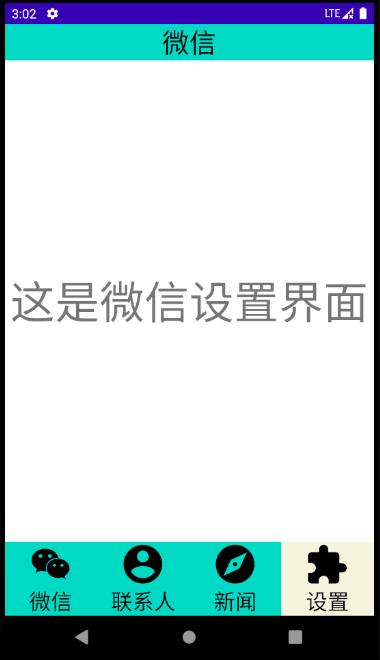
1.监听到点击时切换fragment内容
2.监听到点击时改变底部被点击的按钮的颜色
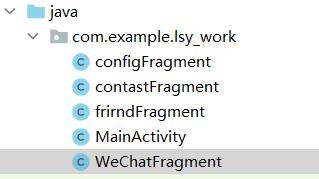
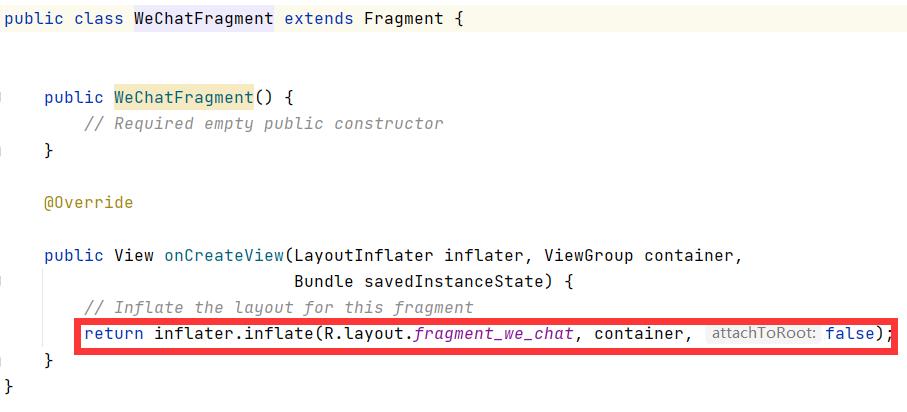
第一步:需要生成四个fragment文件:在as中选择创建fragment文件,生成后更改oncreateview函数中的页面id即可将页面内容放进类中。
如图:
第二步:java代码实现功能。
import androidx.appcompat.app.AppCompatActivity;

import android.app.Fragment;
import android.app.FragmentManager;
import android.app.FragmentTransaction;
import android.graphics.Color;
import android.os.Bundle;
import android.view.View;
import android.view.Window;
import android.widget.LinearLayout;

public class MainActivity extends AppCompatActivity implements View.OnClickListener {

    private Fragment WeChatFragment = new WeChatFragment();
    private Fragment frirndFragment = new frirndFragment();
    private Fragment configFragment = new configFragment();
    private Fragment contastFragment = new contastFragment();


    private FragmentManager fragmentManager;
    private LinearLayout linearlayout_1, linearlayout_2, linearlayout_3, linearlayout_4;

    @Override
    protected void onCreate(Bundle savedInstanceState) {
        super.onCreate(savedInstanceState);
        supportRequestWindowFeature(Window.FEATURE_NO_TITLE);
        setContentView(R.layout.activity_main);

        linearlayout_1 = findViewById(R.id.linearlayout_1);
        linearlayout_2 = findViewById(R.id.linearlayout_2);
        linearlayout_3 = findViewById(R.id.linearlayout_3);
        linearlayout_4 = findViewById(R.id.linearlayout_4);

        linearlayout_1.setOnClickListener(this);
        linearlayout_2.setOnClickListener(this);
        linearlayout_3.setOnClickListener(this);
        linearlayout_4.setOnClickListener(this);

        initfragment();
    }

    private void initfragment() {
        fragmentManager = getFragmentManager();
        FragmentTransaction transaction = fragmentManager.beginTransaction();
        transaction.add(R.id.content, WeChatFragment);
        transaction.add(R.id.content, frirndFragment);
        transaction.add(R.id.content, contastFragment);
        transaction.add(R.id.content, configFragment);
        transaction.commit();
    }

    private void hidefragment(FragmentTransaction transaction) {

        transaction.hide(WeChatFragment);
        transaction.hide(frirndFragment);
        transaction.hide(contastFragment);
        transaction.hide(configFragment);
    }


    @Override
    public void onClick(View v) {
        switch (v.getId()) {
            case R.id.linearlayout_1:
                showfragment(0);
                break;
            case R.id.linearlayout_2:
                showfragment(1);
                break;
            case R.id.linearlayout_3:
                showfragment(2);
                break;
            case R.id.linearlayout_4:
                showfragment(3);
                break;
            default:
                break;
        }
    }

    private void showfragment(int i) {
        FragmentTransaction transaction = fragmentManager.beginTransaction();
        hidefragment(transaction);
        switch (i) {
            case 0:
                transaction.show(WeChatFragment);
                linearlayout_1.setBackgroundColor(Color.parseColor("#F5F5DC"));
                linearlayout_2.setBackgroundColor(Color.parseColor("#FF03DAC5"));
                linearlayout_3.setBackgroundColor(Color.parseColor("#FF03DAC5"));
                linearlayout_4.setBackgroundColor(Color.parseColor("#FF03DAC5"));
                break;
            case 1:
                transaction.show(frirndFragment);
                linearlayout_2.setBackgroundColor(Color.parseColor("#F5F5DC"));
                linearlayout_1.setBackgroundColor(Color.parseColor("#FF03DAC5"));
                linearlayout_3.setBackgroundColor(Color.parseColor("#FF03DAC5"));
                linearlayout_4.setBackgroundColor(Color.parseColor("#FF03DAC5"));
                break;
            case 2:
                transaction.show(contastFragment);
                linearlayout_3.setBackgroundColor(Color.parseColor("#F5F5DC"));
                linearlayout_1.setBackgroundColor(Color.parseColor("#FF03DAC5"));
                linearlayout_2.setBackgroundColor(Color.parseColor("#FF03DAC5"));
                linearlayout_4.setBackgroundColor(Color.parseColor("#FF03DAC5"));
                break;
            case 3:
                transaction.show(configFragment);
                linearlayout_4.setBackgroundColor(Color.parseColor("#F5F5DC"));
                linearlayout_1.setBackgroundColor(Color.parseColor("#FF03DAC5"));
                linearlayout_3.setBackgroundColor(Color.parseColor("#FF03DAC5"));
                linearlayout_2.setBackgroundColor(Color.parseColor("#FF03DAC5"));
                break;
            default:
                break;
        }
        transaction.commit();
    }
}
三、运行界面
以上是关于Android Studio微信界面开发的主要内容,如果未能解决你的问题,请参考以下文章
Android 逆向Android 进程注入工具开发 ( Visual Studio 开发 Android NDK 应用 | Visual Studio 中 SDK 和 NDK 安装位置 )(代码片段