Beats:使用 Autodiscover 监控 Docker 容器
Posted 中国社区官方博客
tags:
篇首语:本文由小常识网(cha138.com)小编为大家整理,主要介绍了Beats:使用 Autodiscover 监控 Docker 容器相关的知识,希望对你有一定的参考价值。
当你在容器上运行应用程序时,它们会成为监控系统的移动目标。在实际的容器部署中,我们通常并不知道到底部署多少个容器以及运行的接口是什么样的。这在实际的监控中是非常麻烦的。 Autodiscover 允许你跟踪它们并在发生变化时调整设置。 通过定义配置模板,自动发现子系统可以在服务开始运行时对其进行监控。
在今天的展示中,我将使用 Heartbeat 来进行展示。如果你想了解更多关于 Heartbeat 的配置,你可以阅读我之前的文章:
你可以在 heartbeat.yml 配置文件的 heartbeat.autodiscover 部分定义自动发现设置。 要启用自动发现,请指定提供程序列表。
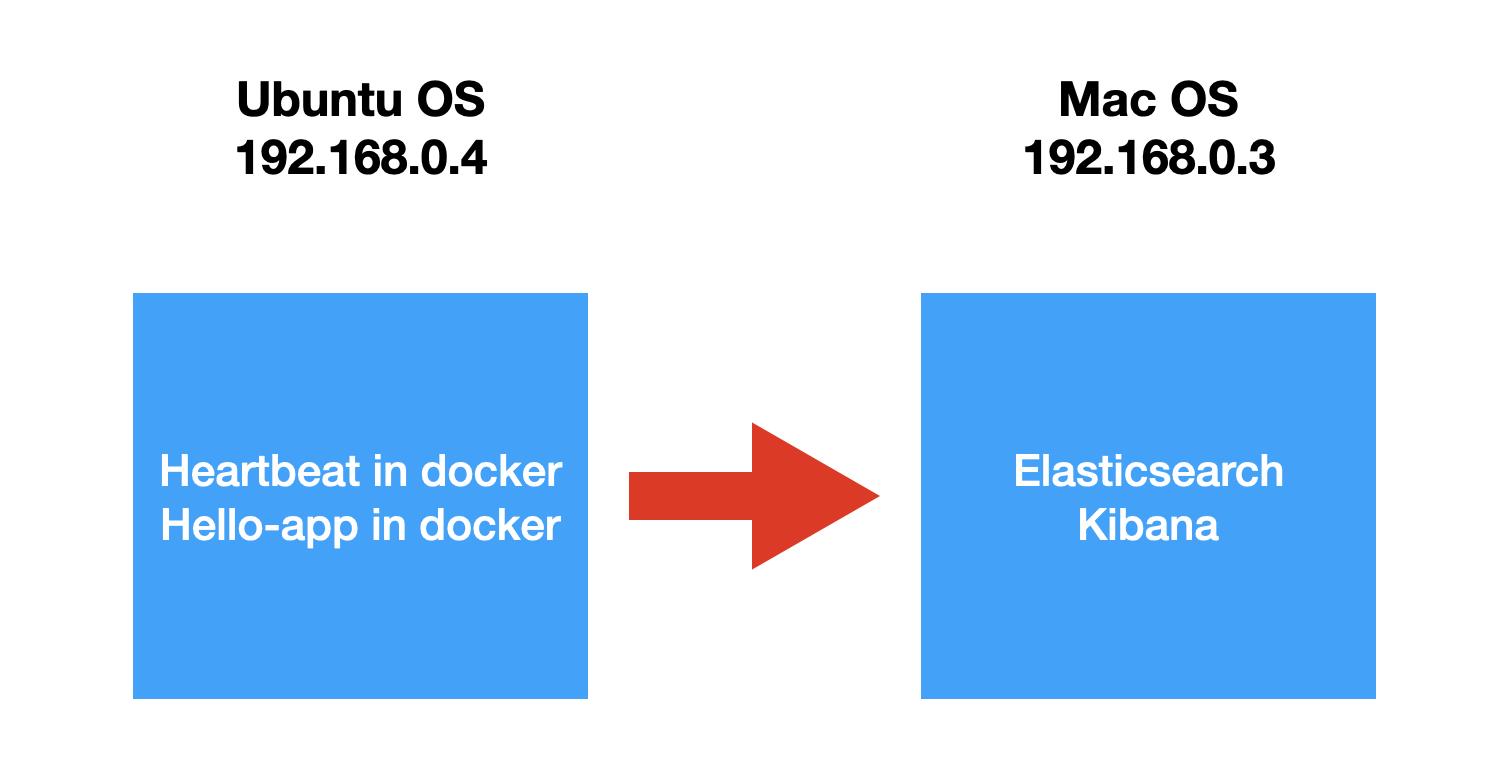
在今天的展示中,我们将使用如下的架构来进行展示:

我在 Mac OS 的电脑上安装好 Elasticsearch 及 Kibana,而在另外一台 Ubuntu OS 的机器上安装 Docker,并在 Docker 里运行 Hearbeat 及一个 Web service 应用 hello-app。我们把 Heartbeat 及 Hello-app 置于 docker 里运行是为了能够使得它们互相能够通信。
安装
我们需要按照 Elasticsearch 及 Kibana。请按照我之前的教程分别进行安装:
因为我们需要使得我们的 Elasticsearch 及 Kibana 被另外一个机器所访问,所以在默认的配置中,我们需要对 config/elasticsearch.yml 做如下的修改:
config/elasticsearch.yml
network.host: 0.0.0.0
discovery.type: single-node
我们需要对 config/kibana.yml 文件做如下的修改:
config/kibana.yml
server.host: "0.0.0.0"修改完上面的配置后,需要重新启动 Elasticsearch 及 Kibana。
下载测试服务
在今天的练习中,我们将使用一个非常简单的 hello-app 应用来进行展示。我们把这个应用安装到 Ubuntu 机器中。我们可以在如下的地址下载这个应用:
docker pull phozzy/hello-app它的源码位于:https://github.com/phozzy/hello-app
这个应用是一个 go 语言编译的应用。它非常之简单:
main.go
package main

import (
	"fmt"
	"log"
	"net/http"
	"os"
)

func main() {
	// use PORT environment variable, or default to 8080
	port := "8080"
	if fromEnv := os.Getenv("PORT"); fromEnv != "" {
		port = fromEnv
	}

	// register hello function to handle all requests
	server := http.NewServeMux()
	server.HandleFunc("/", hello)

	// start the web server on port and accept requests
	log.Printf("Server listening on port %s", port)
	err := http.ListenAndServe(":"+port, server)
	log.Fatal(err)
}

// hello responds to the request with a plain-text "Hello, world" message.
func hello(w http.ResponseWriter, r *http.Request) {
	log.Printf("Serving request: %s", r.URL.Path)
	host, _ := os.Hostname()
	fmt.Fprintf(w, "Hello, GKE!\\n")
	fmt.Fprintf(w, "Version: %s\\n", os.Getenv("VERSION"))
	fmt.Fprintf(w, "Hostname: %s\\n", host)
}
在默认的情况下,这个应用运行于 8080 口上。从上面的应用中,我们可以看出来它有一个接口 "/",运行后输出一些文字。
我们通过如下的命令来查看已经下载的 docker image:
$ docker images | grep hello-app
phozzy/hello-app                      latest          ccc079c68c8d   16 months ago   11.5MB
我们使用如下的命令来进行运行:
docker run --name hello-app-1 -p 8888:8080 -d phozzy/hello-app:latest$ docker run --name hello-app-1 -p 8888:8080 -d phozzy/hello-app:latest
952f433dad61a9991c2f4b5e5bf2da4fe15121990e0f69c1f2509ebe0376ba36我们可以使用如下的命令来查看 container:
$ docker ps
CONTAINER ID   IMAGE                     COMMAND         CREATED              STATUS              PORTS                                       NAMES
952f433dad61   phozzy/hello-app:latest   "./hello-app"   About a minute ago   Up About a minute   0.0.0.0:8888->8080/tcp, :::8888->8080/tcp   hello-app-1
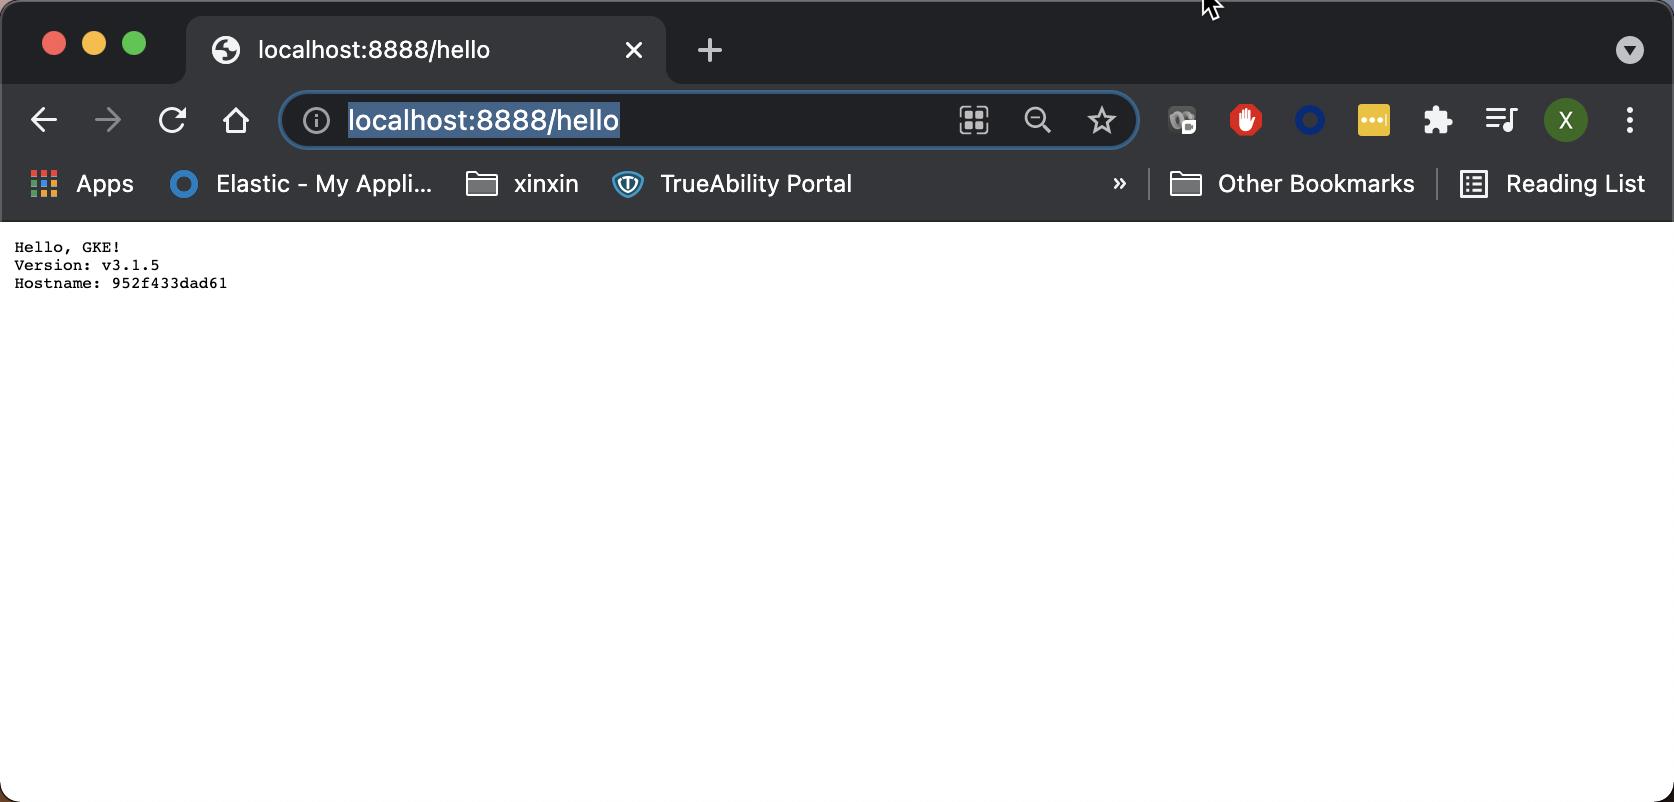
我们看到一个 container 已经运行起来了。我们在浏览器中打入如下的地址 http://localhost:8888/hello:

我们可以看到如上的输出。
我们知道如果我们使用 HTTP 协议来监控这个服务时,我们必须很清楚地在 heartbeat.yml 文件中定义出来,比如:
heartbeat.yml
heartbeat.monitors:
- type: http
  enabled: true
  id: my-monitor
  name: My Monitor
  urls: ["http://localhost:8888/hello"]
  schedule: '@every 10s'

output.elasticsearch:
  hosts: ["192.168.0.3:9200"]
从上面我们可以看出来,我们需要非常明确地告诉 Heartbeat 我们需要对哪个服务的接口进行监控。但是如果是使用 container 的话,那么这个 url 可能是变化的,比如我们可以使用如下的方式来启动这个服务:
docker run --name hello-app-1 -p 1234:8080 -d phozzy/hello-app:latest在上面,我们把端口地址修改为 1234,那么是不是我们需要重新修正刚才的 heartbeat.yml 文件呢?另外一种情况是,我们假如不使用之前的端口地址 8888,而改为新的端口地址,那么我们是不是也要重新来修改 heartbeat.yml 文件呢?
如果是,那么我们需要不断地修改这个 heartbeat.yml 文件。这样会显得非常之麻烦。如果你使用 Kubernetes 时,通常这些容器都是动态生成的。我们需要一种动态的方法来跟踪这些变化并自动做适当的调整。
使用 Autodiscover 来动态跟踪动态部署
我们首先来创建一个崭新的文件 heartbeat.docker.yml 文件。它的内容如下:
heartbeat.docker.yml
heartbeat.config.monitors:
  # Directory + glob pattern to search for configuration files
  path: ${path.config}/monitors.d/*.yml
  # If enabled, heartbeat will periodically check the config.monitors path for changes
  reload.enabled: false
  # How often to check for changes
  reload.period: 5s

# Configure monitors inline
heartbeat.monitors:
- type: http
  # Set enabled to true (or delete the following line) to enable this example monitor
  enabled: false
  # ID used to uniquely identify this monitor in elasticsearch even if the config changes
  id: my-monitor
  # Human readable display name for this service in Uptime UI and elsewhere
  name: My Monitor
  # List or urls to query
  urls: ["http://192.168.0.3:9200"]
  # Configure task schedule
  schedule: '@every 10s'

setup.template.settings:
  index.number_of_shards: 1
  index.codec: best_compression

setup.kibana:
  host: "192.168.0.3:5601"

# ---------------------------- Elasticsearch Output ----------------------------
output.elasticsearch:
  # Array of hosts to connect to.
  hosts: ["192.168.0.3:9200"]

processors:
  - add_observer_metadata:

# This allows to enable 6.7 migration aliases
#migration.6_to_7.enabled: true
heartbeat.autodiscover:
  providers:
    - type: docker
      templates:
        - condition:
            contains:
              docker.container.image: phozzy/hello-app:latest
          config:
            - type: http
              name: "Hello instance ${data.docker.container.name}"
              hosts: ["${data.host}:${data.port}/hello"]
              check.request:
                method: GET
              check.response:
                body: "Hello, GKE!"
              schedule: "@every 5s"
在上面,我们创建了一个 type 为 docker 的 provider。根据 Elastic 官方文档,这个 type 也可以是 kubernetes 或 AWS。在今天的练习中,我将使用 docker。我们为 docker 创建了一个 template。一个 template 由 condition 及 config 组成。只要满足条件的,就会使用相应定义的 config。针对我们的情况,我们希望 docker image 里含有 phozzy/hello-app:latest。如果这个条件满足,它就会自动地使用在 config 中定义的参数。在上面的 name 及 hosts 中,我们动态地从 docker 中获取一些数据,并配置。在上面的最后,我们把数据传入到 Elasticsearch 中。
我们来创建一个叫做 my_network 的 network:
docker network create --driver bridge my_network这个 my_network 将被用作 Heartbeat 和 Hello-app 的通信。我们可以通过如下的命令来查看所有的 network:
docker network ls$ docker network ls
NETWORK ID NAME DRIVER SCOPE
9c37dcff81fb bridge bridge local
b53ad76ab5ec data-pipeline_default bridge local
da545fd42864 host host local
2f8db3d8dca8 my_network bridge local
091528d93dcb none null local在上面,我们可以看到 my_network 已经被成功地创建。我们可以使用如下的命令来检查这个 network:
docker network inspect my_network$ docker network inspect my_network
[
{
"Name": "my_network",
"Id": "2f8db3d8dca8ec28c2fc3af6729830797a8cc86ff34d5f9a44948b8abdbe253e",
"Created": "2021-07-15T12:20:33.200347731+08:00",
"Scope": "local",
"Driver": "bridge",
"EnableIPv6": false,
"IPAM": {
"Driver": "default",
"Options": {},
"Config": [
{
"Subnet": "172.19.0.0/16",
"Gateway": "172.19.0.1"
}
]
},
"Internal": false,
"Attachable": false,
"Ingress": false,
"ConfigFrom": {
"Network": ""
},
"ConfigOnly": false,
"Containers": {
"c0807f8e0118a6eb5fc96217aad4a7bc2ae0493977cb5fb8b61ab7e01169c3a7": {
"Name": "hello-app-1",
"EndpointID": "3a511f2edf891b70278cc96f9d0a7863f1b7208ea89bb6fa7bd69eeb2177513a",
"MacAddress": "02:42:ac:13:00:03",
"IPv4Address": "172.19.0.3/16",
"IPv6Address": ""
},
"f96004623acb404ca882e8f2f3b666960016f90fdf0b800849c5fa7eb7aa3066": {
"Name": "heartbeat",
"EndpointID": "6235d2ab9256a7ed36c56cc03ae81a3b1338d7f3a8fd1ed25a9dcd0384723d34",
"MacAddress": "02:42:ac:13:00:02",
"IPv4Address": "172.19.0.2/16",
"IPv6Address": ""
}
},
"Options": {},
"Labels": {}
}
]接下来,我们添加 Ubuntu OS 当前的用户到 docker group。这个是因为我们需要用到 /var/run/docker.sock 这个文件。
ls -l /var/run/docker.sock~$ ls -l /var/run/docker.sock
srw-rw---- 1 root docker 0 7月 15 10:56 /var/run/docker.sock我们使用如下的命令:
sudo usermod -a -G docker $USER由于一些原因,在我的配置中,我需要把 /var/run/docker.sock 的 owner 修改为我的账号 liuxg,否则有权限问题。
sudo chown $USER /var/run/docker.sock我们进入上面 heartbeat.docker.yml 文件所处的目录,并使用如下的命令来启动 Heartbeat:
docker run -d \\
  --name=heartbeat \\
  --user=heartbeat \\
  --net=my_network \\
  --mount type=bind,source=/var/run/docker.sock,target=/var/run/docker.sock \\
  --volume="$(pwd)/heartbeat.docker.yml:/usr/share/heartbeat/heartbeat.yml:ro" \\
  docker.elastic.co/beats/heartbeat:7.13.0 \\
  --strict.perms=false -e
我们可以通过如下的命令来查看 heartbeat 容器是否已经成功运行:
docker ps | grep heartbeat$ docker ps | grep heartbeat
f96004623acb docker.elastic.co/beats/heartbeat:7.13.0 "/usr/bin/tini -- /u…" 2 hours ago Up 35 minutes heartbeat上面显示我们的 Heartbeat 已经被成功地部署了。
我们接下来启动 hello-app 应用。我们使用如下的命令来启动:
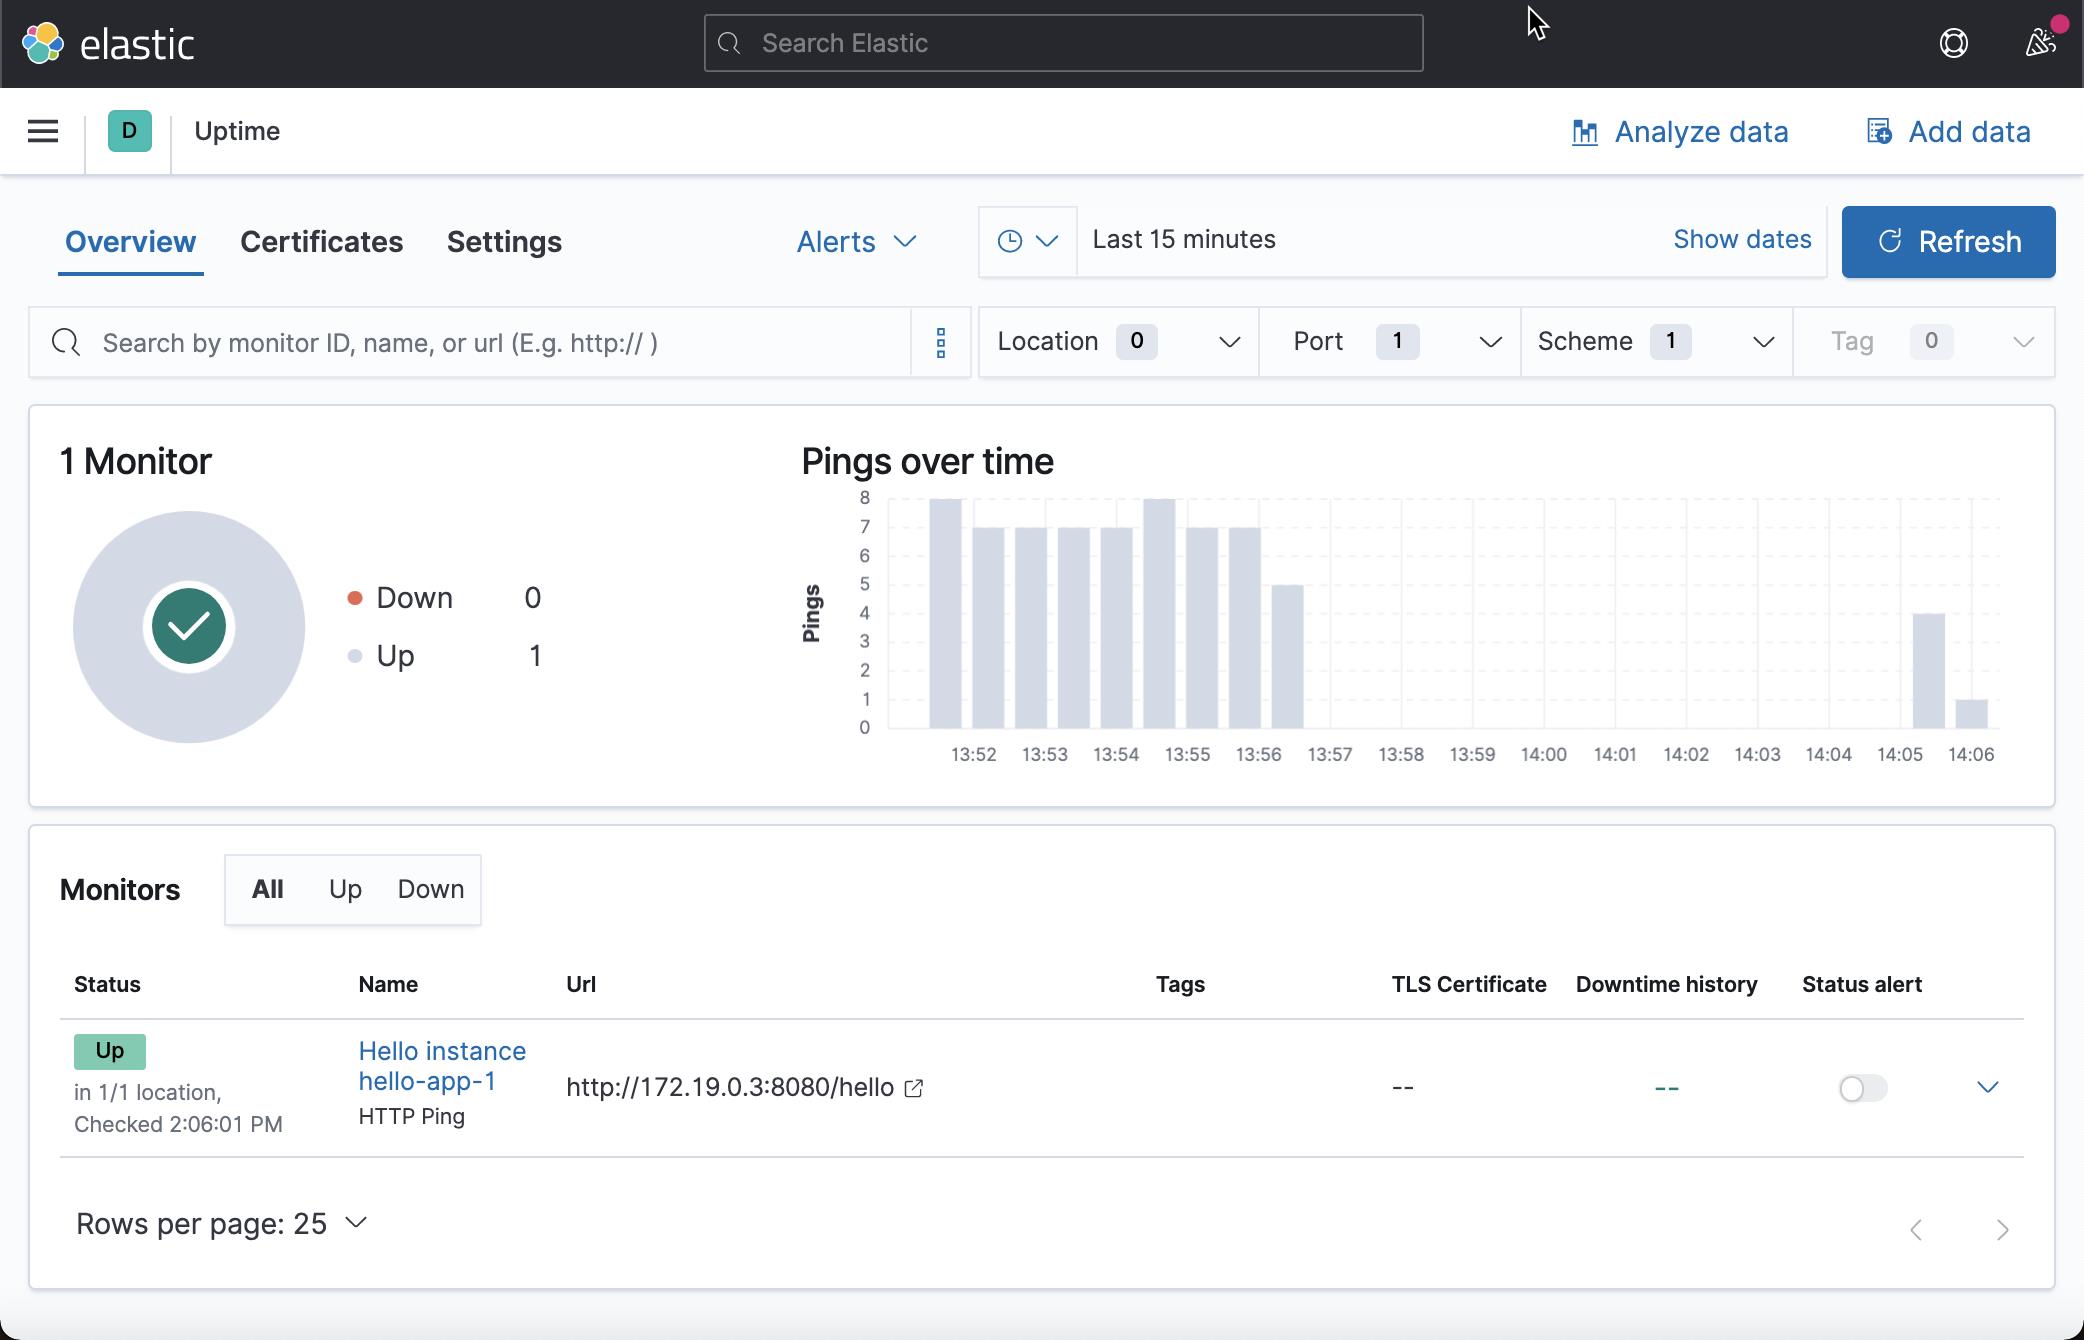
docker run --name hello-app-1 --net my_network -p 8888:8080 -d phozzy/hello-app:latest等上面的 hello-app 应用成功启动后,我们打开 Kibana 的界面:

我们可以看到 hello-app-1 的状态是 Up 的。它表明我们的 Heartbeat 能够成功地监控有 docker 生成的服务。
我们接下来启动另外一个 hello-app 的服务实例。在另外一个 terminal 中打入如下的命令:
docker run --name hello-app-2 --net my_network -p 9999:8080 -d phozzy/hello-app:latest$ docker run --name hello-app-2 --net my_network -p 9999:8080 -d phozzy/hello-app:latest
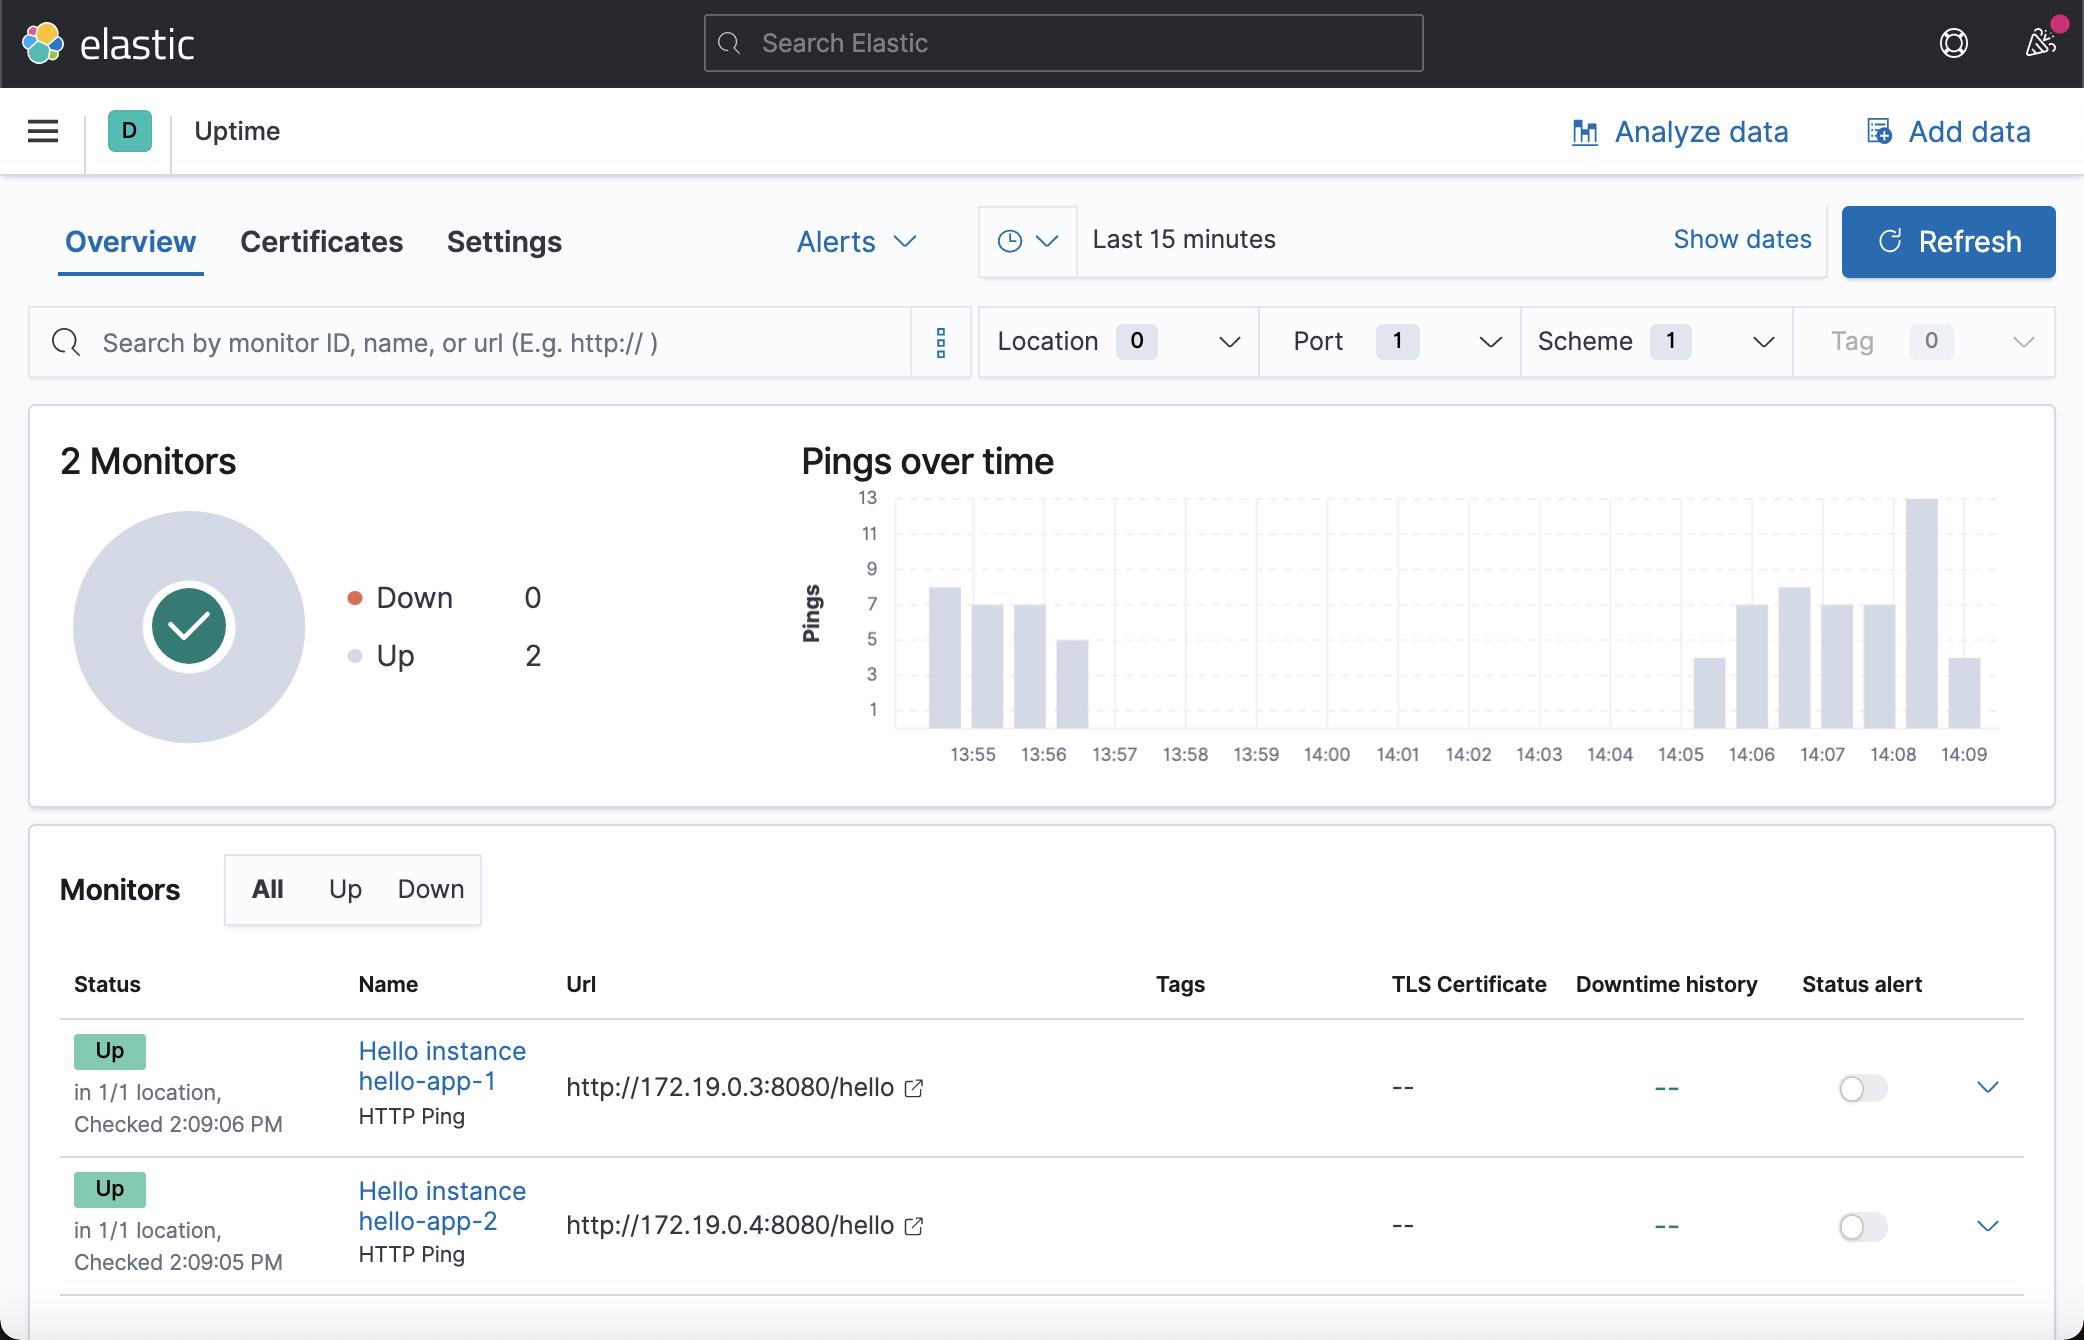
cee77bd60d95cf25d7605c9c6b48a24b632dc61db9599c3e6b09afb089d36999我们再次回到 Kibana 的界面,我们会看到如下的画面:

从上面,我们可以清楚地看出来 hello-app-2 的状态也是 Up 的。
参考:
以上是关于Beats:使用 Autodiscover 监控 Docker 容器的主要内容,如果未能解决你的问题,请参考以下文章