Elastic:索引备份及恢复
Posted 中国社区官方博客
tags:
篇首语:本文由小常识网(cha138.com)小编为大家整理,主要介绍了Elastic:索引备份及恢复相关的知识,希望对你有一定的参考价值。
在我之前的文章 “Elasticsearch:Cluster 备份 Snapshot 及 Restore API”,我详细地描述如何使用 Elastic 官方所提供的 snapshot 及 resotore API 接口来对我们想要的索引或者集群状态进行备份和恢复。
在今天的文章中,我们将使用另外一种方法来针对一个 Elasticsearch 集群中的一个索引来进行备份及恢复。
首先,在我们的 Linux 机器上我们安装如下的包:
apt-get update
apt-get install curl jq npm
接着,我们安装 elasticdump NPM 安装包:
sudo npm install elasticdump --global我们可以使用如下的命令来得到 elasticdump 命令的帮助信息:
elasticdump --help我们首先来测试一下我们我们的 Linux 机器是否能够正确地连接到 Elasticsearch 服务器:
curl -u elastic:password -X GET "http://192.168.0.3:9200"在上面的命令中,我们需要根据自己集群的配置修改上面的用户名及密码。你也需要根据自己的情况修改上面的 IP 地址。
$ curl -u elastic:password -X GET "http://192.168.0.3:9200"
{
  "name" : "liuxg",
  "cluster_name" : "elasticsearch",
  "cluster_uuid" : "-vtUaRdHSnGJb5XdGC32bA",
  "version" : {
    "number" : "7.13.0",
    "build_flavor" : "default",
    "build_type" : "tar",
    "build_hash" : "5ca8591c6fcdb1260ce95b08a8e023559635c6f3",
    "build_date" : "2021-05-19T22:22:26.081971330Z",
    "build_snapshot" : false,
    "lucene_version" : "8.8.2",
    "minimum_wire_compatibility_version" : "6.8.0",
    "minimum_index_compatibility_version" : "6.0.0-beta1"
  },
  "tagline" : "You Know, for Search"
}
在我们的 Kibana 中,我们来创建一个叫做 twitter 的索引:
POST _bulk
{ "index" : { "_index" : "twitter", "_id": 1} }
{"user":"双榆树-张三","message":"今儿天气不错啊,出去转转去","uid":2,"age":20,"city":"北京","province":"北京","country":"中国","address":"中国北京市海淀区","location":{"lat":"39.970718","lon":"116.325747"}}
{ "index" : { "_index" : "twitter", "_id": 2 }}
{"user":"东城区-老刘","message":"出发,下一站云南!","uid":3,"age":30,"city":"北京","province":"北京","country":"中国","address":"中国北京市东城区台基厂三条3号","location":{"lat":"39.904313","lon":"116.412754"}}
{ "index" : { "_index" : "twitter", "_id": 3} }
{"user":"东城区-李四","message":"happy birthday!","uid":4,"age":30,"city":"北京","province":"北京","country":"中国","address":"中国北京市东城区","location":{"lat":"39.893801","lon":"116.408986"}}
{ "index" : { "_index" : "twitter", "_id": 4} }
{"user":"朝阳区-老贾","message":"123,gogogo","uid":5,"age":35,"city":"北京","province":"北京","country":"中国","address":"中国北京市朝阳区建国门","location":{"lat":"39.718256","lon":"116.367910"}}
{ "index" : { "_index" : "twitter", "_id": 5} }
{"user":"朝阳区-老王","message":"Happy BirthDay My Friend!","uid":6,"age":50,"city":"北京","province":"北京","country":"中国","address":"中国北京市朝阳区国贸","location":{"lat":"39.918256","lon":"116.467910"}}
{ "index" : { "_index" : "twitter", "_id": 6} }
{"user":"虹桥-老吴","message":"好友来了都今天我生日,好友来了,什么 birthday happy 就成!","uid":7,"age":90,"city":"上海","province":"上海","country":"中国","address":"中国上海市闵行区","location":{"lat":"31.175927","lon":"121.383328"}}
我们使用 bulk 接口来进行批量导入6个文档。这样我们就创建了一个叫做 twitter 的索引。
因为我的集群已经配置了安全,所以我创建了一个如下的 auth.ini 文件,并且它的内容如下:
auth.ini
$ pwd
/home/liuxg/tmp
liuxg@liuxgu:~/tmp$ ls auth.ini
auth.ini
liuxg@liuxgu:~/tmp$ cat auth.ini
user=elastic
password=password
我们紧接着下来创建一个针对 twitter 索引的 backup。在位于 auth.ini 所在的目录中,运行如下的命令:
elasticdump --httpAuthFile auth.ini --input=http://192.168.0.3:9200/twitter --output=/tmp/backup.json --type=data$ elasticdump --httpAuthFile auth.ini --input=http://192.168.0.3:9200/twitter --output=/tmp/backup.json --type=data
Wed, 21 Jul 2021 02:07:09 GMT | starting dump
Wed, 21 Jul 2021 02:07:09 GMT | got 6 objects from source elasticsearch (offset: 0)
Wed, 21 Jul 2021 02:07:09 GMT | sent 6 objects to destination file, wrote 6
Wed, 21 Jul 2021 02:07:09 GMT | got 0 objects from source elasticsearch (offset: 6)
Wed, 21 Jul 2021 02:07:09 GMT | Total Writes: 6
Wed, 21 Jul 2021 02:07:09 GMT | dump complete如上所示,我们的 backup.json 文件位于 /tmp/backup.json 位置。我们接下来查看这个文档的内容:
cat /tmp/backup.json | jq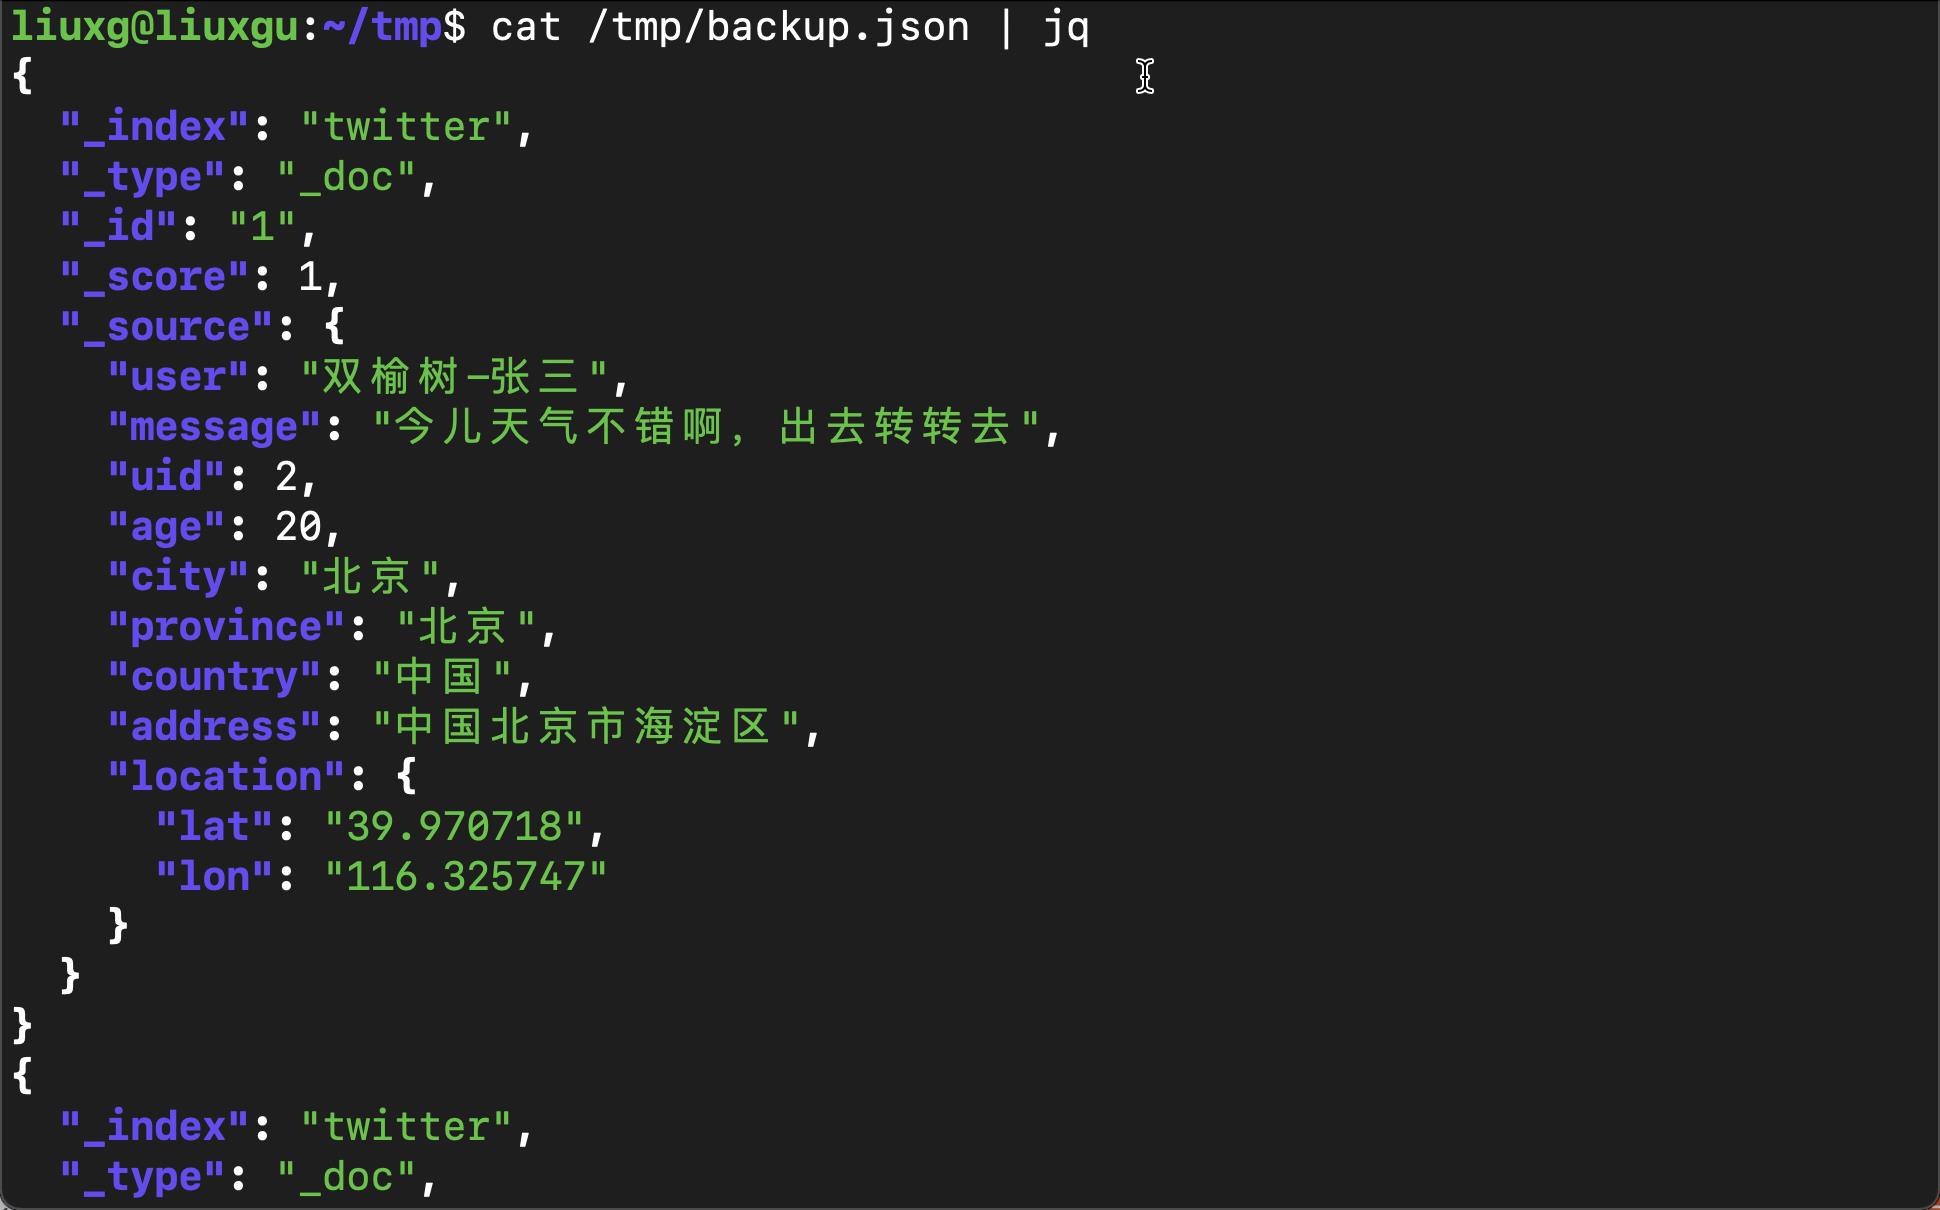
显然在上面的文件中,它包含了我们之前导入到 twitter 索引中的6个文档。
如果你已经看到上面的输出,那么我恭喜你。你已经成功地备份了你的索引。
再接下来,我们来使用 elasticdump 命令来对我们之前备份的文档进行恢复。我们使用如下的命令:
elasticdump --httpAuthFile auth.ini --input=/tmp/backup.json --output=http://192.168.0.3:9200/twitter1 --type=data为了不覆盖之前的 twitter 索引,我把恢复的索引设置为 twitter1。在运行上面的指令之前,记得根据自己的情况修正上面的 IP 地址。
运行上面的指令:
$ elasticdump --httpAuthFile auth.ini --input=/tmp/backup.json --output=http://192.168.0.3:9200/twitter1 --type=data
Wed, 21 Jul 2021 02:21:19 GMT | starting dump
Wed, 21 Jul 2021 02:21:19 GMT | got 6 objects from source file (offset: 0)
Wed, 21 Jul 2021 02:21:20 GMT | sent 6 objects to destination elasticsearch, wrote 6
Wed, 21 Jul 2021 02:21:20 GMT | got 0 objects from source file (offset: 6)
Wed, 21 Jul 2021 02:21:20 GMT | Total Writes: 6
Wed, 21 Jul 2021 02:21:20 GMT | dump complete
使用如下的命令来进行查看:
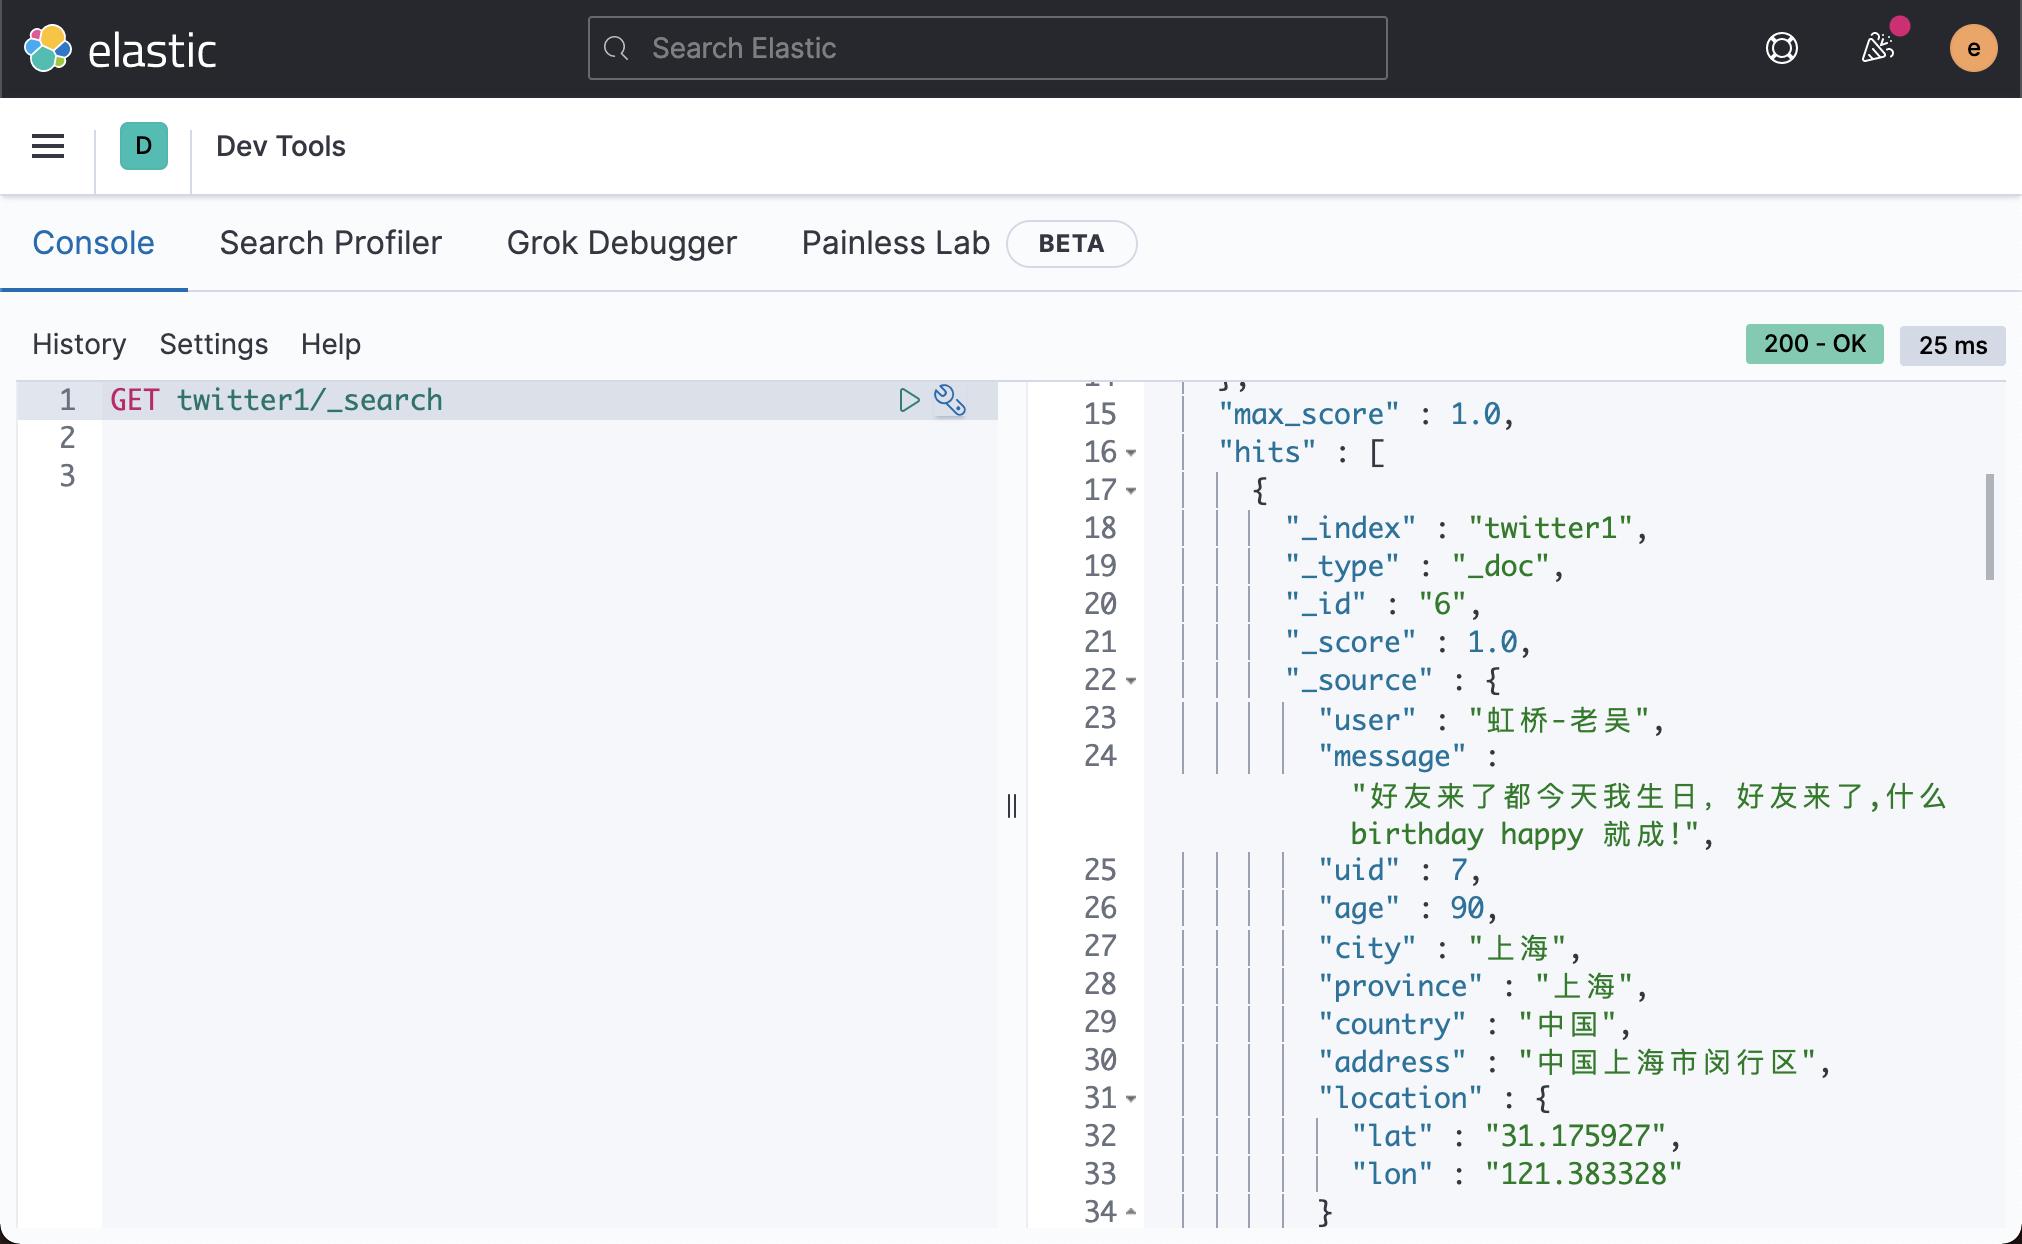
curl -u elastic:password -X GET "http://192.168.0.3:9200/twitter1/_search?pretty=true&q=*:*"
在上面,我们可以看到有6个文档。它说明我们已经正确地恢复了之前备份的索引 twitter。
以上是关于Elastic:索引备份及恢复的主要内容,如果未能解决你的问题,请参考以下文章
mongoDB (mongoose增删改查聚合索引连接备份与恢复监控等等)