讲讲Android为自定义view提供的SurfaceView
Posted 计蒙不吃鱼
tags:
篇首语:本文由小常识网(cha138.com)小编为大家整理,主要介绍了讲讲Android为自定义view提供的SurfaceView相关的知识,希望对你有一定的参考价值。
系列文章目录
讲讲android为自定义view提供的SurfaceView
文章目录
前言
前几天发表了几篇在自定义view中通过修改值实现动态效果的文章。起到主要作用的是调用刷新界面的方法。但是假设绘制的过程逻辑比较复杂,并且界面更新频繁,这时候就会造成界面的卡顿。十分影响用户体验感。
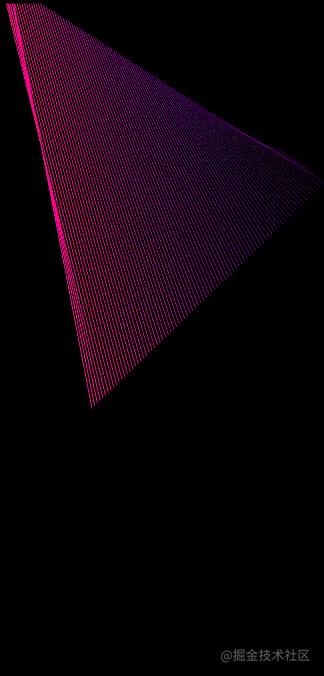
灵感来源于,Android官方demo(效果图如下)

一、Android为什么会提供SurfaceView
View是通过刷新来重绘视图,并且有一个刷新的间隔,当绘制过程逻辑很复杂加上界面更新还非常频繁时,就可能无法在间隔内完成绘制,就会造成界面效果的卡顿,影响用户体验,为此Android提供了SurfaceView来解决这一问题。
二、先看看Android Demo的实现
1.实现接口以及接口定义的方法
....implements SurfaceHolder.Callback2
public void surfaceCreated(SurfaceHolder holder) {
    synchronized (mDrawingThread) {
        mDrawingThread.mSurface = holder;
        mDrawingThread.notify();
    }
}

public void surfaceChanged(SurfaceHolder holder, int format, int width, int height) {
    //这里不需要做任何事情;绘制线程将从画布中获取
}

public void surfaceRedrawNeeded(SurfaceHolder holder) {
}

public void surfaceDestroyed(SurfaceHolder holder) {
    //我们需要告诉绘图线程停止
    synchronized (mDrawingThread) {
        mDrawingThread.mSurface = holder;
        mDrawingThread.notify();
        while (mDrawingThread.mActive) {
            try {
                mDrawingThread.wait();
            } catch (InterruptedException e) {
                e.printStackTrace();
            }
        }
    }
}
2.与Activity生命周期进行绑定
@Override
protected void onPause() {
    super.onPause();

    //当我们暂停时,确保绘制线程没有运行。
    synchronized (mDrawingThread) {
        mDrawingThread.mRunning = false;
        mDrawingThread.notify();
    }
}

@Override
protected void onResume() {
    super.onResume();

    //让绘图线程继续运行。
    synchronized (mDrawingThread) {
        mDrawingThread.mRunning = true;
        mDrawingThread.notify();
    }
}

@Override
protected void onDestroy() {
    super.onDestroy();

    //确保绘图线程消失。
    synchronized (mDrawingThread) {
        mDrawingThread.mQuit = true;
        mDrawingThread.notify();
    }
}
3.完成初始化操作
4.实现
- 通过
lockCanvas()方法获得Canvas对象
//锁定画布进行绘图。
Canvas canvas = mSurface.lockCanvas();
if (canvas == null) {
    Log.i("WindowSurface", "Failure locking canvas");
    continue;
}
- 在子线程中使用Canvas对象进行绘制
// 更新图形
if (!mInitialized) {
    mInitialized = true;
    mPoint1.init(canvas.getWidth(), canvas.getHeight(), mMinStep);
    mPoint2.init(canvas.getWidth(), canvas.getHeight(), mMinStep);
    mColor.init(127, 127, 1);
} else {
    mPoint1.step(canvas.getWidth(), canvas.getHeight(),
            mMinStep, mMaxStep);
    mPoint2.step(canvas.getWidth(), canvas.getHeight(),
            mMinStep, mMaxStep);
    mColor.step(127, 127, 1, 3);
}
//颜色的效果
mBrightLine+=2;
if (mBrightLine > (NUM_OLD*2)) {
    mBrightLine = -2;
}

// 清理背景
canvas.drawColor(mBackground.getColor());

// 画旧线
for (int i=mNumOld-1; i>=0; i--) {
    mForeground.setColor(mOldColor[i] | makeGreen(i));
    mForeground.setAlpha(((NUM_OLD-i) * 255) / NUM_OLD);
    int p = i*4;
    canvas.drawLine(mOld[p], mOld[p+1], mOld[p+2], mOld[p+3], mForeground);


}

// 画新线
int red = (int)mColor.x + 128;
if (red > 255) red = 255;
int blue = (int)mColor.y + 128;
if (blue > 255) blue = 255;
int color = 0xff000000 | (red<<16) | blue;
mForeground.setColor(color | makeGreen(-2));
canvas.drawLine(mPoint1.x, mPoint1.y, mPoint2.x, mPoint2.y, mForeground);


// 添加新的线条
if (mNumOld > 1) {
    System.arraycopy(mOld, 0, mOld, 4, (mNumOld-1)*4);
    System.arraycopy(mOldColor, 0, mOldColor, 1, mNumOld-1);
}
if (mNumOld < NUM_OLD) mNumOld++;
mOld[0] = mPoint1.x;
mOld[1] = mPoint1.y;
mOld[2] = mPoint2.x;
mOld[3] = mPoint2.y;
mOldColor[0] = color;
- 使用
unlockCanvasAndPost()方法将画布内容进行提交
//全部完成
mSurface.unlockCanvasAndPost(canvas);
5.运行
//告诉活动的窗口,我们想做我们自己的绘制
getWindow().takeSurface(this);
//这是将绘制到我们的表面的线程。
mDrawingThread = new DrawingThread();
mDrawingThread.start();
三、继承SurfaceView实现
1.自定义类继承自SurfaceView,并且实现两个接口以及接口定义的方法。
public class MyView extends SurfaceView implements SurfaceHolder.Callback, Runnable {
    public MyView(Context context) {
        super(context);
    }

    public MyView(Context context, AttributeSet attrs) {
        super(context, attrs);
    }

    public MyView(Context context, AttributeSet attrs, int defStyleAttr) {
        super(context, attrs, defStyleAttr);
    }
    //创建
    @Override
    public void surfaceCreated(SurfaceHolder holder) {

    }
    //改变
    @Override
    public void surfaceChanged(SurfaceHolder holder, int format, int width, int height) {

    }
    //销毁
    @Override
    public void surfaceDestroyed(SurfaceHolder holder) {

    }
    //子线程
    @Override
    public void run() {
    //子线程中执行的绘图逻辑
    }
}
2.初始化
        mSurfaceHolder = getHolder();
        mSurfaceHolder.addCallback(this);
       ......
3.步骤与Android Demo的实现-4.实现类似
- 通过
lockCanvas()方法获得Canvas对象 - 在子线程中使用Canvas对象进行绘制(run())
- 使用
unlockCanvasAndPost()方法将画布内容进行提交
        try {
            mCanvas = mSurfaceHolder.lockCanvas();
            mCanvas.drawColor(Color.WHITE);
            //绘制的逻辑
            .....
        }catch (Exception e){

        }finally {
            if (mCanvas != null){
                //释放canvas对象并提交画布
                mSurfaceHolder.unlockCanvasAndPost(mCanvas);
            }
        }
四、放一个使用案例源码
效果见:Android自定义view之线条等待动画(灵感来源:金铲铲之战)
public class MyView extends SurfaceView implements SurfaceHolder.Callback, Runnable {
    private SurfaceHolder mSurfaceHolder;
    private Canvas mCanvas;
    private int mWidth;
    private int mHeight;
    private int useWidth, minwidth;
    private boolean viewContinue=true,viewContinue1=true;
    private float mSweep,mSweep1;
    private boolean runDrawing;
    private Paint mPaint;
    public MyView(Context context) {
        super(context);
        initView();
    }

    public MyView(Context context, AttributeSet attrs) {
        super(context, attrs);
        initView();
    }

    public MyView(Context context, AttributeSet attrs, int defStyleAttr) {
        super(context, attrs, defStyleAttr);
    }
    //创建
    @Override
    public void surfaceCreated(SurfaceHolder holder) {
        runDrawing = true;
        new Thread(this).start();
    }
    //改变
    @Override
    public void surfaceChanged(SurfaceHolder holder, int format, int width, int height) {

    }
    //销毁
    @Override
    public void surfaceDestroyed(SurfaceHolder holder) {
        runDrawing=false;
    }
    @Override
    protected void onSizeChanged(int w, int h, int oldw, int oldh) {
        super.onSizeChanged(w, h, oldw, oldh);
        mWidth = w;
        mHeight = h;
        useWidth = mWidth;
        if (mWidth > mHeight) {
            useWidth = mHeight;
        }

    }
    //子线程
    @Override
    public void run() {
        while (runDrawing){
            draw();
        }
    }

    //绘制
    private void draw() {
        try {
            //获得canvas对象
            mCanvas = mSurfaceHolder.lockCanvas();
            //绘制背景颜色
            mCanvas.drawColor(Color.WHITE);

            minwidth = useWidth / 10;

            mCanvas.drawLine(minwidth*5,minwidth*5,minwidth*5+mSweep,minwidth*5+mSweep,mPaint);
            mCanvas.drawLine(minwidth*5,minwidth*5,minwidth*5-mSweep,minwidth*5-mSweep,mPaint);
            mCanvas.drawLine(minwidth*5,minwidth*5,minwidth*5+mSweep,minwidth*5-mSweep,mPaint);
            mCanvas.drawLine(minwidth*5,minwidth*5,minwidth*5-mSweep,minwidth*5+mSweep,mPaint);

            mCanvas.drawLine(minwidth*5+mSweep,minwidth*5+mSweep,minwidth*5+mSweep,minwidth*5+mSweep-mSweep1,mPaint);
            mCanvas.drawLine(minwidth*5-mSweep,minwidth*5-mSweep,minwidth*5-mSweep,minwidth*5-mSweep+mSweep1,mPaint);
            mCanvas.drawLine(minwidth*5+mSweep,minwidth*5-mSweep,minwidth*5+mSweep-mSweep1,minwidth*5-mSweep,mPaint);
            mCanvas.drawLine(minwidth*5-mSweep,minwidth*5+mSweep,minwidth*5-mSweep+mSweep1,minwidth*5+mSweep,mPaint);


            if (viewContinue&&viewContinue1){
                mSweep += 2;
                if (mSweep > minwidth*2) {
                    viewContinue=false;

                }

            }
            if (!viewContinue&&viewContinue1){
                mSweep1 += 4;
                if (mSweep1 > 4*minwidth) {
                    viewContinue1=false;
                    viewContinue=true;

                }
            }
            if (viewContinue&&!viewContinue1){
                if (mSweep1 <=0) {
                    mSweep-=4;
                    if (mSweep<0){
                        viewContinue=true;
                        viewContinue1=true;
                    }

                }else{
                    mSweep1 -= 2;
                }
            }
            //刷新View
            invalidate();
        }catch (Exception e){

        }finally {
            if (mCanvas != null){
                //释放canvas对象并提交画布
                mSurfaceHolder.unlockCanvasAndPost(mCanvas);
            }
        }
    }
    private void initView(){
        mSurfaceHolder = getHolder();
        //注册回调方法
        mSurfaceHolder.addCallback(this);
        setFocusable(true);
        setKeepScreenOn(true);
        setFocusableInTouchMode(true);
        //初始化画笔
        initPaint();
    }

    private void initPaint() {
        mPaint = new Paint();        //创建画笔对象
        mPaint.setColor(Color.BLACK);    //设置画笔颜色
        mPaint.setStyle(Paint.Style.STROKE);
        mPaint.setStrokeWidth(4f);     //设置画笔宽度为10px
        mPaint.setAntiAlias(true);     //设置抗锯齿
        mPaint.setAlpha(255);        //设置画笔透明度
    }
}
五、拓展一下(以下内容来源于网络)
View和SurfaceView的区别:
- View适用于主动更新的情况,而SurfaceView则适用于被动更新的情况,比如频繁刷新界面。
- View在主线程中对页面进行刷新,而SurfaceView则开启一个子线程来对页面进行刷新。
- View在绘图时没有实现双缓冲机制,SurfaceView在底层机制中就实现了双缓冲机制。
以上是关于讲讲Android为自定义view提供的SurfaceView的主要内容,如果未能解决你的问题,请参考以下文章