实现简单Restful API
Posted 静! 非淡泊无以明志,非宁静无以致远!
tags:
篇首语:本文由小常识网(cha138.com)小编为大家整理,主要介绍了实现简单Restful API相关的知识,希望对你有一定的参考价值。
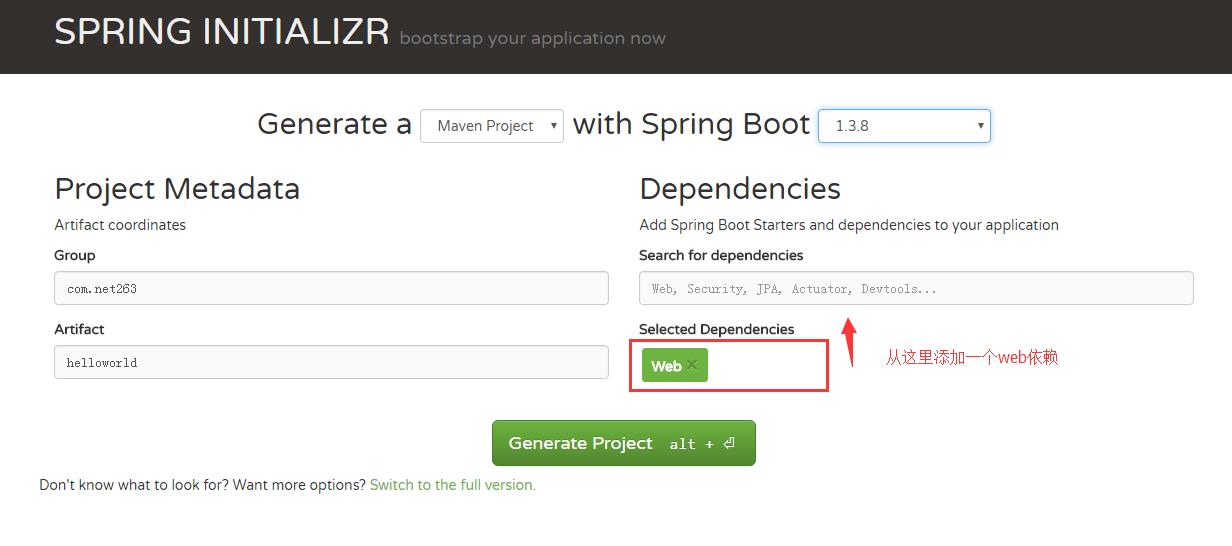
1. 首选我们通过 http://start.spring.io/ 网址生成一个基础spring boot 项目,截图配置如下:

点击 generate Project 按钮生成并下载基础项目
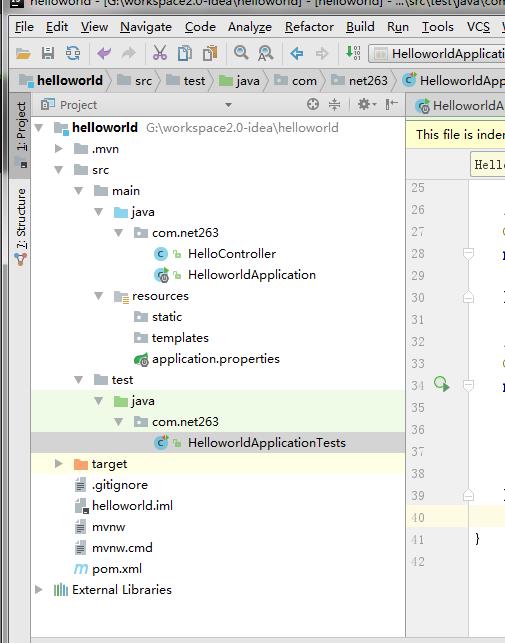
2. 将下载的项目导入到 Intellij Idea 中,截图如下:

Intellij Idea 会自动添加maven依赖
3. 创建 HelloController.java 控制器类
package com.net263;

import org.springframework.web.bind.annotation.RequestMapping;
import org.springframework.web.bind.annotation.RestController;

/**
 * Created by Administrator on 2017/5/9.
 */

@RestController
public class HelloController {

    @RequestMapping("/hello")
    public String index(){
        return "Hello World";
    }
4. 编写单元测试类
package com.net263;

import org.junit.Before;
import org.junit.Test;
import org.junit.runner.RunWith;
import org.springframework.boot.test.SpringApplicationConfiguration;
import org.springframework.http.MediaType;
import org.springframework.test.context.junit4.SpringJUnit4ClassRunner;
import org.springframework.test.context.web.WebAppConfiguration;
import org.springframework.test.web.servlet.MockMvc;
import org.springframework.test.web.servlet.request.MockMvcRequestBuilders;
import org.springframework.test.web.servlet.setup.MockMvcBuilders;

import static org.hamcrest.Matchers.equalTo;
import static org.springframework.test.web.servlet.result.MockMvcResultMatchers.content;
import static org.springframework.test.web.servlet.result.MockMvcResultMatchers.status;

@RunWith(SpringJUnit4ClassRunner.class)
@SpringApplicationConfiguration(classes = HelloworldApplication.class)
@WebAppConfiguration
public class HelloworldApplicationTests {

    // 模拟调用Controller接口发起请求
    private MockMvc mvc;

    // 初始化mvc
    @Before
    public void setUp(){
        mvc = MockMvcBuilders.standaloneSetup(new HelloController()).build();
    }

    // 测试hello 接口
    @Test
    public void testHello() throws Exception{
        mvc.perform(MockMvcRequestBuilders.get("/hello").
                accept(MediaType.APPLICATION_JSON)).
                andExpect(status().isOk()).
                andExpect(content().string(equalTo("Hello World")));
    }

}
5. 启动Srping boot 应用程序可以通过 http://localhost:8080/hello 请求访问到我们的Hello Restful API,截图如下:

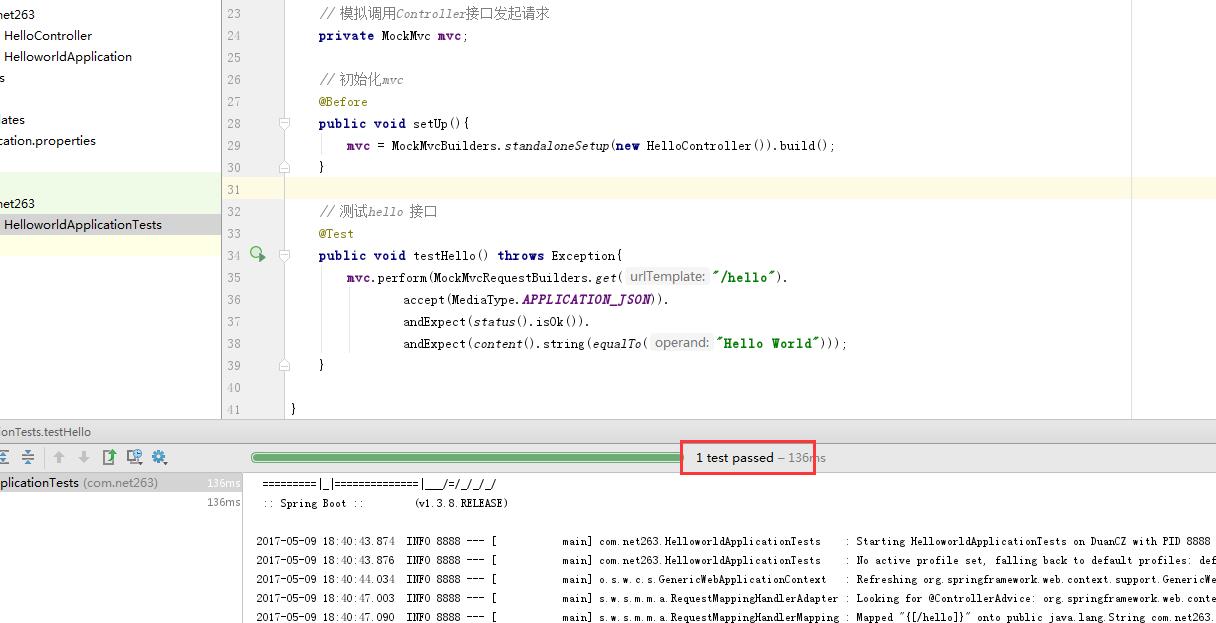
6. 运行单元测试类可做单元测试:

以上是关于实现简单Restful API的主要内容,如果未能解决你的问题,请参考以下文章